
We noticed you are blocking ads. DO THE TON only works with community supporters. Most are active members of the site with small businesses. Please consider disabling your ad blocking tool and checking out the businesses that help keep our site up and free.
You are using an out of date browser. It may not display this or other websites correctly.
You should upgrade or use an alternative browser.
You should upgrade or use an alternative browser.
1972 CB350 / First bike&build
- Thread starter adam704
- Start date
spurlock
New Member
Re: 1972 CB350 Brat Build
Normally you would have wanted to measure the hub/rim offset before taking apart. Before disassembly lay a straightedge across the hub and measure down to the outside of the rim. Do this in several places and record the average. Then when re-lacing the wheel you will know how to align the rim side to side to match the factory setup. Chances are you will get an acceptable job by threading all nipples on an equal distance in relation to the spoke threads, but not necessarily.
-Bill
adam704 said:Putting wheel back together today, got all the way to the last set of spokes but had to push down on the hub a good bit(1/4"?) to get it in position, is that normal? Got all the nipples snugged down now.
Normally you would have wanted to measure the hub/rim offset before taking apart. Before disassembly lay a straightedge across the hub and measure down to the outside of the rim. Do this in several places and record the average. Then when re-lacing the wheel you will know how to align the rim side to side to match the factory setup. Chances are you will get an acceptable job by threading all nipples on an equal distance in relation to the spoke threads, but not necessarily.
-Bill
crazypj
Split personality, I fake being smart
Re: 1972 CB350 Brat Build
Should have had all the 'inner' spokes in hub (the ones that go in from the outside) and nipples just a couple of threads on so wheel is real 'loose'
It's quite normal to have to flex last couple of spokes a bit, particularly if you got nipples tweaked a bit too far")
Should have had all the 'inner' spokes in hub (the ones that go in from the outside) and nipples just a couple of threads on so wheel is real 'loose'
It's quite normal to have to flex last couple of spokes a bit, particularly if you got nipples tweaked a bit too far
Re: 1972 CB350 Brat Build
Got both wheels laced and spokes tightened until they don't wiggle. Some spokes have a small amount of thread poking through the top of the nipple, some don't. Should they all be close to equal before truing or what?
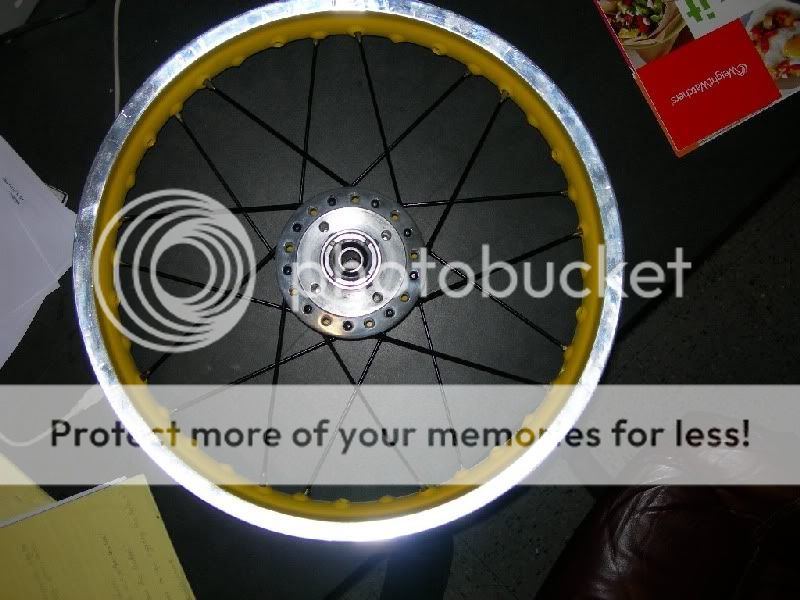
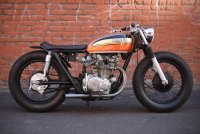
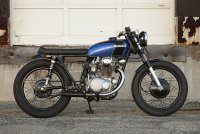
Also, here's some pictures of my inspiration and a helmet I'm considering.
Got both wheels laced and spokes tightened until they don't wiggle. Some spokes have a small amount of thread poking through the top of the nipple, some don't. Should they all be close to equal before truing or what?
Also, here's some pictures of my inspiration and a helmet I'm considering.
Attachments
Re: 1972 CB350 Brat Build
sometimes a bit of thread will poke out after truing its no big deal, but you need to grind down/file the nipples smooth, so there are no sharp edges. You can use a rubber rim strip but i personally like the rim tape, because it cant move on the wheel and wear through.
sometimes a bit of thread will poke out after truing its no big deal, but you need to grind down/file the nipples smooth, so there are no sharp edges. You can use a rubber rim strip but i personally like the rim tape, because it cant move on the wheel and wear through.
Re: 1972 CB350 Brat Build
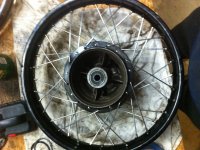
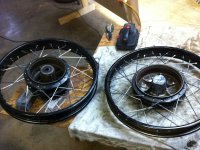
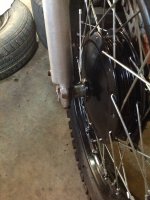
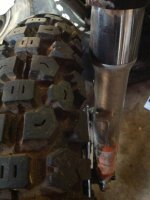
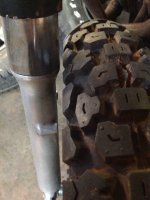
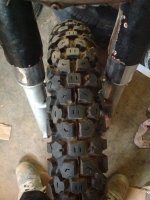
Finally got the wheels trued and boxes of parts. Got the tank stripped and sandblasted and in epoxy. Front wheel isn't center, can't figure out why. I have the double washer axle nut, seems like I need a single washer axle nut. Or perhaps the forks are bent, I don't know. They're pretty beat up. Can I buy a couple washers to put on the spacer side to push it center, or what do I need to do?
Finally got the wheels trued and boxes of parts. Got the tank stripped and sandblasted and in epoxy. Front wheel isn't center, can't figure out why. I have the double washer axle nut, seems like I need a single washer axle nut. Or perhaps the forks are bent, I don't know. They're pretty beat up. Can I buy a couple washers to put on the spacer side to push it center, or what do I need to do?
Attachments
crazypj
Split personality, I fake being smart
Re: 1972 CB350 Brat Build
Check you have the correct spacers in the correct places. More than once a disc brake bike spacer has ended up on a drum bike or parts were fitted from wrong side/incorrect positions
'We' have even seen bearings not fully seated cause the same problem
One other thing is possible, the rim is not properly centered on hub and you have an offset
Re: 1972 CB350 Brat Build
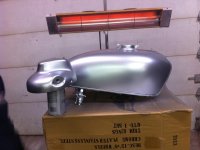
Hey guys, been a while but I got the wheels on & brakes working. Got it running and adjusted clutch, works but I don't think it's fully disengaging. I can let it out and go into first and swap gears, but if I'm in 1st gear and it cuts off, I should be able to crank by holding in clutch right? Other than that it seems to be doing decently. Not sure if you can hear it, but theres some sort of tinny sound coming from the engine as well. What is that?
Electric start started working after I got it warm as well. Tank is almost ready for paint too. Making good progress!
DoghouseRiley
Born Glasgow,living in Fife
Re: 1972 CB350 Brat Build
wow they look pretty cool indeed!
wow they look pretty cool indeed!
Re: 1972 CB350 Brat Build
Quick question - I have a tiny shifter mounted to the spindle. From what I understand, it came stock with the linkage and the long shifter. Should I order the linkage shifter or just a regular long shifter to moint to the pivot? Will it make any difference? From what I understand, the linkage shifters were sloppy and are only needed for looks/keeping it stock.
Quick question - I have a tiny shifter mounted to the spindle. From what I understand, it came stock with the linkage and the long shifter. Should I order the linkage shifter or just a regular long shifter to moint to the pivot? Will it make any difference? From what I understand, the linkage shifters were sloppy and are only needed for looks/keeping it stock.

Re: 1972 CB350 Brat Build
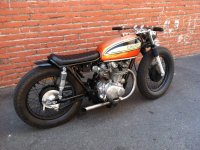
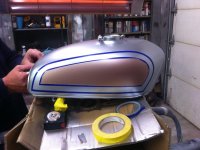
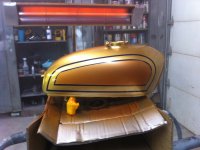
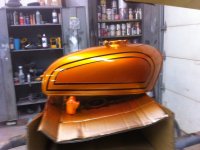
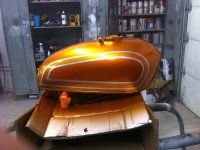
Color sanding and buffing to go. Gonna have the silver pinstriped black around it and re-clear. (Eventually) pictures in the sun come tomorrow, the candy metallic is beautiful in the light. Color changes completely with the light.
Color sanding and buffing to go. Gonna have the silver pinstriped black around it and re-clear. (Eventually) pictures in the sun come tomorrow, the candy metallic is beautiful in the light. Color changes completely with the light.
Attachments
Habanero52
The Race......is only with yourself!
Re: 1972 CB350 Brat Build
Impressive!!!!!
Impressive!!!!!


