Steaksauce
New Member
Hello everyone, so far I've always been a car guy and the older I get the old the cars have gotten but lately I've had the desire to play with a bike, with older cars I've grown to love simplicity and old bikes just hit it dead on for me. I picked up this 72 SL125 with no key and not running for 200 bucks with big plans even though it had been like 6 years since I had even been on a bike and it was a big heavy HD Softail.
This is a definite budget build as my 72 BMW 2002 gets most of my free money but really just building a bike to have fun with around town.
Here is how it looked when the PO bought it:


And then when I got it home (close ups just to show where I started):


Some parts were robbed off it or stuff had been removed. Didn't really care since I'll be changing almost everything, motor has good compression and spins freely and thats all I was worried about.
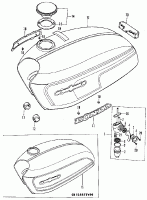
Plans are to strip it down to the frame and just go with the flow, no set plan except to get it an old school feel.. Already know it will be getting a different tank as this one has rust in it.
__________
Well jacked with it for a couple hours tonight, wanted it all the way apart but after not having a big enough socket for the triple tree and a bolt breaking on the rear shock I decided to say screw it. Got to this point though. More tear down happening this weekend after I get all the crap I need.

__________
More tear down tonight, couldn't help myself haha, all thats left is the triple tree

Then decided to polish up the chain cover a bit, needs more work and probably ditch the dealer sticker.
Before:

After:

Close up on the motor, it will get rebuilt, cleaned up and repainted:

____________
Well got the triple tree off and also the broken bolt out of the frame but didn't make much more progress on the frame, cut a few things off but have to borrow a grinder will I'm ready to do some paint. The motor has also been a battle as every phillips screw has been tightened way too tight, got two broke loose but have 3 to go...been doing it when I'm in the mood so I don't jack anything up lol.
So since I've been stuck I decided to do some painting, not too exciting but atleast its some progress.
Before:

After:

Also painted two of the motor mounts and also the headlight bucket:


____________
More little stuff done today since my son was sick and he was napping through out the day:
Top of the triple tree:

Handle bar mounts:

Skid plate:

Another cover off the motor
Before:

After: Need to touch up the black

___________________
Did some more painting tonight:


Before and After on the horn, decided to add a little color because I was sick of painting gloss black lol


______________________
Couple days ago cleaned up another cover:
Before:

After:

Also finally got my frame where I wanted, cut off some tabs for side covers and also a helmet lock that was welded to the frame. Then got it all painted up, getting me a lot closer to starting to put the bike back together.

Tonight I plan on starting to order stuff like a full gasket kit, allen bolt kit and some other odds and ends to get the motor done so I can get it mounted back up so I can start putting on all the brackets I have painted.
__________________
Well decided to loosely bolt on some stuff, couldn't help myself, made the bolts look terrible but I might just run it all till I decided to jack with it again.

Close up of the triple tree

______________________
Got rear trailing arm on tonight, kickstand and skidplate. Pretty unhappy with how the paint turned out on the rear arm but oh well, maybe it will be something only I notice lol.

Thanks for reading, that was all I've done in the past couple weeks since buying the bike. More parts are on the way. What will probably happen and I'll get the bike back together and redo the whole thing in the fall with new hardware and maybe spend a little more money on the motor and suspension. Really this bike is one to learn, one to learn how to work on bikes plus one to get my license on since I just had my permit before. Any pointers or tips at all I'm open ears and hopefully it can keep up with all the great builds on the site.
This is a definite budget build as my 72 BMW 2002 gets most of my free money but really just building a bike to have fun with around town.
Here is how it looked when the PO bought it:


And then when I got it home (close ups just to show where I started):


Some parts were robbed off it or stuff had been removed. Didn't really care since I'll be changing almost everything, motor has good compression and spins freely and thats all I was worried about.
Plans are to strip it down to the frame and just go with the flow, no set plan except to get it an old school feel.. Already know it will be getting a different tank as this one has rust in it.
__________
Well jacked with it for a couple hours tonight, wanted it all the way apart but after not having a big enough socket for the triple tree and a bolt breaking on the rear shock I decided to say screw it. Got to this point though. More tear down happening this weekend after I get all the crap I need.

__________
More tear down tonight, couldn't help myself haha, all thats left is the triple tree

Then decided to polish up the chain cover a bit, needs more work and probably ditch the dealer sticker.
Before:

After:

Close up on the motor, it will get rebuilt, cleaned up and repainted:

____________
Well got the triple tree off and also the broken bolt out of the frame but didn't make much more progress on the frame, cut a few things off but have to borrow a grinder will I'm ready to do some paint. The motor has also been a battle as every phillips screw has been tightened way too tight, got two broke loose but have 3 to go...been doing it when I'm in the mood so I don't jack anything up lol.
So since I've been stuck I decided to do some painting, not too exciting but atleast its some progress.
Before:

After:

Also painted two of the motor mounts and also the headlight bucket:


____________
More little stuff done today since my son was sick and he was napping through out the day:
Top of the triple tree:

Handle bar mounts:

Skid plate:

Another cover off the motor
Before:

After: Need to touch up the black

___________________
Did some more painting tonight:


Before and After on the horn, decided to add a little color because I was sick of painting gloss black lol


______________________
Couple days ago cleaned up another cover:
Before:

After:

Also finally got my frame where I wanted, cut off some tabs for side covers and also a helmet lock that was welded to the frame. Then got it all painted up, getting me a lot closer to starting to put the bike back together.

Tonight I plan on starting to order stuff like a full gasket kit, allen bolt kit and some other odds and ends to get the motor done so I can get it mounted back up so I can start putting on all the brackets I have painted.
__________________
Well decided to loosely bolt on some stuff, couldn't help myself, made the bolts look terrible but I might just run it all till I decided to jack with it again.

Close up of the triple tree

______________________
Got rear trailing arm on tonight, kickstand and skidplate. Pretty unhappy with how the paint turned out on the rear arm but oh well, maybe it will be something only I notice lol.

Thanks for reading, that was all I've done in the past couple weeks since buying the bike. More parts are on the way. What will probably happen and I'll get the bike back together and redo the whole thing in the fall with new hardware and maybe spend a little more money on the motor and suspension. Really this bike is one to learn, one to learn how to work on bikes plus one to get my license on since I just had my permit before. Any pointers or tips at all I'm open ears and hopefully it can keep up with all the great builds on the site.