We noticed you are blocking ads. DO THE TON only works with community supporters. Most are active members of the site with small businesses. Please consider disabling your ad blocking tool and checking out the businesses that help keep our site up and free.
You are using an out of date browser. It may not display this or other websites correctly.
You should upgrade or use an alternative browser.
You should upgrade or use an alternative browser.
1973 CB450. First Project
- Thread starter fordop87
- Start date
IT'S ALIVE! ;D. but still not running quite right. took it for a quick drive and it doesn't feel like it has full power. especially when i give it full throttle. I looked at the spark plugs and they were black. Running too rich. Going to change the main jet and see how it goes.
When i had rebuilt the carbs, i put the #130 main jets in because that's what's stock. I didn't figure it would work great here cuz i'm at 3600ft altitude. When i bought it, there were #115 main jets. I put those back in. I think it was running so rich from the foam air filters that are in place of the paper.
I did another compression test with the engine warm and still got 110psi out of 185psi. looks like I'm in for a rebuild... Damn. So I figured if I'm doing a rebuild I'll go ahead and put performance pistons in.
I did another compression test with the engine warm and still got 110psi out of 185psi. looks like I'm in for a rebuild... Damn. So I figured if I'm doing a rebuild I'll go ahead and put performance pistons in.
d9canada
Just keep pluggin' every day and it'll get done!
No, no and NO! Run the beast a while, not idling but run it on the road. You'd be surprised how the compression comes in after it's sat a while and then gets run again. Don't give up so easily. Just make sure your oil is up, valve lash is set and don't beat the crap out it.
Brian
4X CB900C
CB750K3
2X CB550K
CB350F
883 Sportster
Brian
4X CB900C
CB750K3
2X CB550K
CB350F
883 Sportster
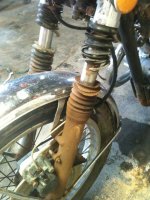
I'm no longer a dirt driveway mechanic! A friend of my family who used to go hunting on our property has a shop that he is going to let me work on my bike in. I'm pretty lucky to have good friends.
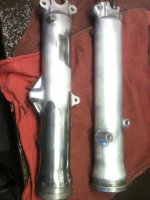
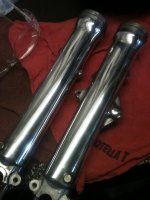
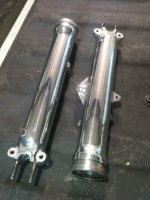
So I decided to work on the front shocks. They didn't have a good feel to them and they were squeaky.
I removed the bottom case off of both sides and the left piston just fell out. Some water drained out of the
left side and some nice brown sludge out of the right.
So I decided to work on the front shocks. They didn't have a good feel to them and they were squeaky.
I removed the bottom case off of both sides and the left piston just fell out. Some water drained out of the
left side and some nice brown sludge out of the right.
Attachments
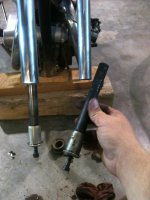
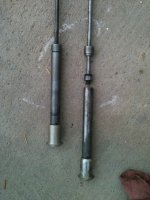
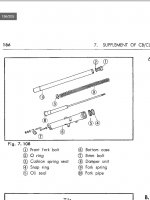
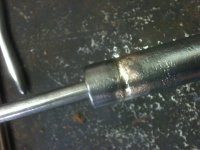
How is the top part of the cylinder connected to the bottom part? It looks like it was pressed or welded on. On the one that was still intact I can't even see a seam or weld. And also, from looking at the diagrams, there is supposed to be a "rebound stopper spring" inside of the cylinder. I there wasn't one in the left side when it fell off, and it doesn't feel like there is one in the right side. I have zero experience rebuilding forks so any info anyone has would be greatly appreciated.