We noticed you are blocking ads. DO THE TON only works with community supporters. Most are active members of the site with small businesses. Please consider disabling your ad blocking tool and checking out the businesses that help keep our site up and free.
You are using an out of date browser. It may not display this or other websites correctly.
You should upgrade or use an alternative browser.
You should upgrade or use an alternative browser.
1975 CB400F Aussie Brat
- Thread starter DannyD
- Start date
DannyD
New Member
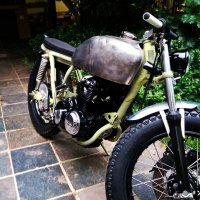
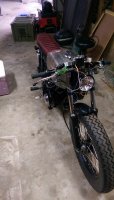
So its been a long cold winter and the bike has been sitting patiently in parts waiting for me to get the time and funds to progress further.
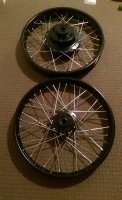
I've had a battery box made by a mate and I am now removing the spokes on my wheels to have the rims and rubs powder coated black and then I will relace the wheels with new spokes. Can anyone recommend whether its worth paying the extra for stainless steel spokes or are the standard plated spokes just as good..?
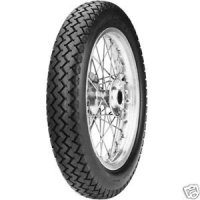
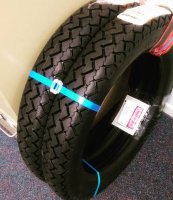
Also interested in whether anyone has advice on whether there is any issue with running 400-18 Avon Safety Mileage MKII on both the front and rear wheels..?
These ones....?
I've had a battery box made by a mate and I am now removing the spokes on my wheels to have the rims and rubs powder coated black and then I will relace the wheels with new spokes. Can anyone recommend whether its worth paying the extra for stainless steel spokes or are the standard plated spokes just as good..?
Also interested in whether anyone has advice on whether there is any issue with running 400-18 Avon Safety Mileage MKII on both the front and rear wheels..?
These ones....?
Attachments
") If you don't mind me asking, How much was the engine rebuild? I'm in Melbs.
If you don't mind me asking, How much was the engine rebuild? I'm in Melbs. DannyD
New Member
Thanks Tim, I am going for the vintage look with this bike...so really I am just tossing up between the firestone champion deluxe and the avons MKII's.
Hey Andy I think the re-build was around $1k but as you can see from the pics I now have a virtually brand new engine so I'm pretty happy with that.
Hey Andy I think the re-build was around $1k but as you can see from the pics I now have a virtually brand new engine so I'm pretty happy with that.
andycafe
Northern Suburbs, Melbourne Victoria, Australia
DannyD said:Hey Andy I think the re-build was around $1k but as you can see from the pics I now have a virtually brand new engine so I'm pretty happy with that.
Well that's not bad, it does look sweet 8) where about's did you get in done, Up your way or in Melb?
DannyD
New Member
Tim said:I'm running those tires on a rigid project I'm working on but for a bike I want performance out of I'd stick with a modern tread and profile. AVON Roadriders are great tires. I run them on my XS cafe racer and my BMW R75/6.
So Tim are you saying that you run them on the front and rear...? I have seen pics of it done...
DannyD
New Member
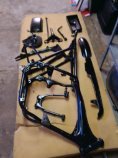
So I have done what should be the last of my major spending for this build...
No pics to update you with but I have removed all the old spokes from my wheels and dropped the rims and hubs to my paint guy and they should be ready to be picked up next week. I have ordered new stainless spokes and will relace them and then drop them in to someone who knows what they are doing to be trued and have the new rubber fitted (which I expect to arrive today or tomorrow).
I have also ordered the Motogadget M-unit v.2 with the M-button and wiring pack.
Then I jumped on the Webike site from Japan and spent some $Yen....! On its way from the land of the rising sun is:
1 x [KOMINE] GK-161 Vintage Short Leather Gloves
1 x [PMC] Brake Shoe
1 x [DAYTONA] Mechanical Speedometer with White LED Lighting
2 x [NitroHeads] Mini Switch for φ7/8-Inches(22.2mm) Color:Black
1 x [POSH] Universal Vintage Round Tail Lamp Color:Black
1 x [POSH] Repair Blinker Bracket Bolt Size:M10 x 20mm Hexagon Head Bolt
1 x [HURRICANE] Grounding Wire for indicators
1 x [GARAGE T&F] 4.5-Inches Bates Light & Bracket Kit Type B
1 x [DAYTONA] Small Blinker (2 pieces)
1 x [WM] Very Short Aluminum Front Fender
So along with the previous purchases from DCC I am pretty sure the only thing left to buy is a battery (8 Cell Antigravity) and a new regulator/rectifier unit.
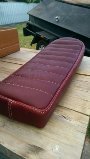
Will then just need to pay for the seat to be upholstered and whatever I owe to my paint guy.
Ps. I needed to spend another $40 to get free shipping so that's why the gloves are on the list...!
No pics to update you with but I have removed all the old spokes from my wheels and dropped the rims and hubs to my paint guy and they should be ready to be picked up next week. I have ordered new stainless spokes and will relace them and then drop them in to someone who knows what they are doing to be trued and have the new rubber fitted (which I expect to arrive today or tomorrow).
I have also ordered the Motogadget M-unit v.2 with the M-button and wiring pack.
Then I jumped on the Webike site from Japan and spent some $Yen....! On its way from the land of the rising sun is:
1 x [KOMINE] GK-161 Vintage Short Leather Gloves
1 x [PMC] Brake Shoe
1 x [DAYTONA] Mechanical Speedometer with White LED Lighting
2 x [NitroHeads] Mini Switch for φ7/8-Inches(22.2mm) Color:Black
1 x [POSH] Universal Vintage Round Tail Lamp Color:Black
1 x [POSH] Repair Blinker Bracket Bolt Size:M10 x 20mm Hexagon Head Bolt
1 x [HURRICANE] Grounding Wire for indicators
1 x [GARAGE T&F] 4.5-Inches Bates Light & Bracket Kit Type B
1 x [DAYTONA] Small Blinker (2 pieces)
1 x [WM] Very Short Aluminum Front Fender
So along with the previous purchases from DCC I am pretty sure the only thing left to buy is a battery (8 Cell Antigravity) and a new regulator/rectifier unit.
Will then just need to pay for the seat to be upholstered and whatever I owe to my paint guy.
Ps. I needed to spend another $40 to get free shipping so that's why the gloves are on the list...!
DannyD
New Member
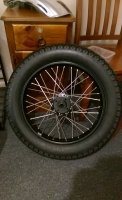
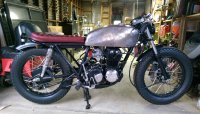
A little bit of progress now that I have my wheels laced and new rubber fitted. I also received some goodies from Webike in Japan, great site with heaps of products. And I received my Motogadget M-unit from Germany. So as it stands I think the only thing I have to buy now is a lithium battery and a new regulator/rectifier.
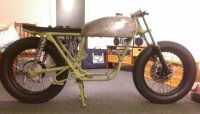
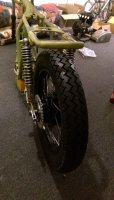
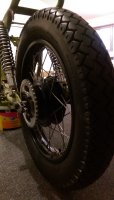
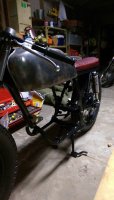
So I am starting to piece everything back together before the frame and tank go to paint...still have a couple of mounting points to add to the frame for the seat and the underseat tray that will house the battery the m-unit and the reg/rec.
My question for anyone who might be able to help is whether I should rebuild the front steering stem prior to painting, my thinking is that to get it seated properly and see if the handle bars foul the tank I need the bearings in place as at the moment it is just sitting in there loosely. I'm getting the frame painted and not powder coated so I don't think having the bearings in place will really matter and as I have the tapered bearings they should be pretty easy to just take out anyway if needed, right..?
Here are a few more pics....
Attachments
The bearing races being in the frame for paint or powder shouldn't be an issue - just mask them. Or pop the races out and put them back in. Worst case you need a new set if you bung them up removing them.
The bearing itself on the lower tree is a different matter, if you're powder coating it. There is likely a seal under the bearing that wouldn't withstand the heat. But if you're painting the tree then no worries.
The bearing itself on the lower tree is a different matter, if you're powder coating it. There is likely a seal under the bearing that wouldn't withstand the heat. But if you're painting the tree then no worries.
DannyD
New Member
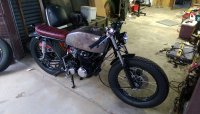
Ok so the All Balls bearings went in without too much trouble at all thanks to a few of the blogs on here with very helpful instructions and pictures.
Have made a bit more progress tidying up some little jobs like the headlight bracket and drilling hole for the seat pan, also have fixed the underseat tray to the frame, however the most exciting part was putting the engine back in. I will hook up the carbs and the exhaust tonight and then I need to spend some time working out exactly how I am going to do the new wiring harness, I'm hoping its going to be relatively straight forward with the use of the Motogadet M-Unit and M-button and the instructions included..!
Have made a bit more progress tidying up some little jobs like the headlight bracket and drilling hole for the seat pan, also have fixed the underseat tray to the frame, however the most exciting part was putting the engine back in. I will hook up the carbs and the exhaust tonight and then I need to spend some time working out exactly how I am going to do the new wiring harness, I'm hoping its going to be relatively straight forward with the use of the Motogadet M-Unit and M-button and the instructions included..!
Attachments
DannyD
New Member
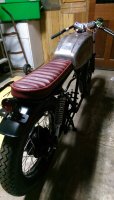
Alright time for an update...I've been getting a fair bit done since November and the old girl is getting close to being fired up for the first time.
First here are some pics of the progress...
First here are some pics of the progress...
Attachments
DannyD
New Member
Okay so whats left to do...wiring...pretty much done and I have to say thanks to Matthew at SparckMoto who has been very helpful over email with the wiring of the rec/reg I purchased from them. Although I am still a bit fuzzy on a couple of things as I have never wired a bike before....but seriously Matt is a legend for the responses I have received from him...so cheers Matt..!
I have just dropped off the exhaust and muffler at a local shop so they can make up a reducer from the muffler to the collector and I should get that back tomorrow, should also have replacement exhaust crush gaskets arriving in the next few days.
I have also ordered a new pair of shocks from IKON...luckily for me they are made here in my home town and I went in to see them...getting a set made which are 26mm longer than stock to give me the extra clearance I need with the bigger tyres...this will give me around 55-57mm clearance and the shocks are being made with 50mm play in them.
Next job after wiring is the tank which I am just leaving bare with a clear coat on it...will see how I feel about it and possibly get it painted later in the year.
Lots of other little jobs to do like finishing off the bracket for the muffler to attach to the frame, bleeding the front brakes and adjusting the rear brake pedal...but I am booked in with they mechanic who rebuilt the engine for me on Sunday week to start it up so I am going to be busy until then...!
DannyD
New Member
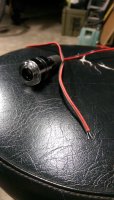
Okay so i have a question for anyone that might know.
I have these bar end indicators and i am wondering if i need to use both the black and red wire? SHould i run one to the indicator output on the m-unit and ground the other or do i not need a ground on these? And does it matter which wire i use for the output or the ground..? Thanks
I have these bar end indicators and i am wondering if i need to use both the black and red wire? SHould i run one to the indicator output on the m-unit and ground the other or do i not need a ground on these? And does it matter which wire i use for the output or the ground..? Thanks