
We noticed you are blocking ads. DO THE TON only works with community supporters. Most are active members of the site with small businesses. Please consider disabling your ad blocking tool and checking out the businesses that help keep our site up and free.
You are using an out of date browser. It may not display this or other websites correctly.
You should upgrade or use an alternative browser.
You should upgrade or use an alternative browser.
1978 CB750 - From tacky to refined
- Thread starter monteboy84
- Start date
monteboy84
Rowdy Rookie
Kev Nemo said:well, b ready to drop some coin for rear sets as well; cb750 units under $200 are hard to come by. If someone wants to prove me wrong and post links, please do!")
So I'll just design some for under $200 8) I'd like to run some Tarozzi folders, and don't mind paying $169 for the universal set, I main just need the mounting bracket and to fabricate my linkages, which I've got some plans for already. I'll toss up some images of my CAD work when I get to that point.
-matt
Re: 1978 CB750 - Pics to come
Yes,Matt welcome to the sickness!
Here is my ongoing little racer project(link is at the bottom page).

I too am building a Harley,a 883 Pro street hard tail with a 200mm rear tire/21" skinny front.
It is my first Harley and I started off with a wrecked 2005 rubber mount 883 bike,but the frame turned out to be too damaged/tweaked to repair so I was strapped for a solution.
Here's the solution:


Skyeye said:Matt,
Welcome to the sickness! I'm a Harley man myself as are a few more members of the forum. I think Carpy inspired a fair number of us to go out and find those old CB750's waiting for a new life. Harley owners/ex-owners identify yourselves!
This is a good place to hang out and there are a lot of talented members waiting to help and offer suggestions. Let's see what you've got in that Craigslist 750!
Scott
Yes,Matt welcome to the sickness!
Here is my ongoing little racer project(link is at the bottom page).
I too am building a Harley,a 883 Pro street hard tail with a 200mm rear tire/21" skinny front.
It is my first Harley and I started off with a wrecked 2005 rubber mount 883 bike,but the frame turned out to be too damaged/tweaked to repair so I was strapped for a solution.
Here's the solution:
monteboy84
Rowdy Rookie
Yeehaw! Pictures anyone?
This shows the difference between the old (long) and the new (stock, short) fork legs.

Looking much better now:

Another good shot:

New bars look much better:

Took the seat apart to use the pan as a donor:

Here's the seat pan, pretty gro-ass . . .

On the bike to show fit, still gross!!

My fat arse, to check fitment for tail fabrication:

With a little cutting, hammering, looking better:

More pics on their way!
-matt
This shows the difference between the old (long) and the new (stock, short) fork legs.
Looking much better now:
Another good shot:
New bars look much better:
Took the seat apart to use the pan as a donor:
Here's the seat pan, pretty gro-ass . . .
On the bike to show fit, still gross!!
My fat arse, to check fitment for tail fabrication:
With a little cutting, hammering, looking better:
More pics on their way!
-matt
monteboy84
Rowdy Rookie
Had to check the look of my new rear signals, I like 'em

Initial tail mold mock-up

Some foam shaping

More shaping

At this point I'm sick of foam . . .

Wrapping it up

Other side getting wrapped up

First layer of the itchy stuff

More resin, more fiber

Getting there

Initial trimming

That's all I've got for now
-matt
Initial tail mold mock-up
Some foam shaping
More shaping
At this point I'm sick of foam . . .
Wrapping it up
Other side getting wrapped up
First layer of the itchy stuff
More resin, more fiber
Getting there
Initial trimming
That's all I've got for now
-matt
monteboy84
Rowdy Rookie
The signals are ebay units, but they're metal and seem to be high quality. The bulbs are dual filament so they can be used as running lights as well. For $40 a set, they're really hard to beat.
Here's a link to some identical ones:
http://cgi.ebay.com/ebaymotors/Turn-Signal-Bullet-Lights-2-Red-2-Amber-Dual-Filament_W0QQitemZ170273584834QQcmdZViewItemQQptZMotorcycles_Parts_Accessories?hash=item170273584834&_trksid=p3911.c0.m14&_trkparms=72%3A727%7C66%3A2%7C65%3A12%7C39%3A1%7C240%3A1318
I used red in the rear and amber in the front, but they do also have sets with all amber lenses.
Thanks as well for the compliments on the seat, I'm looking forward to getting more work done on this.
-matt
monteboy84
Rowdy Rookie
Johnny5 said:Where did you get the fiberglass from? Does it come in a kit?
I bought the cloth, chopped mat, and resin all from Advance Auto Parts, but I'll not be doing that again. Next time I'll go straight to a conposites specialist company, as the resin you can buy at the corner store is much thicker than what I've used for industrial resin, and it really sucks for jobs like this where you're laminating a larger area. Next stuff I buy will be waxless commercial-grade resin, as I've used it on racecar parts with great success.
If you're intimidated by the process, read as much as you can, and see if there's someone local to you who can show you a few of the ins and outs of this kind of work. It's honestly not difficult at all, but there are a couple pointers that help a lot. Namely, get your mix ratio right, or you will have a solid cup of resin before you get anywhere with laminating. Also, eliminate as much air between layers as you possibly can, there should ideally be none, as air pockets weaken the part.
-matt
monteboy84
Rowdy Rookie
UPDATE:
I've been busy with other things, but I've been making headway on the bike.
I got in my 4-into-1 exhaust and bolted it up, though I still need to fab up a custom tailpipe for her, can't decide exactly the look I want there. I alos got another rack of carbs for cheap, which fixed the problem I had with getting it to idle without the choke. The old ones have a plugged idle circuit somewhere I'll have to find and clear at some point.
I also have a good start on a seat tail made of 16 gauge steel instead of the fiberglass piece I was playing with before, mainly because I feel I can do a cleaner install with the steel tail. It need finish welding and putty work.
The gauge housings were damaged by an incident with the kickstand not working properly, as well as the engine's stator side cover. Both replacement parts have been sourced and purchased, and a new kickstand is enroute to replace the aftermarket "chopper" kickstand that's on the bike. I'll salvage the housings from the new guages with my internals, and replace the stator cover so the bike holds oil, but only after replacing that @#$%&^$ kickstand.
Next important items include rebuilding the front caliper with the rebuild kit I ordered this weekend, measuring for a new front brake line, fitting a new clutch cable (4" under stock), and finishing up the tail.
It's coming along nicely, I've got pictures of almost everything to post up this week as well.
-matt
monteboy84
Rowdy Rookie
Here's the latest progress:

I ditched the fiberglass seat idea, instead for purposes of strength and quality bodywork I went to a fabricated tail of 18 gauge steel. Not the lightest thing, but it's a heavy bike and has plenty of power, so no big loss by adding a couple pounds, should still be lighter than the stock fender and taillight bracket I removed. The seat will be custom-upholstered by a reputable local guy my family deals with.
The 4-1 exhaust sounds pretty good, I got some gray/black header wrap that I'll be installing before she's road-ready. I may add a muffler later, but in the mean-time, it's really not all that loud without one.
-matt
andrew embassy
Been Around the Block
that's looking really good man!
andrew embassy
Been Around the Block
Re: 1978 CB750 - Pics to come
You know matt - for some reason, I find myself strangely attracted to the bike in this state... I mean, the seat is hideous, yes. But... something about the geometry is kind of cool in a blatantly 70's sort of way...
monteboy84 said:Here she is in all her ugliness:
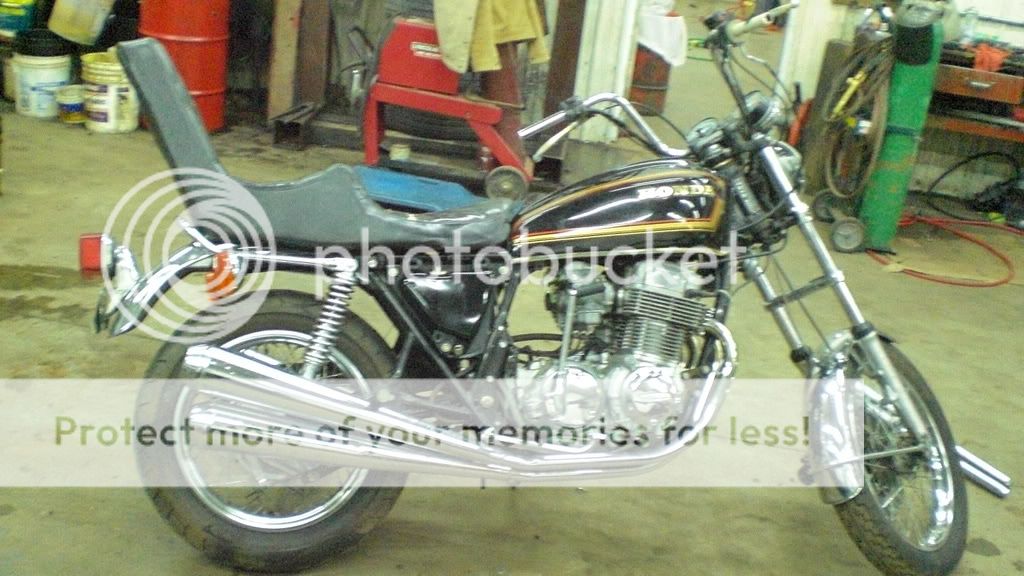
You know matt - for some reason, I find myself strangely attracted to the bike in this state... I mean, the seat is hideous, yes. But... something about the geometry is kind of cool in a blatantly 70's sort of way...
monteboy84
Rowdy Rookie
Re: 1978 CB750 - Pics to come
I'll send you the 6" over stock forks and the apehanger bars, you can replicate the widowmaker aesthetics of a 6" over front end using stock triple trees . . . scary!!!
-matt
andrew embassy said:You know matt - for some reason, I find myself strangely attracted to the bike in this state... I mean, the seat is hideous, yes. But... something about the geometry is kind of cool in a blatantly 70's sort of way...
I'll send you the 6" over stock forks and the apehanger bars, you can replicate the widowmaker aesthetics of a 6" over front end using stock triple trees . . . scary!!!
-matt
andrew embassy
Been Around the Block
haha, keep em - it's more like the occasional picture of some girl in complete crazy 80's style and you're like 'huh... completely dated, and garish, but I'm actually turned on..." Then somebody being like "well, she's right over there" and you're like "oh sweet crackers hell no."
monteboy84
Rowdy Rookie
LOL - We call those types "no-pride girls" around here
-matt
-matt


