1980 CB750 “Beavertail” Cafe Build

Week 0 - Intros and Goals

What’s up everyone, I’m posting here to keep track of a build I’ve been planning out and to hopefully ask and answer some questions along the way. I recently began some online courses covering engine building and automotive wiring and thought a motorcycle might be a good low cost (hah yeah right) gateway into that world. I’ve done some basic maintenance on cars in the past but overall I’m just looking to see what I can do and maybe learn something about myself along the way.

A buddy of mine began a cafe racer project on a CB750F and after it’s been sitting for a while he said he would give me what he has (frame with no motor). I plan to also buy a donor bike in any condition to pull parts from and rebuild the engine. Overall I’d like to build a classic looking cafe racer and leave no bolt unturned on this bike. The name "Beavertail" will make more sense once my vision comes to life and based on how some of the tail ends of these bikes look.

Projects for the week:
Shop clean out / prep
Workbench build
Start compiling a list of tools and supplies the shop will need

Photos:
Some before and afters of the shop (aka basement)
IMG_8938.jpg

IMG_9677.jpg


After the initial cleanout...
IMG_9678.jpg


Who says you can’t use a Tiguan (aka Truckuan) to haul a future workbench!
IMG_9822.jpg


Workbench construction and final product! First successful project of the build :D
IMG_9850.jpg

IMG_9851.jpg

IMG_9867.jpg


Field notes:
Oxygen tanks are impossible to get rid of
Plywood is much more expensive than I thought
Drilling pocket holes is extremely satisfying

Upcoming:
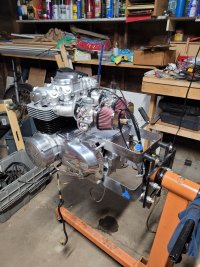
Bike pickup 1980 CB750F
Donor bike drop-off 1980 CB750C
More shop tools/organize
 
Hell ya man! Welcome to DTT.. There are many great people on here who know more about bikes than a single person could hope to learn in 3 lifetimes. That is a great workspace you have carved out for yourself and I'm looking forward to watching your project!
 
Welcome to the jungle and nice job on the clean-up/prep. This is a good bunch of folks w/ lots of knowledge and skills. Good luck w/ your build. (And amen on the pocket holes!)
 
Week 1 Bike(s) Arrival and Shop Organize

Projects for the week

Bike Pickup
Parts Organize
Donor Bike Dropoff
More shop tools/organize

Thanks for the welcome and encouragement everyone! I'm posting in quick succession from my last update because I was behind on posts as I had trouble setting up my DTT account...

In just a week I’ve gone from never owning a motorcycle to owning two - I guess this is how it starts! I drove 6 hours round trip to pick up my friend’s bike. The day after I had the donor dropped off - busy week. The shop feels like it’s slowly coming together. After living in the city for the last 13 years I am extremely excited for my modest dusty basement workshop. Just having the option to take on a motorcycle build is exciting in itself.


IMG_9894.jpg

IMG_9907.jpg

IMG_0017.jpg


A bit about the bikes:

1980 CB750C - Engine Donor - I purchased this bike for cheap off of FB marketplace. To my knowledge it has not been started in 15ish years - it's ready for a second chance on the road. The frame and engine have about 67k miles on them but the motor spins freely and aside from 40 years of road grit things look pretty okay. Once I get the motor out I’ll do a full teardown, paint and build it back up like it was new. Tank looks to be in good shape - if the paint wasnt so trashed then the candy muse red (I think that's the paint code name) might have been a cool option to keep.

This may become the offical "before" picture:
IMG_9895.jpg


1980 CB750F - My friend gifted me his project after he hung up his wrenches and it sat for about 10 years. The bike comes with a frame that has already been modified with a rear hoop/detabbed. I have a feeling I will need to adjust the seat area/tank mount/add a battery box but we will cross those bridges when we get there - it will likely need to go back to bare metal and repowdercoated. Some welds looks a bit sketchy too. In addition to the frame there are loads of spare parts/set of wheels/forks/suspension/clip on handlebars/exhaust/carbs. His original goal was a tank with a rust patina but it was stored without a gas cap and now the interior of the tank has more "patina" than the rest of it....thankfully it was free so can't complain too much. I will likely end up using the tank from the donor bike as I like the shape a bit more and I think it will make the bike look more classic like a SOHC.

The truckuan strikes again! There’s almost a full motorcycle packed in there.

IMG_9960.jpg

IMG_9961.jpg


If anyone has run spoked wheels, with dual front rotors, that did not involve a front end conversion - I'd be interested to learn more about what the set up looks like as I think the only spoked options for early 80s bikes was a 79 K but they were single dics front...could be wrong. Im assuming Cognito Moto or something more custom is the only option? I plan to use the Comstars for this build but would prefer a spoked wheel for future iterations if it's not too crazy.

Fieldnotes:
Workshop needs more light
Picking up the middle of someone else's project is more difficult than expected
So much cleaning to be done

Upcoming this weekend:
New Front Master Cyl
Clean/Paint/Rebuild Rear Master Cyl
Front/Rear Calipers Disassemble/Clean
Forks Disassembly/Clean/Paint
 
Week 2 Brakes and Front Forks

Projects for the week

Rear Master Cyl Stripdown/Paint
Front Master Cyl Upgrade
Front Calipers Disassembly/Clean/New Seals
Rear Caliper Disassembly/Clean/New Seals
Front Fork(s) Disassembly/Clean/Paint

Brakes and front forks come first in the build. Both jobs seemed relatively easy and a good chance to get my feet wet and build up some confidence.

Brakes
Front and rear master cylinders both look like they have put some hard work in - time to relieve them of their duty. I upgraded the front master and rebuilt/repainted the rear. All caliper pistons were seized which was fun. I attached a brake line from the master to the caliper to build pressure and pop the pistons out so I can replace them along with all the rubber seals and clean the interior. I bought a brass wire wheel off Amazon to clean the area in the caliper where the piston sits, however, I received a brass colored steel wire wheel…almost ruined the inside of the caliper. Glad I noticed before I scuffed up the inner walls/changed the bore diameter.

I threw away the rear brake shim and then realized they’re pretty hard to find…lesson learned. Also the rear brake pistons are not made anymore (I think this is true?) and they are taller than the fronts - I found someone on ebay selling some replica’s and it looks to be pretty good quality and a snug fit.

CB750 - Week 2-6.jpg

1.jpg

3.jpg

4.jpg


Forks
Didn’t get a good before picture of the forks but the fork tubes had some surface rust on them and the paint on the lower fork assembly was chipped/faded. I drained what fluid was left in the forks which certainly was not fresh. The forks came to me off the bike which made unscrewing the top bolt pretty difficult. I was ready to buy a vice with a soft jaw attachment but realized through the forums that I could just put it back on the bike and crack it loose before moving forward. Another lesson learned - loosen bolts on the bike before fully disassembling.

After disassembly, I was able to get the fork seals out (huge pain) and then began stripping/repainting. I sanded off the old coating and used some high durability frame paint - hoping it is strong enough and doesn’t chip. It’s not very clear which side is top/bottom on the new seals. I used the old seals to help me figure it out - hopefully they were installed properly.

2.jpg


Overall, the front forks and braking system look and feel brand new. I’ll get some new brake lines and fittings later on down the line in the build.

Gotta show off my sad looking paintbooth:
CB750 - Week 2-20.jpg


Fieldnotes:
-Don’t throw out any parts until reassembly is complete
-CB750F Rear brake pistons are taller than fronts 38mm vs 41mm.
-Brake fluid sucks to work with

Upcoming:
Frame Clean
Seat Measurements
Electrics Tray Plan/Layout
Wiring Diagram
 
Week 3 Miscellaneous Prep

Projects for the week

Frame Clean
Seat Measurements
Electrics Tray Plan
Potential Electrics Tray layout
Battery/Wiring Arrival

The bike received a little bit less attention this week as work picked up and some family was visiting. Had a chance to get the frame out of the basement for a quick clean to remove about 10 years of dirt/dust and the inevitable mouse droppings. Not nearly as bad as cleaning the engine, I’m sure.

1.jpg


Loads of parts have begun to arrive and with the warmer weather as a teaser its fun to think about riding the bike once its done…still a long way to go though. I plan to run an M.unit for the additional functionality it provides as well as how simple it makes the wiring. I figured since this is my first big wiring overhaul it might be best to keep things relatively simple and easily research-able. Alongside the M.unit I’ll run a 801 Antigravity battery, Revival Cycles wiring kit and a Ricks Reg/Rec. Straight from the cafe racer playbook, right? :)

2.jpg


I took some measurements for the seat and still need to plan out my approach here. I don’t really have an interest in making a fully custom seat, but I am pretty picky and don’t want a cheap Amazon seat.

4.jpg


These measurements will also help me plan out my electronics tray. I would like to keep all electronics under the seat even if it is a bit more bulky and less streamlined than mounting the battery under the bike. Below is a picture of my very advanced CAD (Cardboard Aided Design) layout of the tray and components.

Photo Notes:
-I’m missing the spark units in this layout (I have them just left them in the shop)
-The Harry’s shaving cream cap will eventually be my starter solenoid
-I’d like to squash the Ricks unit on the inside but I’m not sure about overheating with the reg/rec, battery and spark units..
-The stock key barrel is huge - I hoped to keep this original but I may upgrade for a smaller unit
-I was hoping there would be space for a spare tools roll but I think this box will quickly fill up with wires

3.jpg


Looking forward to some of the big projects coming up. I’ll have to enlist some help getting the engine out and I’m dying to clean and tear into it.

Fieldnotes:
-Not much to report this week

Upcoming:
Exhaust De-rust
Exhaust Paint
Exhaust Wrap
Engine Out!
Tank + Frame + Rear Suspension Mockup for fun
 
Looks good. I would advise against the exhaust wrap as the pipes will rust underneath, even painted.
 
Looks good. I would advise against the exhaust wrap as the pipes will rust underneath, even painted.
Thanks @adventurco I appreciate the pro tip! I have seen quite a few reports of that on the forum. The exhaust was free to me so I may try it out and if it rusts I'll be out a can of spray paint and some wrap, so not too bad. Maybe it'll be an excuse to get a Delkevic...Also I saw your Westfalia build in your signature, I'm a big fan of VWs and have helped friends with some Mk2's and I own a Mk3. Vw forever!
 
Yep, just from experience. I built a 2 into 1 for the CB360 and it was badly rusted when I pulled the wrap off after only a year or two so I always try to talk folks out of it lol. That’s rad though, I need to update that build thread. I’m a big VW fan along with a couple others on here. Had an MKVI GTI and dad and I restored a 64 Beetle.


Sent from my iPhone using DO THE TON
 
Week 4 Exhaust and Engine Time

Projects for the week
Exhaust De-rust
Exhaust Paint
Exhaust Wrap
Engine Out!
Tank + Frame + Rear Suspension Mockup for fun

I made - what feels like - big progress on the bike this week. I was able to get a buddy to help me get the engine out of the donor bike. I have never taken a motor out of a vehicle before so I wanted to move slowly and be cautious of the frame/bolts/cooling fins to avoid injury and anything breaking. Overall, it was not that difficult and the Clymer was a good resource to give us the proper order of operations for removal. The removable frame section was also a huge help - I’ve seen some YouTube videos of SOHC guys struggling to yank the engine out of there.

So far the engine looks to be in good shape - the oil didn’t look milky or have a shimmer to it which is good - we’ll see what the oil pan has to say but I’m confident she’s solid. Cleaning and degreasing the engine is going to be a nightmare I can already tell. I’m not sure how I’ll get all the dirt out between the cooling fins aside from using a steel bristle brush.

CB750 - Week 4-5.jpg

CB750 - Week 4-7.jpg


Next up I wanted to clean/de-rust/paint/wrap the exhaust. I’m not 100% sure I’ll end up using the stock exhaust but I wanted to try my hand at bringing it back to life and wrapping it. The headers had some surface rust up near the engine but nothing too bad. I put a flashlight inside the headers to see if there were any pinhole leaks where the rust got through but didn’t see anything of concern (I didnt get any good “before” photos). I bought a stripping disc that can be used with a drill and it’s a game changer - no need to buy a sander…yet.

As I move the exhaust around the workbench for grinding and sanding more and more mouse nests continue to fall out. I don’t think this exhaust has been used for probably 18-20 years…half the life of the bike!

The finished product looks…okay. The header’s came out great but going down the pipe it looks pretty bulky and not tight enough. I may try and tidy it up a bit but I’d hate to do it all over. It looks like the previous owner used a grinder to get the exhaust collars off…these look to be pretty hard to find online. I’m not sure if the stock ones will properly seal against the exhaust gasket with a gap from the grinder. Any recommendations where to source new ones are welcome!

CB750 - Week 4-1.jpg

CB750 - Week 4-9.jpg

CB750 - Week 4-18.jpg

CB750 - Week 4-19.jpg


To keep motivation up I put the frame on the jack and mocked up the tank and suspension. If you squint your eyes and tilt your head you can see a first glimpse of what the end product will look like. I’m looking forward to the bodywork portion of the build and working on the tank. Hopefully when the engine and/or wiring work gets overwhelming I can switch to the more creative and less technical projects to keep making progress. Time to start thinking of color schemes and the final “look” I’m going for. I keep switching back and forth between a few styles..

CB750 - Week 4-17.jpg


Fieldnotes:
Use stripping discs for sanding/grinding
Exhaust wrap is nasty stuff - use safety goggles/dust mask/gloves/throw away clothes
Did not expect there to be asphalt/tar on the engine…cleaning should be fun

Upcoming:
Engine Clean Degrease
New Tires
Wheel Bearings
Wheel Sanding
Wheel Painting
New Sprocket
Rotor Deglaze
Rotor Paint
 
The exhaust you have pictured is not the stock exhaust. It is a MAC. There isn't anything wrong with MAC, but they were the cheapest of the 4-1 replacments at the time. All of the stock DOHC 750 exhausts have turned to rust by now. I have a MAC header section on my Seca 550 racebike and it works just fine.
 
The exhaust you have pictured is not the stock exhaust. It is a MAC. There isn't anything wrong with MAC, but they were the cheapest of the 4-1 replacments at the time. All of the stock DOHC 750 exhausts have turned to rust by now. I have a MAC header section on my Seca 550 racebike and it works just fine.
Great call out - I had no idea. I guess I shouldn't take any previous owner's word that things are stock or not! Time to do some more research into MAC exhausts...
 
Week 4.5 Engine prep and Wheel Paint

Projects for the week

Engine Clean Degrease (this sucks!)
New Tires
Wheel Bearings
Wheel Sanding
Wheel Painting
New Sprocket (not shown)
Rotor Deglaze
Rotor Paint

I’m attempting to tackle this build within specific sections/categories. Since I recently was in the brakes/suspension world I figured it made sense to continue to work on that part of the bike. This week I was able to give the wheels some love. I knew that with the wheels I wanted to paint them and it looks like the best process for that is to make the painting process be the last step for the wheels. Aka don't paint the wheels and then scratch them up while putting new tires on…

I put new wheel bearings in both wheels - I don’t know if the old ones were bad or not but I’m constantly in the “while you’re in there” mentality so I just went ahead and did them. It was fairly simple and the Clymer laid out some good steps. Hopefully they are straight and safe After the wheel bearings were done the wheels were off to a local shop to have tires mounted - I had no desire to try and muscle these on myself and also didn’t feel like looking into how/if that’s possible.

Onto the sanding and painting - these wheels might be the most frustrating things ever to sand. My knuckles and fingertips were in shambles after trying to rough these up and get 40 years of road grit off. The spokes are also kind of sharp on the edges so while sanding you’ll probably punch them a few times by accident. In the end, I was pretty psyched with the outcome. Maybe next year I’ll find a way to do some cool setup with wire wheels, but these will do for now.

CB750 - Week 4.5-3.jpg

CB750 - Week 4.5-4.jpg

CB750 - Week 4.5-5.jpg


Not pictured but completed
  • New rear sprocket. The old one was going to look terrible against the newly painted wheels. I considered changing up the gearing on front and rear sprockets but I kept it stock for now. The CB750f gearing seemed to be sporty enough.
  • Deglaze the rotors. I had no idea motorcycle rotors could not be resurfaced because they are too thin. I’m too used to the car world!
  • Sand/Paint rotors. Hopefully deglazing these and repainting them is good enough for now because new rotors for this bike seem to be ridiculously expensive.

I started to degrease and clean the engine so it was more enjoyable to work with/take apart. I enjoy the part of all service manuals that say something along the lines of “the first priority when undertaking maintenance or repair work of any sort is to have a clean, dry, well-lit working area. Work carried out in peace and quiet in a well ordered atmosphere of a good workshop will give more satisfaction and much better results than can be achieved in poor working conditions.” Gotta have a clean space and clean parts to do a good job. The rear section of the engine by the sprocket was very dirty - it’s getting much better with some degreaser and scrubbing.

The engine is looking pretty good and ready to be torn into! Can’t wait to get in there and see what’s going on.

Week 4.5.jpg

CB750 - Week 4.5-1.jpg

CB750 - Week 4.5-2.jpg


Fieldnotes:
Com-stars are a pain to clean/sand/paint
Warmer weather will make painting more accessible
Use a small file to help painters tape come off in tricky places
Using Kerosene as a degreaser is sketchy when done in your basement! Purple Power will have to do
Tracking grease into your house and on the carpet is not recommended

Upcoming:
Engine work begins!
Oil pan check
Spark plug/cylinder check
Cams out
 
Some nice progress man. Degreasing/cleaning an old engine is a battle of attrition for sure
 
Week 5 Engine Work Begins!

Projects for the week

Oil pan check
Valve Cover Off
Spark Plug Check
Cams Out

Hardest part of the engine work so far was trying to find someone to help me get it up on the workbench. All my friends that are in town were unavailable and the wife and I couldn’t get it done (though it was hilarious to try). I spotted my neighbor smoking a cigarette outside and he was my next victim to help out . After it was up on the table I wasn’t sure how to support it. I know in the automotive world the oil pan is pretty weak but on a motorcycle it looks to be pretty solid - just don’t want to break any fins. You’ll see in the photos below as I work on the motor I have a few variations as to how I stabilize it for work. I’m jealous of the SOHC guys who have engine holders available to them online. Another good reason for me to learn how to weld…eventually

CB750 - Week 5-3.jpg


CB750 - Week 5-1.jpg


First part of the engine I wanted to check was the oil pan. Thankfully there were no metal shavings in the oil - just a bunch of sludge (as expected on an older engine that sat for awhile). Since I plan to rebuild the engine I would like to run a magnetic drain plug just in case theres some self-tolerancing that occurs post-build. Hopefully not much of course.

CB750 - Week 5-6.jpg


After the pan was off I noticed that the bottom of the engine was pretty flat without the pan so I put some 2x4s (as pictured) below the engine to keep it straight up and down and easy to work on. I figured it would be a little disorienting to work on the engine with a slight tilt to it all the time…we’ll see.

CB750 - Week 5-7.jpg


CB750 - Week 5-8.jpg


Since I’m rebuilding the top end I don’t think the spark plugs will tell me much as they’ll be replaced in the end along with seals/rings/etc. All plugs looked pretty good with the exception of cylinder 4 (they’re laid out in order 1,2,3,4 in the below pics). I took a picture to document just in case anyways…

CB750 - Week 5-12.jpg


CB750 - Week 5-14.jpg


My end goal is to paint the engine black and have new stainless steel hardware. I can’t deal with the JIS screws. I know some people swear by them but it’s just asking for the bolt to be stripped and ruined in my opinion. Especially the old rusty ones.

CB750 - Week 5-15.jpg


The clymer says the first step is to line up the crank with the T markings so I had to document this as well just in case I forgot later on if I did it or not. We’re on our way to rebuilding an engine - this felt like the moment of no return.

CB750 - Week 5-18.jpg


While working on the engine and performing the above checks, the workbench quickly got pretty oily. I was at Home Depot and thought it might be a good idea to grab some toolbox drawer liner so I can use it as a spot to remove and inspect engine parts before putting them on the now dirty/oily workbench. Turned out to be a pretty helpful idea and pretty cheap.

CB750 - Week 5-19.jpg


While working on the engine I had to take a step back and admire my workshop setup. Just a little over a month ago this was a dirty/dusty/dim basement with no real purpose. Now it feels fully transformed into a nice amateur workshop for me to get this project done. Not bad progress in about 5 weeks time! I plan to bag and tag all components and place them in chronological order for reassembly - aka the last thing taken out of the engine will be right next to the engine while the valve cover will be further away as it’s the last to go on at the completion of the build. I even have some bags labeled with the page/chapter number with the instructions where they were taken out….I think I’m being a bit too detailed here.

I got both cams out of the engine with little issue. I moved painfully slow because I do not want to break any hardware or potentially ding the cams etc. I stuffed some rags in the middle of the engine so I do not drop and hardware into the case but it is still pretty nerve racking to have, what feels like, an open wound ready for debris to fall into. With that said, please excuse my wrench that is being used as a cam chain holder while I disassemble. I promise it is being used gently! I didn’t have any properly sized wood pieces or anything sturdy enough to hold up the cam chain to keep it from falling in the case.

CB750 - Week 5-20.jpg


CB750 - Week 5-21.jpg


CB750 - Week 5-22.jpg


Fieldnotes:
Engine is still dirty even after a good cleaning
Engine is pretty stable on the bench but torquing bolts might cause it to shift and be an issue
Drawer liner on workbench was genius
Engine components bagged and tagged and placed in chronological order

Upcoming:
Valve Head Off
Cylinder Jugs Off
 
I bought my CB550 as a basket case and the guy gave me the motor stand with it. It made everything easy and you can spin the motor upside down which was great because I dropped a screw into the bottom end.
 

Attachments

  • 20221031_202617.jpg
    20221031_202617.jpg
    1.8 MB · Views: 21
Week 6 & 7 Engine and Tank Work

Projects for the week

Valve Head Off
Cylinder Jugs Off
Tank primer/sand
Triple tree assembly
Frame mockup

Sorry for the lack of updates lately - I went to see a big hole in the ground…it was awesome. I’m going to combine the last two weeks of progress into one post to catch up. I feel like I’ve been working around the clock but still not making enough progress. Time to mock up the bike with some of the parts I’ve finished already to help boost morale.

IMG_2453.jpg


IMG_2459.jpg


I was able to get the valve head off as well as the cylinder jugs. Valves gave me no problem but the cylinder jugs were such a pain. Also after cleaning the engine for so long - there was still loads of road dirt deep down in all the cracks. As soon as the jugs came out all the dirt fell into the case. If I had only planned to do a top end rebuild I would be in a lot of trouble with all that dirt in the case. Luckily the case will be split this weekend!

CB750 - Week 6-1.jpg


CB750 - Week 6-2.jpg


CB750 - Week 6-4.jpg


This photo shows all the road grit that fell into the case after pulling the jugs off

CB750 - Week 6-3.jpg


And here is a photo of a lowrider mockup of the bike just for fun lol.

CB750 - Week 6-7.jpg


Time to take a break from the stress of the engine work and move over to sanding, priming and bondo’ing the tank. This process feels a little less risky as every bolt I turn on the engine I’m waiting for it to break or something else catastrophic to happen.

You can see the tank has some minor dents and it looks like the previous owner may have started to sand it down a bit because it’s a bit scratched up.

1.jpg


Here she is after primer! A good base layer to use as a guide while sanding. I’ll probably sand nearly all of this primer off.

2.jpg


And like I said…here is the tank post sanding with little primer leftover. I’ll probably prime this again and then bondo it up and repeat at least 100 times.

CB750 - Week 7-24.jpg


And finally, I attempted to assemble the triple tree but it looks like my buddy (who I got the frame + parts from) bought a part for a 550 and the forks cant get up and through to be in-line. I have a replacement on order and it should be here within a few weeks or less hopefully.

CB750 - Week 7-5.jpg


Another mockup pic again for fun with front forks!

CB750 - Week 7-8.jpg


Fieldnotes:
If doing a top-end rebuild - cylinder jugs are very hard to get off without debris going in case
Tank pinstriping is impossible to get off for some reason
Time to finally decide on a tank color..

Upcoming:
Split Case
Need new rotor
Sending engine out locally for Gloss Black Cerakote
 
Back
Top Bottom