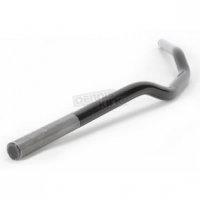
OK - based on this explanation http://www.nexflowair.com/air-conveyor-standard.php (and the assumption that you blocked off the high-pressure inlet) you are using this device as a quasi velocity stack between your carb and the foam filter on the end. If so, this is very similar to other successful applications of a velocity stack/pod filter extension I've seen. Most of them do not require carb re-jetting. But if I were you I'd definitely check the spark plug color at idle, mid-speed and WOT throttle positions to make sure your bike is not running lean.
We noticed you are blocking ads. DO THE TON only works with community supporters. Most are active members of the site with small businesses. Please consider disabling your ad blocking tool and checking out the businesses that help keep our site up and free.
You are using an out of date browser. It may not display this or other websites correctly.
You should upgrade or use an alternative browser.
You should upgrade or use an alternative browser.
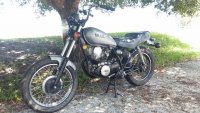
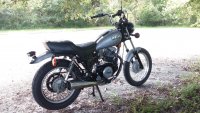
1981 Yamaha sr250
- Thread starter .Dave.
- Start date
.Dave.
New Member
My idea was to use it as a "velocity stack" of sorts. It was originally just something I was going to throw on as a "what the hell" to see if it would even work and it has seemed a complete success. It feels, sounds, and runs well through the lows, mids and highs. I will definitely be checking the plug this weekend though.
.Dave.
New Member
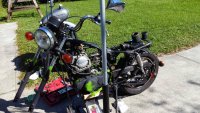
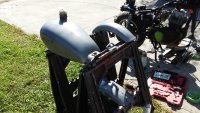
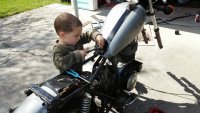
Had some time this weekend and got a little bit done... My 3-year-old son and I worked together to do a little teardown, chop and lower the fender and do a little painting. Everything came out nicely, still need to shape the fender a bit more though... My new handlebars should be in soon and I am working on bringing some old mirrors back to life. Still weighing options on a battery box, seat, and signals.
Attachments
.Dave.
New Member
Thanks for all.Brodie said:Engine looks good, could do with the cam and valve covers being black.
I have never been a fan of silver on bikes, always looks like primer at first glance.
Chopped fender looks good as well.
Great suggestion for the added black to the engine, it will pull it together much better.
I was going to go with black paint for the tank and fenders but then I figured it's so unoriginal, everyone has a black bike. Back to the planning for a nice paint scheme.
I think you should cut a little more from the F/R sides of your front fender to taper it into the side supports (so it looks more like it tapers into points). I also think it would look better with a solo seat that had the same bottom line as the tank. Maybe one that looks more like an old motocross seat? Are you thinking about constructing side panels that cover the battery and allow the air filter to stick through? It might help the overall color scheme.
.Dave.
New Member
zap2504 said:I think you should cut a little more from the F/R sides of your front fender to taper it into the side supports (so it looks more like it tapers into points). I also think it would look better with a solo seat that had the same bottom line as the tank. Maybe one that looks more like an old motocross seat? Are you thinking about constructing side panels that cover the battery and allow the air filter to stick through? It might help the overall color scheme.
I was thinking about shaping the fender a bit more to better match the shapes of the tank and engine. The stock seat will be replaced, it's funny because I was actually thinking about a motocross seat. I was also thinking of constructing my own as well. I wasn't going to go with side panels, I am planning on making a battery box but my creativity has been obscured by mild frustration right now

I think the SR250 seat is unique to that model. Although there is a SR250T - I have one - that has a 2-piece seat; the rear section has a separate metal base and the seat portion can be removed and a (optional) locking storage box can be mounted in its place. Not sure if they are interchangeable with the 1-piece units, but maybe...
just be aware that lowering the seat on an already small bike does nothing for comfort, and gives you less control as wellzap2504 said:Easiest starting place is to re-use the OEM seat base (especially if no frame changes as it mounts right up) and cut down/reshape/reform the OEM seat pad. Then either take it to a marine seat recovering shop or try it yourself.
Absolutely agree! Especially if you are a taller rider and need more peg-to-seat height. But the OEM seat pan can still be easily re-used as a platform for a taller seat so that it is not a completely new construction (and you can re-use the seat mounting methods) or you can add additional high-density foam to the existing seat pan/foam to gain additional height and allow re-shaping if only a small amount of extra height is needed.xb33bsa said:just be aware that lowering the seat on an already small bike does nothing for comfort, and gives you less control as well
.Dave.
New Member
Good suggestion. I was wondering if I would be able to use the OEM seat pan. I'm not a tall guy, 5'8", so seat height on this bike won't be an issue for me I believe.zap2504 said:Easiest starting place is to re-use the OEM seat base (especially if no frame changes as it mounts right up) and cut down/reshape/reform the OEM seat pad. Then either take it to a marine seat recovering shop or try it yourself.
I believe stock seat height is 29.4"; I have a working theory that proper street bike ergos (to alleviate back pain and allow better control via legs) involves a seat height equal to your pants inseam measurement (32" for me). Then handlebar height/pullback to provide a horizontal forearm. Most everything else (pegs, frame size, etc.) is just too hard to change without either major work or looking "wrong". I have just resigned myself that some bikes were just made for shorter folks, some for taller, and some for appearances only  . But the SR250 seat can be raised with a slightly longer rear shock (I currently have 13" on mine) as well as additional seat padding.
. But the SR250 seat can be raised with a slightly longer rear shock (I currently have 13" on mine) as well as additional seat padding.