
We noticed you are blocking ads. DO THE TON only works with community supporters. Most are active members of the site with small businesses. Please consider disabling your ad blocking tool and checking out the businesses that help keep our site up and free.
You are using an out of date browser. It may not display this or other websites correctly.
You should upgrade or use an alternative browser.
You should upgrade or use an alternative browser.
1982 CM450e - City Commuter Cafe
- Thread starter DoTheTodd
- Start date
The engine should be back from the shop any day now (These delays are killing me) and I have some questions. (Sorry for all of the bullet points, but I didn't want to write an essay)
What I want to do:
-Paint and freshen up the look of the engine
The situation:
-I had the shop blast and clean my jugs and head when they rebuilt those
-I'm going to open the cases, just to clean them out (I have reason to believe that some weld slag fell into a cylinder)
-Looking at the diagram for my engine, it looks like everything is attached to the upper case, and I wont need to mess with any of the internals when I crack the case. This is good because I don't want to mess with the internals
My Plan:
-Clean up all engine parts and prep for paint
-Paint cases/covers aluminum
-Paint jugs/head flat black
-Bake bottom of case and jugs/head/valve cover/side covers
-Do not bake the top case since that has all of the internals still attached to it
-Assemble everything with stainless allen head bolts
My questions:
-Will there be an issue with baking the head after having it rebuilt? Will any seals or anything be damaged by the heat?
-Will there be an issue with not baking half of the case? I assume that it will bake itself when the engine gets running, but that wont be for a few months. Will it still bake on that far in the future, or will it not do anything at that point?
-I've done a lot of reading and I'm leaning to VHT primer and VHT paint, any opinions?
I should note that I spoke to my girlfriend about baking the parts in our oven and I have the ok from her. I promised to take her out to dinner that night for her understanding") She drew the line on putting parts in the dishwasher though, haha.
She drew the line on putting parts in the dishwasher though, haha.
What I want to do:
-Paint and freshen up the look of the engine
The situation:
-I had the shop blast and clean my jugs and head when they rebuilt those
-I'm going to open the cases, just to clean them out (I have reason to believe that some weld slag fell into a cylinder)
-Looking at the diagram for my engine, it looks like everything is attached to the upper case, and I wont need to mess with any of the internals when I crack the case. This is good because I don't want to mess with the internals
My Plan:
-Clean up all engine parts and prep for paint
-Paint cases/covers aluminum
-Paint jugs/head flat black
-Bake bottom of case and jugs/head/valve cover/side covers
-Do not bake the top case since that has all of the internals still attached to it
-Assemble everything with stainless allen head bolts
My questions:
-Will there be an issue with baking the head after having it rebuilt? Will any seals or anything be damaged by the heat?
-Will there be an issue with not baking half of the case? I assume that it will bake itself when the engine gets running, but that wont be for a few months. Will it still bake on that far in the future, or will it not do anything at that point?
-I've done a lot of reading and I'm leaning to VHT primer and VHT paint, any opinions?
I should note that I spoke to my girlfriend about baking the parts in our oven and I have the ok from her. I promised to take her out to dinner that night for her understanding
She drew the line on putting parts in the dishwasher though, haha.Engine assembly questions:
I'm looking over the FSM before I install the head and I have a few questions that I'd like to clarify.
1) The FSM states "Lubricate the camshaft bearings with Molybdenum Disulfide grease".
Will this item work since it doesn't specifically state that it's for engines? It says that it's a multi-purpose Moly grease.
http://www.autozone.com/autozone/accessories/Coastal-Moly-grease/_/N-25ap?itemIdentifier=561761&_requestid=354107
2) The FSM states "Apply liquid sealant to the head contacting faces of the camshaft holders".
It's talking about something like Honda-Bond, correct? It would make sense, but for some reason I have it stuck in my head that they are talking about something else.
3) The FSM doesn't say anything about oiling the cylinders when installing the pistons, but I've always been told to rub a little bit on the walls when installing so the rings don't gauge the walls. Thoughts on this?
The top end has been all rebuilt and gone through, so I'm going to go through a break in process similar to a new engine. Does anyone have any break in suggestions for these engines?
Thanks!
I finally get to post some progress. After a million issues during the engine rebuild (ie: tools breaking, discontinued parts, ordering miscommunications) I finally got my engine back. The rebuild ended up consisting of:
New exhaust valves
New valve guides
New seals all around
Valve job
Honed cylinders
Decking the head
Removed broken bolt in block
Installed helicoil in block
Cleaned entire thing
Once I got it back, I got straight to work. Although they washed it, I still wanted it cleaner, so I grabbed brushes and a bunch of degreaser and got to work.
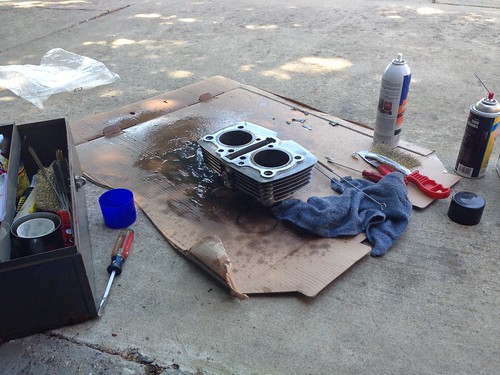
image by toddzy, on Flickr
That still left a couple spots that I couldn't get to with a brush though. So out came the soda blaster.

image (1) by toddzy, on Flickr
My dad even got in on the action.
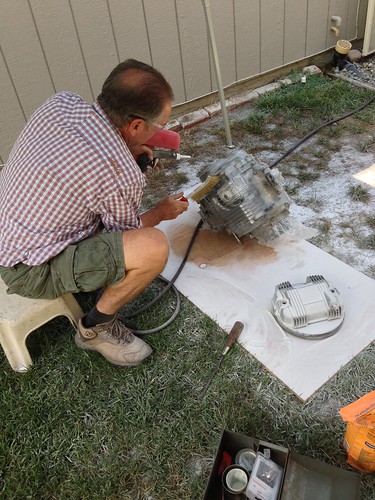
image (2) by toddzy, on Flickr
I cleaned those parts with some air and a light brush and here is the finished product. At this point the parts were finally ready for paint.
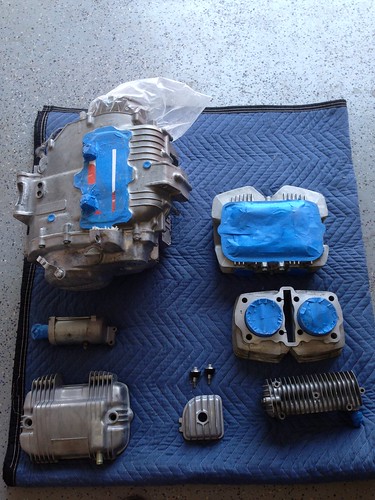
image (3) by toddzy, on Flickr
New exhaust valves
New valve guides
New seals all around
Valve job
Honed cylinders
Decking the head
Removed broken bolt in block
Installed helicoil in block
Cleaned entire thing
Once I got it back, I got straight to work. Although they washed it, I still wanted it cleaner, so I grabbed brushes and a bunch of degreaser and got to work.
image by toddzy, on Flickr
That still left a couple spots that I couldn't get to with a brush though. So out came the soda blaster.
image (1) by toddzy, on Flickr
My dad even got in on the action.
image (2) by toddzy, on Flickr
I cleaned those parts with some air and a light brush and here is the finished product. At this point the parts were finally ready for paint.
image (3) by toddzy, on Flickr
I saw a set up like this on another person's build and thought that is was a great way to be able to get full coverage on the block. So I built a makeshift system to suspend the block.
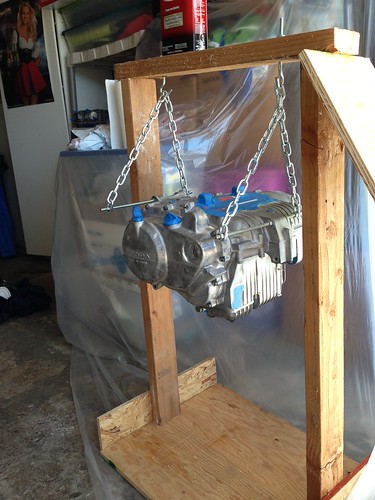
image (4) by toddzy, on Flickr
Following the can's directions, I used three coats of VHT High Temp grey primer, followed by three coats of Flat Black VHT Jug paint on the head, jugs and oil cooler. I also used the primer and three coats of VHT High Temp Universal Aluminum for the rest of the engine, but forgot to take a picture at that stage.
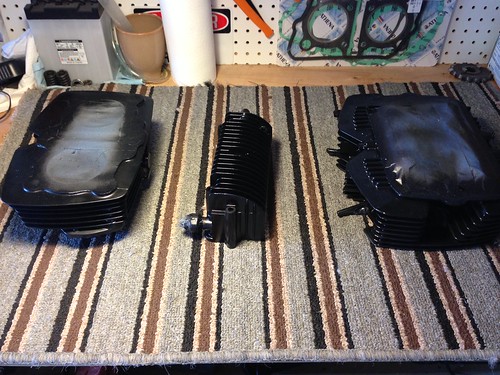
image (5) by toddzy, on Flickr
Then I sanded down the fins on the jugs, head and oil cooler. I had a few chips, but nothing I can't live with.
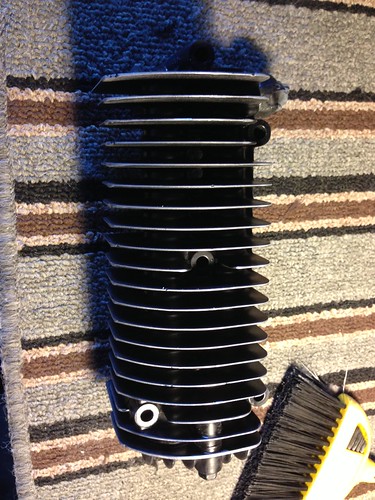
image (6) by toddzy, on Flickr
Let the assembly begin. You can see the aluminum color on the other parts in these pics.
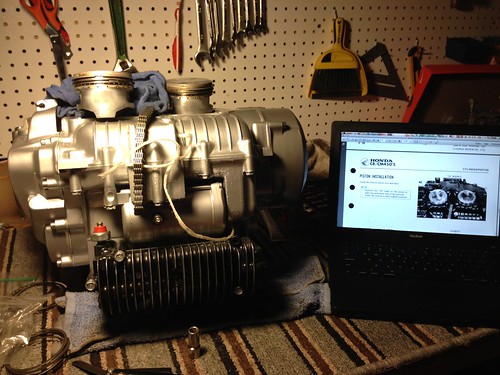
image (7) by toddzy, on Flickr
New rings on the pistons. All checked for clearance and ready to go in.
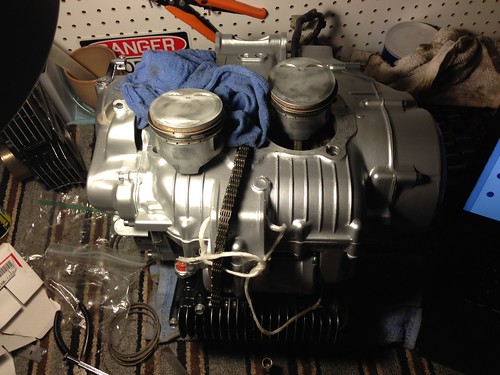
image (8) by toddzy, on Flickr
image (4) by toddzy, on Flickr
Following the can's directions, I used three coats of VHT High Temp grey primer, followed by three coats of Flat Black VHT Jug paint on the head, jugs and oil cooler. I also used the primer and three coats of VHT High Temp Universal Aluminum for the rest of the engine, but forgot to take a picture at that stage.
image (5) by toddzy, on Flickr
Then I sanded down the fins on the jugs, head and oil cooler. I had a few chips, but nothing I can't live with.
image (6) by toddzy, on Flickr
Let the assembly begin. You can see the aluminum color on the other parts in these pics.
image (7) by toddzy, on Flickr
New rings on the pistons. All checked for clearance and ready to go in.
image (8) by toddzy, on Flickr
The pistons went into the jugs very easily. I know that there is a hot debate over a dry install vs a wet install, but I wont be starting it up for a while so I wanted the walls to have some oil while it waited for me.
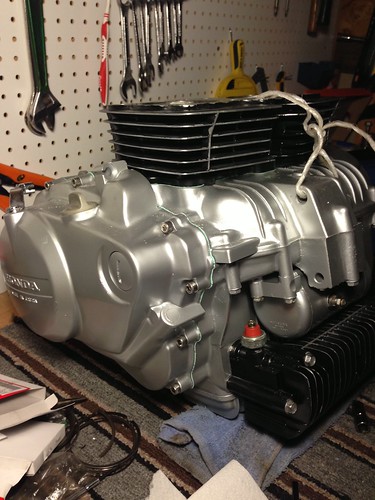
image (9) by toddzy, on Flickr
The shop forgot to break off the tang on the helicoil, and I didn't realize it until I went to install the head bolts and the one in the helicoil wouldn't go down all the way. It was easy to break off and then grab with a long magnet, so it didn't set me back too far.

image (10) by toddzy, on Flickr
All torqued down and assembly finished.
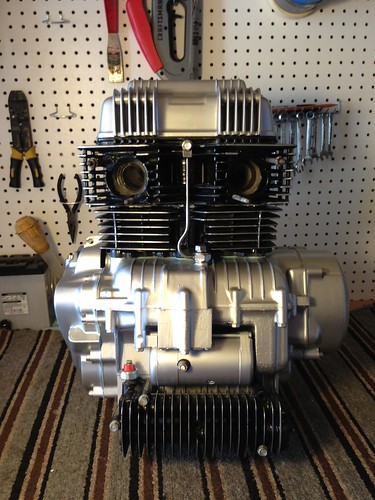
image (11) by toddzy, on Flickr
Side view.

image (12) by toddzy, on Flickr
Other side.
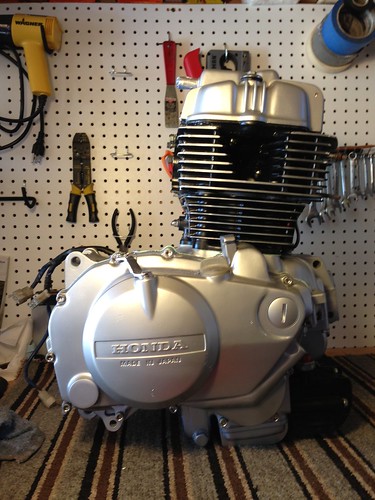
image (14) by toddzy, on Flickr
image (9) by toddzy, on Flickr
The shop forgot to break off the tang on the helicoil, and I didn't realize it until I went to install the head bolts and the one in the helicoil wouldn't go down all the way. It was easy to break off and then grab with a long magnet, so it didn't set me back too far.
image (10) by toddzy, on Flickr
All torqued down and assembly finished.
image (11) by toddzy, on Flickr
Side view.
image (12) by toddzy, on Flickr
Other side.
image (14) by toddzy, on Flickr
MJPriceisright
Coast to Coast
engine looks great man nice work.
I'm still in the stage of the build where you can work on the bike for hours and after you're done, it looks like you haven't done a thing. But, just to keep this updated, here is the latest.
I finally got the seat and tank mounted. Before, they were both just resting on the frame. I still need to make a seat pan and do the upholstry, but the rest is all mounted now. If you look closely, you can see that there is a gap underneath the seat between it and and frame. I will be using this space for my electrical box. The padding of the seat will cover this up, so you won't see it.
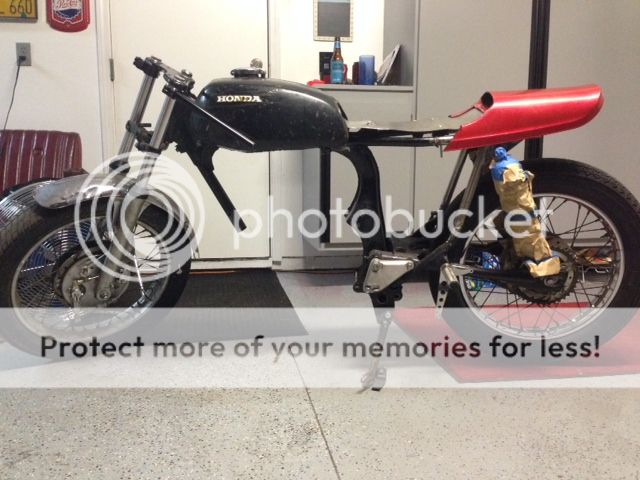
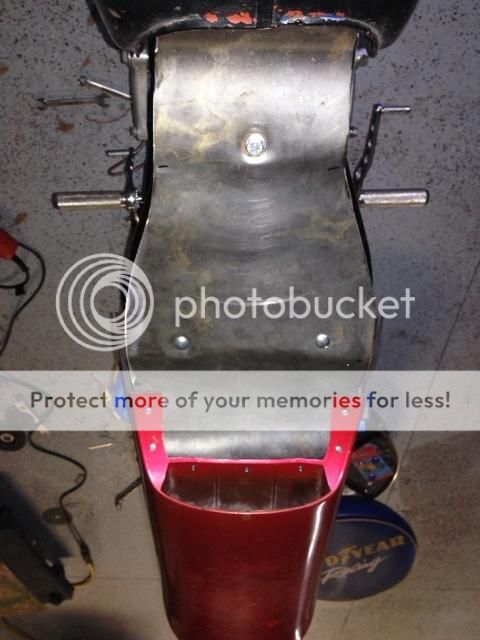
Here is how I mounted the rear of the seat, just some angle iron, cut to fit. As stated earlier, ignore the weld quality.

The sheetmetal is attached to the plastic seat with some rivets.

All of these bolts are attached to the frame with rubber insulators, so the ride should be pretty decent. The spacers also gave me the spacing that I wanted for the electrical box.
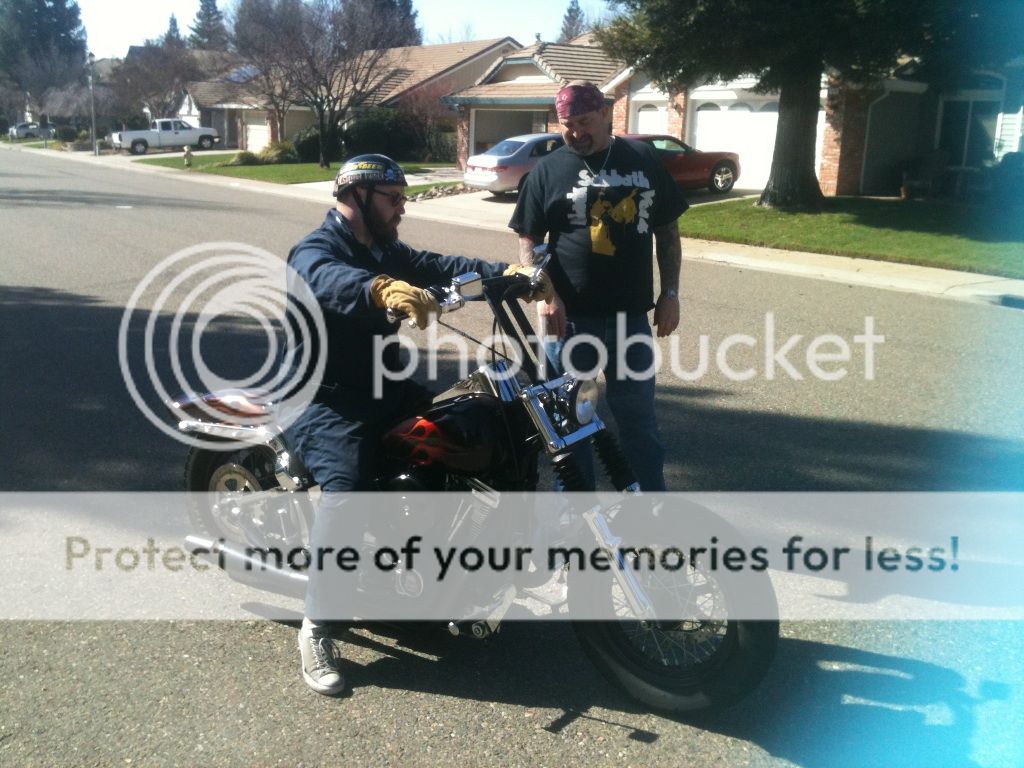
My dad holding the bike up so I could hop on for a test fit without the pit stand.

Like I said, it doesn't look like much changed from the last post, but I swear, this took a while, haha.
I finally got the seat and tank mounted. Before, they were both just resting on the frame. I still need to make a seat pan and do the upholstry, but the rest is all mounted now. If you look closely, you can see that there is a gap underneath the seat between it and and frame. I will be using this space for my electrical box. The padding of the seat will cover this up, so you won't see it.

Here is how I mounted the rear of the seat, just some angle iron, cut to fit. As stated earlier, ignore the weld quality.

The sheetmetal is attached to the plastic seat with some rivets.

All of these bolts are attached to the frame with rubber insulators, so the ride should be pretty decent. The spacers also gave me the spacing that I wanted for the electrical box.

My dad holding the bike up so I could hop on for a test fit without the pit stand.

Like I said, it doesn't look like much changed from the last post, but I swear, this took a while, haha.
Jrbrownie00
Been Around the Block
nice inspiration, lots of work and innovation.
I'm still alive.
It's been quite a while since my last post on this thread. Since then, I've moved, got engaged, been in two weddings, flew cross country three times, continued grad school, and made it to the semi-finals in a business competition. I've been busy. While all that going on, I haven't had much time for the bike. But recently I've had some time to settle into the new (slightly bigger) garage and play with the bike. Here is what I've done.
I moved the frame and all parts that were at my parent's house to my house. The bike is now 100% in one garage. That makes it really easy to hop out and work on for a few minutes here and there. While I was out at the parent's house, their neighbor offered me the chance to take his Harley on a ride. It was fun
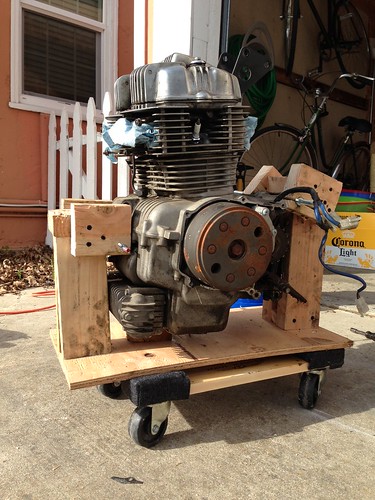
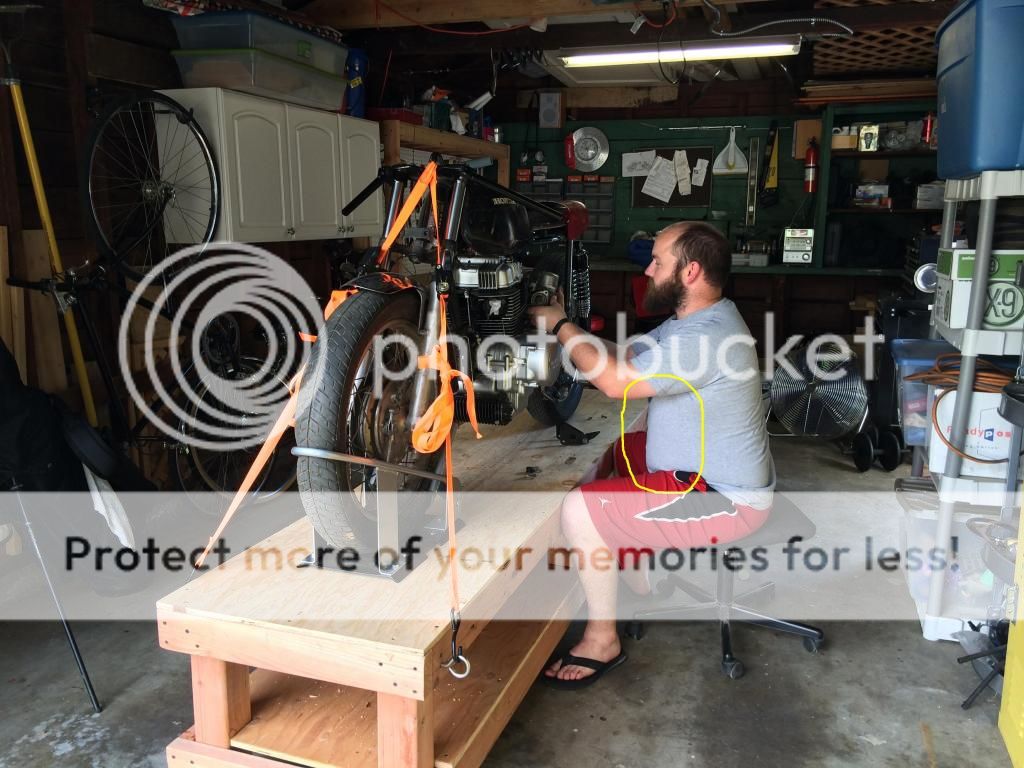
When I got it all home I decided that I needed a table to assemble on so that I wouldn't kill my back bending over. I called my friend with a truck, asked him to go with me to Home Depot for some wood, paid him in beer while we assembled it, and this is what we ended up with.
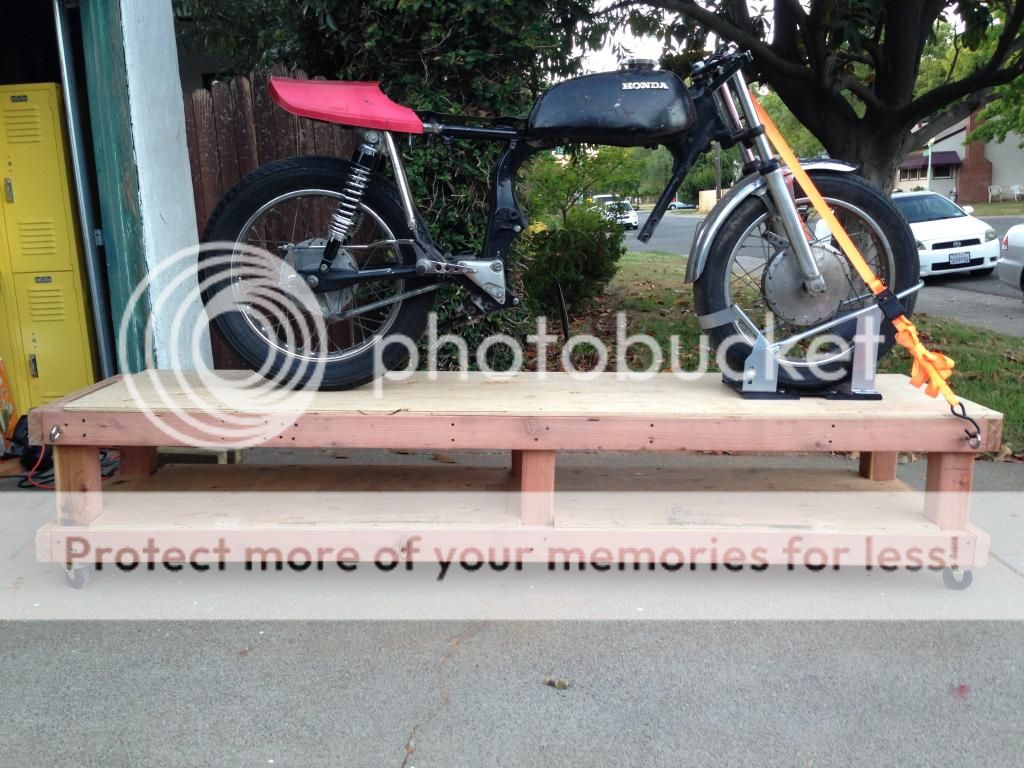
Then there was the matter of getting the engine into the frame. I ended up doing it myself with a jack and some patience. But damn it was heavy.

I got it all in and I think that it looks awesome.

Another angle.
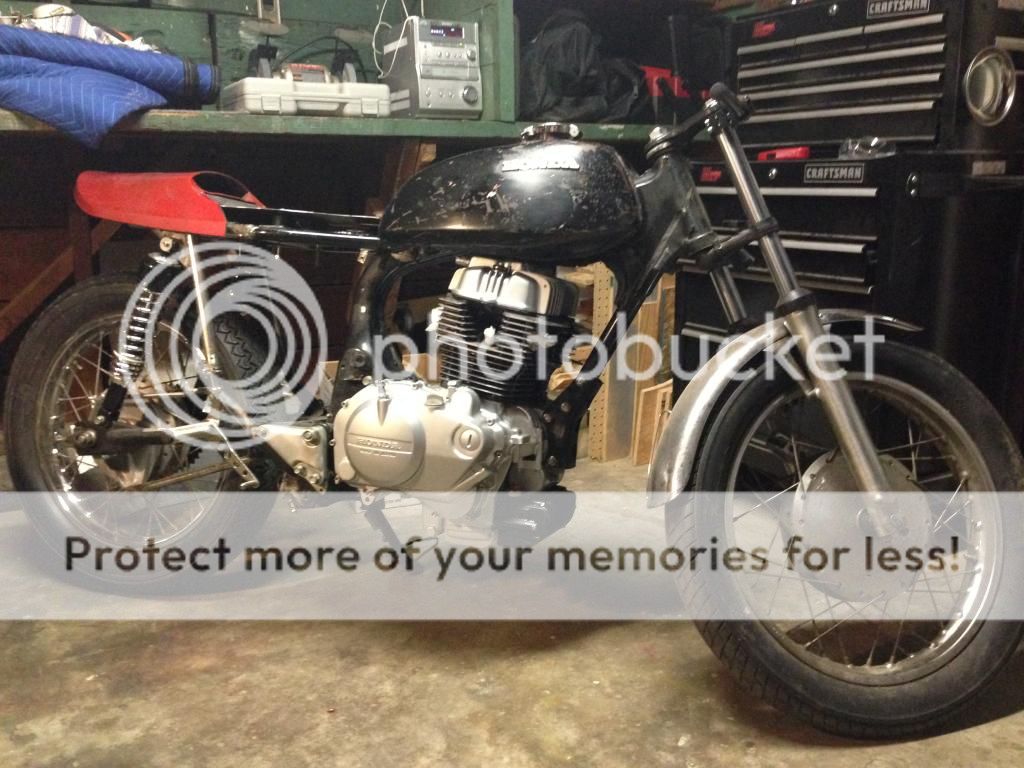
Yet another angle.
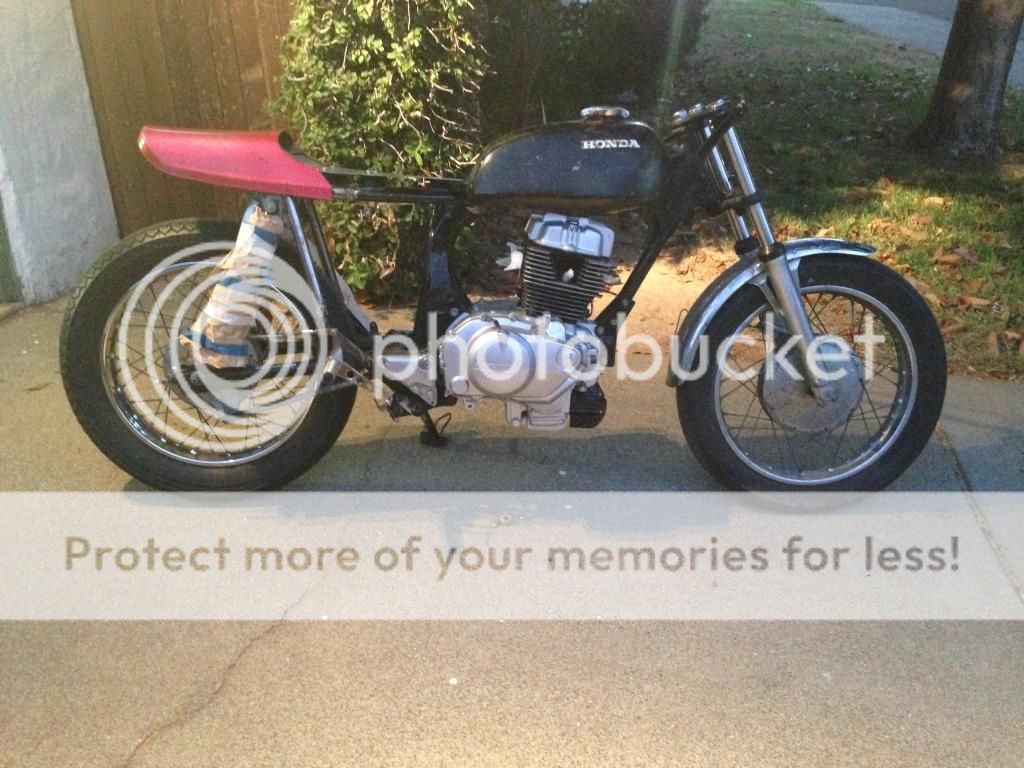
Last angle.

It's so much easier to work on while it's on the table. Now I'm assembling everything to make sure it all fits. Then it will be torn down for paint and powder coat. It looks like I need to do some body work though. Right about here......
It's been quite a while since my last post on this thread. Since then, I've moved, got engaged, been in two weddings, flew cross country three times, continued grad school, and made it to the semi-finals in a business competition. I've been busy. While all that going on, I haven't had much time for the bike. But recently I've had some time to settle into the new (slightly bigger) garage and play with the bike. Here is what I've done.
I moved the frame and all parts that were at my parent's house to my house. The bike is now 100% in one garage. That makes it really easy to hop out and work on for a few minutes here and there. While I was out at the parent's house, their neighbor offered me the chance to take his Harley on a ride. It was fun

When I got it all home I decided that I needed a table to assemble on so that I wouldn't kill my back bending over. I called my friend with a truck, asked him to go with me to Home Depot for some wood, paid him in beer while we assembled it, and this is what we ended up with.

Then there was the matter of getting the engine into the frame. I ended up doing it myself with a jack and some patience. But damn it was heavy.

I got it all in and I think that it looks awesome.

Another angle.

Yet another angle.

Last angle.

It's so much easier to work on while it's on the table. Now I'm assembling everything to make sure it all fits. Then it will be torn down for paint and powder coat. It looks like I need to do some body work though. Right about here......

While putting parts on to check fitment, I noticed that the gas tank is very close to the ignition coil. I hammered the gas tank back a little bit, so it's not touching, but they are very very close to each other. Will this be a problem? I looked around online last night and the only issue I'm seeing is that if they touch, the coil could eventually rub through the metal of the gas tank and start a fire. Since it isn't touching, I don't think this will be an issue. But will there be a problem with heat, or a jumping spark?


