ultskir
New Member
When I was 18 my uncle told me I could have his old street bike. That bike was a 72cb450. I knew the bike well, as it had been sitting in the corner of my fathers garage, for as long as I could remember. The bike bike was finally mine, 21 years or so after my uncle had picked it up from the Honda dealership. I set to work. Pulled the tank, carbs, and got them cleaned up. New fork seals installed. While the fork legs were off I put them to my fathers big 8"polishing wheel, and did the same for both engine covers. Man this bike was coming together nicely I thought, and I'd did. I rode that bike for a couple of years. Fun little bike " I thought", but my speed freak inside of me was yearning for more. I picked up an 84 vf1000f interceptor, and that was the end of the road for the little CB. Until now, nearly another 20years have passed, and I now have resurrected it yet again(2014) from Dads garage. The bike was always garaged, but with that being said, that won't keep that east coast humidity from doing some damage. I headed from my Co home cross country to rescue the ole boy, and now he sits in the comfort of my nice high altitude 9600' garage, where it's nice and dry. This is where this new adventure begins. Cleaned the carbs, tanks, and all that jazz, new rubber, battery, flattrack bar, fixed the dents in the tank, primed it, and off and running. Well sputtering! Time to re-jet! The bike came from uncle with a Hooker header, on it, so I would have to do some freelance jetting. I called the closest Honda dealer (Denver) for jetting recommendations, and that was zero help. I ordered up a handful of jets from dime city, and went to work, and after the sending shot I had him all dialed in. Running like new..........cough cough, weeze, weeze. Bike was running "strong", but lack of O2 and the fact that the bike is 42 years old (last summer time of rescue) has a lot to do with it.
Fast forward to May 2015. I'm helping my friend do his CB900f cafe build, and my wife walks into the garage and say to me " you know I'm a bit jealous" I reply " why sweetheart are you jealous?" He response" well, you know seeing Barrett's bike almost done, really makes me want ours to look that good, why don't you do what we talked about to "The Juice" ( the name she gave the bike in honor of our late Great Dane nick named the Juice). My dumbfounded , and bewildered response was " uh ok,sure, yeah, that can all be done. Now your up to date! Let's begin this little project! FUN FUN FUN fun fun!
The plan:
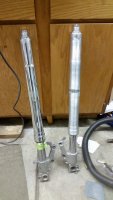
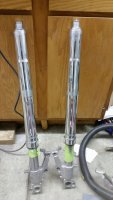
Inverted forks
Good rear shocks racetech springs on/in both
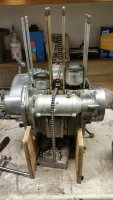
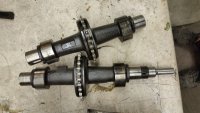
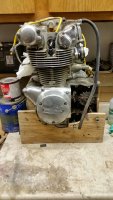
Contact Team Hansen for engine build (498CC BB,custom cams, VM carbs, and chassis gusseting (team Hansen is the current euro world champ in 500 twin class) probably know what they are doing.
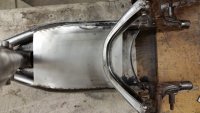
Custom rear sets, not just bolted to passenger peg
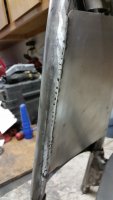
Rear hoop
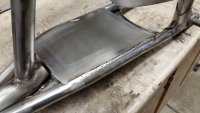
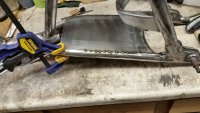
Custom hand made seat and cowl
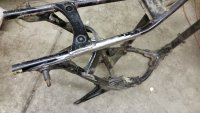
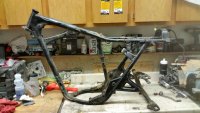
Frame either powder, or paint haven't decided
Paint tank tail section colors of Lily's choice.
That should cover the basics
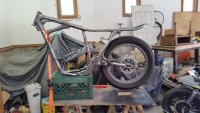
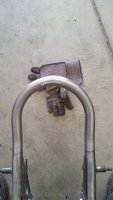
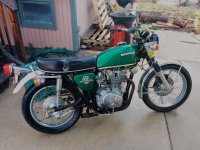
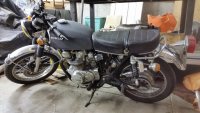
The pic of the bike when it's green is just after I washed all the cob webs and road grime off if it after its 1800 mile trek back to Co. It looks a lot better than it really is. Surface rust galore, paint in ROUGH shape
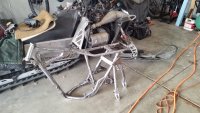
The primer pic is obviously after I fixed the dents and shot or primer.
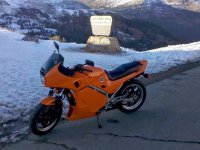
The orange bike is the CB replacement bike VF1000F interceptor. Still have, and she still rips!

Fast forward to May 2015. I'm helping my friend do his CB900f cafe build, and my wife walks into the garage and say to me " you know I'm a bit jealous" I reply " why sweetheart are you jealous?" He response" well, you know seeing Barrett's bike almost done, really makes me want ours to look that good, why don't you do what we talked about to "The Juice" ( the name she gave the bike in honor of our late Great Dane nick named the Juice). My dumbfounded , and bewildered response was " uh ok,sure, yeah, that can all be done. Now your up to date! Let's begin this little project! FUN FUN FUN fun fun!
The plan:
Inverted forks
Good rear shocks racetech springs on/in both
Contact Team Hansen for engine build (498CC BB,custom cams, VM carbs, and chassis gusseting (team Hansen is the current euro world champ in 500 twin class) probably know what they are doing.
Custom rear sets, not just bolted to passenger peg
Rear hoop
Custom hand made seat and cowl
Frame either powder, or paint haven't decided
Paint tank tail section colors of Lily's choice.
That should cover the basics
The pic of the bike when it's green is just after I washed all the cob webs and road grime off if it after its 1800 mile trek back to Co. It looks a lot better than it really is. Surface rust galore, paint in ROUGH shape
The primer pic is obviously after I fixed the dents and shot or primer.
The orange bike is the CB replacement bike VF1000F interceptor. Still have, and she still rips!

 PS I didnt read ALL of it. But get the jist.
  .
.