
We noticed you are blocking ads. DO THE TON only works with community supporters. Most are active members of the site with small businesses. Please consider disabling your ad blocking tool and checking out the businesses that help keep our site up and free.
You are using an out of date browser. It may not display this or other websites correctly.
You should upgrade or use an alternative browser.
You should upgrade or use an alternative browser.
72 Suzuki GT380
- Thread starter interceptor
- Start date
interceptor
Coast to Coast
I'll have to look into that. I actually have 2 other wire harness'. I think one is for a GT550 and one is for a 73 GT380. Still not quite sure how the other harness would hook up to the transmission. I mean it has to have some type of plug coming out of engine, right? Since my engine is a 72, I'm not really sure it's there. I wonder if it's just some kind of position sensor that can be added?
Correct. Early bikes had a simple neutral switch. For the gear indicator the shift cam drum was changed to include a small spring loaded contact and externally the neutral switch was replaced with a switch with 5 or so contacts and a whole bunch of wires coming out of it.
At least that's the 750 situation and the 380 is probably a similar history.
At least that's the 750 situation and the 380 is probably a similar history.
interceptor
Coast to Coast
I guess the first thing to do is see what year the engine actually is. And hopefully it has what I'm looking for. Thanks for the help.
AlphaDogChoppers
Science is true whether you believe in it or not.
You don't need no steenking neutral light or gear indicator.
interceptor
Coast to Coast
ADC,
Yeah, I know. I don't think I really need them either, but if it's there I'd like to make it work. Just more stuff to go wrong in the future
Teazer,
I found another wiring harness in the boxes. I'm hoping that's what it is. Once I get the engine out, I'll check and see if there is a connection.
I didn't see one when I took the wiring harness off the donor bike, but it was dark out and I wasn't paying attention.
On a good note, I went through all the pipes I got with the bike, and i found a really good set. No dents or rust. Man, I'm getting super excited to ride this thing. I've never ridden a 2 stroke street bike, only enduros.
Not a lot that is strictly "needed" but some little touches are nice.
Spoiler alert: GT380 is a nice bike, but it's a bit heavier than most off road two strokes and doesn't have such a sharp powerband. It's still fun though and different. if you ever feel like upgrading it and making it more edgey, it can be ported and piped and that will make it a whole lot more perky.
Spoiler alert: GT380 is a nice bike, but it's a bit heavier than most off road two strokes and doesn't have such a sharp powerband. It's still fun though and different. if you ever feel like upgrading it and making it more edgey, it can be ported and piped and that will make it a whole lot more perky.
interceptor
Coast to Coast
I'm not really into making things go fast. Trust me, I like fast cars and bikes (had them both) but I don't expect alot out of these older bikes. I just like to put things back together and try to learn something from it. If it starts up and moves, I'm very happy
interceptor
Coast to Coast
I found a upper fork mount on ebay this morning. Located the carb rebuild kits and looked at the throttle cables. All seems good Also had a new clutch cable in the boxes, too.
Is it difficult to rebuild a master cylinder? The rod in there is stuck in place. The unit isn't leaking anywhere right now, and it's full of fluid. Thoughts? Buy a universal one or try to rebuild this one? Thanks guys.
Also had a new clutch cable in the boxes, too. Is it difficult to rebuild a master cylinder? The rod in there is stuck in place. The unit isn't leaking anywhere right now, and it's full of fluid. Thoughts? Buy a universal one or try to rebuild this one? Thanks guys.
AlphaDogChoppers
Science is true whether you believe in it or not.
Rebuilding them is a piece of cake. You will need a snap ring pliers that will work. I had to buy one specifically for master cylinder work.
Use Permatex Silicone lube in rebuilding brake parts.
http://www.permatex.com/products/Automotive/lubricants/specialty_lubricants/auto_Permatex_Ultra_Disc_Brake_Caliper_Lube_1.htm
Use Permatex Silicone lube in rebuilding brake parts.
http://www.permatex.com/products/Automotive/lubricants/specialty_lubricants/auto_Permatex_Ultra_Disc_Brake_Caliper_Lube_1.htm
interceptor
Coast to Coast
ADC,
Thanks. I do have an assortment of snap ring pliers, hopefully something will work I'll just dive into it and see where it goes, just like I've done with everything else :. Never done it before, but I see the principle of how it works and I think thats half the battle. I actually have spare master cylinder in the boxes, so maybe I'll take that one apart first and figure out what I need to do.
Thanks. I do have an assortment of snap ring pliers, hopefully something will work
I'll just dive into it and see where it goes, just like I've done with everything else :. Never done it before, but I see the principle of how it works and I think thats half the battle. I actually have spare master cylinder in the boxes, so maybe I'll take that one apart first and figure out what I need to do.interceptor
Coast to Coast
Ok, so the trick to take out the engine is??? Should I take off the top ram air scoops on top of the engine first? I've tried the 'set it on its side' thing, and it ain't workin. Tired for about 15 minutes and had to call it a day. But I did get alot of the electrical connections in the headlight done, and installed the 72 gauges instead of the 73. Oh well, I tried. Oh ya, also got 1 carb cleaned and installed the rebuild kit.
That would make it a whole lot easier I suspect. First though, make sure ALL the electrical connections are unclipped. I cannot tell you how annoyed and silly you will feel with the engine half way out and dragging the rest of the bike along by a lead you missed. Not that I would ever make such a silly mistake. ;-)
I also remove the chain cover and points and alternator covers to get more places to grab onto.
Carbs are presumably off, along with tacho cable, clutch cable, chain etc.
On that master cylinder, if it's OK inside, go ahead and fit a rebuild kit. If it's pitted or scored, grab a replacement new unit off ebay - but get the right diameter.
interceptor
Coast to Coast
Well, ADC was right about the special snap ring pliers, I can't get anything I have in there. But.... I did get it unstuck today by soaking it in PB Blaster. I worked it until it came free. So I think it's ok now. One thing I don't understand though... I took the banjo bolt off the end of the master cylinder and then filled the master cyl. with brake fluid, and then pressed in the brake handle and I don't really get anything coming out of the end (where it connects to the banjo bolt). There is pressure if I put my finger up to the hole, but it doesn't squirt out. Normal? (Sorry, go back and read my first post; first time for hyd. brakes )
Teazer,
Thanks for the input. I made sure that everything was detached I just found my Clymer and maybe it says in there. I'll report later.
)Teazer,
Thanks for the input. I made sure that everything was detached
I just found my Clymer and maybe it says in there. I'll report later.AlphaDogChoppers
Science is true whether you believe in it or not.
interceptor said:the special snap ring pliers, I can't get anything I have in there.
That circlip is a tiny little fucker, ain't it? I did manage to find a snap ring pliers with small enough tips to fit in there, but you may have to do some searching to find the right one.
Remember, that brake fluid is not oil, and is not compatible with petroleum. You have to be sure that every last trace of PB Blaster is flushed out with brake cleaner.
interceptor
Coast to Coast
ADC,
Thanks, good information.
Teazer,
Thats what I was kinda thinking. Have to find the pliers to get clip out so I can clean that thing throughly.
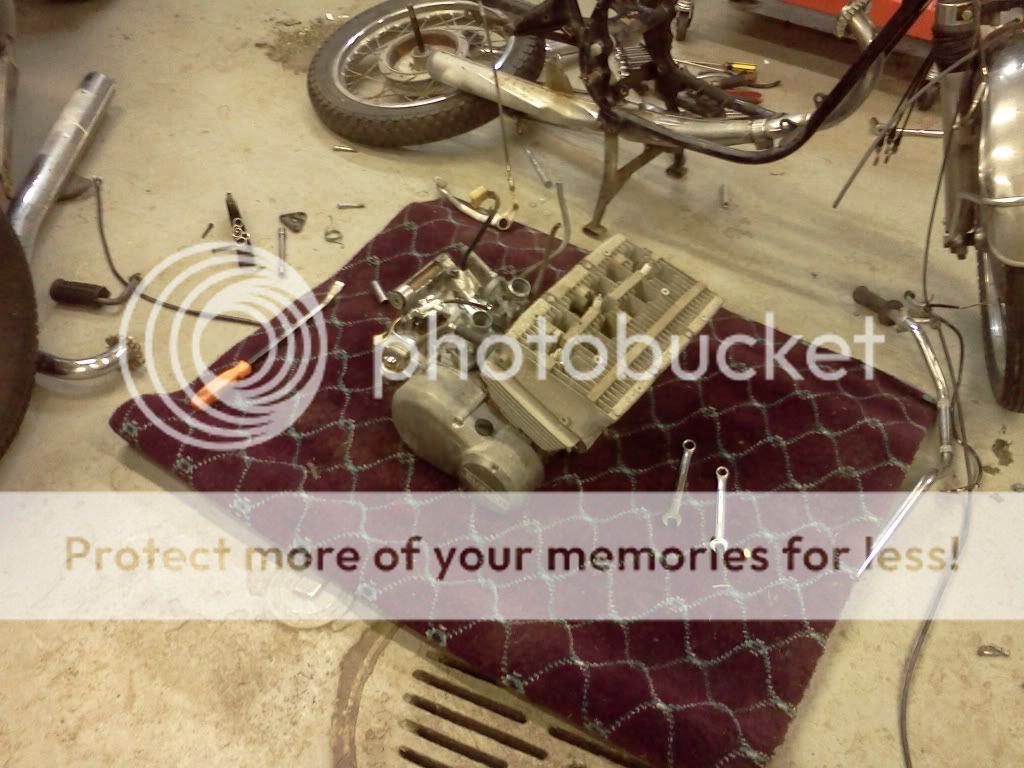
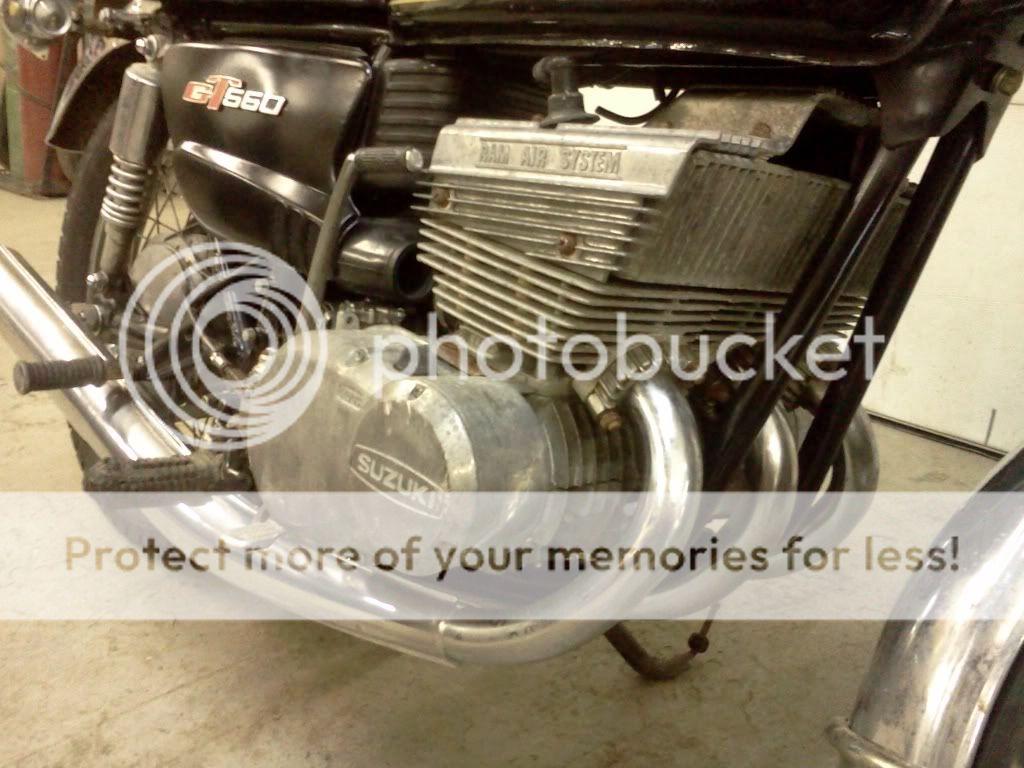
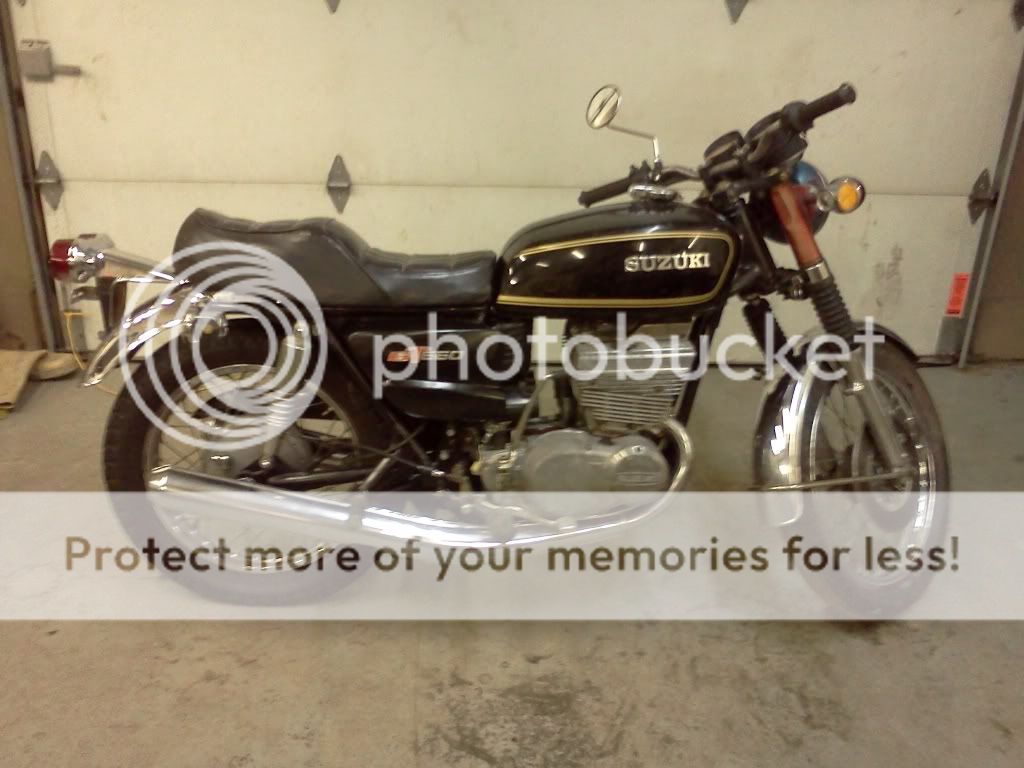
Made some more progress this morning. Got engine out. It's really easy if you read and follow instructions. Lesson learned... read first, then do Pipes cleaned up really nice. Not really any rust because I think the 3 inch deep oil on there saved them. Don't have the middle pipes on yet because I brought 2 right sides :
Here's some pics of the bike as it stands.
Thanks, good information.
Teazer,
Thats what I was kinda thinking. Have to find the pliers to get clip out so I can clean that thing throughly.
Made some more progress this morning. Got engine out. It's really easy if you read and follow instructions. Lesson learned... read first, then do
Pipes cleaned up really nice. Not really any rust because I think the 3 inch deep oil on there saved them. Don't have the middle pipes on yet because I brought 2 right sides : Here's some pics of the bike as it stands.
interceptor
Coast to Coast
I have an issue and need some insite. I rebuilt the spare carbs that were in the boxes and then i notcied that the throttle valves are really tall. They hit the idle adjustment screw and are flush to the top of the carb. Is that normal? When I screw the cap on, there is only about 3/4" (guessing) movement (sliding) up and down. I don't know what they came from, but they could be GT550 carbs. Do you see any problem using them on the 380?
Thanks for any input.
Also got the new top clamp installed, cleaned and lubed the tach cable, installed the oil feed line, installed the rear brake light switch, installed chain, installed all of the exhaust now, installed correct spark plug boots, installed battery, installed new clutch cable, installed clutch cover, installed new (used) left foot rest and switched through the gears to see if anything feels weird-all is good. Airbox is complete and ready to be installed when carbs are done. Wow, seems like alot for a couple hrs. worth of work.
No new photos, as it still looks the same as before.
I can't say about those specific carbs, but Mikuni made tall top caps and long slides for some Suzukis. I have no idea why. For example th 72/3 750 seemed to come with either tall or short slides and corresponding tops. I suspect it may have been a way to limit performance for some markets that they introduced tall slides. That way they could fit tall tops in unrestricted markets and low tops where they were restricted.
I would think that you could machine long slides shorter, but don't you have the short slides or tall caps?
I would think that you could machine long slides shorter, but don't you have the short slides or tall caps?


