Follow along with the video below to see how to install our site as a web app on your home screen.
Note: This feature currently requires accessing the site using the built-in Safari browser.
We noticed you are blocking ads. DO THE TON only works with community supporters. Most are active members of the site with small businesses. Please consider disabling your ad blocking tool and checking out the businesses that help keep our site up and free.
On the motorcycle I mentioned one of the front down tubes was cracked entirely in two, the other half way or so. No the whole bike was not broken in two.
So in other words you havent seen a bike break in half. Your one hand picked example doesn't even qualify to oppose. A waste of words for everyone involved.
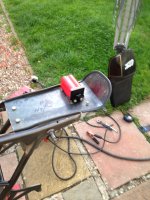
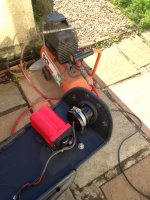
I could only tack them in place today, as it seems the wire I bought today was standard MIG wire. Even though it was specifically labelled Flux core, apparently a quite common problem in the UK with Clarke wire is that at the factory they just stick a flux core label on standard wire before they ship it out.
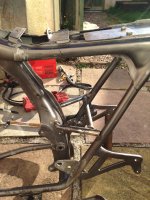
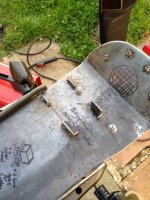
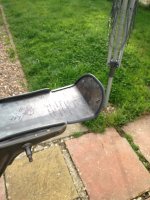
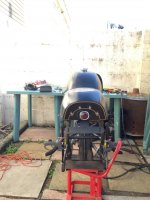
Braces welded in place. Waiting for my die grinder so I can clean the welds up a bit, and to clean the rear set brackets up.
I re-stalled the rear wheel and a spare bottom end, and checked the clearance to the chain with the shocks bottomed out. Should have plenty of clearance (2-3 inches), and have plenty between the brace and the rear wheel itself (3 inches +).
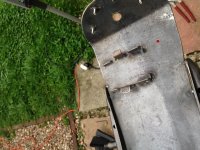
Are you putting a radius on the ends of those tubes? You want the ends to wrap around the tube you're welding them to. You don't want to do any filling with weld.
Are you putting a radius on the ends of those tubes? You want the ends to wrap around the tube you're welding them to. You don't want to do any filling with weld.
Yes I did Deviant. In the pictures they aren't as I had just shaped them with the angle grinder roughly for a mockup. I didn't get the correct size holesaw until after I had tacked them in, so shaped them just before final welding.
Sorry but that doesnt make sense unless you scrapped the tubes that you show tacked in and made all new tubes. To radius them after those pics would make them too short.
Why are you putting all this bracing in? Did I miss something?
Sorry but that doesnt make sense unless you scrapped the tubes that you show tacked in and made all new tubes. To radius them after those pics would make them too short.
Why are you putting all this bracing in? Did I miss something?
They were made shorter, when I tacked them in they were 8-10mm higher than I had intended. So when they were shaped they fit in a suitable place. The middle tube linking both sides was replaced. I should have just waited til I could shape them properly from the start, would have saved time and some estimation work. I know it was a real stupid and ass-about-face way of doing it, I guess I just had idle hands.
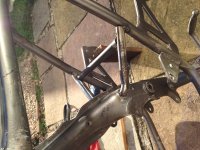
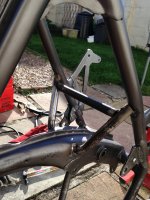
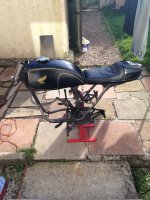
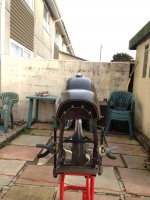
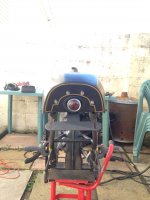
As my rearset brackets were now directly tied into the frame tubes, I wanted to stiffen them up by tying them into the main backbone.
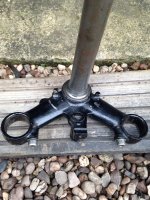
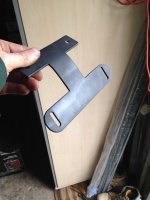
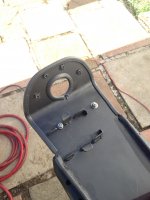
Managed to finish off my numberplate bracket today, and removed the steering lock from the lower triple. I should get access to the die grinder tomorrow so I can finish cleaning them up ready for powder.
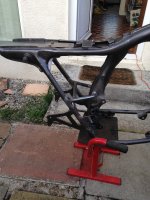
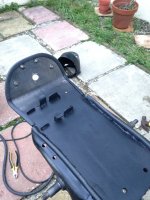
Got the majority of the work for the seat pan completed today. Only thing left is to cut the hole for the tail light.
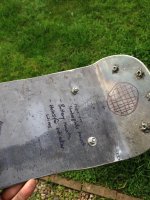
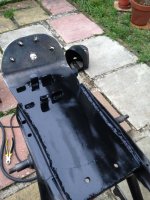
Got the steel pan bent into shape, and welded on 4 nuts for the rear of the seat to mount to. I covered the edges of the pan and the seat rails with some rubber trim. The base of the seat was resting on the rear subframe so the rubber trim is there to stop direct fibreglass to steel contact.
Drilled some holes in the pan for the numberplate mount, and welded in a few brackets to hold the battery. I still need to add one on either side so I can send a strap over to hold it down. Hopefully I can get access to the plasma cutter tomorrow so I can get the tail light in, and then the seat pan will be welded in place.
Seat pan is welded in place, and 2 extra tabs for a battery strap are welded in. The only thing left is to open up the hole so the tail light fits (along with the a grommet), and then its off to the powder coaters.
None of the welds or tabs are the neatest, but seeing as they wont be seen I couldn't care less.
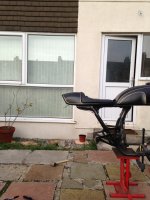
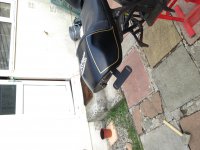
Seat pan is now complete. I cut out the hole for the rear tail light and made one final complete mockup to ensure everything fits.
The rubber trim for the tail light hole will be cut and shaped better for final assembly, but I just cut it out roughly for the mock up.
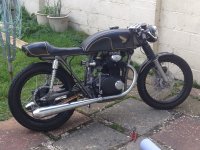
Thinking about powder colours now. I did want to try and match the paint on the frame as close as possible, but now thinking I may go just a tad lighter to provide more contrast between the bodywork/engine and the frame.
that puppy looks awesome ! frame color can go wrong if it is a color ,its rare to see a bike that is an actual rainbow color on the frame and not taste bile
silver grey or black its just opinion but thats my take
i really like the texture hammertone shit balck or silver grey with a hint of the splotchies, i think it looks the geese's gizard
I agree with those 3 colours being the best, or a mix between. At the minute the frame is sprayed a Metallic Graphite. I want to try and get something between silver and this colour, maybe metallic or with a bit of flake in so its not just a solid colour.
Found a local powdercoaters who are gonna do the frame + swinger for me. I think the colour im gonna go for is called Erbium. The only concerns I have are the welding/metal work imperfections being shown up with this effect. Maybe a simple gloss colour would hide them a bit better.
Having rather a good bit of experience with fabrication and paint, I'll pass this along. First, consider that your bike was initially designed with the intent of having the frame - for the most part - fade into the background both by design and by painting it semi gloss black. That's why a typical stock bike with a color painted frame always looks so dreadful. Even with major and meticulous body work and re-welding everything to perfection, usually they don't look very good. You have a lot of cool modifications and I can see showing them off with some color, but I suggest that you expect the powder coating to conceal absolutely nothing and the color (great color choice!) to massively amplify any imperfections. Stamped components usually tend to look a lot larger when not painted black so mock up your bodywork and give things a good look when deciding. I usually spend a rather insane amount of time on my own frames to make them as flawless as the bodywork and I still (almost) always paint them gloss black. Regardless of your color choice, spend whatever time is needed to perfect the welds and any alterations. I tend to weld everything and grind/file everything smooth and expect to do no bodywork although invariably there is some nick or pinhole I miss which I fill with glazing putty after I epoxy everything. You won't have this luxury if powder coating, so inspect carefully for flaws. I have used JB weld and Marine-Tex as body filler under powder coating with good results. The Marine Tex shrinks less with the heat - it will survive re-contouring exhaust ports!
I am definitely steering away from any 'proper' colour, and am just trying to decide the shade/tone of the silver/grey I want. That Erbium colour has been the best I have found.
As it is close to the colour I originally sprayed the frame pre-modifications, I know what the bike will look like fully assembled. So the only things I am unhappy with at the minute are the welds around the bracing and the rearset mounts. I guess I'll just spend the extra time cleaning them up to a decent standard.
This site uses cookies to help personalise content, tailor your experience and to keep you logged in if you register.
By continuing to use this site, you are consenting to our use of cookies.