Follow along with the video below to see how to install our site as a web app on your home screen.
Note: This feature currently requires accessing the site using the built-in Safari browser.
We noticed you are blocking ads. DO THE TON only works with community supporters. Most are active members of the site with small businesses. Please consider disabling your ad blocking tool and checking out the businesses that help keep our site up and free.
took em back to my shop and slapped em on the bike. i was having issues getting the bike going, but after taking my petcock out of the tank and giving it a good cleaning, she awoke! THIS DAMN BIKE RUNS!! (and strong too) i cant express how excited i am having it running and stopping under its own power. i took it out for a little test run tonight and she powers through all the gears great as well as cruises very smoothly. so pumped. heres some more shitty photos of the final product.
and how she sounds. my shop is very "echoie" so it makes it sound like its idling to high, but its just about right. ill try to get a "ride by" clip tomorrow.
That is Sow cool ! 8) How did you ever think of that ?
I also love the "open" look but did not dare to ride "fenderless" on the reartire with my open velocity stacks. But this is briljant !
thanks for the compliments guys. i figured having something there to protect the filters from all the sand and water we have on these florida roads would be better than nothing. the one thing i dont like about the 550's is the huge space between the tire and the front of the swingarm.it makes it difficult to weld in a mount for a "mini" fender. i was going to make flat piece of steel that was welded to a fender that would cover the front most part of the swing arm, but then i came up with this instead. turned out pretty good and has functioned very well. just goes to show, with a little bit of ingenuity, you can make things work for you even if they werent designed to. ;D
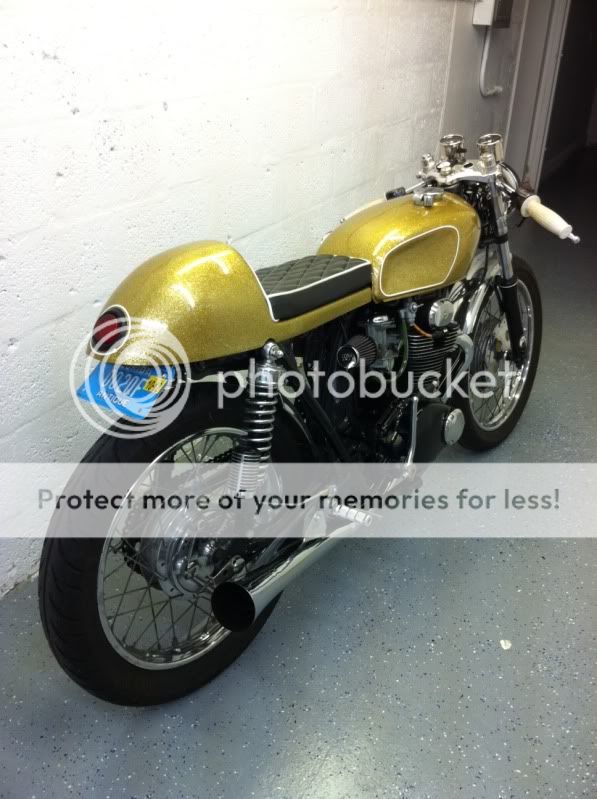
Hey Andrew, in this pic there's a bike with a seat that looks like the fabric has been Diamond tufted. Did you do that yourself? or did you purchase the fabric like that? or did you have an upholsterer do that for you??
I'm lookin to do the same thing but can not for the life of me figure out how i'll do it and don't really wanna shell out the $$$$$$ for an upholsterer to do it for me
devon - the seat your seeing in the photo is the seat on my 350.
.
i had my upholster buddy whip that up for me because my machine was broken at the time.
the process is quite easy though. get whatever material you want to use, (vinyl, leather, etc) and get some kind of foam (i like to use headliner material since it has a thin foam backing to it) and glue the foam to your top material (vinyl, leather etc.) once youve done that, get a ruler or something wider depending on whatever width you want and trace both side of the ruler or strait object and that will be your start of the width your diamonds will be apart. once youve continued down each side of the OG marks turn the ruler or strait object at whatever degree perpendicular to the first set of lines you just drew and do the same thing as you did before all over again. this will give you the diamond or "grid" pattern you desire. make sure in your machine that your bobbin thread color is the color you want shown as that will be the color visible on the top side. and its best to use the same color thread for the spool as well as the bobbin. hope that helps. its how i tought myself how to do it, you could always google the process. perhaps theres an easier way of going about it. 8)
i got new longer hot and ground cables since the battery is in the hump. the rest of the electronics i moved around and positioned between the frame rails horizontally under the seat pad area. made brackets to attach a few elec. components to the frame and called it done.
This site uses cookies to help personalise content, tailor your experience and to keep you logged in if you register.
By continuing to use this site, you are consenting to our use of cookies.