
We noticed you are blocking ads. DO THE TON only works with community supporters. Most are active members of the site with small businesses. Please consider disabling your ad blocking tool and checking out the businesses that help keep our site up and free.
You are using an out of date browser. It may not display this or other websites correctly.
You should upgrade or use an alternative browser.
You should upgrade or use an alternative browser.
78 Kawa KZ650 Road Racer/Cafe Project
- Thread starter perattzi
- Start date


guitargeek
Been Around the Block
Nope, 750. My build thread is over here: Freshening Up I originally set out to just replace some gaskets and freshen up the top end...perattzi said:Awesome Kawa! Is it a 650 as well?
AGMThose battery are nice and small huh. What type did you go with,
Haha, not that great! It's only a 4 amp hour battery, the stock battery is a 12 amp hour. I installed a kill switch for the headlight and it helps, but I really need to add a second small battery in parallel. If I had a kick starter, I'd use it (just fold up the peg first). If you're sticking with points and condenser (rather than electronic ignition) you can get away with a smaller battery (or just a big capacitor if you're okay with kick starting).and how is it working for cold starts etc. ? Thanks
Finally got my head back...A mechanic buddy disassembled, and inspected it. Then ran everything thru a parts washer, new valve seals installed, and valve seats lapped. I masked and painted with PJ1 hi temp fast black, then hit the sides of the fins with my dremel. Still need to polish the exposed aluminum. Looks pretty sweet I think!

I also posted this on the KZrider and kz650.info sites...but thought it may be useful here too...
Starting making the braces for my frame. Originally I was going to just use sheet metal gussets, but from what I have read, a brace is much more effective. I am just doing the usual I see on all these old KZ's: a tube just above the front engine mounts, two in the swingarm area(one horizontal and one diagonal to create some triangulation), 2 in the side cover area, and maybe a few up by where the coils mount to tie the 3 tubes there together.
For the brace in the front and swingarm area, I am using 3/4" inch DOM mild steel with .065 wall thickness. For the other ones in the side cover area I am using 1/2" DOM with .05 wall thickness. From everything that I have read, especially on the Tony Foale site, the bracing tube need not be as thick as the main tubing. I ordered it cheap and cut to approximate sizes from speedymetal.com, they have a good selection and no minimum if you can't source locally.
For a good fit, I took the tubing to my dad's where we leveled the frame up and measured everything out, and found the angles that the tubing needed to be cut at. For the two front down tubes, about and an inch and a half above the front engine mount, we came up with 8 degress.I then measured the tubing of the KZ frame, which is right around 1 1/8" in diameter. We chucked a 1 1/8" metal hole saw bit into the drill press. Then on his drill press, we adjusted the vice to the 8 degree angle we found. After securing the tube into the vice and squaring the center of the bit on the tube, you can make your first cut. Make sure the tube is plenty longer than the actual size you need. For this to work correctly, the center bit must penetrate the metal and hold it secure while the outside hole saw cuts the curved notch. Then just measure and mark the other side, be certain it is chucked with the top of the tube exactly where it was before and cut the other side. Debur and check fitment. Our first one was just a tab off, on the second cut the tube wasn't lined up perfectly...but then again neither of us have done this before so try again and it came out great!
Only had time to make the first one but very satisfied with the results. Surely there is a better way to do this if you have a machine shop but hopefully this helps anyone who has simple tools at home.
The setup:

Front brace...checking the fit:

Nice and snug:

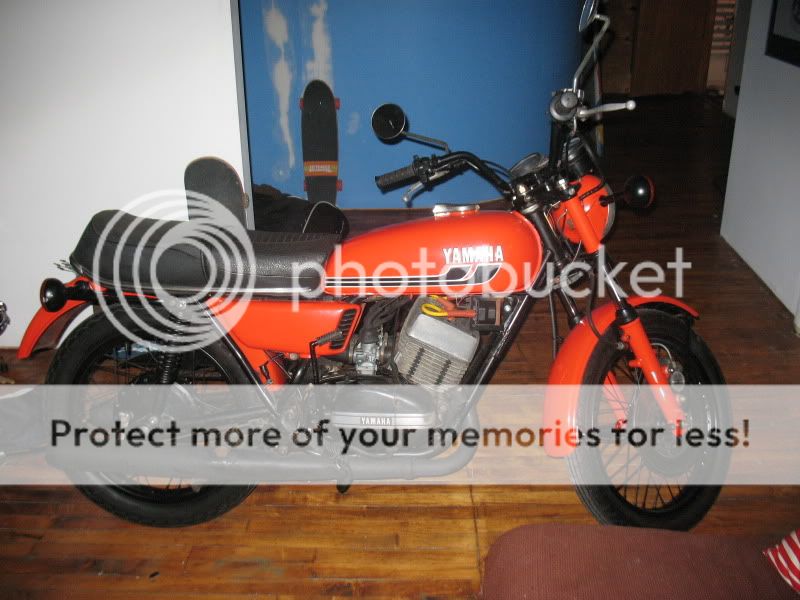
BTW I'm trying real hard not to think about the RD350 for sale near me on craigslist... :")
Starting making the braces for my frame. Originally I was going to just use sheet metal gussets, but from what I have read, a brace is much more effective. I am just doing the usual I see on all these old KZ's: a tube just above the front engine mounts, two in the swingarm area(one horizontal and one diagonal to create some triangulation), 2 in the side cover area, and maybe a few up by where the coils mount to tie the 3 tubes there together.
For the brace in the front and swingarm area, I am using 3/4" inch DOM mild steel with .065 wall thickness. For the other ones in the side cover area I am using 1/2" DOM with .05 wall thickness. From everything that I have read, especially on the Tony Foale site, the bracing tube need not be as thick as the main tubing. I ordered it cheap and cut to approximate sizes from speedymetal.com, they have a good selection and no minimum if you can't source locally.
For a good fit, I took the tubing to my dad's where we leveled the frame up and measured everything out, and found the angles that the tubing needed to be cut at. For the two front down tubes, about and an inch and a half above the front engine mount, we came up with 8 degress.I then measured the tubing of the KZ frame, which is right around 1 1/8" in diameter. We chucked a 1 1/8" metal hole saw bit into the drill press. Then on his drill press, we adjusted the vice to the 8 degree angle we found. After securing the tube into the vice and squaring the center of the bit on the tube, you can make your first cut. Make sure the tube is plenty longer than the actual size you need. For this to work correctly, the center bit must penetrate the metal and hold it secure while the outside hole saw cuts the curved notch. Then just measure and mark the other side, be certain it is chucked with the top of the tube exactly where it was before and cut the other side. Debur and check fitment. Our first one was just a tab off, on the second cut the tube wasn't lined up perfectly...but then again neither of us have done this before so try again and it came out great!
Only had time to make the first one but very satisfied with the results. Surely there is a better way to do this if you have a machine shop but hopefully this helps anyone who has simple tools at home.
The setup:
Front brace...checking the fit:
Nice and snug:
BTW I'm trying real hard not to think about the RD350 for sale near me on craigslist... :


perattzi said:
Score! ZRX1200 shocks. 1" longer than stock, perfect.
nice find! What are the specs if those, e.g. Free length, travel, spring weight, etc. Also, are those dampers single or double adjustable? How many clicks total?
The build is looking great.
--Thanks, Chris
I haven't received the shocks yet, but from what I researched, they are 14" free length, 5-way adj. preload & 4-way adj. comp. & rebound damping, with 4.8 in. travel. Not sure about spring rate. Gonna take alot of tuning and tinkering, especially with the new forks as well. It's going to be stiff I know that much. Still need to determine what I want my rake to be. Basically the only control I have over that is where I mount the shocks, thus raising the back up. Probably shooting for like 25.5. But it's hard to figure without knowing how much everything is going to sag. Gonna buy a suspension book or something...
perattzi said:I haven't received the shocks yet, but from what I researched, they are 14" free length, 5-way adj. preload & 4-way adj. comp. & rebound damping, with 4.8 in. travel. Not sure about spring rate. Gonna take alot of tuning and tinkering, especially with the new forks as well. It's going to be stiff I know that much. Still need to determine what I want my rake to be. Basically the only control I have over that is where I mount the shocks, thus raising the back up. Probably shooting for like 25.5. But it's hard to figure without knowing how much everything is going to sag. Gonna buy a suspension book or something...
Nice find. When you get the dampers, will you take some calipers to the coils? I'm curious the diameter. You can get the spring rate from that. Keep us updated because I wouldn't mind trying them on my RD if they will work. It might be possible to replace the springs, but then again, it blow the dampning frequencies way off.
For reference, you're kinda mixing terms.
Preload: 5 click-adjustable
Dampening: 2-way adjustable; 5-clicks bump/rebound
Travel : 4.8"
That's interesting about the dampening adjustments. Typically, these type of dampers are significantly more than 5 -clicks for bump/rebound..
Thanks for the info!
--Chris
BadKaw
Active Member
chrisf said:,,,
For reference, you're kinda mixing terms.
Preload: 5 click-adjustable
Dampening: 2-way adjustable; 5-clicks bump/rebound
Travel : 4.8"
,,,
To quote a guy I once read: For reference, you're kinda mixing terms. ;D
"Dampening" - to make wet, or to moisten.
"Damping" - to lessen the effect, to reduce impact.
;D ;D ;D All in good fun!!! ;D ;D ;D-KR
Well got my shocks...although they do have a 'dampening' effect, in terms of sexy looks, not sure they are going to work for my damping purposes. Hmmm....... They are oriented so that the spring starts on the bottom...and they shocks are huge and heavy! Where the spring would sit on the drive side, my chain will hit, even after machining the hub in and converting to a 530...it just right in the way. If I mounted them upside down they would work, but would add probably about 8 pounds of unsprung weight. They weigh about 6.5 lbs a piece. So, probably gonna put em back on fleabay...and hunt around. Maybe YSS or Works. I definitely don't wanna spend more than $400...so any ideas are appreciated.
They are oriented so that the spring starts on the bottom...and they shocks are huge and heavy! Where the spring would sit on the drive side, my chain will hit, even after machining the hub in and converting to a 530...it just right in the way. If I mounted them upside down they would work, but would add probably about 8 pounds of unsprung weight. They weigh about 6.5 lbs a piece. So, probably gonna put em back on fleabay...and hunt around. Maybe YSS or Works. I definitely don't wanna spend more than $400...so any ideas are appreciated.Baby...steps...finally was able to get my braces welded into place.


Should help to stiffen the frame up a bit. I also made a electronics mount and a rear brake fluid resevoir mount from some sheet steel.


And to solve my rearset problem, I had some substantial coupling nuts welded on. Theres room to just barely get a wrench on the swingarm bolt. I still need to fabricate brackets to attach the rearsets, the ones provided will not work. But that should be pretty straightforward.

There will still be a few more mounts welded on, for the seat and tailpiece. Next order of business is aligning the sprockets!
On a side note my roommate got his first bike this past weekend...the venerable cb350. In time it too will become a cafe bike. But in the meantime I am helping him to make it road worthy. Runs great, and is overall very nice. Crappy paint job, but that will all be redone later. For now we are concentrating on things like rebuilding the brakes and replacing bearings and tires, so he can actually learn to ride. His is the disc brake version. My first bike was a 72 350, they have an awesome sound....but it looks so tiny to me now!

Should help to stiffen the frame up a bit. I also made a electronics mount and a rear brake fluid resevoir mount from some sheet steel.
And to solve my rearset problem, I had some substantial coupling nuts welded on. Theres room to just barely get a wrench on the swingarm bolt. I still need to fabricate brackets to attach the rearsets, the ones provided will not work. But that should be pretty straightforward.
There will still be a few more mounts welded on, for the seat and tailpiece. Next order of business is aligning the sprockets!
On a side note my roommate got his first bike this past weekend...the venerable cb350. In time it too will become a cafe bike. But in the meantime I am helping him to make it road worthy. Runs great, and is overall very nice. Crappy paint job, but that will all be redone later. For now we are concentrating on things like rebuilding the brakes and replacing bearings and tires, so he can actually learn to ride. His is the disc brake version. My first bike was a 72 350, they have an awesome sound....but it looks so tiny to me now!
Have you done any bracing around the headstock area? The KZ frames were pretty weak up that end - and with the new stiff USD front, this will be pretty important.
The bracing you have on there is VERY tidy, but to be honest, they are so close to the engine mounts I don't think it make a noticeable difference once the motor is bolted back in. Also, the swingarms on the KZ's were pretty flexy, but you've got that sorted
Nice work, and one of the best looking KZ cafe's on this board IMO ;D
Thanks for the kind words. As for the bracing, I just copied what is normally done on KZ racers. The engine mounts are not very stout and incorporate long skinny bolts and spacers...so I think the braces should help out. With regards to the headstock area, the 650 frame was designed better than the Z1's, which had no gusseting at all up front. Here are the stock gussets:

Bracing example:

And here's my first go at shining up the aluminum.

I just wetsanded with 180 to 2000 paper making sure to sand out all the scratches from each previous grit. Then I hand buffed and added the black paint. Took like 5 hours! Looks ok, not a total mirror but I'm happy. So does a bench grinder kit accomplish this much easier?
Bracing example:
And here's my first go at shining up the aluminum.
I just wetsanded with 180 to 2000 paper making sure to sand out all the scratches from each previous grit. Then I hand buffed and added the black paint. Took like 5 hours! Looks ok, not a total mirror but I'm happy. So does a bench grinder kit accomplish this much easier?
manchestermichael
hello
nice rd i would kill for one :'( but in the uk prices are going up and up how much did you get it for . are you going to mod it at all?
Rd was a pretty good buy I must say! Needs work but, gotta expect that. I got started on the ergos of the bike by carving out the seat so I'm not sitting up so high over the bike and am more tucked in. The rearsets are still mocked up, I need to make my brackets but I'm lazy haha . I know not everybody is going to like the seat, it isn't the traditional cafe style but I want to mainitain the semi stock look. Heresa what I'm atalkin bout...pretty comfy


. I know not everybody is going to like the seat, it isn't the traditional cafe style but I want to mainitain the semi stock look. Heresa what I'm atalkin bout...pretty comfy


