78 KZ Twin Tracker

brick_pastard

New Member
This has been my ongoing project, spent last winter doing a bit of maintenance and some minor cosmetic work. This year I'm working on a custom tail, new exhaust, and rebuilding the front end. First bike, and I've done all the work myself, learning by doing. Started some of the work already, pics show when I first got the bike, a few from last summer and some steps along the way to where I am now.
 

Attachments

  • from phone 092.jpg
    from phone 092.jpg
    916.2 KB · Views: 290
and this is the progression to roughly where she's at right now, mid project, but the weather has me itching to get er back on the road again.
 

Attachments

  • 914.jpg
    914.jpg
    1.5 MB · Views: 259
  • 07292012486.jpg
    07292012486.jpg
    975.5 KB · Views: 256
  • 005 (9).jpg
    005 (9).jpg
    1.4 MB · Views: 254
Getnjgywitit said:
Looks like a great starting point. And that's the only way to learn, by doing!

Came in to post exactly this.

Bike looks really clean, will follow this project, i love the Kawa twins
 
This next week I'm hoping to get a good few days work on the bike in. Started today dropping the front forks, swapping to new bars, and getting everything together to hook up a new brake master cylinder.
I've got progressive springs and a heavier weight fork oil, and new seals for my forks. The old ones were a brute to get out and ended up gouging the aluminum on one side a bit, hoping a wet sand will smooth it out enough to still work. Also planning on painting my lower legs black, along with a pair of gaiters I've got to put on.
New bars and grips are looking awesome. Right now I have bar end mirrors, but I don't think they'll fit with the more tracker style bars I'm putting on, may just toss one onto the old mount on my brake master cylinder to make it legal...it'll give me a great view of my armpit when I'm riding!

Hope to start bringing everything together tomorrow.
 

Attachments

  • 464843_10152743470615276_732596637_o.jpg
    464843_10152743470615276_732596637_o.jpg
    133 KB · Views: 248
Finally got my forks back together with fresh seals, oil and new progressive springs. The damper in these is a royal b#$* to get torqued and wasted about half my day on it. Nevertheless, managed to get the newly built forks in with some gaiters. Rattlecan'd the base of my new master cylinder to match the other controls and got most of the other controls mounted on the new bars. Hoping to finish up the front end tomorrow, then move on to a carb rebuild.
 

Attachments

  • 474449_10152746822745276_1972426081_o.jpg
    474449_10152746822745276_1972426081_o.jpg
    136.7 KB · Views: 259
  • 468155_10152746823020276_188720088_o.jpg
    468155_10152746823020276_188720088_o.jpg
    134.4 KB · Views: 267
Looks good. Those carbs are real simple. Pull one apart and leave the other as reference. If you go pods you'll want to rejet. Both pilot and main jet are located in the bowls of the carbs.

I'd check your tank petcock as they always get real dirty. Clean that, new gas lines and clean carb will go a long way. New plugs as well.
 
thanks for the tips crackerman, Looking at them again one of the fuel lines looks pretty gnarly, definitely going to redo them both.

Tried to hook up my new Brake master cylinder today, went to bleed the brakes with no luck. Thinking its the seals in the Brake master cylinder (its off a parts bike) so it'll be rebuild time for that sucker too.
 
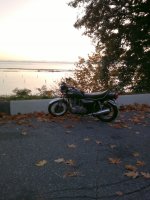
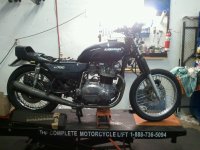
Been a while since I updated, mostly since I got the KZ back insured and the weather here's been great so I've been riding as much as possible.

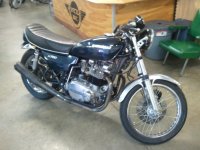
As it stands I've been running the stock seat and the same old brake system (mushy as hell). I ran some SeaFoam through the bike and thats cleared out my carbs and fixed the little leak I had (suspect a sticky float). Now she's running like a dream.

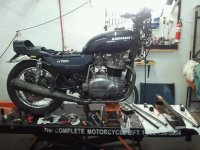
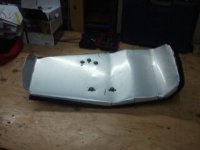
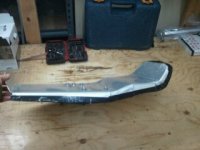
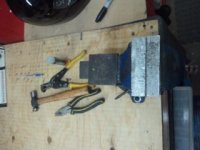
Current project, I built a custom seat pan to fit my shortened rear end, and still uses the original mounting hardware so the seat flips up. I've posted the pic of the pan I built, and the tools I used. Definitely not professionally done but turned out pretty well, although I did sacrifice all the skin on the fingers of my right hand. Next I'm glueing and shaping foam, then getting it wrapped in brown leather.

The next project in the works will be redoing the front brakes, steel braided line and the other brake master cylinder I have for sure, possibly a drilled rotor as well.
 

Attachments

  • 2013-05-15 18.06.04.jpg
    2013-05-15 18.06.04.jpg
    99.4 KB · Views: 944
  • 1369078639045.jpg
    1369078639045.jpg
    12.6 KB · Views: 853
  • 1369078649842.jpg
    1369078649842.jpg
    15.5 KB · Views: 836
  • 1369078662243.jpg
    1369078662243.jpg
    16 KB · Views: 832
My carbs have been leaking a bit out of the overflow tubes, figured it was a sticky float. Ran some seafoam through it, worked like a charm for about a month, then parked it for a few days and the one carb started leaking like a sieve.
Pulled the carbs today, cleaned the floats and replaced the float valves, but its still leaking like a sieve... any thoughts?
 
Well, successfully got my floats set, just need to tune the carbs now. Finished shaping the foam on my seat, now for the big task...handstitching a leather cover for it (because why not, right?)

Picture to come of the seat,
 
And in the process of tuning my carbs, had them all nicely synced, went to tighten the locknut and it promptly caused the threads to strip. back to ol' square one to pull the carbs out and fix that lil mishap.

Any tips for tuning the carbs after that? I've got the manual and a decent idea of what to do, but any tips or hints would be hugely appreciated!
 
What a great bike, brings back memories. This year, make an model is what I learned how to ride on. Though it was a super faded maroon color - and it was the early 90's ;) Always felt like Arthur Fonzeralli every time I had to kick start it, be cause the starter never worked.

This is making me want to find another one of these.
 
Back
Top Bottom