
We noticed you are blocking ads. DO THE TON only works with community supporters. Most are active members of the site with small businesses. Please consider disabling your ad blocking tool and checking out the businesses that help keep our site up and free.
You are using an out of date browser. It may not display this or other websites correctly.
You should upgrade or use an alternative browser.
You should upgrade or use an alternative browser.
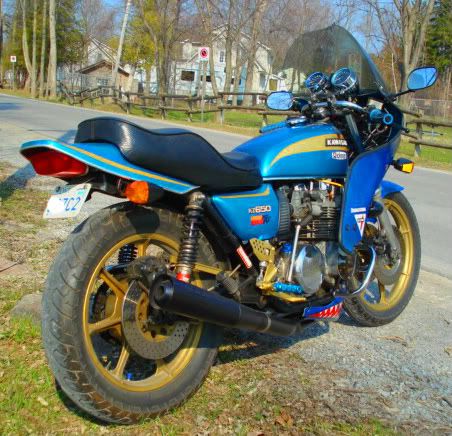
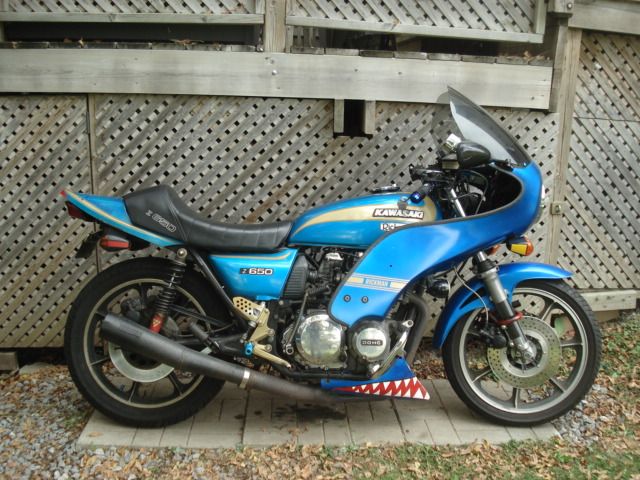
79 Kawasaki KZ650 - 8 minute video, 282 West, Pennsylvania
- Thread starter SrgtBear
- Start date

SrgtBear
The arsenic has oddly shaped feet...
Re: 79 Kawasaki KZ650 - Homemade spacers & new start switch
I saw your bike on KZ650 info. I read a little bit but could you describe in detail how you built your fender eliminator.
As far as updates - still working on fitting signals. Haven't had much time. Although I wired up the aftermarket switches I might resort to the stock ones just because they look better with the bike. After that the only thing I need to do is rebuild the engine, install, fendor eliminator, paint, the fire her up.
78kz said:Coming along well.
Any updates?
8)
Ditch the rear fender.
I saw your bike on KZ650 info. I read a little bit but could you describe in detail how you built your fender eliminator.
As far as updates - still working on fitting signals. Haven't had much time. Although I wired up the aftermarket switches I might resort to the stock ones just because they look better with the bike. After that the only thing I need to do is rebuild the engine, install, fendor eliminator, paint, the fire her up.
3DogNate
"You Meet the Nicest People on a Honda"
Re: 79 Kawasaki KZ650 - Homemade spacers & new start switch
Saw + ABS Glue = sized to fit
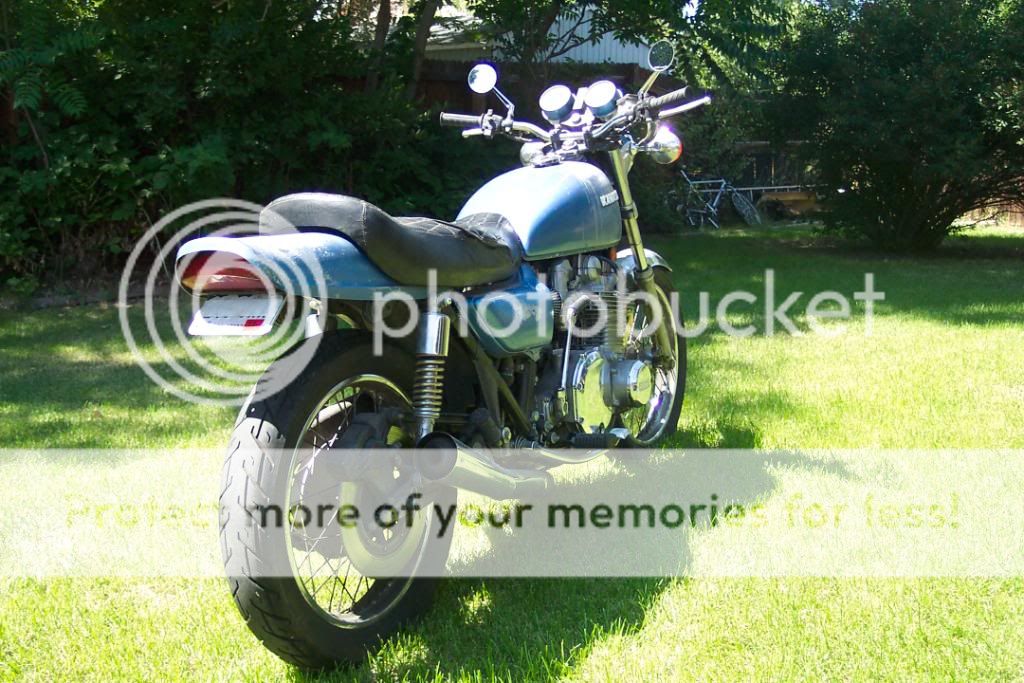
crazypj said:The Z/KZ650 has the best looking tail ever once rear mudguard is removed (even better than Ducati 916)
I bought one to fit on CB360 but it's too wide to look 'good'
Saw + ABS Glue = sized to fit
78kz
Over 1,000 Posts
Re: 79 Kawasaki KZ650 - Homemade spacers & new start switch
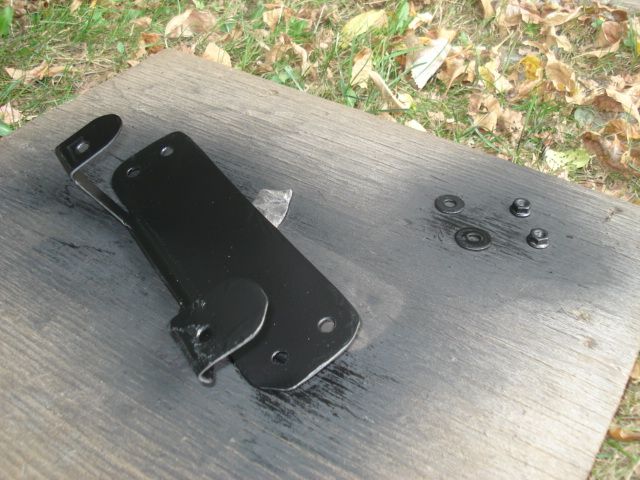
Light of your choice, and bracket/s made to mount it:

crazypj said:The Z/KZ650 has the best looking tail ever once rear mudguard is removed (even better than Ducati 916
I bought one to fit on CB360 but it's too wide to look 'good'
A second inner plastic fender, cut short, to replace large chrome one.could you describe how you built your fender eliminator.
Light of your choice, and bracket/s made to mount it:


CarbsAndCylinders
Careful With That Axe Eugene
Re: 79 Kawasaki KZ650 - Homemade spacers & new start switch
Love your build, SRG, gives me some ideas for mine, any updates?
Love your build, SRG, gives me some ideas for mine, any updates?
SrgtBear
The arsenic has oddly shaped feet...
Re: 79 Kawasaki KZ650 - Homemade spacers & new start switch
Yes, there are some...and thank you. Feel free to share a link to your build too.
Recent Updates:
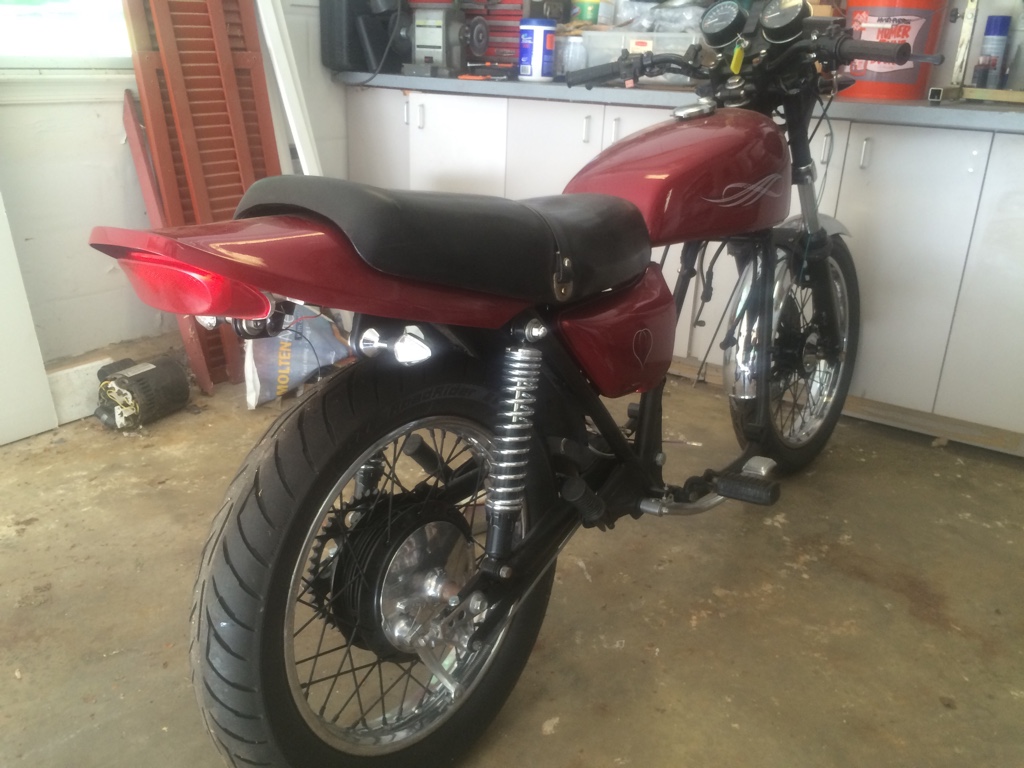
I've made a first attempt at creating a fender eliminator. I'm happy with the design but not sure if I am crazy about the taillight. You can alter these plans to fit any taillight. I made a template out of poster board to start.


Second, I scored a sweet find off of a the 'The KZ Market' & 'Kawasaki KZ/Z650 owners' forum on Facebook. This Lockhart aftermarket oil cooler was a performance part made for this bike. I've read good things about its efficiency.


Third, I wanted to put my older GPS on this bike for riding peace of mind. I think this will do the trick as long as it doesn't fall off while riding.


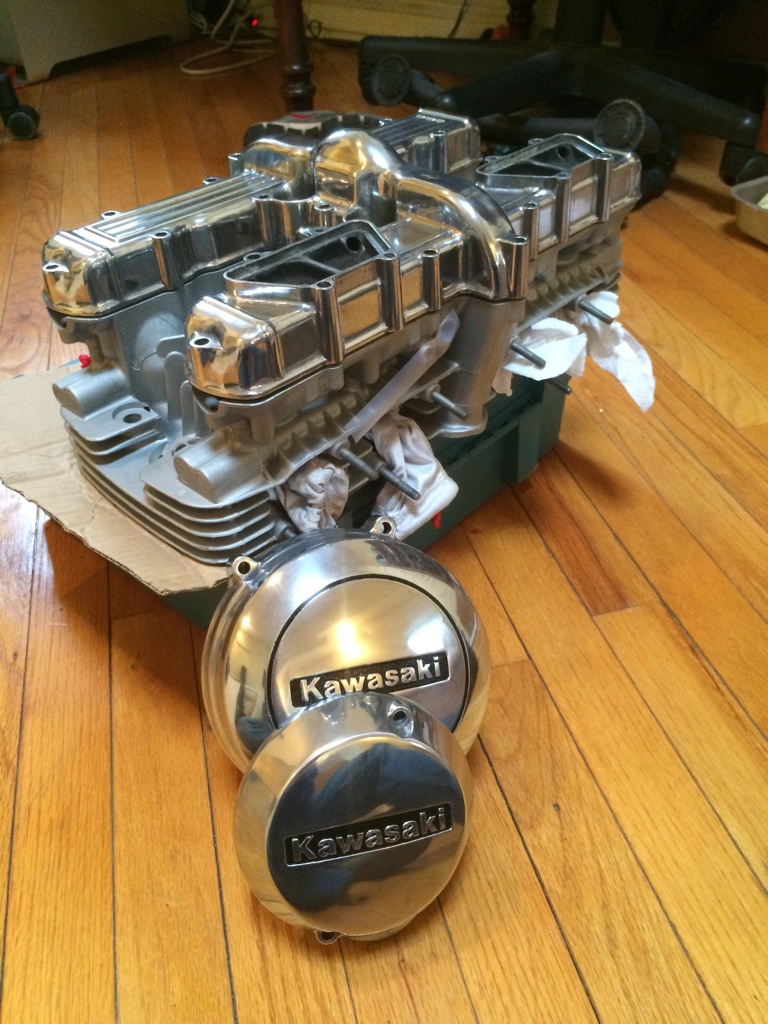
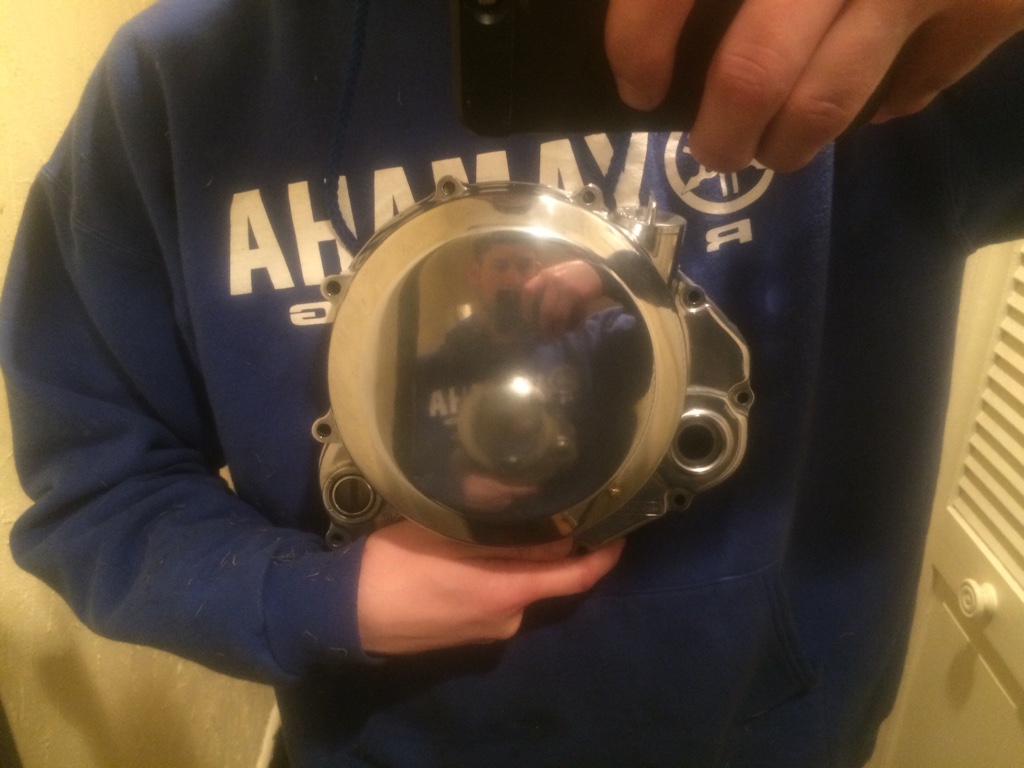
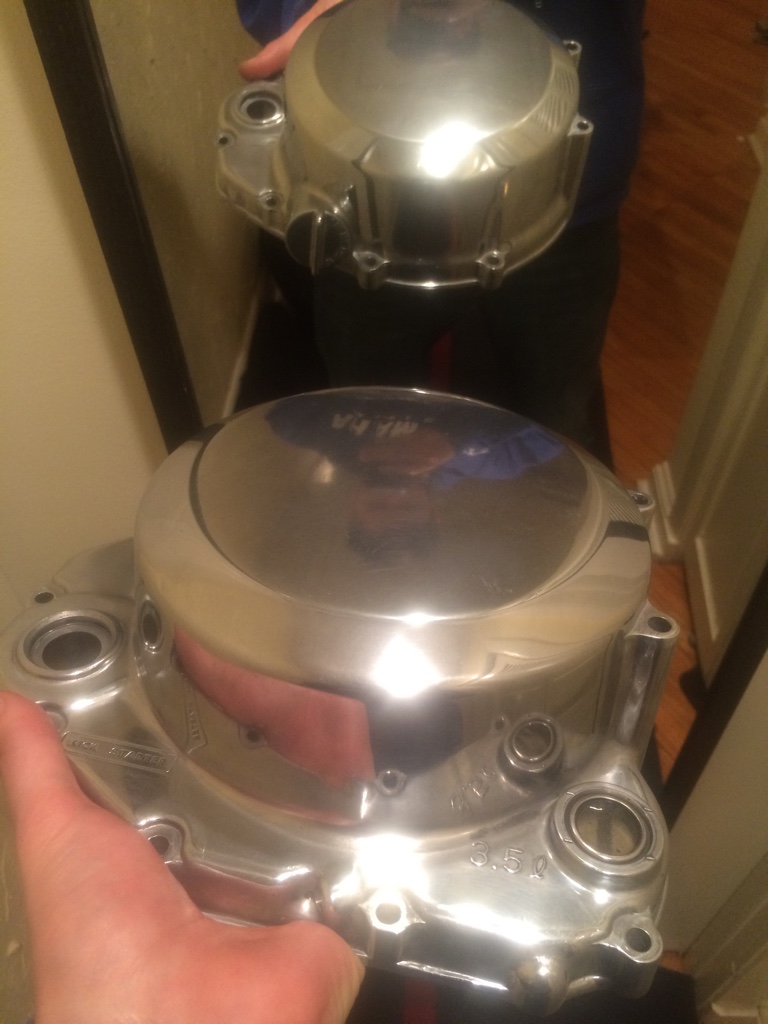
Lastly, I've been screwing around with polishing my valve cover. I've already committed to it and it's been a royal pain in the ass. It's really the major thing holding me up. I wouldn't suggest doing it even when you eventually see how nice it looks.
CarbsAndCylinders said:Love your build, SRG, gives me some ideas for mine, any updates?
Yes, there are some...and thank you. Feel free to share a link to your build too.
Recent Updates:
I've made a first attempt at creating a fender eliminator. I'm happy with the design but not sure if I am crazy about the taillight. You can alter these plans to fit any taillight. I made a template out of poster board to start.
Second, I scored a sweet find off of a the 'The KZ Market' & 'Kawasaki KZ/Z650 owners' forum on Facebook. This Lockhart aftermarket oil cooler was a performance part made for this bike. I've read good things about its efficiency.
Third, I wanted to put my older GPS on this bike for riding peace of mind. I think this will do the trick as long as it doesn't fall off while riding.
Lastly, I've been screwing around with polishing my valve cover. I've already committed to it and it's been a royal pain in the ass. It's really the major thing holding me up. I wouldn't suggest doing it even when you eventually see how nice it looks.
SrgtBear
The arsenic has oddly shaped feet...
Re: 79 Kawasaki KZ650 - Polished Covers
Update:
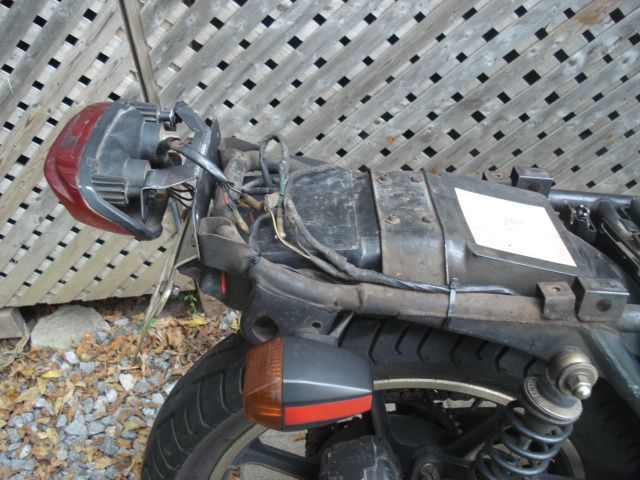
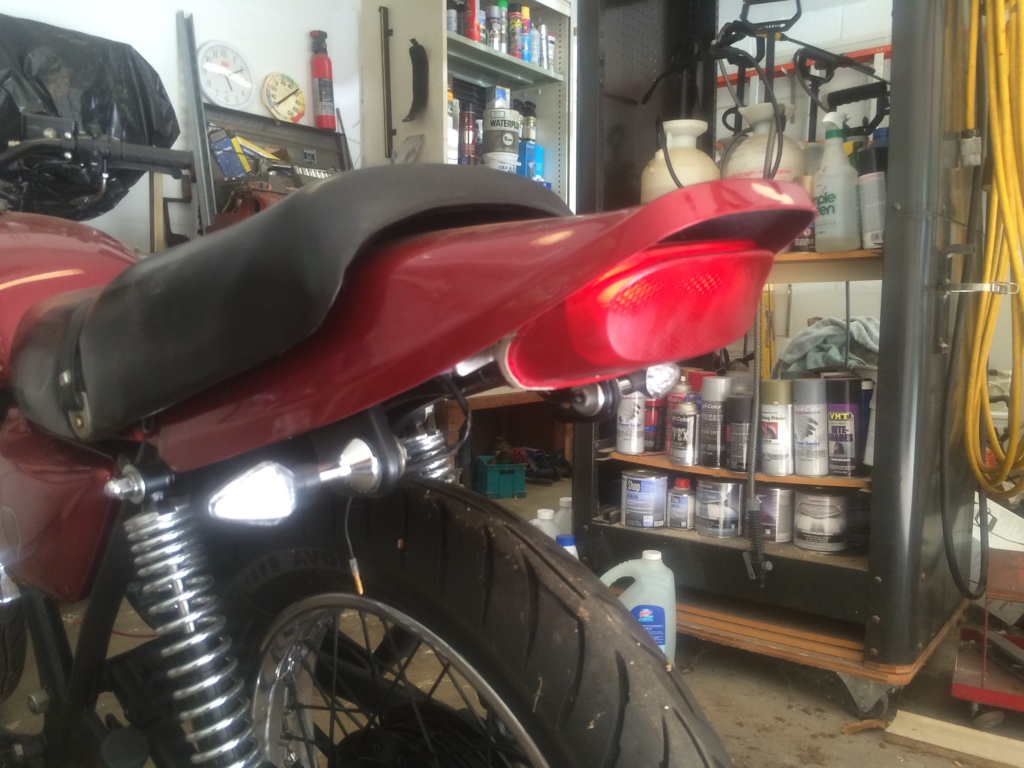
I went with the advice from user (78kz) on mounting a taillight. I bought a zx6e tail light and mounting it was pretty easy using some c shaped brackets. I figured out how to get the LED turn signals to fit in the large holes. Basically bought these kz900 short signals off of Amazon. Cut them, drilled and tapped the hole to the thread on the LED signals. Fits nice and snug. I will probably have them powder coated and use some thread locker for peace of mind.
I used the original spot for signals because I wanted to put my grab rails back on and use them to strap down luggage and stuff


Sent from my iPhone using Tapatalk
Update:
I went with the advice from user (78kz) on mounting a taillight. I bought a zx6e tail light and mounting it was pretty easy using some c shaped brackets. I figured out how to get the LED turn signals to fit in the large holes. Basically bought these kz900 short signals off of Amazon. Cut them, drilled and tapped the hole to the thread on the LED signals. Fits nice and snug. I will probably have them powder coated and use some thread locker for peace of mind.
I used the original spot for signals because I wanted to put my grab rails back on and use them to strap down luggage and stuff
Sent from my iPhone using Tapatalk
SrgtBear
The arsenic has oddly shaped feet...
Re: 79 Kawasaki KZ650 - ZX6E tail light
That looks good! Unfortunately I was unimpressed with what I got or found on eBay as far as universal LED tail lights. The filament tail light seems like a better choice at this time. Plus, I personally think it's brighter having two bulbs. I think it will look complete once I got the license plate bracket installed
I stuck with side signals because 1) these led's are bright!; and 2) drivers aren't paying attention half the time. I wanted to make sure i had their attention. I'll also be installing a stop module on the tail light for full on braking alert.
B541Niner said:Did something like that on a '78 KZ1000. This tail/brake light had 2 bulbs side by side though so I wired it up to be turn signals too.
That looks good! Unfortunately I was unimpressed with what I got or found on eBay as far as universal LED tail lights. The filament tail light seems like a better choice at this time. Plus, I personally think it's brighter having two bulbs. I think it will look complete once I got the license plate bracket installed
I stuck with side signals because 1) these led's are bright!; and 2) drivers aren't paying attention half the time. I wanted to make sure i had their attention. I'll also be installing a stop module on the tail light for full on braking alert.
SrgtBear
The arsenic has oddly shaped feet...
Re: 79 Kawasaki KZ650 - ZX6E tail light
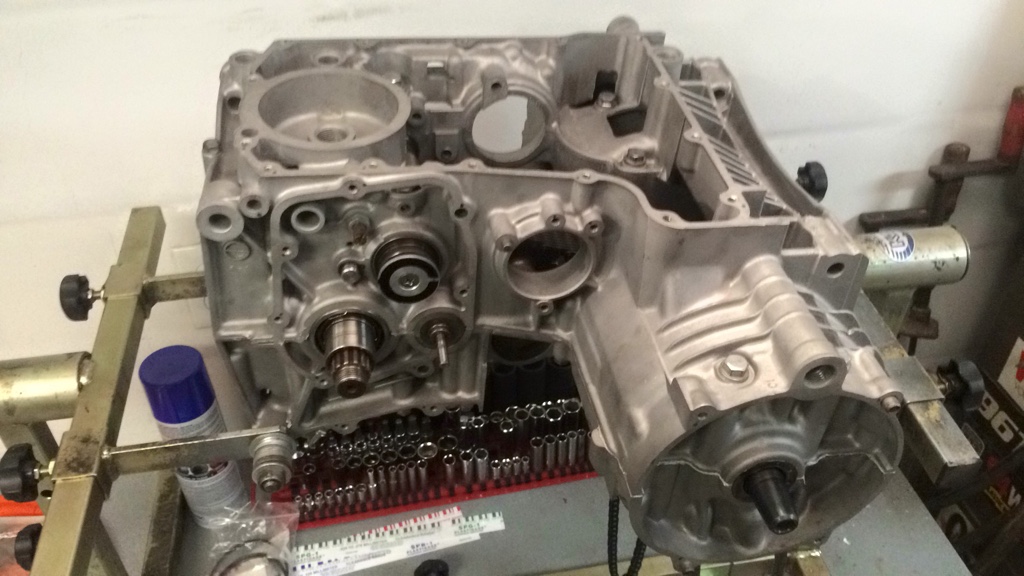
How I spent my Saturday.
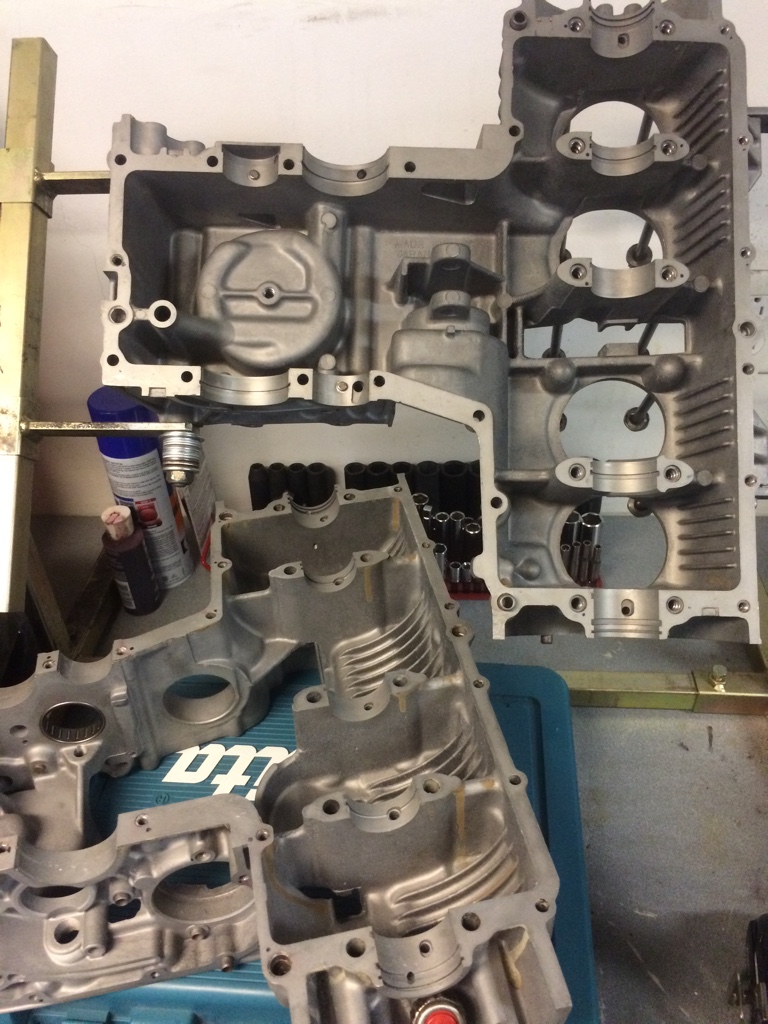
Let's talk about the shift drum and shift forks for a bit. It appears kawasaki changed how they looked a lot between the models. Don't think they ever updated service manual. Sat there scratching my head a lot.
Also. There a pin on the middle shift fork/drum. Don't put it in upside down. It needs to go long end down otherwise your gears won't shift. Thankfully I could fix the problem after I already sealed the cases.
Sealing cases. I used Hondabond high temp, why? Idk because I'm running oversided pistons and cams. Figured I better be safe. Hondabond is kind of like caulking. It comes out thick and is hard to smooth over surface. Don't use a lot. The cases flatted well enough to squeeze the excess out. To much excess is bad since it can clog holes.
Used new bearing for the crankcase inserts. Also used a new cam chain. Better to get it right the first.
Finally thought, still not confident that I did everything right. Pray to god I didn't miss anything. (Sigh)
Sent from my iPhone using Tapatalk
How I spent my Saturday.
Let's talk about the shift drum and shift forks for a bit. It appears kawasaki changed how they looked a lot between the models. Don't think they ever updated service manual. Sat there scratching my head a lot.
Also. There a pin on the middle shift fork/drum. Don't put it in upside down. It needs to go long end down otherwise your gears won't shift. Thankfully I could fix the problem after I already sealed the cases.
Sealing cases. I used Hondabond high temp, why? Idk because I'm running oversided pistons and cams. Figured I better be safe. Hondabond is kind of like caulking. It comes out thick and is hard to smooth over surface. Don't use a lot. The cases flatted well enough to squeeze the excess out. To much excess is bad since it can clog holes.
Used new bearing for the crankcase inserts. Also used a new cam chain. Better to get it right the first.
Finally thought, still not confident that I did everything right. Pray to god I didn't miss anything. (Sigh)
Sent from my iPhone using Tapatalk
SrgtBear
The arsenic has oddly shaped feet...
Re: 79 Kawasaki KZ650 - Engine Assembly
A good question. Started without flaw in video of me first firing her up before tear down. Assuming that you are talking about the weights and springs, truthfully I haven't open the primary drive to take a look. So my answer would be good condition. Didn't hear any thing odd from when i had it running.
Nebr_Rex said:How good is your starter drive?
They are a pain to replace.
A good question. Started without flaw in video of me first firing her up before tear down. Assuming that you are talking about the weights and springs, truthfully I haven't open the primary drive to take a look. So my answer would be good condition. Didn't hear any thing odd from when i had it running.
Re: 79 Kawasaki KZ650 - Engine Assembly
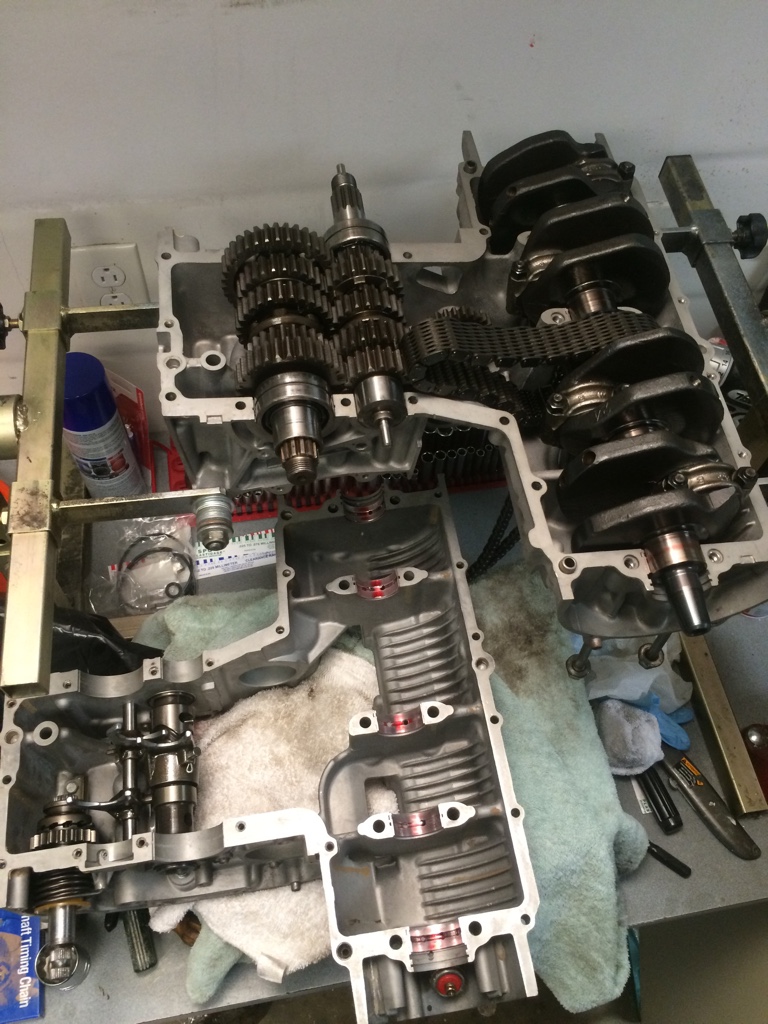
did you trowel down the layer of sealer a bit ? see ,it is an actual zero zero, imperfect as a liquid or gas seal but , metal to metal fit on the cases as per the original design the intention being sealer only to fiill and seal into microscop porosities, cutting tool travel path marks etc.
95% of that what you put on there is squished out making for a lot of hard stringy chunks for the gearbox to grind up
thats why i like using the 515 loctite its red and like you can squegee it down to a see thru ultra fine layer as long as its pink, yer in the mink so to to speak
and beiing anorobic it doesnt get hard after squeeze-out
just something to keep in mind it looks like you gonna lay another set of bricks across there ,plenty of mortar fro sure
but keep up the good work
awesome you have it all laid clean and efficient likeSrgtBear said:A few more pics of laying down the sealant.
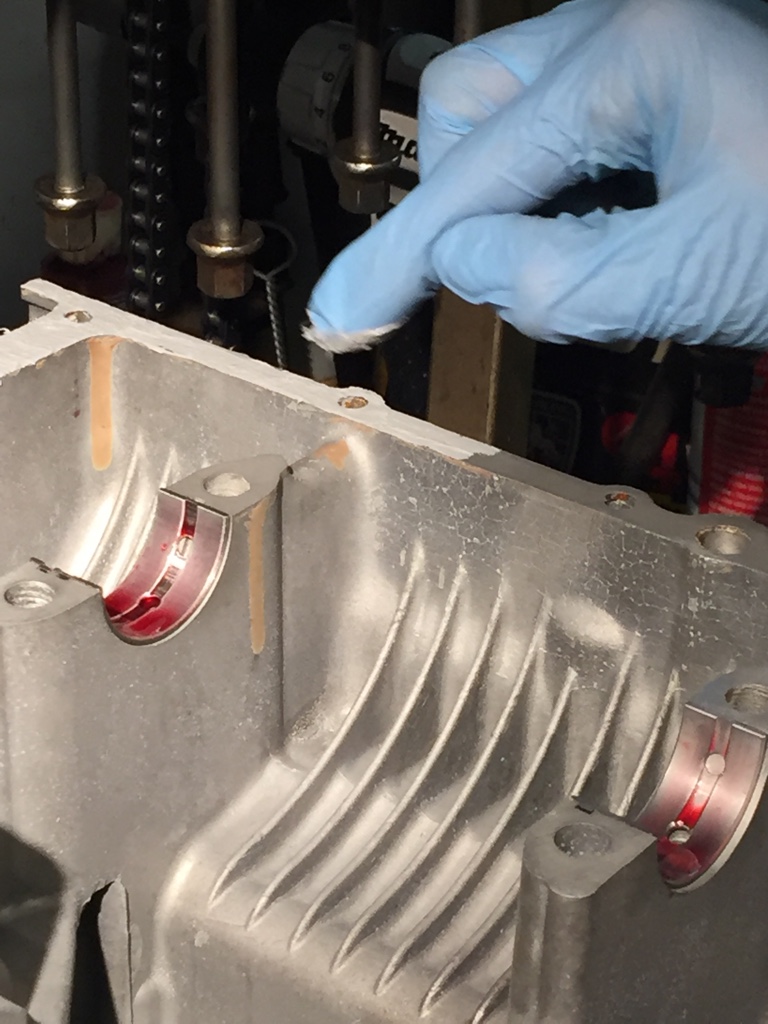
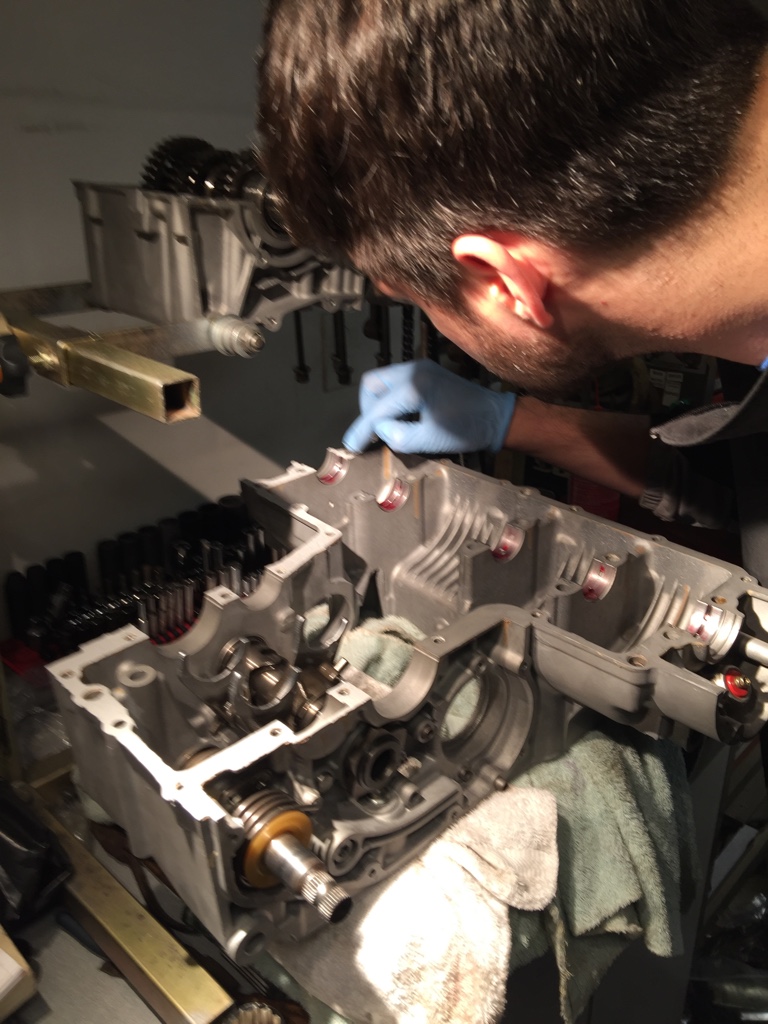
Sent from my iPhone using Tapatalk
did you trowel down the layer of sealer a bit ? see ,it is an actual zero zero, imperfect as a liquid or gas seal but , metal to metal fit on the cases as per the original design the intention being sealer only to fiill and seal into microscop porosities, cutting tool travel path marks etc.
95% of that what you put on there is squished out making for a lot of hard stringy chunks for the gearbox to grind up
thats why i like using the 515 loctite its red and like you can squegee it down to a see thru ultra fine layer as long as its pink, yer in the mink so to to speak
and beiing anorobic it doesnt get hard after squeeze-out
just something to keep in mind it looks like you gonna lay another set of bricks across there ,plenty of mortar fro sure
but keep up the good work
CarbsAndCylinders
Careful With That Axe Eugene
Re: 79 Kawasaki KZ650 - Engine Assembly
Thanks for posting that, XB, I didn't know that, good info!
Thanks for posting that, XB, I didn't know that, good info!


