'81 Suzuki GS450 Cafe Build. An Odyssey

hillsy said:
I can't recall the finer details, but I got my GS airbox out without having to move the motor.

It came out in one piece, too ;)

But you have to admit - it wasn't easy! :D
 
I honestly can't remember Rich - but I think it ended coming out the back through the triangle area somehow?? The bike was pretty much down to just engine and frame by that stage.

A bit of careful twisting and leverage perhaps....
 
@ Legionnaire - Those filters look about right.

@ Hillman - I was able to find a rear wheel off of a GS450T over at thegsresource.com. The front wheel took a little bit of searching on the Google machine. I can't wait to get them on. They shine a lot more than those cast wheels.

@ everyone else. thanks for the props. This project is becoming more in-depth than I had intended, but I want to get it right. I just picture the finished product in my mind and say to myself, "just a few more weeks"
 
And... because I need to have this thing "finished" by the end of march, (I say "finished" because I'm aware that a bike is never completely finished) I made some more progress today. I've estimated about 20 hours spent stripping, cleaning and painting the engine and frame alone. I was concerned how it would turn out without pulling the engine, but I'm a meticulous masker. Should have bought stock in blue tape before starting. Oh well... Also got my upper Tree, forks, and various other pieces painted. Hope to get the front end back on this week.
 

Attachments

  • IMG_20120226_130132.jpg
    IMG_20120226_130132.jpg
    416.1 KB · Views: 351
  • IMG_20120226_144135.jpg
    IMG_20120226_144135.jpg
    425.4 KB · Views: 356
  • IMG_20120226_145214.jpg
    IMG_20120226_145214.jpg
    419.6 KB · Views: 418
Lookin' real good!


I also got my airbox out without moving the engine... can't remember how as that was 10 years ago now, but i do know that's what made me think to myself "I'm going K&N's!!!!"
 
Front end back on with the new front wheel. Threw on the bars again to make sure all the wiring is routed the way I want it. Also threw on the rear wheel to check spacing and swingarm clearance and, thankfully, the spacing is the same, so no modification necessary :) 
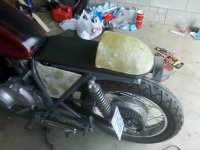
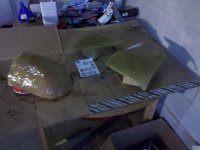
Will pull the hubs and swingarm tomorrow to start cleaning and painting. Also, if anyone has any ideas for pulling apart rear shocks without the appropriate shock tool, I'm all ears!
 

Attachments

  • IMG_20120303_151047.jpg
    IMG_20120303_151047.jpg
    446.6 KB · Views: 345
  • IMG_20120303_151113.jpg
    IMG_20120303_151113.jpg
    458.3 KB · Views: 355
Many hours spent this week/weekend trying to get ready for the road soon. (not finished, just road ready, because I've got the bug) Front end is nearly finished. New gauges are on, and look a whole lot better than the original cluster. Only odd thing is that they were both purchased from DCC, and although my speedo has a blue backlight, my tach has a standard yellow/white, so that's going to have to be adjusted. Other than that, very happy with the way it turned out. Also got my tail light mounted on the seat pan (of which the seat keeps getting pushed further and further back in my priorities list) and my rear turn signals mounted in the frame. Exhaust got wrapped also, but forgot to snap photos. I'll get a shot when my second exhaust clamp comes in and I get them mounted (yes, I only ordered a single clamp :-[ )
 

Attachments

  • IMG_20120318_131525.jpg
    IMG_20120318_131525.jpg
    498.9 KB · Views: 342
  • IMG_20120318_132317.jpg
    IMG_20120318_132317.jpg
    473.4 KB · Views: 329
  • IMG_20120316_091534.jpg
    IMG_20120316_091534.jpg
    470.5 KB · Views: 346
This looks like a totally different bike now! It's turning out great I especially like the Stainless Paint you went with! Cant wait to see it with the finished seat!
 
Today put me ahead of schedule. I will most likely never use that sentence again.

First item of business was to get her started! I had to trim down my new fuel lines, and take apart my leaky petcock to reconfigure some of the gaskets, but once all was connected she started up first try. Smoked a bit and smelled awful (from the new header wrap) but ran beautifully for a first start... http://www.youtube.com/watch?v=dYmNJEmqbbo&feature=youtu.be

Wired up the lights and turn signals, and that's where my next decision comes in. I had no idea that I was ordering a blue/red bar end turn signal for my rear. I had assumed they were orange until I wired them up. They kind of look cool, but I'm not sure how legal they are.

My question is... do turn signals have to be orange? And if not, does this look tacky? My front signals are orange, so I'm thinking about getting new rears. You be the judge.
 

Attachments

  • IMG_20120324_193055.jpg
    IMG_20120324_193055.jpg
    436 KB · Views: 357
  • IMG_20120324_200742.jpg
    IMG_20120324_200742.jpg
    180.3 KB · Views: 351
Don't know about over there, but here they definitely have to be orange.


Either way, yeah... to be honest not my cup of tea... but it ain't my bike either ;)
 
I agree, Pete. The more I looked at them, the more I realized that they look like something a 17 year old would put on his honda civic. I ordered a pair of amber lights. :D
 
My first attempt at glassing went better than expected. Still need to fill out the cowl with some more body filler and sand down the side covers, but it was a fairly simple process.

I was also able to take her for a short spin, but after glassing the seat pan I nearly slid right off the back. In theory, I could have this thing road ready in a week.
 

Attachments

  • IMG_20120325_151543.jpg
    IMG_20120325_151543.jpg
    499 KB · Views: 331
  • IMG_20120325_190006.jpg
    IMG_20120325_190006.jpg
    468.8 KB · Views: 308
  • IMG_20120325_192024.jpg
    IMG_20120325_192024.jpg
    456.3 KB · Views: 321
How do you plan to attach the side covers? I want do something with mine just can't figure out the best thing to do. I have painted them but would like to do something more.
ae00aa87-d396-c6a6.jpg
 
I'm just going to bolt them on through the 3 tabs on each side. I took off the hook tabs so that I could flush mount the covers with the frame. I'll use long bolts and spacers to mount through the side with the electronics plate. It works well in my head, so hopefully it will work fine in practice. Should have them mounted later this week, so I'll post pics when they're on.
 
Good read so far, giving me ideas (and reassurance) about my '82 GS450T build.

How's the clearance with that new seatpan? I was planning to do something similar, but paused when someone asked me if I wouldn't be rubbing up against the new, slightly lower seatpan with the stock rear shocks. How much room do you think you have in there?
 
I was just thinking about fiberglass side covers and then came upon your build. How did you make the mold? I was thinking about maybe glassing in some nuts so that I could bolt them on from the inside and the heads wouldn't show.

Looks great so far.
 
I just shaped the mold out of planters foam. Stuff was great to work with. Then wrapped it in aluminum foil and painters tape. (mold is back on page 3)

I never thought about glassing in the bolt, but I'm planning on going with some stainless cap screws.
 
Back
Top Bottom