82 GS1100 vintage street fighter? modern cafe? who the F knows....

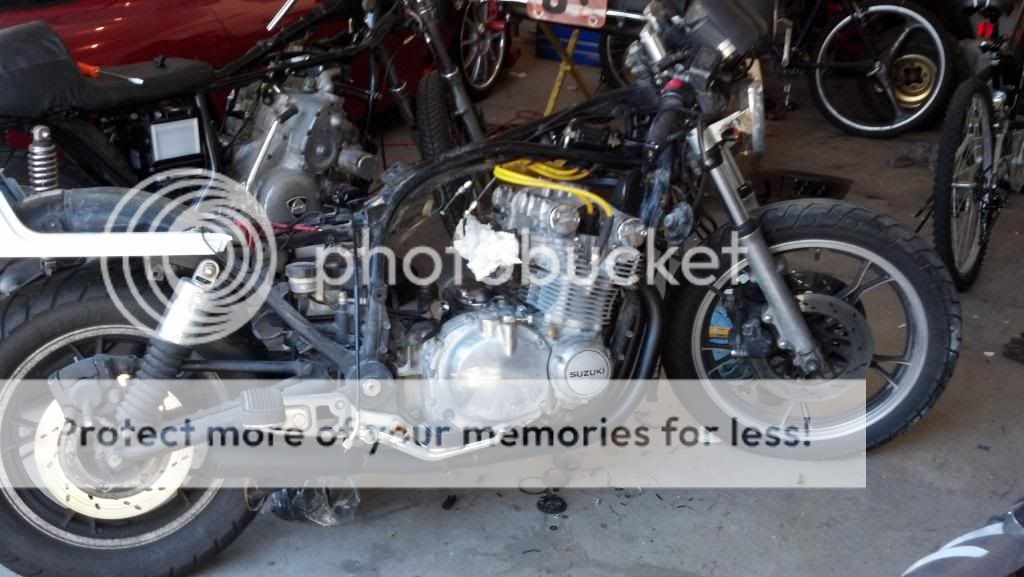
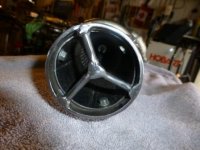
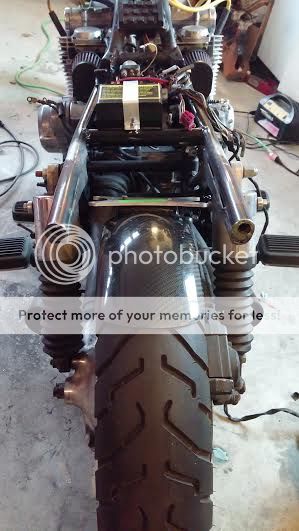
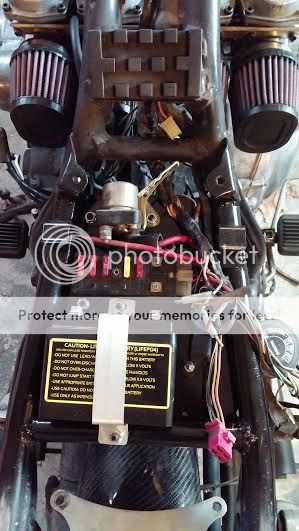
didn't get a heck of a lot done today, finished up wiring up the new switches and started digging into the carbs. got one all cleaned up and ready to be reassembled, this is what it looked like....
carb4_zps5be3d434.jpg


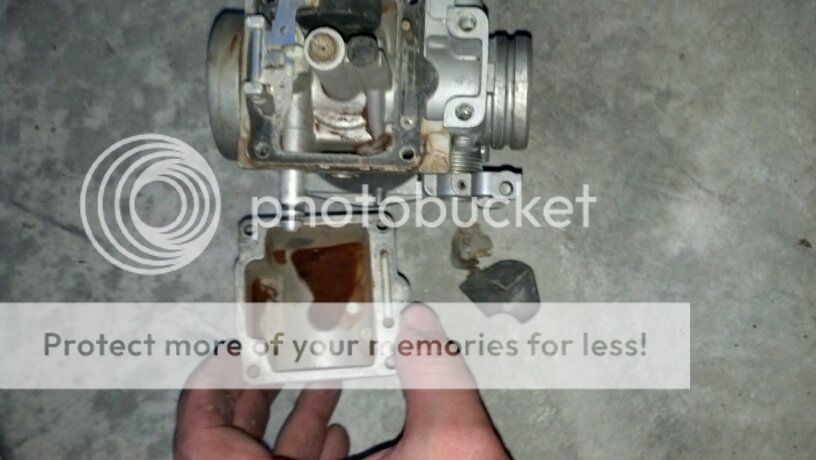
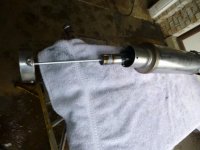
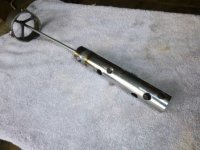
as you can see there is so much sediment in it that the drain hole is plugged, and that little black thing? that was attached with that little grey thing, yeah PO tried to silicone the broken float back together.... ::)
 
All this moving backwards was starting to get to me but it seems to be finally heading in the right direction. got some caswell and new brushes from ricks ordered over the weekend. got the carbs all cleaned up and reassembled with new hardware. pulled the valve cover today and checked clearances, unfortunately I had none lol. hopefully I can pick up some new shims tomorrow locally. so many little things to button up to get this thing on the road but I pretty much have all the parts I need to do so at this point, just a matter of the labor. hoping that with the carb cleaning and valve adjustment this thing might actually do more than 50mph.
 
no pics cause none of it is really worth looking at, but finally got a little bit done.

Valve job is done thanks to a local that had all the shims I needed.

starter is rebuilt and in, still not turning over though. Going to replace the solenoid next unless anybody here has any better ideas.....the motor turns freely by hand, as does the starter. I gave the starter juice outside of the motor and it spun, but doesn't seem to have the strength to crank the motor.

Got the dynatek coils mounted and wired up.

and finally cleaned up the pig sty I had going in the garage.
 
you can't ask for much more on father's day than to be left alone with your bike :) So I got a few more small things wrapped up today, finally got around to installing the new speedo cable, got my slightly modified stock exhaust prepped, painted, and installed. and changed out the plugs.

mastercheif-16_zpsb4436ff7.jpg


I kinda like how the exhaust turned out, can't complain for a mod that only cost about $7 for the two cans of paint. Those bright yellow 8.8 plug wires look nice hanging off the new (to me) dynatek coils as well. :) Hopefully I'll have this starter issue sorted out soon as well so I can fire it up and hear just how obnoxious I made the exhaust :) And hell, maybe even ride it one day....
 
And the best part about this whole project is what is currently keeping me from moving forward on it....
18.5 inches, 7pounds-1ounce, plenty of hair, and great big dimples....
Photo-1_zps6d997091.jpg

IMG_20130619_081946_214_resized_zps821fc33c.jpg


I have a feeling I'm going to have other stuff I'm going to want to do a bit more than work on the bike for a while...
 
Thanks guys! I now have to invest in more tattoos and guns, it's a whole new ball game when you actually have something worth killing for lol..........the rx7 isn't mine, and it's mostly cosmetic mods. Mine is not in the pic lol, it has a gt35r with a custom v-mount etc. and is in the process of being stripped for track duty only. As much as I love it, a 500 hp rx-7 just isn't the best daily driver....
 
Nice 1100. there is always more to do than expected. posting a pic of my 1980 GS850 Shafty
 
Jed

2 1/2 custom bent connector from four into on manifold, into 2 1/2 in/out straight through with a custom baffle i will try to post pics
 

Attachments

  • P1000504 - Copy.JPG
    P1000504 - Copy.JPG
    41.2 KB · Views: 1,285
  • P1000500 - Copy.JPG
    P1000500 - Copy.JPG
    46.4 KB · Views: 1,302
  • P1000494 - Copy.JPG
    P1000494 - Copy.JPG
    43.7 KB · Views: 1,299
  • IMG_2741 - Copy.JPG
    IMG_2741 - Copy.JPG
    44.1 KB · Views: 1,304
alright, small update. looks like the coil in the starter is toast. just doesn't want to turn without cooking. so that's fun.......also got the caswell in the tank, ended up having to use the entire kit which should have done 2- 5 gallon tanks, with very little draining out. going to have to wait to order a new starter unless somebody here has a source for the bits I need.
 
funny how these projects slow down when there's a new baby in the house lol. got a new starter ordered though since I was unable to find just an armature. hopefully I'll be able to take a day off work soon and get thins thing on the road. everything is ready to slap back on as soon as I get a new starter here.
 
it's getting there! got the new starter in and carbs installed. petcock decided to go to shit, so hoping the local parts place has one I can pick up after work. But I did start it up yesterday for the first time since hacking the exhaust and SWEET JESUS IT'S LOUD! when I get the tank on i'll try to get a video. Just a few little things to button up and I should be able to finally ride it for what's left of the summer before the winter tear down....
 
WOW! Life got crazy there for a while! I thought work was going to swallow my soul and the kids were going to eat what was left. Anyway, haven't had enough time to post or read much on here and sure enough haven't had much time to touch the bike. I did finally start cutting a bit and trying to sort out what I want to do. I had a rear cover laying around from my old gixxer and figured I'd use it to do a crappy mock up and figure out what direction to go. While the finished product won't be exactly like the gixxer cover, it will share some shape and similarities. anyway, figure i'd snap and share a few pics....
mastercheif_1_zps05428e91.jpg


mastercheif_2_zps4b6d21b3.jpg


mastercheif_3_zpsab9c15d7.jpg
 
Well it was a long very uneventful winter, thanks to having to store my work vehicle in my shop space. But I have finally got back to working on it, got started shaping the seat for it last night...
unnamed1_zpsd36b80f2.jpg


unnamed12_zpsd46bb0bd.jpg


unnamed13_zps55c9ad0d.jpg


And got a little help from the sweet heaert that put this project on hold to begin with..
unnamed14_zpsaf14acac.jpg
 
Picture time!

when I first had the bike running, it was running like crap even with the carbs getting cleaned. So I decided it was time to rebuild them, and indeed it was. several of the float valves were sticking and rubber parts hardened as well as jets that were mangled by the PO, some of the extraction was fun......... ::)

Anyway, ordered some decent quality rebuild kits and while I was at it decided I needed a cute little lithium ion battery, which of course needed a regulator upgrade.....
masterchief-17_zps11d258d4.jpg


Also figured I'd get some proper pods instead of rigging up something to run the emgo's, and picked up a jetting kit since the bike barely runs with the pods and exhaust as it
masterchief-18_zpsbef5b54c.jpg


pipe showed up to build the tail, it's now at my buddies shop waiting to get bent...
masterchief-19_zps498b664c.jpg


started working on shaping the tail and rear seat
masterchief-21_zpsf51bec65.jpg

masterchief-20_zps378b75a1.jpg


finished cutting, shaping, lowering the front fender and laid down some primer on it
masterchief-22_zpsa4b7175a.jpg


decided I didn't like how the tail looked....a bit too wide. took the saws all too it, I really like how it is looking
masterchief-24_zps732b62a2.jpg

masterchief-23_zpsc824c78d.jpg


picked up a buell carbon fiber front fender at a local swap meet this weekend, fits the rear nice and snug
masterchief-25_zpsfdec1a56.jpg


and the last pic for tonight, I spent the week fabbing up a little battery, fuse box, and starter relay tray complete with studs and a grounding pole. The plate mounts flush against the bottom of the frame rails in order to move everything up under the seat
masterchief-26_zps08b97a74.jpg
 
Back
Top Bottom