A dream to realize - Yamaha XS 750 cafe racer by - (*Garage Creations*)

Stefanpeterhaldnielsen

Cafe racer fanatic!
Hallo my name is Stefan and I am Danish 8)
I want to share with you and the rest of the world, what I have been doing the last year or so.
The last couple of years I have had many ideas about how to make i cafe racer, suitable for me and my needs. I have been studying a lot of build methods, handcrafts and assembled the knowledge I needed to build my ultimate cafe racer.
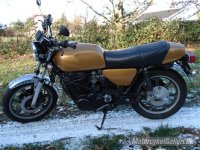
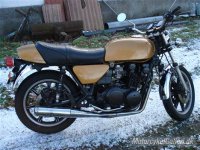
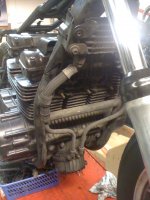
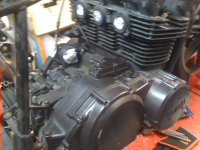
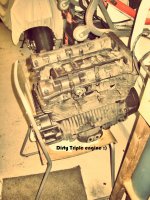
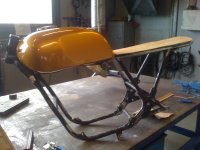
For me it is not essential what base model you use. It could be a CB750 or CB500T. I got an old Yamaha XS 750 in exchange for my previous GSXR 400 from 1992. The from the sale was this old motorcycle with a broken exhaust, fainted paintwork etc.

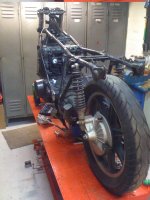
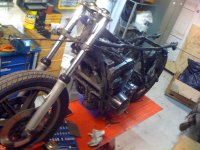
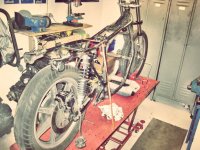
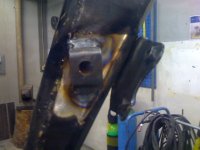
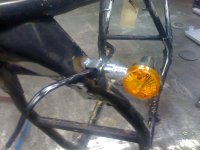
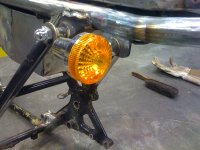
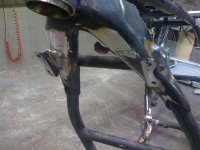
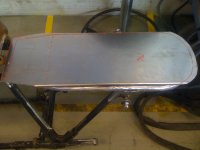
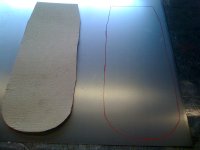
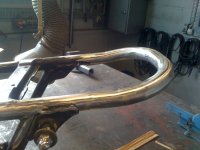
I started from scratch ripping the bike apart, welding up the frame from rust and making and rear loop. Apart from that the frame is stock.
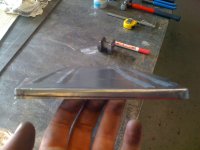
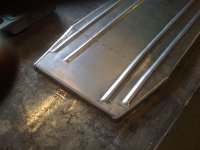
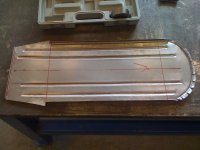
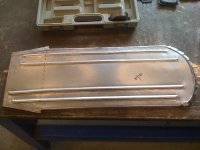
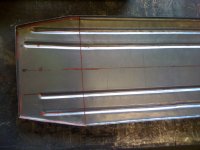
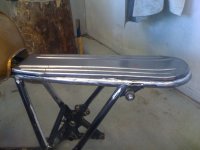
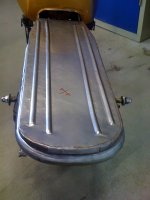
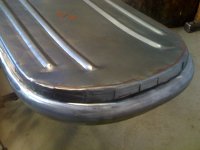
Here is a few pictures from how it all started. I will continue ths story later :)
 

Attachments

  • 233153.jpg
    233153.jpg
    43.1 KB · Views: 745
  • 233150.jpg
    233150.jpg
    40.7 KB · Views: 687
Subscribed. Im just starting on a 78 XS750 in much, much worse condition than yours so keen to see how you go!

Sent from my Galaxy Note 10.1 using Tapatalk 2
 
Hey ManxieRacer :) Congrats on the bike 8) Hope you fall in love to it like I did with mine.

Back to the cafe racer build. I got the bike stripped, and obviously the bike had more work in it than see by the first look.
The frame had some rust damage from 35 years of hard use. Actually I don´t know the current milage/km for the bike totally (who does on a 35 year old bike), the speedo-counter did not function as I bought it. The previous owner told me that it broke like 15000 km earlier, but who knows :) Actually I don't care, and since the engine seemed to run just fine, I did not give it any second thoughts.
Back to business, the frame! It had been repaired earlier. Not done in a prober way. Cracks at the rear mounting studs for the engine/gearbox. And of cause some minor rust spots on the surface. But the frame was good compared to other 3 year old frames. And a MIG/TIG welding later and the frame was back in shape.

Here is some pics of the bike dismantling. I started the rebuild in my garage/storage for my CBR 900 fra 1996 :p A bit tight and not a lot of albow room, but I managed to do it anyway ;)
 

Attachments

  • 4.JPG
    4.JPG
    522.5 KB · Views: 254
  • IMG_0101.JPG
    IMG_0101.JPG
    898.3 KB · Views: 225
  • 1.JPG
    1.JPG
    451.8 KB · Views: 232
  • 2.JPG
    2.JPG
    435.9 KB · Views: 229
To be able to get the engine out the frame i had to dismantle the oilsump pan and the oil pump. Otherwise they would get stuck between the frame rails going under the engine. I found out that was because of an enlarged oilsump from an XS850 as well as a bigger oilpump. (Not a bad thing at all since these things seems to bee an issue on most early XS 750). I found out that the easiest way is the lay the stripped frame down on the right side, and unbolt the engine from the frame and simply lift the frame off the engine, since the engine is really heavy compared to the frame. So the engine got out! Now I could strip off the rest of the bike (rearswinger, forks etc.)
 

Attachments

  • IMG_0235_Fotor.jpg
    IMG_0235_Fotor.jpg
    190.4 KB · Views: 221
  • Stripped frame without engine.jpg
    Stripped frame without engine.jpg
    127 KB · Views: 227
Hey again

The next step in the progress was to restore the frame and repair it from any rust and other damages. Also i welded a u-bended tube at the back of the frame (rear loop). I tig welded two brackets for the front indicators af the front of the frame just underneath the gastank. For the rear indicators to metal brackets was cut and welded to the frame as-well. Brackets for the XS850 oilcooler was also welded to the frame.
 

Attachments

  • IMG_0383.JPG
    IMG_0383.JPG
    673.3 KB · Views: 229
  • IMG_0384.JPG
    IMG_0384.JPG
    739.4 KB · Views: 224
  • IMG_0380.JPG
    IMG_0380.JPG
    817.6 KB · Views: 222
  • IMG_0382.JPG
    IMG_0382.JPG
    848.1 KB · Views: 220
Kiwi 60, you are very Welcome

The frame was not finished yet. I had to make a seat bottom, and I wanted to make it from 0,7mm steel plate. Also some brackets was needed to mount the seat to the frame.
First i made the seat. I used some cardboard I found in the workshop at work, and cut it to the shape i wanted. Used it as a template on the body plate and cut it on a steel cutting machine. We also had a plate bending machine i used for the bending of the long straight sides. I rear I bend in hand.
 

Attachments

  • IMG_0182.JPG
    IMG_0182.JPG
    556.5 KB · Views: 219
  • IMG_0181.JPG
    IMG_0181.JPG
    592.1 KB · Views: 218
  • IMG_0180.JPG
    IMG_0180.JPG
    648.5 KB · Views: 211
  • IMG_0178.JPG
    IMG_0178.JPG
    613.7 KB · Views: 220
I also had access to more than one seam machine 8) Very nice machine to make the seat steel plate stiff enough for my big behind ;D I am no pro at bending and cutting steel as well welding it. But you never learn it you dont try. Today i would have made the seat rear and front bend differently.
 

Attachments

  • IMG_0187.JPG
    IMG_0187.JPG
    631.2 KB · Views: 215
  • IMG_0186.JPG
    IMG_0186.JPG
    689.8 KB · Views: 220
  • IMG_0184.JPG
    IMG_0184.JPG
    688.6 KB · Views: 215
  • IMG_0183.JPG
    IMG_0183.JPG
    702.8 KB · Views: 208
I bend the sides up i a 90 degree angle, and welded it al together, and used a grinder to grind any excess welds.
 

Attachments

  • IMG_0188.JPG
    IMG_0188.JPG
    660.5 KB · Views: 219
  • IMG_0189.JPG
    IMG_0189.JPG
    601 KB · Views: 241
  • IMG_0190.JPG
    IMG_0190.JPG
    285.5 KB · Views: 222
  • IMG_0191.JPG
    IMG_0191.JPG
    623.5 KB · Views: 200
Back
Top Bottom