rockland213
New Member
CanadianBacon
What tires do you have on your bike ?
What tires do you have on your bike ?
I thought the same thing at first, but turns out the rotation indicator is pointed properly. Once she is all painted up I think the seat will flow a lot better. And the thin little seat bad will tie it all up.G3Sam said:Hey great build! This thing is coming out really sweet. I really like how the seat is coming along. I like how the shape mimics the cool lines of the tank. Using a mold looks like it produced a really clean seat, I should have done that with mine!
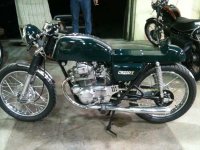
One concern, it looks as if your front tire is mounted backwards.. I just mounted some tires yesterday on my bike so thats where my eyes were trained to look. I could be wrong but in the shots you put up it definitely looks backwards...
Good luck!
CanadianBacon said:Well, after a bit of a break I was able to get back into the shop and work on the seat and tank.
I decided to cover up the emblem mounts on the tank and make it smooth for some graphics I'm working on. I was a bit sad to see them go but I'll get over it i think.
I then sealed the foam model and covered it in plaster and burlap. Now I just have to wait for the mold to dry and I will lay up the fiberglass and hopefully have a new seat by weeks end! I can't wait to get this all to the paint shop and put all the finishing touches on it.
So close!
")
CanadianBacon said:Yeah the tires are directional so you mount the front one the opposite of the back. They make me do a double take too. They are Avon Roadriders. I can't wait to get them dirty!
The seat mold is made with just regular pottery plaster (plaster of paris) I did one liquid skim coat and then started laying plaster soaked burlap in layers on top of that. It makes for a really nice surface to pull glass off of. It's not a long lasting mold but it's cheaper that buying tooling gel!
I've been in the shop quite a bit this weekend figuring the mounting out for the seat and getting the rear light all bracket installed. It's setting up with resin right now so I'll post some pics of that tomorrow.
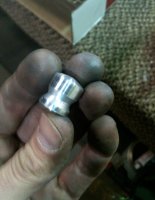
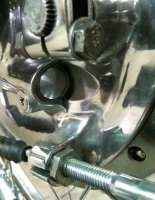
I did one thing I thought people might be interested in though. Since I'm only running a tack not a speedo I needed a small plug to fill the cable hole. And I didn't feel like running out to the machine shop since I was in full work mode so I did the next best thing. I cut a piece of aluminum to rough size and ground it sort of roundish on the grinding wheel. Then tapped it and cut a screw to fit and put it on the end of my electric drill.
I just used a hard drill bit for a cutting tool and before you know it... I had my plug. I'm sure it's been done before but I was happy with how it turned out. (sorry, pun intended)
More pics soon.
cheers