Anyone have experience with the Barnett +1 clutch kit? for cb550??

sallgoodguy

Been Around the Block
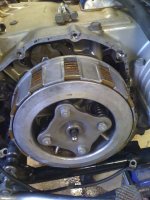
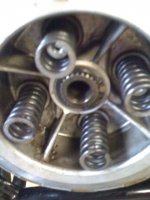
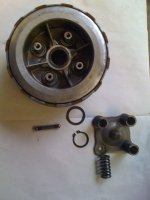
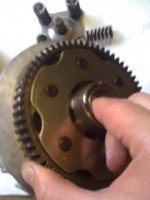
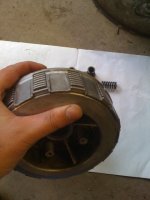
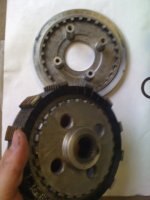
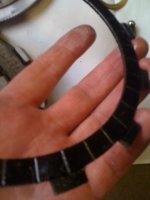
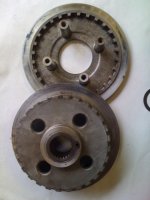
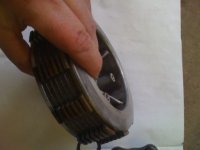
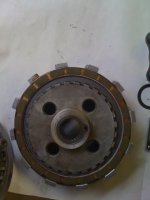
Just got mine in and all pressure plates are the same. I havent pulled the basket yet but isnt there a pressure plate thats double thikness? Also one of the friction plates tangs are wider (circumferance) than all the others.... Not something I expected to see.
 
Nobody?!?!?!?!? allright it looks like I'll be starting a thread about Barnett clutch adventures. Hahahaha!
 
Hope you find an answer - if nobody here knows you should also check at the SOHC4 forums - they're all about the Honda 4's.

I've had the CB500, CB550 and CB750 myself. The 500/550's are one of my faves.
 
Im pretty sure the barnett does away with the double thick disc i cant 100% remember but a cb500 doesnt use the double disc and takes the same clutch kit
 
73 People read this thread, so I'm wondering if anyone wants me to put together a walk thru for them. Clutch plate swaps are not that hard, but seeing it before you crack your bike open could help.
 
sallgoodguy said:
73 People read this thread, so I'm wondering if anyone wants me to put together a walk thru for them. Clutch plate swaps are not that hard, but seeing it before you crack your bike open could help.

That would be great, I am looking at changing my CB550 clutch at some stage and a walk thru would be a great help.
 
Allright here we go. These are the steps for the CB550 wet clutch. Clutches are pretty much the same, with the main differences being wet or dry. The cb550 has a wet clutch design, so I soak my friction discs in the SAME OIL I would use in the engine for an hour. Clean oil btw. I have had people tell me they soak them for longer blah blah better oil penetration yadda yadda, but I dont. You can do this as you are disassembling, but Murphys law dictates that something will come up and you'll forget about the soaking discs. Never fails. Anyway...


So step one is obviously to drain the oil from the engine. The clutches are in an engine oil bath and it will dump all over that clean garage floor if you dont drain it first. Personally I think its a shit design to have the clutch share engine oil, but that a debate for another time. Oil is drained? Good! Remove the kicker arm and whatever else is in your way. I made an investment long ago in magnetic bowls. I dont do any work without at least one handy. All the hardware you remove goes in the and stays in. Never lose bolts again! Clutch cover is off? GREAT! This is what you should see.
 

Attachments

  • clutch.JPG
    clutch.JPG
    68.6 KB · Views: 357
What you're seeing in that sideways picture is whats under the cover... You can see the clutch lift rod, the lift plate in the center, the basket, the clutch center, and you can just see the springs. I cleaned this up and reassembled it to make it easier to see so dont be surprised if yours is a mess. You can put a piece of paper on the floor and put the parts in the order they came out, so they go back in reverse if it helps you. Pull out that clutch lift rod. Remove the bolts on the lift plate. The lift plate holds the springs in, so I try to go evenly around to all of them. Do whatever you want, its just how I do it. Once thats off.. you will be looking at this. See the snapring in there??
 

Attachments

  • springs and snap ring.JPG
    springs and snap ring.JPG
    49.2 KB · Views: 190
So now you'll probably see a little filmy sludge in there with the springs. Dont worry, its normal. It shouldnt be like pudding... just a film. Pull the springs and take off that snap ring with your trusty snap ring pliers. Dont have a set? Get one! DONT use a screw driver! Your kit does not have an extra! Under the snap ring is a very thin washer. Again... not in the kit so be carefull. Now you can grab the antire assembly, basket and all, and pull it off the shaft. It should take any force to get it off. heres all your pieces so far.
 

Attachments

  • pieces so far.JPG
    pieces so far.JPG
    40.7 KB · Views: 156
Now you can do it my way or your way.. my way is to stick a finger in thru the back of the basket to hold the collar in place. I just dont like things falling out.
 

Attachments

  • holding collar in.JPG
    holding collar in.JPG
    35.6 KB · Views: 136
Put your free hand on the open end of the basket... the end that had the springs, and gently flip the whole thing over so that the clutch center, discs, and pressure plate slide out of the basket as one piece. The collar has a shoulder on it, so it cant slip out the back of the basket, but it can pop out of the front so be carefull as you put down the basket that you dont lose it. Now your holding the pressure plate, friction discs, clutch plates, and clutch center.
 

Attachments

  • pressure plate and center.JPG
    pressure plate and center.JPG
    40.6 KB · Views: 155
Keeping your hand on the spring end of this assembly, you can separate it by simply pulling up the pressure plate. It has four parts that go thru the center to hold springs and bolts for the lifter plate.
 
I got this kit for my bike because I wanted the added friction disc in the plus one kit, along with stronger springs. This is what the old friction discs looked like. Not terrible, but not great.
 
Ok! now clean everything!!! Parts cleaner is good, but dont leave any solvents on the parts if you can help it. Things like solvent, or grease, can make your friction discs slippery and make everything you're doing pointless. So clean clean clean!
 

Attachments

  • pressure plate and center cleaned.JPG
    pressure plate and center cleaned.JPG
    44.5 KB · Views: 112
Now you can start the reassembly. You have the friction discs and plates in your hands. If there is a particular order, the kit should have them that way already for you, but pay attention! It might not! In this clutch, there IS an outside friction disc. If you look at the old pack you'll see the difference in the tangs.
 

Attachments

  • old clutch assmbly.JPG
    old clutch assmbly.JPG
    32.1 KB · Views: 143
Can you see it? I know the pics suck. So this is the order you assemble in. outer friction disc, then clutch plate, then disc, plate, disc, plate, etc. I assemble it all on the clutch center because the clutch plates have inner tangs, and its easier to line up the outer tangs than the inner ones.
 

Attachments

  • assemling on center.JPG
    assemling on center.JPG
    37.2 KB · Views: 123
I forgot to mention inspecting all the parts once you get them clean. Loook for obvious wear, broken pieces and so on. This is what the inside of my basket looked like. You can see the scratches in there. I couldnt find the thing that had made them so I'm going to assume its now in the oil pan and I'll have to drop the whole thing to try and find whatever it is.
 

Attachments

  • inside basket.JPG
    inside basket.JPG
    38.4 KB · Views: 123
  • inspect collar.JPG
    inspect collar.JPG
    39.9 KB · Views: 124
Back
Top Bottom