
swellguy
Wear out, don't rust out.
This is a post I made on the sohc forums some months ago about my experience with BCR parts on my café build. It's neither a warning or an endorsement . . . merely a story "from the trenches" that might be helpful to those considering a café and are drawn toward ordering parts from him.
--
I’m writing in the hope that someone who is committed to a cafe build and considering purchasing pieces from Benji, they might read this message and come away with a more complete understanding of the process.
I am not new to motorcycle building but this is my first Japanese project. I’ve built four Harley’s over the past five years and had been wanting to do a cafe build. I had looked at number of Ironhead, Evo Sportster and Buell builds and they mostly seemed like trying to fit big bike pieces into small frames. When you stray from the Harley community, the most acceptable place to wind up seems to be in Triumphland; there were plenty of fine examples of pre-unit bikes and lots of resources for those not familiar with British Twins, but it wasn’t doing it for me. I guess seeing some of Carpy’s bikes, some Ton Up sites and eventually BCR’s work that sold me on the idea of working with an sohc Honda.
My original plan was to work with a cb500, even better a cb550, but they were becoming harder to find and I wanted to work on a running bike for my first project instead of basket case. Luckily, I stumbled onto a 73 cb750 for a good price that I purchased from someone I knew.
So with a fully loaded paypal account I ordered from Benji
- stainless steel fork covers
- stainless steel headlight bracket
- fiberglass Dolphin gas tank
- fiberglass Dolphin seat (with some slight modifications)
- weld-on seat frame loop
- stainless steel 4 into 4 Trixie exhaust
Three or four months later, everything is in my hands via UPS. To his credit, Benji marked the packages as having very little commercial value so instead of spending hundreds of dollars in duties in taxes, I spent maybe $75. At the time, though, I had no idea his stuff was made in the Philippines. I have no problem with this but the geography of where we both were eventually entered into some of my decision making.
At the outset, I think everyone who has worked on custom bikes understands that unless it’s a simple part or piece, nothing is truly “bolt-on”, and the same held true for my project. I have experience in metal fabrication, can TIG weld competently and don’t mind getting greasy. I guess that when I began and considering the purported universality of Honda motorcycles, I assumed things would go together smoother than they did. And it is important to bear in mind that on the one hand these are all one-off handmade pieces so some variances in fitment should be expected (on the other, they are handmade so once might well assume the fit would be excellent); I just didn’t think it would be so involved.
Before I go further I want to say that Benji was very prompt and responsive to all of my questions, sent photos that were helpful and guidance that could have proven to be useful had my timeline unfolded differently. The problem though is that he’s halfway around the world from me (west coast Canada) and for his shop to touch anything in my hands now means at least not having it for an additional two weeks. Self-reliance is the key here.
Fork covers:

The build and weld quality of these are great, but the lowers just didn’t fit over the fork lowers; they were too small in diameter. Benji said they should slip on, maybe with a bit of rubber mallet persuasion, but that simply wasn’t the case. I thought that perhaps that with a 37 year old bike, maybe my fork lowers weren’t necessarily from a 73 but the point was moot since I didn’t want to go out and get new lowers. Instead I milled about 1/8” off the out diameter of the fork lower tops and the cover eventually did fit.
When assembling the front end with the fork covers, everything did fit but it was the most complex juggling act of tightening, loosening, twisting and pounding to finally get everything into place. Right now, I dread ever having to change the oil seals.
Headlight bracket:

No major surprise here, it just bolts onto the lower tree, but I did find the bracket required some spreading to fit a headlight bucket and it seems positioned slightly rearward of the stock location.
Gas tank:

When you order what is described as a fiberglass tank I think it’s fair to assume you’ll get a tank made out of fiberglass. In BCR’s case this is only partially accurate. As far as I can tell, they take part of the carcass from an old metal tank, add fiberglass molded components to create the rough final shape and then cover the whole piece with a layer of bondo of varying thicknesses. In my case, the filler neck was covered in rust, there was rust on the tunnel and bit of rust around the petcock mounting holes.
My first issue was getting it to fit. I think I prefaced every email to Benji with the fact that I had a 73 bike, nevertheless, the tank he used was a later model that had a different shaped rear rubber mount flange:
Mine:

BCR:

It’s not a serious issue, except that I don’t live in Hondaland and a repeated theme about this build has been getting a new or other parts requiring several calls to dealers who told me parts were either discontinued and/or unavailable. In these cases, eBay saves the day but it adds roughly 10 or more working days to get the part.
When I got the tank, Benji advised using the Hirsch tank sealer. Because I was waiting for the new rubber mount to arrive, the tank sat idle and reports of Hirsch failure started showing up on the sohc4 forums. Some people posted about using this product and that product, one was great for metal but not fiberglass, others great for fiberglass but not metal. The problem is that my tank was made from both metal and fiberglass so there was no real consensus about an appropriate coating. I finally took it to a radiator shop we we used a variance on Red Kote that the shop guaranteed for three years. This seemed to be the only way to avoid a serious issue in the future, but it cost $180 for this security. Oddly enough, months after I had the tank and reports about Hirsch failure emerged did I get an email from Benji saying “don’t use the Hirsch product”.
The rubber strip did arrive and the tank does fit.
Seat, weld-on loop:

The seat is primarily made of fiberglass with some metal bits for mounting purposes but, again, it is covered in bondo. The mounting system is functional and simple. The seat pad itself had very little padding and was covered in a very thin, cheap (to my tastes) layer of vinyl that chipped easily. I wound up recovering the seat pan in leather with a much thicker layer of padding so it looks much better.
Benji shows you exactly where to cut the frame in order to mount the loop:

I did so but found the lines of the loop piece didn’t match the lines of the frame and the loop wasn’t symmetrical, so I had to do some more cutting and grinding to get things to finally line up. As a result, the rear seat mounting holes were out of alignment by about 1/8” so I had to trim the tongue of the seat pan slightly to ensure a cleaner fit with the gas tank lines.
Remarkably, I heard from a forum member about how, while the fit might look tight and clean, after his first ride with a BCR seat/tank combo, the gas tank had vibrated and moved around so much that the paint on the two pieces were chaffing, so I’ve had to further adjust and trim the join so that it looks normal but provides space for the tank to shift around without damaging the paint on either piece.

When you use one of these loops, stock length shocks simply don’t give you the ride height you need so know you’ll have to replace them with something longer (14+”) and that can start at $100 and climb. Again, add another week or more for shipping.
Exhaust:

This is probably the quintessential BCR and disappointing experience: beautiful looking pieces that will be fabulous on my bike . . . once I finally am able to get them to fit.
Again, I had constantly told Benji my bike was a 73 but they exhaust design they use fits a later model manifold.

Thankfully, we have a good Japanese bike salvage yard and I was able to find the correct pieces, but it took three hours of driving, scrounging, haggling and wire wheeling to get them and into nice shape.
The headers and mufflers all arrived labelled 1 through 4 so this would seem to translate into a relatively straightforward install. I mount headers labelled 1-4 in exhaust ports and it looks like an octopus; pipes point in every direction but rearward. Ok, maybe my 1, 2, 3, 4 is really their 4, 3, 2, 1, so I reverse the order of the headers and again it looks like a clusteru#$%* of tubing.
Benji has sent me pictures of the pipes mocked up and they look fine, so I decide to work backwards. It’s easy to figure out which muffler goes where so I’ll just match the header to the muffler. The mufflers mount to the passenger peg holes but they ship with a bolt far to short to even fit through the mount holes. I quickly discover that this is not just a metric bolt but a very specific automotive fastener that no major auto parts store locally carries. Three hours on the phone I find some hole in the wall shop that has some but I need to buy 100 of them in order to get two.
I mount the right side pipes and find two headers that match. Now I proceed with the left side, but there is no way they’re going to work. To make a long story short, my pipes were fabricated on cb750 frame that had a custom mounted and relocated kickstand, whereas mine was in the stock location. Number 4 pipe was not going to clear at all.
BCR:
Stock:
Benji asked for all sorts of pictures to try and figure out the problem and couldn't see or acknowledge that his from was different than mine. He did offer to fix or replace the pipe in question, but if you look at where everything lines up, a new pipe 4 means a new pipe 3 and since the whole setup is meant to be be symmetrical, it would mean new pipes on the right side:
And the real question is how many more months must I wait to get things going on this bike build?
Despite his insistence to the contrary, the only solution was to relocate the kickstand in order for pipe 4 to clear the frame. So I cut off the kick stand and now my exhaust fits.Since I also lost my center stand, my bike is now marooned on the lift until I get my new weld on stand (it’s in the mail). The old stand is simply too short and won’t fit along the bottom rail in concert with the exhaust.
I am happy to report I found a really trick kickstand that will look great and flow with the lines of the exhaust, but $165 and three weeks later, this seems to be a Mantra for this bike.
So here’s where I was in my build (new shocks not shown):
and was off to paint this week.
In an ideal world it would be great if this stuff always fit and if there was a problem we’d take it back to Sears for a refund. People are correct when their advice states “send it back” and under ideal circumstances I would have done that for some of my items. But each situation is different and what presents itself as an obstacle to some can be seen as a creative challenge to others.
My only advice is that if you are looking for smooth, simple bolt-on pieces from BCR, I have yet to hear about such a situation. I’ve tried to be forthcoming without trying to lay blame on Benji. I can say that what I received was in need of some serious work on my part to get proper fitment. The quality of the metalwork and design are what I expected but my journey to date has been far more hard work than I expected.
My message to Benji is that while you design and build signature pieces, nothing fit my bike properly or easily when I got it except the headlight bracket. Some issues were an easy remedy, some were very serious oversights.
--
I’m writing in the hope that someone who is committed to a cafe build and considering purchasing pieces from Benji, they might read this message and come away with a more complete understanding of the process.
I am not new to motorcycle building but this is my first Japanese project. I’ve built four Harley’s over the past five years and had been wanting to do a cafe build. I had looked at number of Ironhead, Evo Sportster and Buell builds and they mostly seemed like trying to fit big bike pieces into small frames. When you stray from the Harley community, the most acceptable place to wind up seems to be in Triumphland; there were plenty of fine examples of pre-unit bikes and lots of resources for those not familiar with British Twins, but it wasn’t doing it for me. I guess seeing some of Carpy’s bikes, some Ton Up sites and eventually BCR’s work that sold me on the idea of working with an sohc Honda.
My original plan was to work with a cb500, even better a cb550, but they were becoming harder to find and I wanted to work on a running bike for my first project instead of basket case. Luckily, I stumbled onto a 73 cb750 for a good price that I purchased from someone I knew.
So with a fully loaded paypal account I ordered from Benji
- stainless steel fork covers
- stainless steel headlight bracket
- fiberglass Dolphin gas tank
- fiberglass Dolphin seat (with some slight modifications)
- weld-on seat frame loop
- stainless steel 4 into 4 Trixie exhaust
Three or four months later, everything is in my hands via UPS. To his credit, Benji marked the packages as having very little commercial value so instead of spending hundreds of dollars in duties in taxes, I spent maybe $75. At the time, though, I had no idea his stuff was made in the Philippines. I have no problem with this but the geography of where we both were eventually entered into some of my decision making.
At the outset, I think everyone who has worked on custom bikes understands that unless it’s a simple part or piece, nothing is truly “bolt-on”, and the same held true for my project. I have experience in metal fabrication, can TIG weld competently and don’t mind getting greasy. I guess that when I began and considering the purported universality of Honda motorcycles, I assumed things would go together smoother than they did. And it is important to bear in mind that on the one hand these are all one-off handmade pieces so some variances in fitment should be expected (on the other, they are handmade so once might well assume the fit would be excellent); I just didn’t think it would be so involved.
Before I go further I want to say that Benji was very prompt and responsive to all of my questions, sent photos that were helpful and guidance that could have proven to be useful had my timeline unfolded differently. The problem though is that he’s halfway around the world from me (west coast Canada) and for his shop to touch anything in my hands now means at least not having it for an additional two weeks. Self-reliance is the key here.
Fork covers:
The build and weld quality of these are great, but the lowers just didn’t fit over the fork lowers; they were too small in diameter. Benji said they should slip on, maybe with a bit of rubber mallet persuasion, but that simply wasn’t the case. I thought that perhaps that with a 37 year old bike, maybe my fork lowers weren’t necessarily from a 73 but the point was moot since I didn’t want to go out and get new lowers. Instead I milled about 1/8” off the out diameter of the fork lower tops and the cover eventually did fit.
When assembling the front end with the fork covers, everything did fit but it was the most complex juggling act of tightening, loosening, twisting and pounding to finally get everything into place. Right now, I dread ever having to change the oil seals.
Headlight bracket:
No major surprise here, it just bolts onto the lower tree, but I did find the bracket required some spreading to fit a headlight bucket and it seems positioned slightly rearward of the stock location.
Gas tank:
When you order what is described as a fiberglass tank I think it’s fair to assume you’ll get a tank made out of fiberglass. In BCR’s case this is only partially accurate. As far as I can tell, they take part of the carcass from an old metal tank, add fiberglass molded components to create the rough final shape and then cover the whole piece with a layer of bondo of varying thicknesses. In my case, the filler neck was covered in rust, there was rust on the tunnel and bit of rust around the petcock mounting holes.
My first issue was getting it to fit. I think I prefaced every email to Benji with the fact that I had a 73 bike, nevertheless, the tank he used was a later model that had a different shaped rear rubber mount flange:
Mine:
BCR:
It’s not a serious issue, except that I don’t live in Hondaland and a repeated theme about this build has been getting a new or other parts requiring several calls to dealers who told me parts were either discontinued and/or unavailable. In these cases, eBay saves the day but it adds roughly 10 or more working days to get the part.
When I got the tank, Benji advised using the Hirsch tank sealer. Because I was waiting for the new rubber mount to arrive, the tank sat idle and reports of Hirsch failure started showing up on the sohc4 forums. Some people posted about using this product and that product, one was great for metal but not fiberglass, others great for fiberglass but not metal. The problem is that my tank was made from both metal and fiberglass so there was no real consensus about an appropriate coating. I finally took it to a radiator shop we we used a variance on Red Kote that the shop guaranteed for three years. This seemed to be the only way to avoid a serious issue in the future, but it cost $180 for this security. Oddly enough, months after I had the tank and reports about Hirsch failure emerged did I get an email from Benji saying “don’t use the Hirsch product”.
The rubber strip did arrive and the tank does fit.
Seat, weld-on loop:
The seat is primarily made of fiberglass with some metal bits for mounting purposes but, again, it is covered in bondo. The mounting system is functional and simple. The seat pad itself had very little padding and was covered in a very thin, cheap (to my tastes) layer of vinyl that chipped easily. I wound up recovering the seat pan in leather with a much thicker layer of padding so it looks much better.
Benji shows you exactly where to cut the frame in order to mount the loop:
I did so but found the lines of the loop piece didn’t match the lines of the frame and the loop wasn’t symmetrical, so I had to do some more cutting and grinding to get things to finally line up. As a result, the rear seat mounting holes were out of alignment by about 1/8” so I had to trim the tongue of the seat pan slightly to ensure a cleaner fit with the gas tank lines.
Remarkably, I heard from a forum member about how, while the fit might look tight and clean, after his first ride with a BCR seat/tank combo, the gas tank had vibrated and moved around so much that the paint on the two pieces were chaffing, so I’ve had to further adjust and trim the join so that it looks normal but provides space for the tank to shift around without damaging the paint on either piece.
When you use one of these loops, stock length shocks simply don’t give you the ride height you need so know you’ll have to replace them with something longer (14+”) and that can start at $100 and climb. Again, add another week or more for shipping.
Exhaust:
This is probably the quintessential BCR and disappointing experience: beautiful looking pieces that will be fabulous on my bike . . . once I finally am able to get them to fit.
Again, I had constantly told Benji my bike was a 73 but they exhaust design they use fits a later model manifold.
Thankfully, we have a good Japanese bike salvage yard and I was able to find the correct pieces, but it took three hours of driving, scrounging, haggling and wire wheeling to get them and into nice shape.
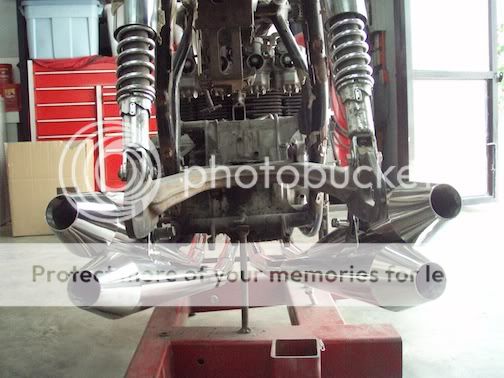
The headers and mufflers all arrived labelled 1 through 4 so this would seem to translate into a relatively straightforward install. I mount headers labelled 1-4 in exhaust ports and it looks like an octopus; pipes point in every direction but rearward. Ok, maybe my 1, 2, 3, 4 is really their 4, 3, 2, 1, so I reverse the order of the headers and again it looks like a clusteru#$%* of tubing.
Benji has sent me pictures of the pipes mocked up and they look fine, so I decide to work backwards. It’s easy to figure out which muffler goes where so I’ll just match the header to the muffler. The mufflers mount to the passenger peg holes but they ship with a bolt far to short to even fit through the mount holes. I quickly discover that this is not just a metric bolt but a very specific automotive fastener that no major auto parts store locally carries. Three hours on the phone I find some hole in the wall shop that has some but I need to buy 100 of them in order to get two.
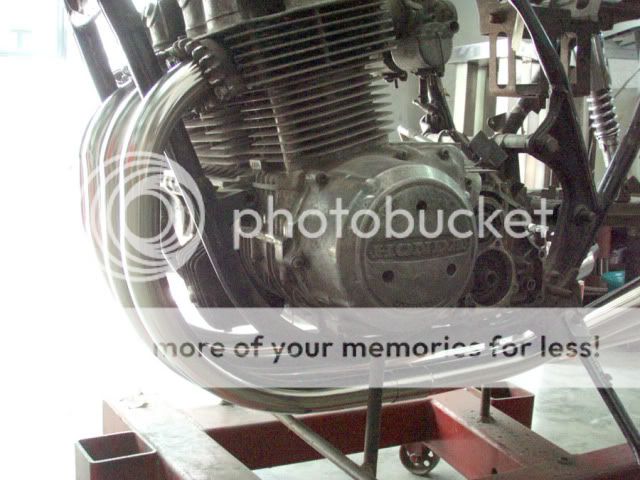
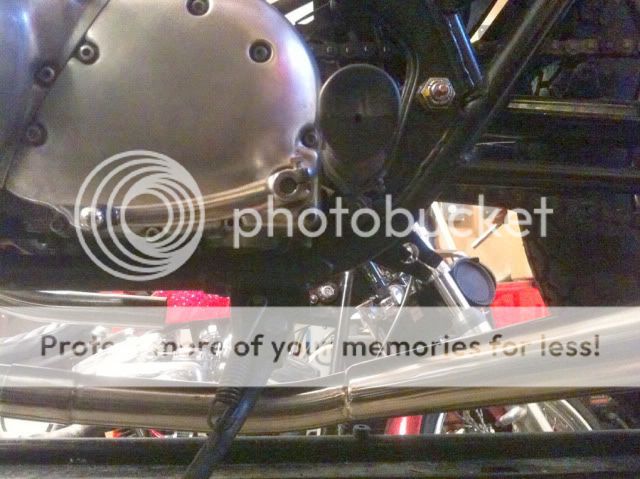
I mount the right side pipes and find two headers that match. Now I proceed with the left side, but there is no way they’re going to work. To make a long story short, my pipes were fabricated on cb750 frame that had a custom mounted and relocated kickstand, whereas mine was in the stock location. Number 4 pipe was not going to clear at all.
BCR:
Stock:
Benji asked for all sorts of pictures to try and figure out the problem and couldn't see or acknowledge that his from was different than mine. He did offer to fix or replace the pipe in question, but if you look at where everything lines up, a new pipe 4 means a new pipe 3 and since the whole setup is meant to be be symmetrical, it would mean new pipes on the right side:
And the real question is how many more months must I wait to get things going on this bike build?
Despite his insistence to the contrary, the only solution was to relocate the kickstand in order for pipe 4 to clear the frame. So I cut off the kick stand and now my exhaust fits.Since I also lost my center stand, my bike is now marooned on the lift until I get my new weld on stand (it’s in the mail). The old stand is simply too short and won’t fit along the bottom rail in concert with the exhaust.
I am happy to report I found a really trick kickstand that will look great and flow with the lines of the exhaust, but $165 and three weeks later, this seems to be a Mantra for this bike.
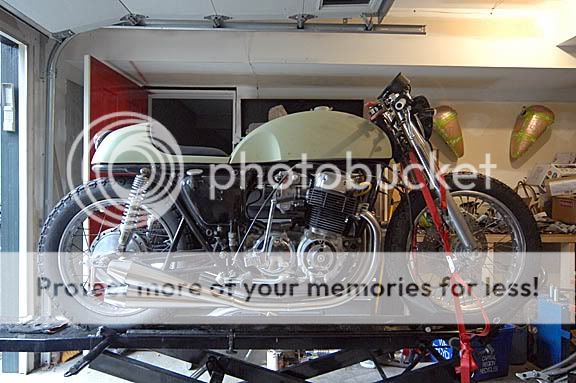
So here’s where I was in my build (new shocks not shown):
and was off to paint this week.
In an ideal world it would be great if this stuff always fit and if there was a problem we’d take it back to Sears for a refund. People are correct when their advice states “send it back” and under ideal circumstances I would have done that for some of my items. But each situation is different and what presents itself as an obstacle to some can be seen as a creative challenge to others.
My only advice is that if you are looking for smooth, simple bolt-on pieces from BCR, I have yet to hear about such a situation. I’ve tried to be forthcoming without trying to lay blame on Benji. I can say that what I received was in need of some serious work on my part to get proper fitment. The quality of the metalwork and design are what I expected but my journey to date has been far more hard work than I expected.
My message to Benji is that while you design and build signature pieces, nothing fit my bike properly or easily when I got it except the headlight bracket. Some issues were an easy remedy, some were very serious oversights.

")


