Follow along with the video below to see how to install our site as a web app on your home screen.
Note: This feature currently requires accessing the site using the built-in Safari browser.
We noticed you are blocking ads. DO THE TON only works with community supporters. Most are active members of the site with small businesses. Please consider disabling your ad blocking tool and checking out the businesses that help keep our site up and free.
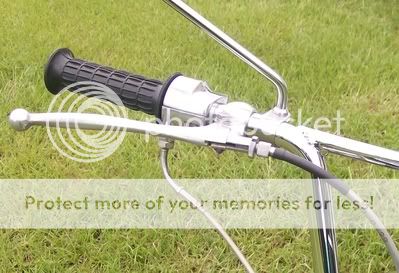
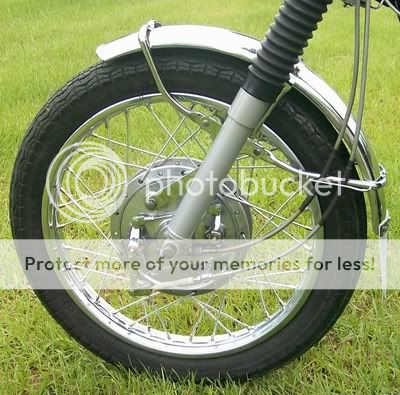
I had some butterflies in my stomach about the front fender as it was nearly impossible to find a good quality one but Joe you have turned a usable fender into a piece of art! It trully bringsthe front end together. As for the steering damper, who knows if it will function like the new technology but it at least looks real perrrrrty!
That it does, deffinetly more subtle than modern tech
Have played a bit with an old Suzuki T250 which has the same type of damper. It is more or less just a long screw threaded into friction plates below the triple tree which effectively "brakes" like your basic caliper/rotor making the front end harder to turn, simple to tune but not as effective at dampening hard jerks as the more modern rod damper, still very cool though.
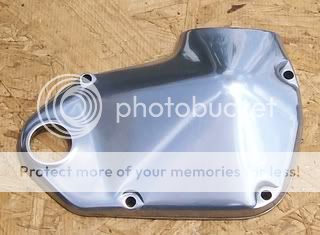
We have been working on restoring several different pieces for the Bridgestone this week, the carburetor covers had a lot of corrosion so we sanded them down to remove the fine pitting and started to give them a light hand polish. I am going to polish the carburetor covers some more however here are the before and after photos that show how they look after their first hand polishing
We also installed the front brake cable and adjusted the front brakes. There was one small place in the cables casing that we were not happy with so we sealed it with black heat shrink, after we sealed that area of the cable we liked the way it looked so much that we added two pieces of heat shrink to the front brake and speedometer cable where they run through the front fenders bracket as accent pieces which will also add protection for the cables.
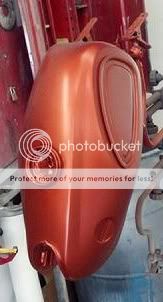
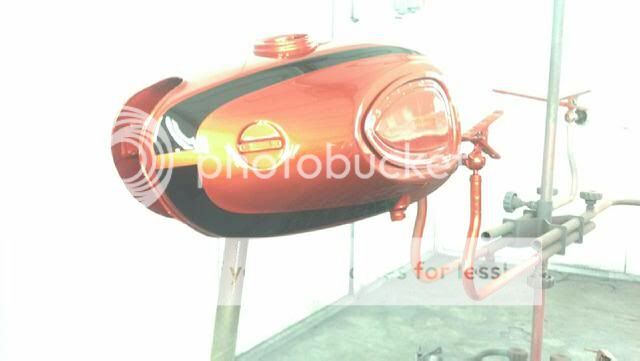
I would also like to send out a very special thank you to my Brother Jason who does absolutely beautiful paint work for taking the time to give these parts the quality restoration and paint work that they deserve and only you can do, I love you man! Jason just sent me these photos of the tank in basecoat as well as the side cover and oil tank in basecoat with their new checkered decals! He also took more photos of the restoration work he has been doing on these parts and we will post them all togethor once we has clearcoated and completed all of the parts.
Thank you Brothers! I will never be able to thank you all enough for your kind words and support, they truly mean more to me than you know!
Brother casi approved the color for the tins so my Brother Jason is working on clearcoating them and he sent me this photo of the side cover today!
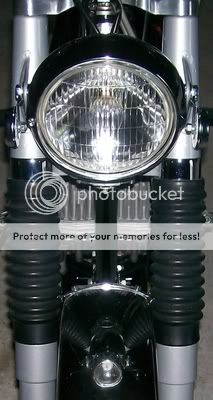
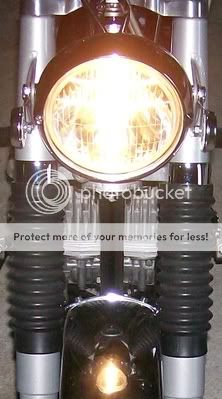
We have been working on the wiring and I was able to get most of it installed, I have just a few small things left to wire however I have most of it completed. We have had the headlight bucket mounted on the bike and now that I have most of the wiring completed I installed the new old stock headlight that Brother casi sent so that I could test it, according to the tag that was on the bike when we received it this is the first time that she has powered a light in 38 years so it was really awesome to see the first signs of new life from her this evening!
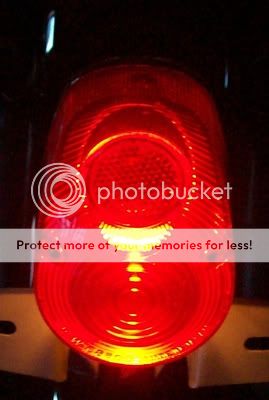
I still have to complete the final wiring for the tail light however I temporarily connected the wiring so that I could test it and the running light as well as the brake light are working good so I should have all of the wiring completed very soon!
As much as I love to return bikes to their former glory it truly was a special moment, I had to leave the light on for a minute so that I could stand there and look at how pretty she is!
JustinLonghorn said:
Indeed. I think we will need a video of her first breath, sir.
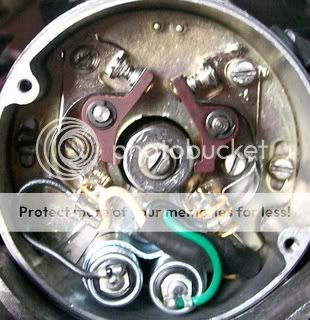
Today Dad was here and we had a really enjoyable time working on the Bridgestone togethor, we installed the new points and condensors that Brother casi sent, adjusted the gap on both sets of points, and set the ignition timing. After we installed and set everything we ran a test and we have really nice fire on both spark plugs!
Here is a photo of the new points and condensors mounted in the end of the generator.
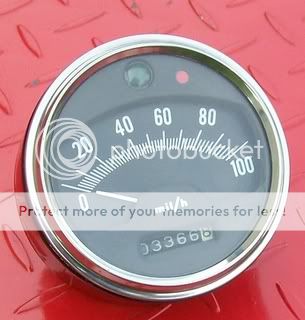
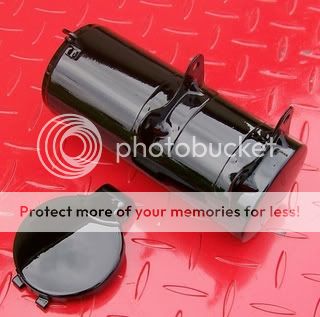
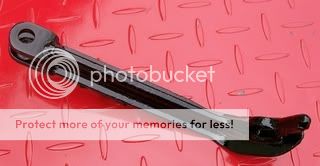
My Brother Jason really did beautiful work on the tins and I can not wait to see them on the bike, he put the final coat of clear on the tank today and has it so smooth there is no edge around the decals! I have been working on restoring the last few pieces that we are painting black, today I painted the speedometer, tool box, tool box door, kickstand, and the skid plate. I am still working on the skid plate and I have more detail work to do on these parts however here are a few photos of how they look this evening!
This site uses cookies to help personalise content, tailor your experience and to keep you logged in if you register.
By continuing to use this site, you are consenting to our use of cookies.

")