Cafe Seat - Metal Thoughts

neevo

Over 1,000 Posts
So I have been looking at fibreglass for my cafe seat and whilst it is a great option I would prefer to make it out of metal.

I have a fair bit of 1.5mm steel left over from my under rear frame tray and I was thinking of making it out of that.

Need to create a compound curve as I am aiming for a Benjie's style seat and bump. Nice short stop with a round bubble stop. Can someone provide inputs to my plan?

Going to cut the seat pan section out and bend down the sides, leaving them long so I can wrap them around to form a strap around the rear hoop and joining in the middle. Was going to form the curve with segments as they should be easier to curve and weld together as I don't have an English wheel.

Anyone got some inputs? Is there a program I can use to work out my templates for my segments?

Cheers!
 
I have no idea dude but ive always wanted to learn how to do what your talking about .... i always go with fiberglass and i still kinda screw that up ( usually takes me a couple of molds ) but please post pics whenever you get your input
 
I will be the pioneer then, like Scott in the Antarctic... but much less dangerous, without snow, sledges and death ;)
 
there's a video somewhere of a guy using 1/8 or 1/4 in rods to form a base onto which he welds segments of sheet. i only wish i could find it.
 
Kicked off the build today, follow the progress here:

http://www.dotheton.com/forum/index.php?topic=31541.msg365508#msg365508
 
cut a piece that looks like a big eye, tuck shrink the edges, stretch the middle, on steel and with hand tools, it'll take you a couple days, but that's how it's done.
 
rockcitycafe said:
cut a piece that looks like a big eye, tuck shrink the edges, stretch the middle, on steel and with hand tools, it'll take you a couple days, but that's how it's done.

I assume you need a shot bag and an English wheel for that, or can you do it with other more available tools?
 
ToastyTofu said:
there's a video somewhere of a guy using 1/8 or 1/4 in rods to form a base onto which he welds segments of sheet. i only wish i could find it.

I think you may have been talking about this video.

http://www.youtube.com/watch?v=KT31eNdQaEI

-Cheers
 
Yo peeps! Help me out. I am removing all the bracing between the frame rails and replacing it with 5mm plate welded on top of the frame. This is going to give me the base to mount the seat to and I am keen to have some rubber washers on it too.

Is this needed or can I bolt the seat straight into these frame braces? If I put rubber mounts in between the seat and bracing what do I use that is not too thick? I want to maintain a reasonably specific height for the seat so it covers a certain amount of the horizontal rear frame.

Anyone got some links for appropriate rubbers?

I am welding the frame this Sat and keen to know if I need to recess them slightly to accommodate the width of the rubbers.

Can give pics if needed.
 
Pics. I mocked up my seat supports with some 6mm Alu I had left over from my brake arm fabrication. Planned on swapping it out for steel so I could weld it to the frame. A thinner section at the front and a wider section at the back to replace the brace I cut out between the shock mounts.

Front:

174e90fb.jpg


Front & rear (under the masking tape):

1c6a4b2c.jpg


More angles, I am hoping welding it on top will provide enough support:

4be4ab1f.jpg


This is the 5mm plate I will be making the supports out of:

7cfdce8c.jpg


This is the height I am trying to roughly maintain. I have 1mm - 3mm of rubber I could put in there I estimate without it getting too high:

3d6be4ec.jpg


b5ec96ce.jpg
 
Pasted from my bigger thread to update this one:

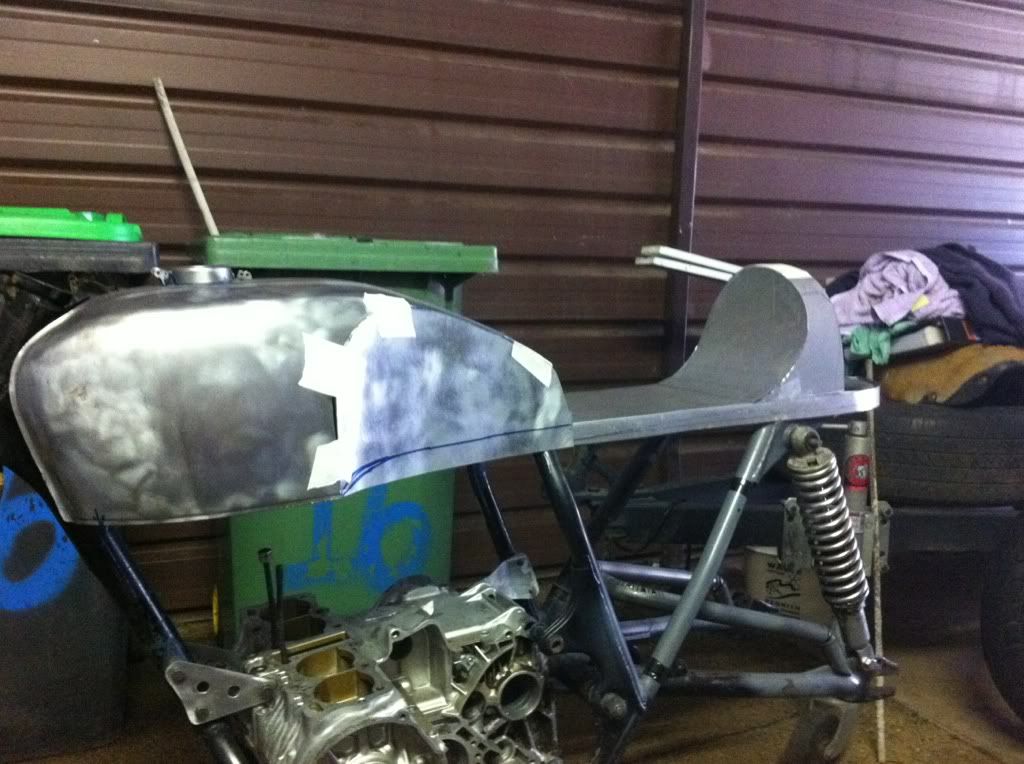
Also kicked off my seat build today. Always preferred steel to fibreglass but didn't know how I was going to do the bump stop.

Decided to just start and see where it took me. Used the upside down frame to trace the seat pan out. Cut it out with the angle grinder:

6211b44d.jpg


Plan is to weld these bits together at the end with some bracing behind. Next up I needed to bend the sides down, a tough job as I could only do it by hand and in the end I used the angle grinder to help start the process. Here it is post bending with extra long sides so I can trim them back:
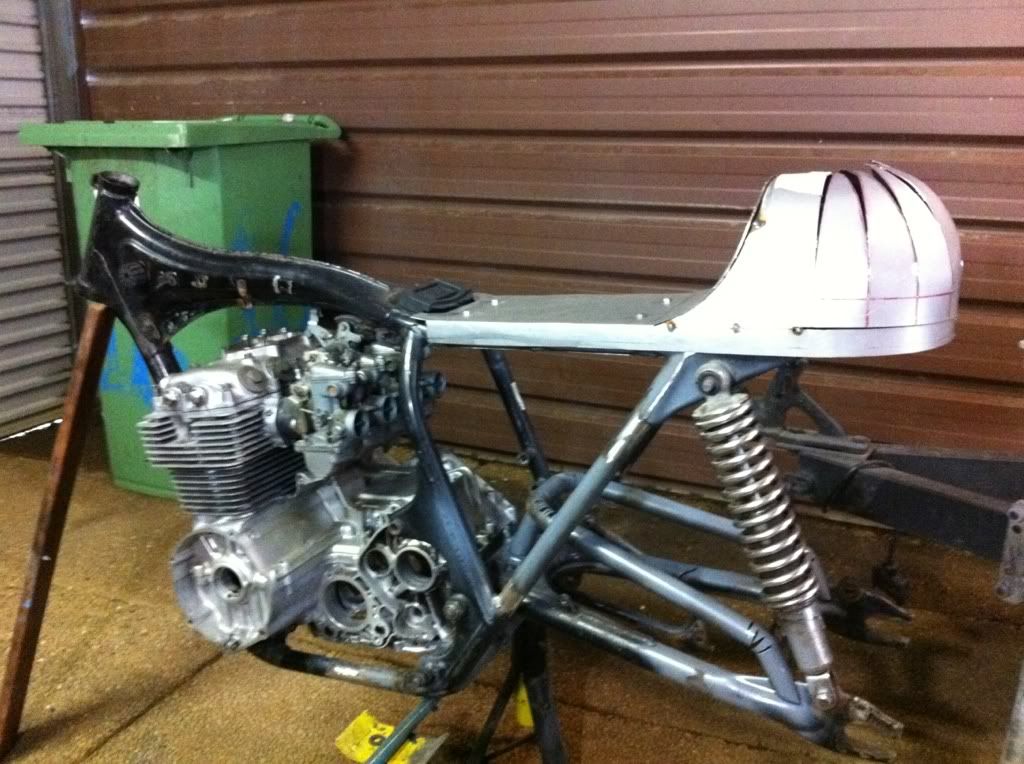
529710b8.jpg


On the bike:

ff01b073.jpg


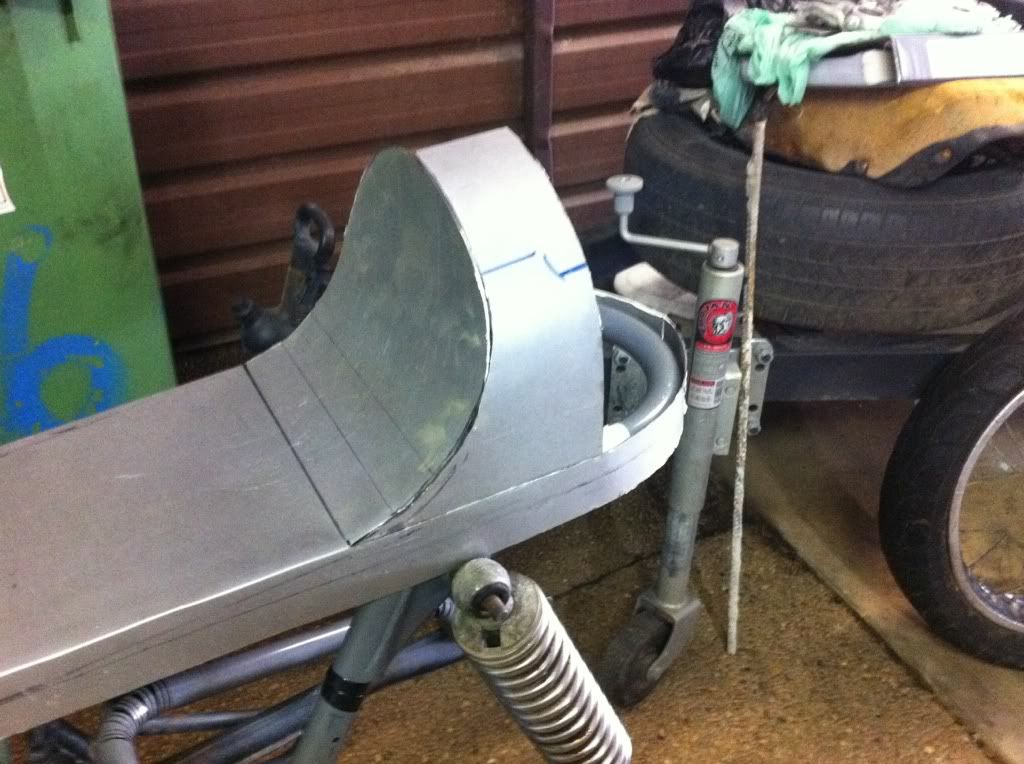
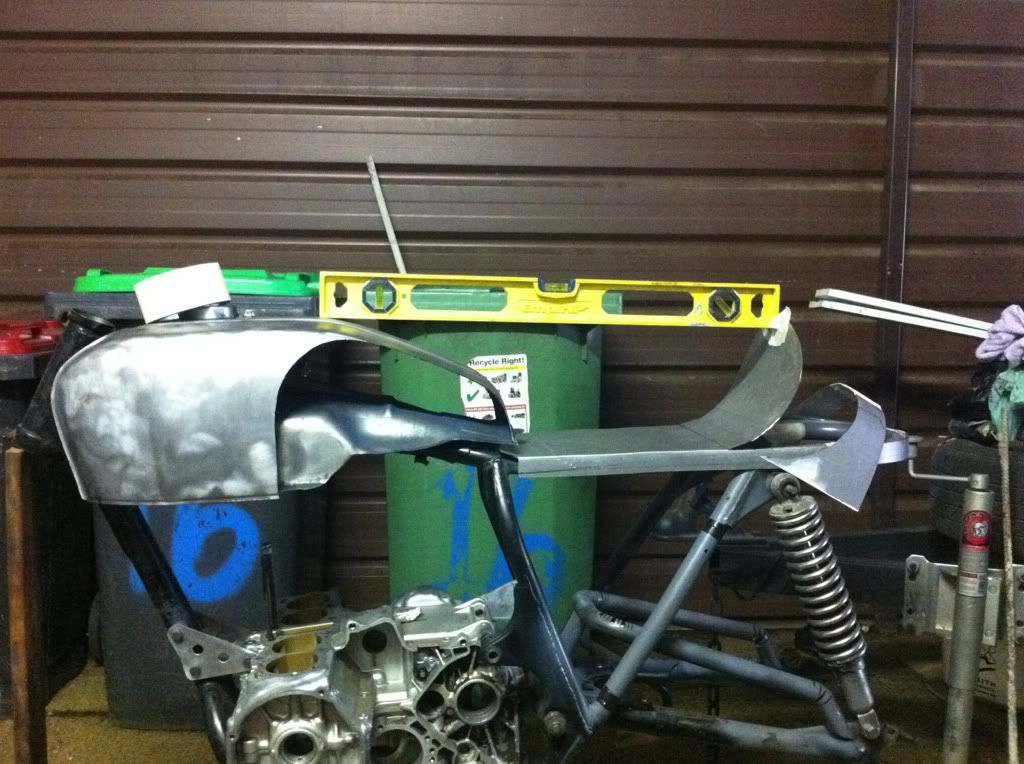
Next up was cutting the seat pan back further to bend up the rear of the seat area, the plan was to curve it up like Benjie's seats so I used my rear hub to get the curve:

8105d406.jpg


Next up was cutting the bent up rear seat section, I used my grinders disc as it was almost the perfect size:

270e607f.jpg


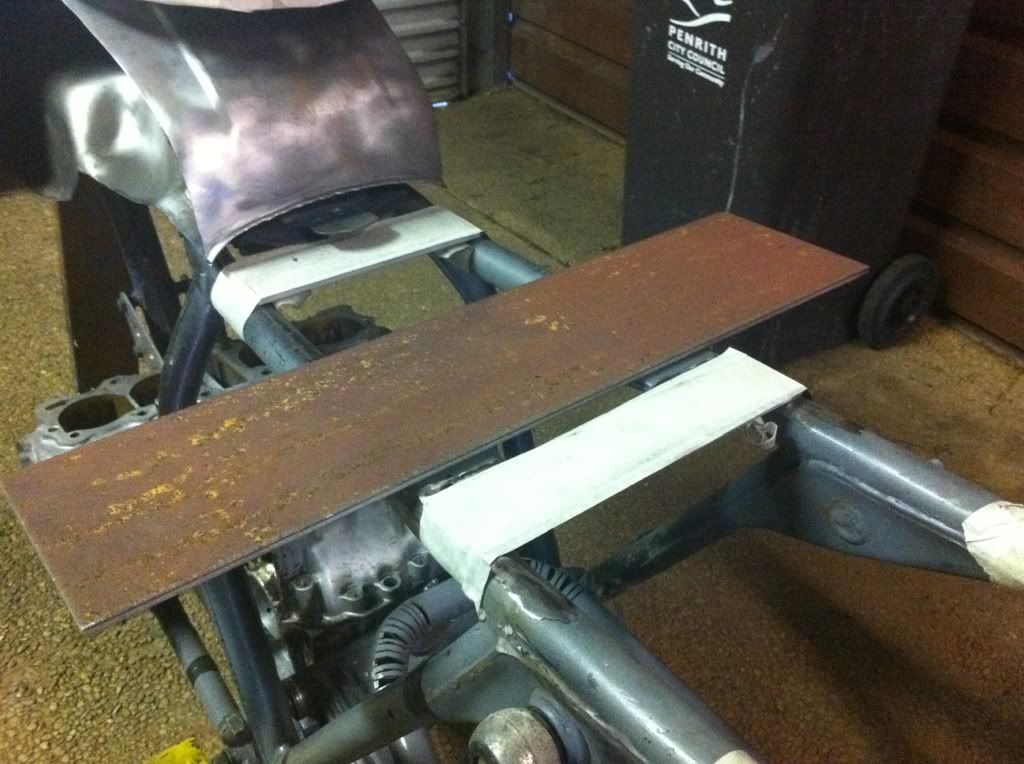
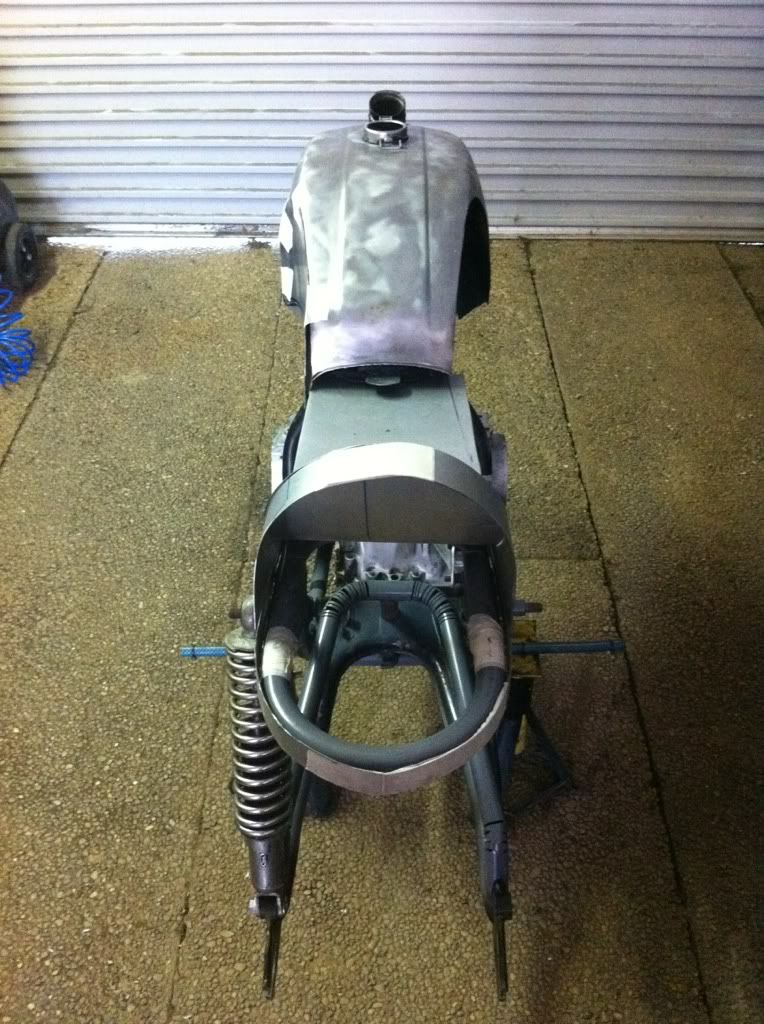
A nice line from the tank through to the bump stop:

80b7fed3.jpg


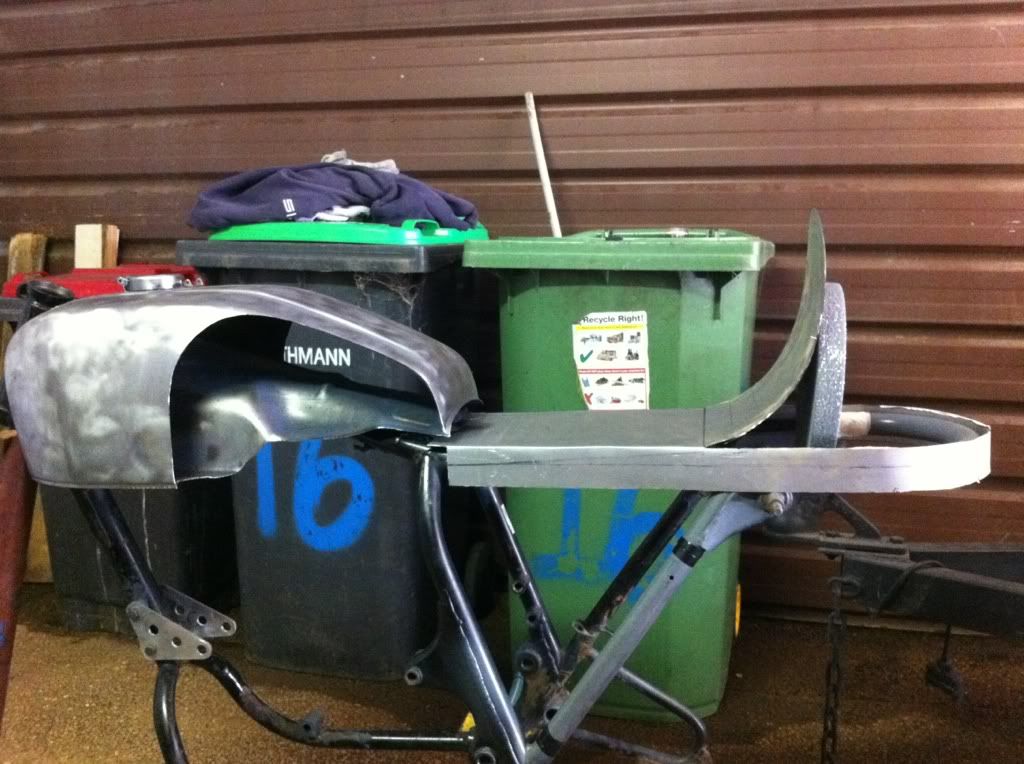
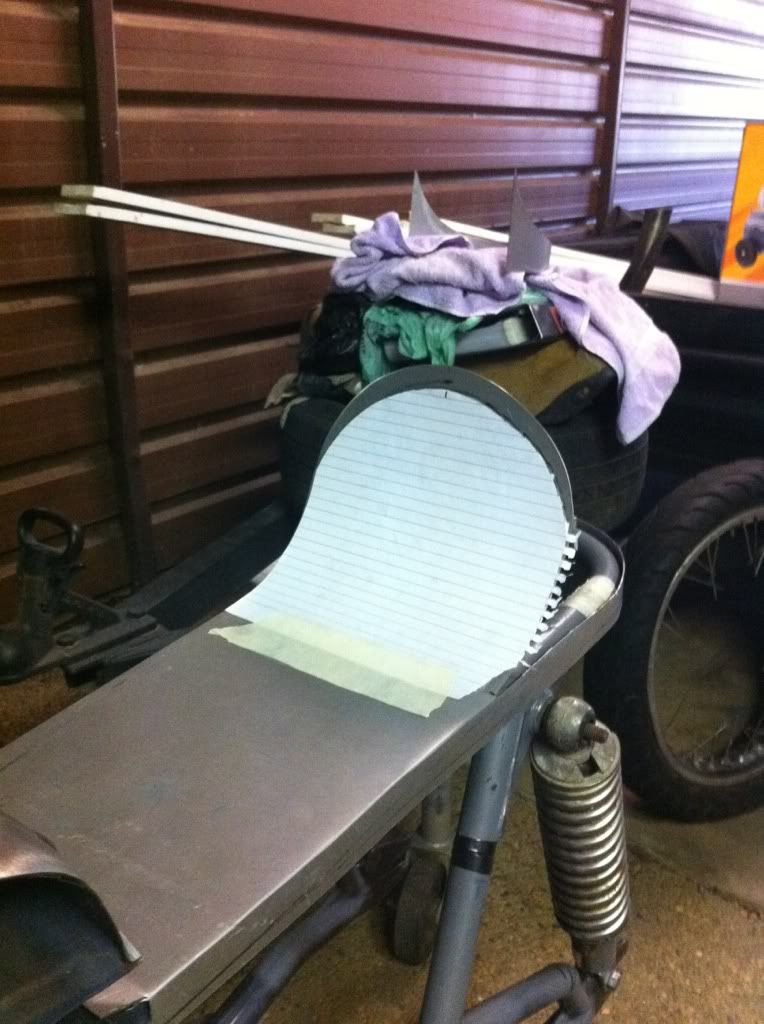
Afterwards I cut the first of the segments, made an error here as I really should have made both sides out of 1 piece to minimize the welds, might redo it tomorrow. It needs trimming too as its a bit too wide still:

06b87405.jpg


30392a95.jpg


6e2967ff.jpg


4933c20e.jpg


This first section will probably get cut by about half so I have enough room on the end to get a nice rounded end piece. Then need to French in a rear light.

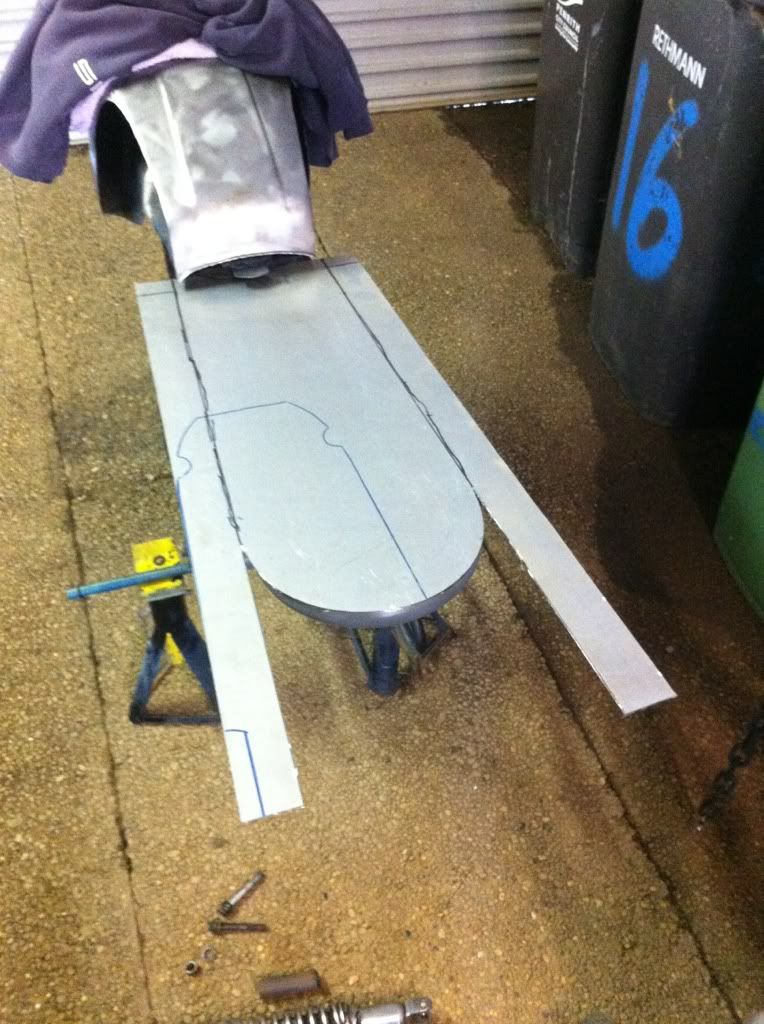
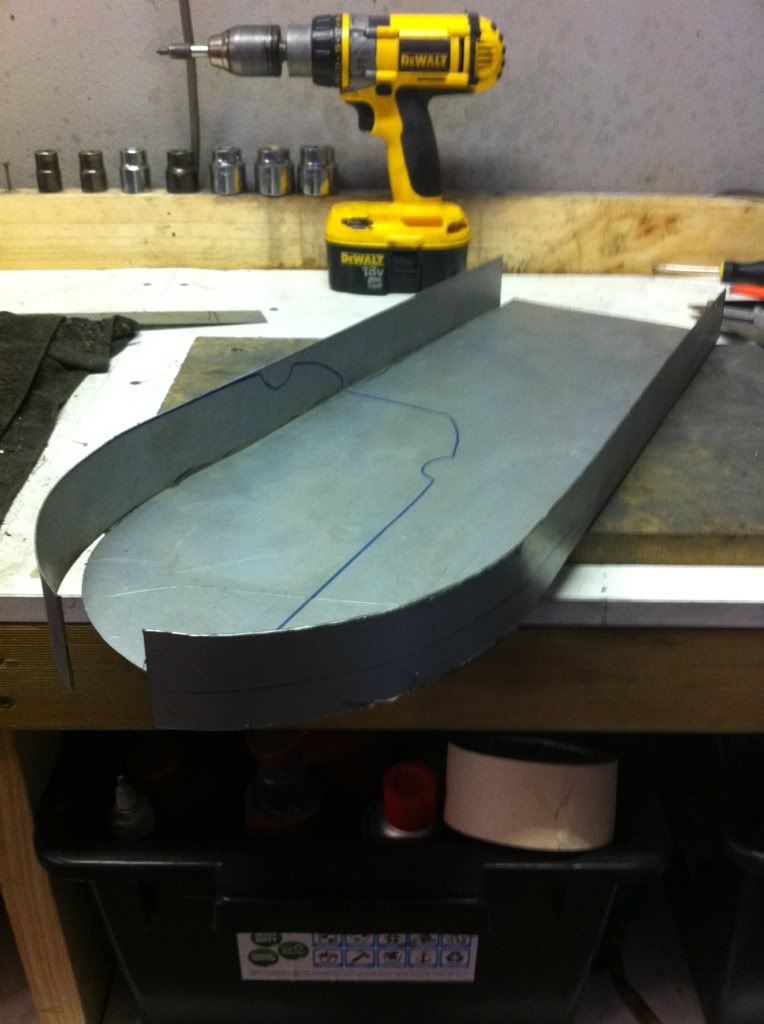
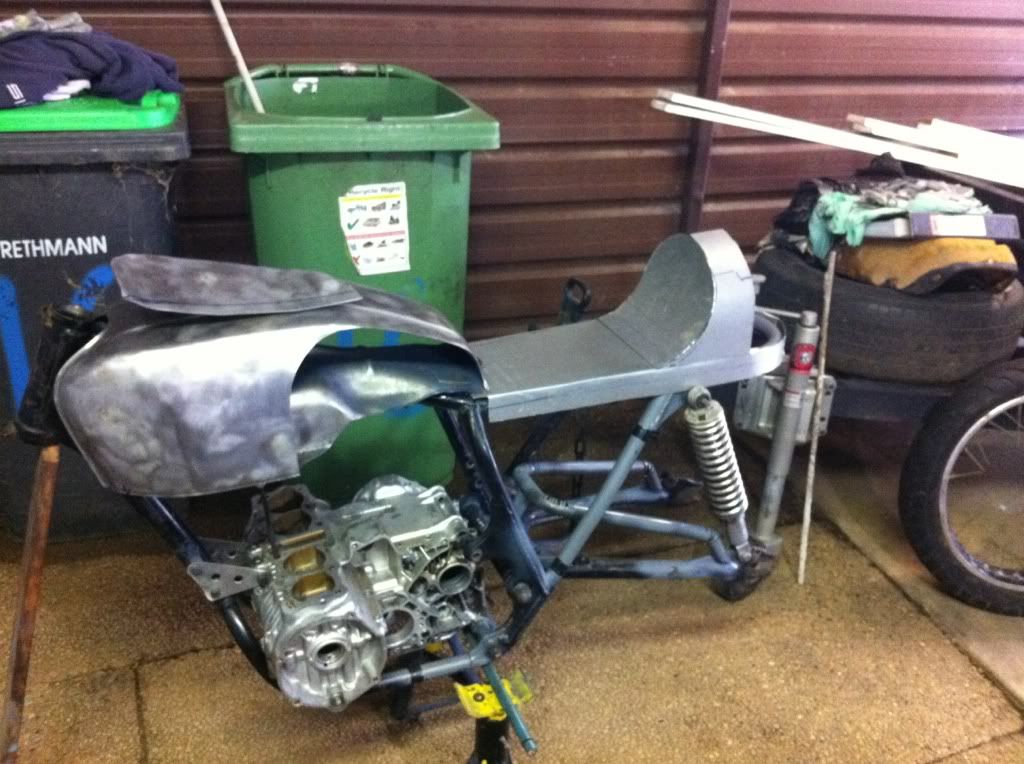
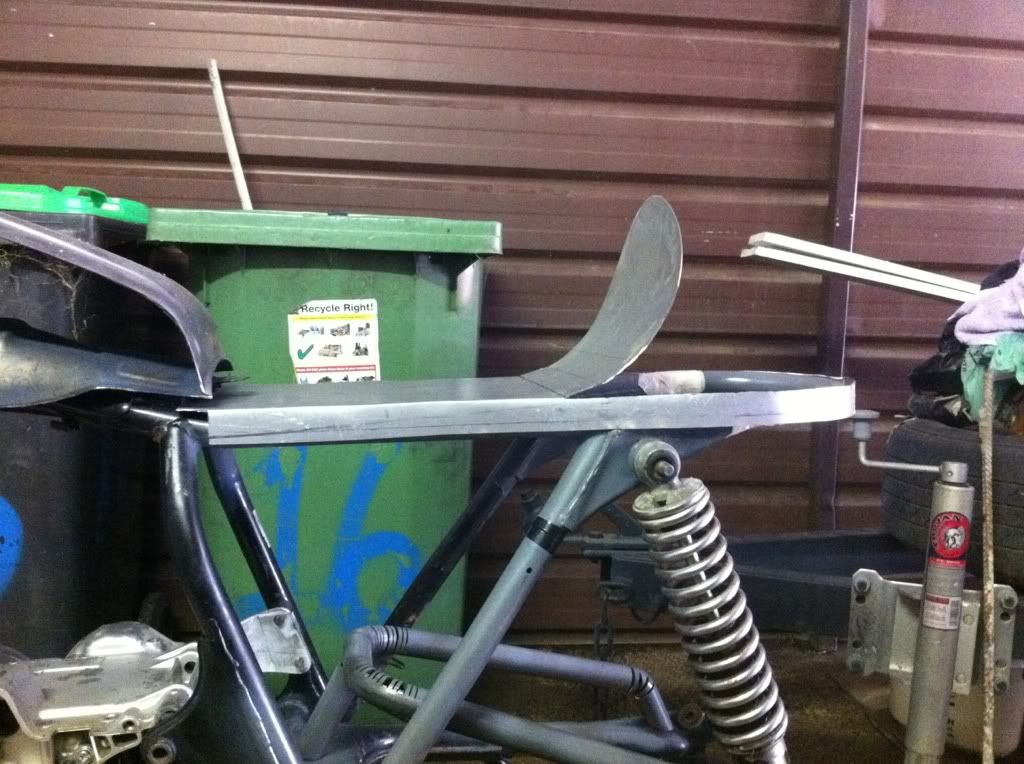
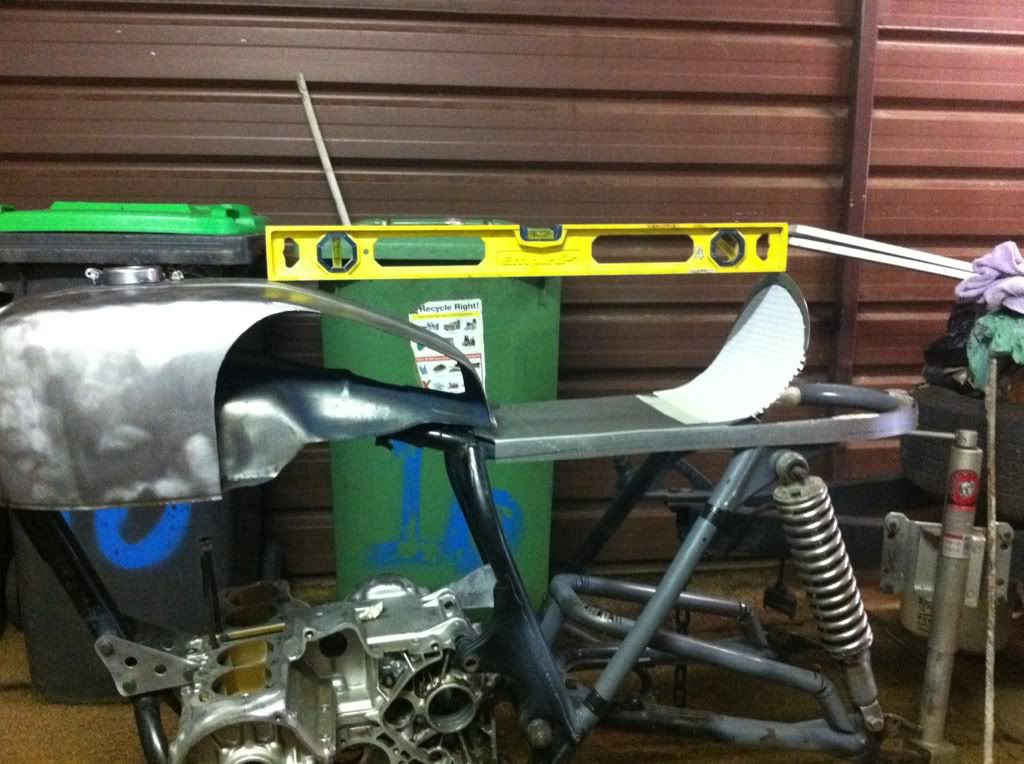
Bit more seat work done today. First question was how much of the frame rails do I want to expose. I cut the edge to 1" first as I could always cut again, I do like this look though so it will probably stay at 1":

53b05189.jpg


Just the slightest amount of frame visible and it gives a nice sharp edge to the seat area. Test fit with knee scoops to check the lower lines:
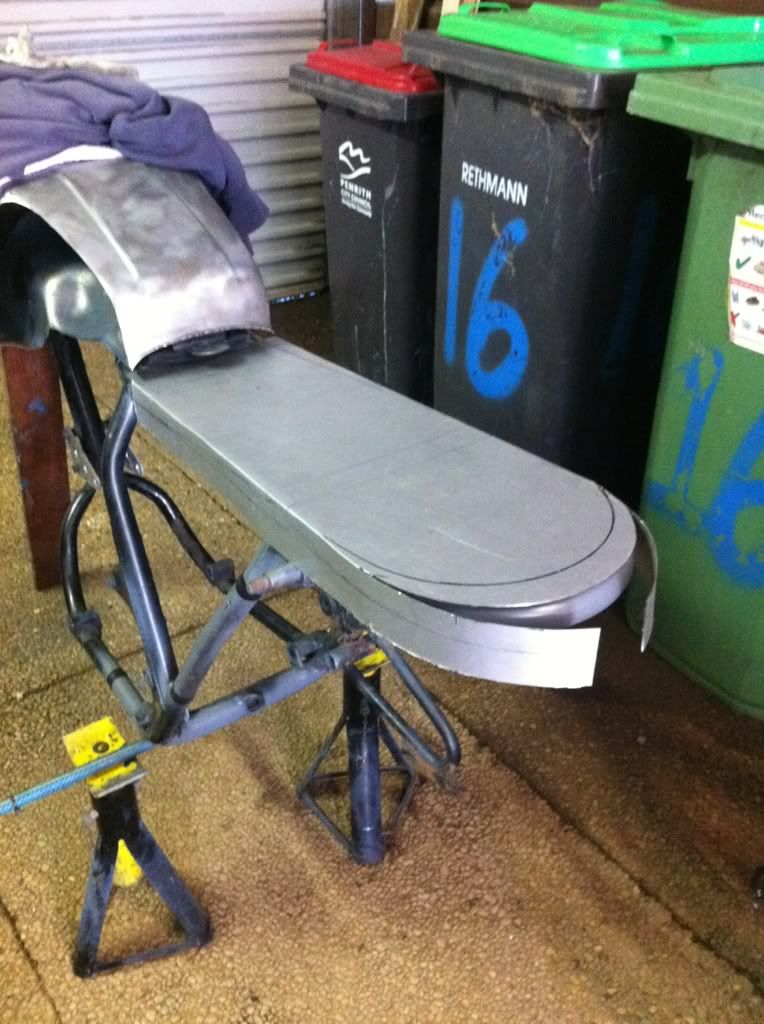
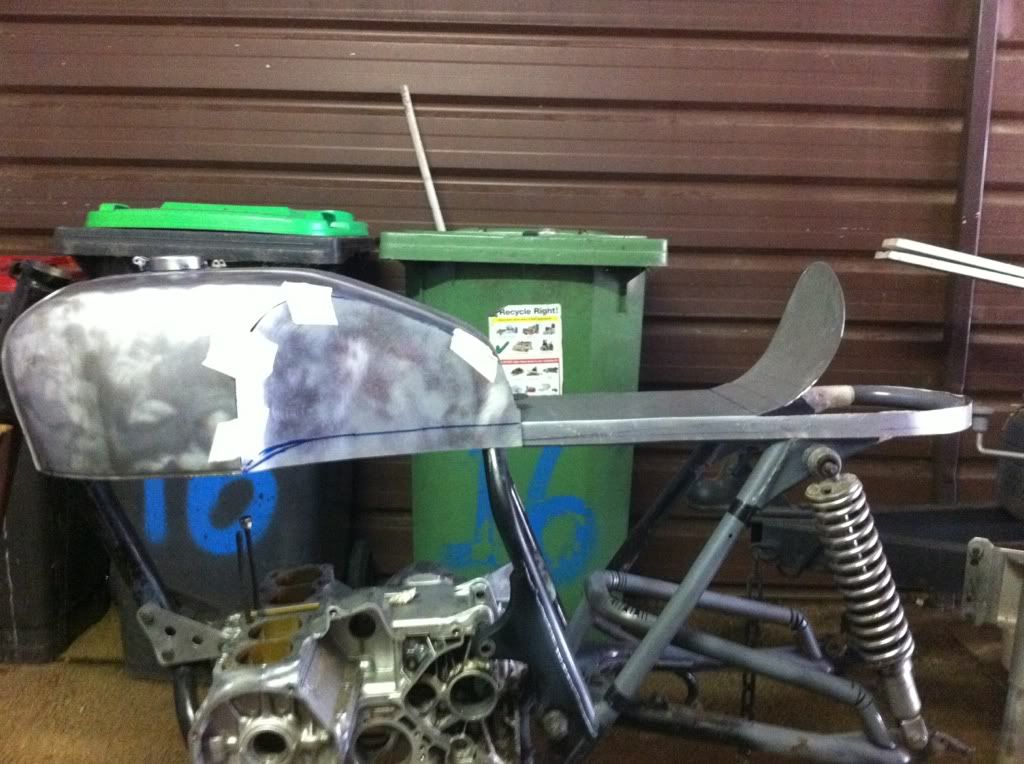
3902dac0.jpg


Everything so far:

309ee695.jpg


9bd41bfa.jpg


93704584.jpg


b0ef0618.jpg


d5649632.jpg


9015c6f0.jpg


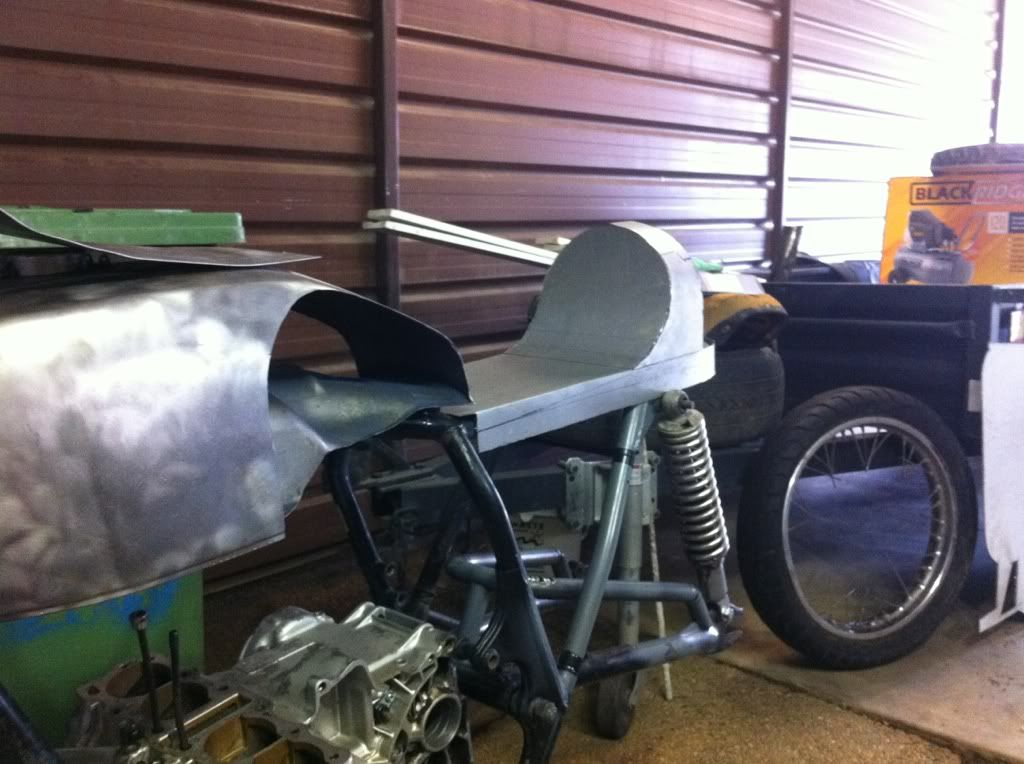
I suspect the rear bump is a little on the tall side. It's quite large and seems a little goofy. I was playing with the idea of trimming approx 15mm off the height as most nice looking bumps seem to be slightly shorter than the top of the tank (Bonita Applebum and GoingsMoto's to be precise). Anyone got some inputs? Estimated new line:

9795244a.jpg


New shape:

def64e87.jpg


Old lines:

4543d2a4.jpg


All the electricals and battery will be going in the bump but I plan on getting an antigravity battery so I don't need a huge space.

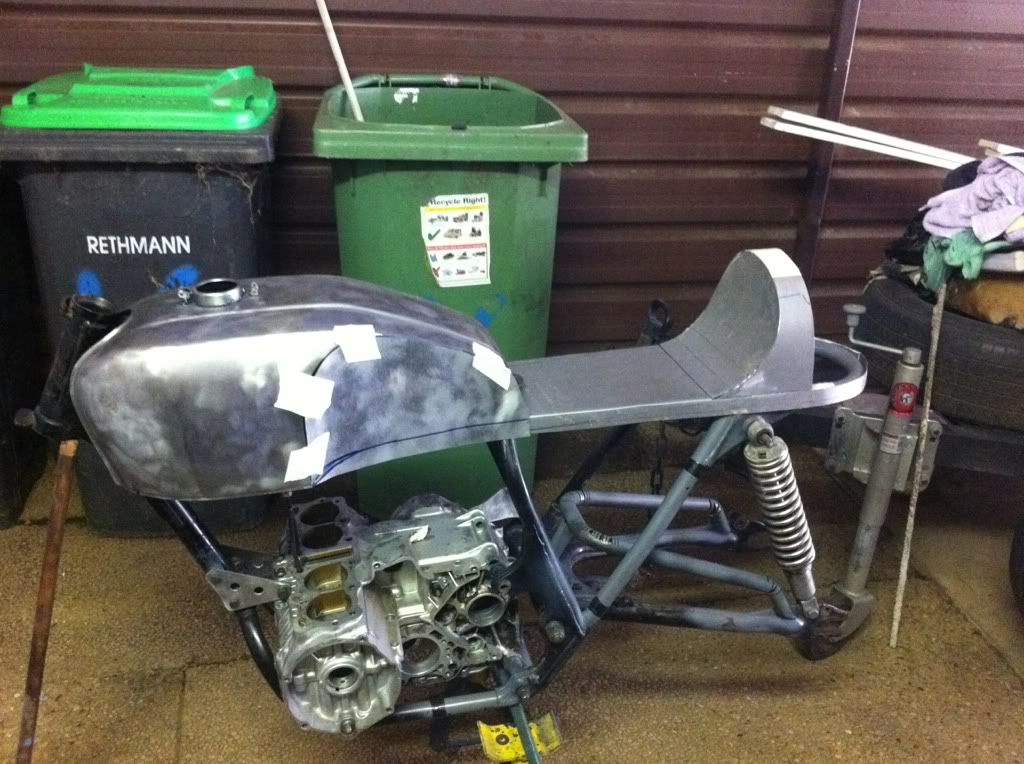
So the plan for this weekend was to redo the bump stop section to get rid of the extra long flat bit and also tidy up the tank holes in preparation for welding in the panels. I have signed up to the Sydney Cafe Racers Facebook page and found someone with a TIG welder that is going to help me get the seat and tank finished.

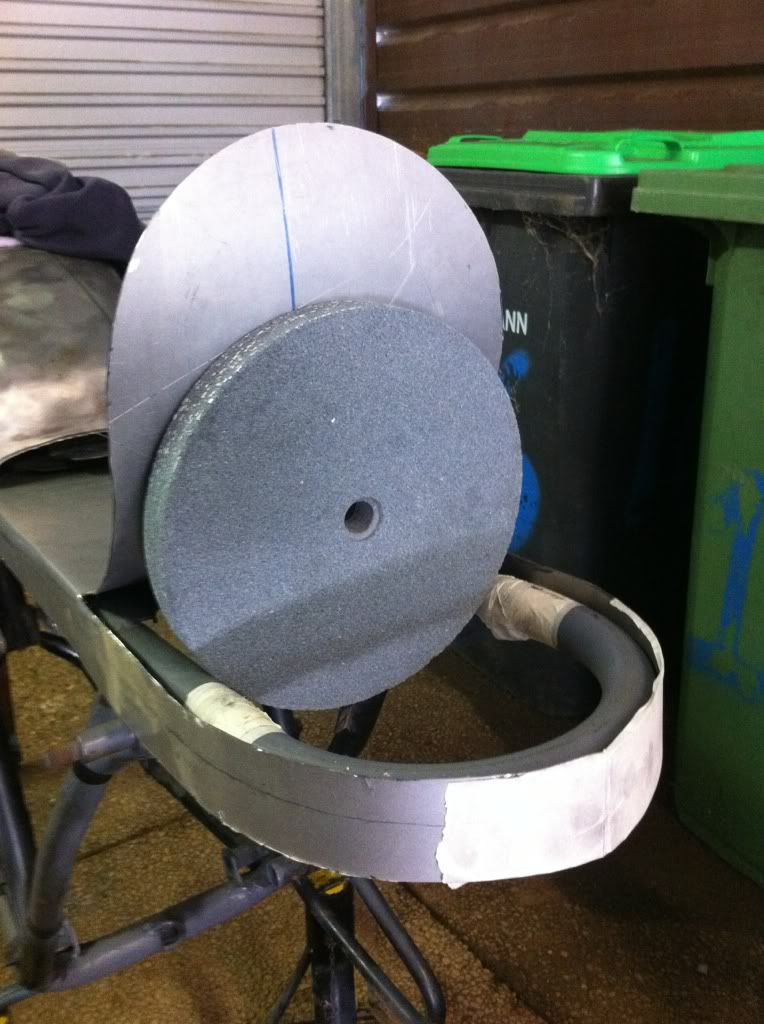
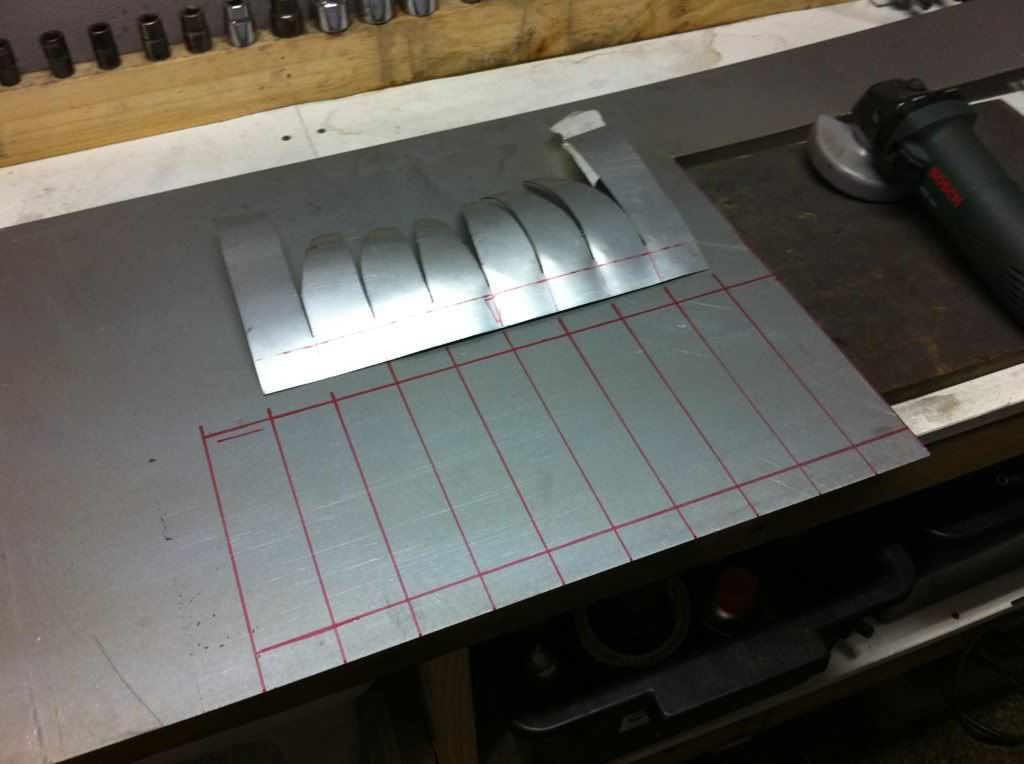
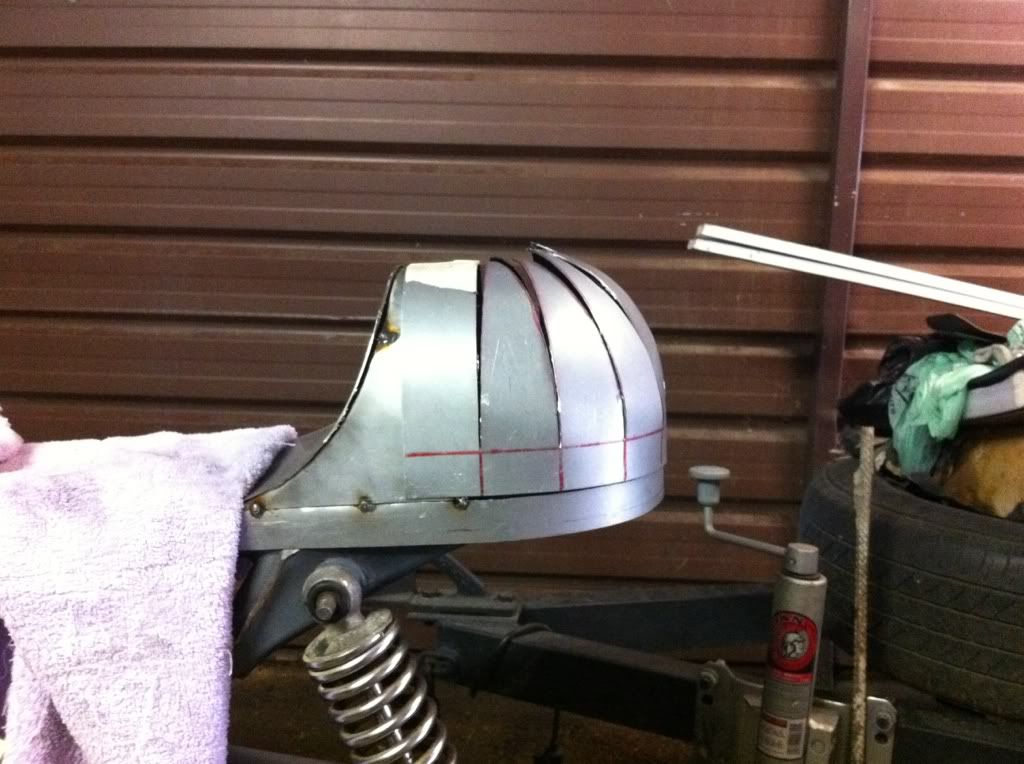
Had 2 goes at the bump stop today... the first ended up in the rubbish bin, the angles weren't working as I was keeping one side straight and curving the other for each leaf as per the original version. It turned into a shit fight so I came up with a more mathematics based solution:

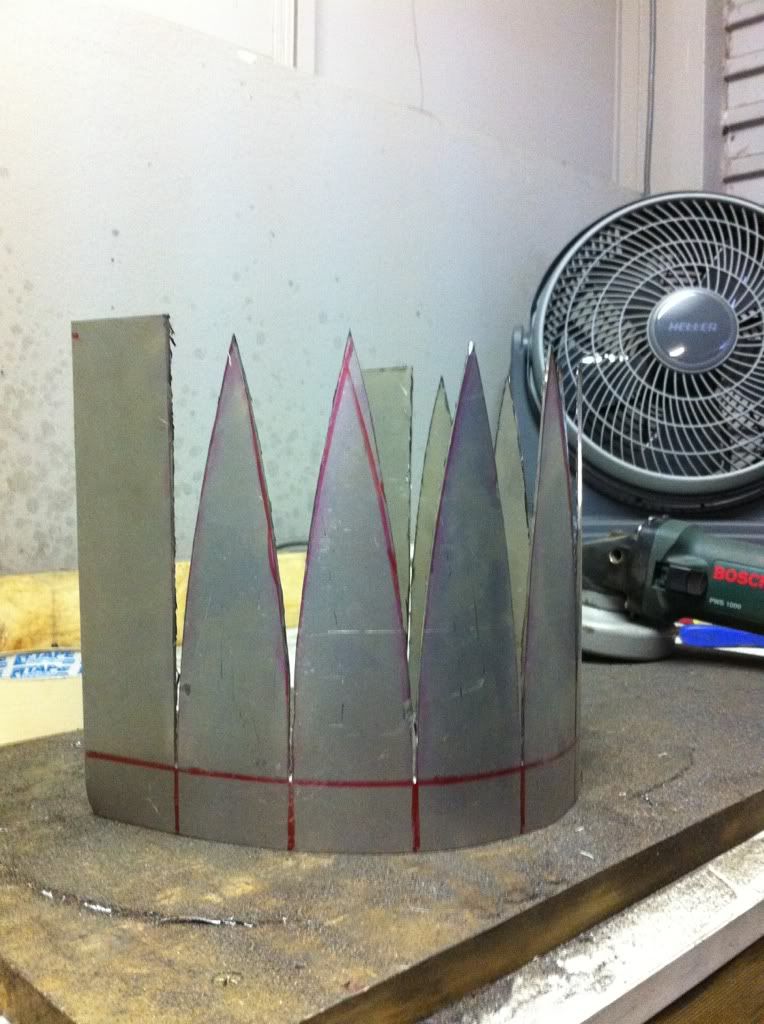
1. Cut out sheet metal and mark up 10 leaves (2 of these will be cut off at the end leaving me with a fully curved rear section):

d22e4124.jpg


2. Cut a curve on each leaf side. Didn't have a compass so ended up using a length of masknig tape stuck to my pen, it worked out ok):

361f5205.jpg


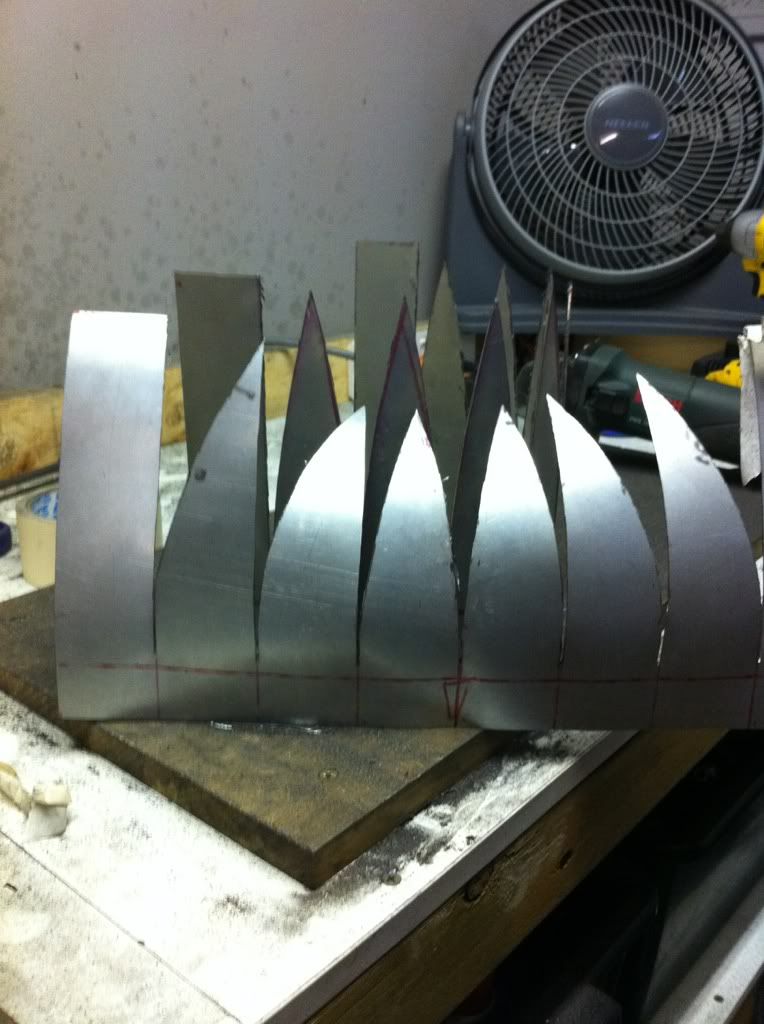
You can see the difference in the leaves between the old version and new version:

bfc3adb9.jpg


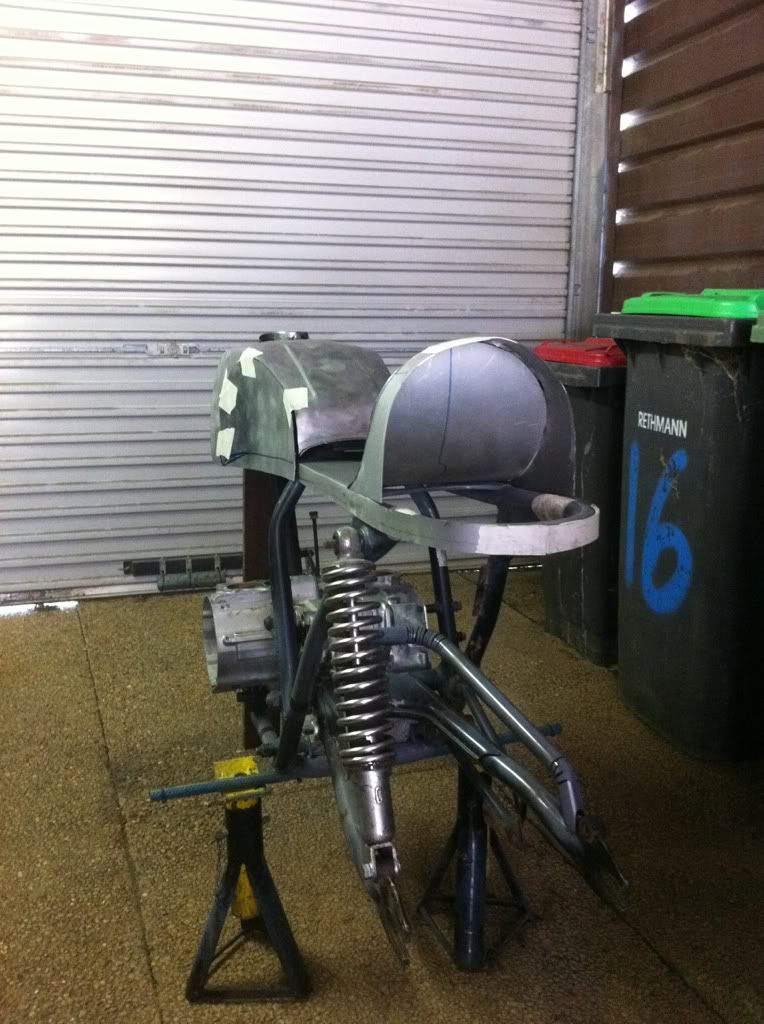
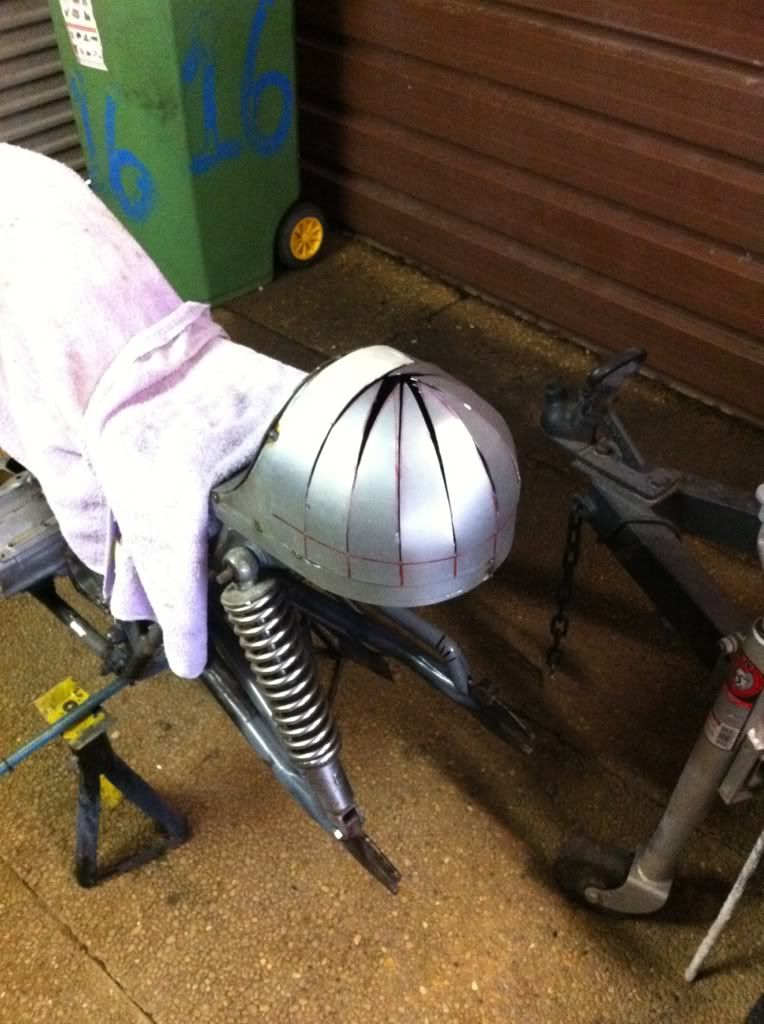
3. Carefully bend them and mount it on the bike to get a look:

ed30a6bd.jpg


dd373414.jpg


d17b735a.jpg


I think it looks 10x better than the old one :)

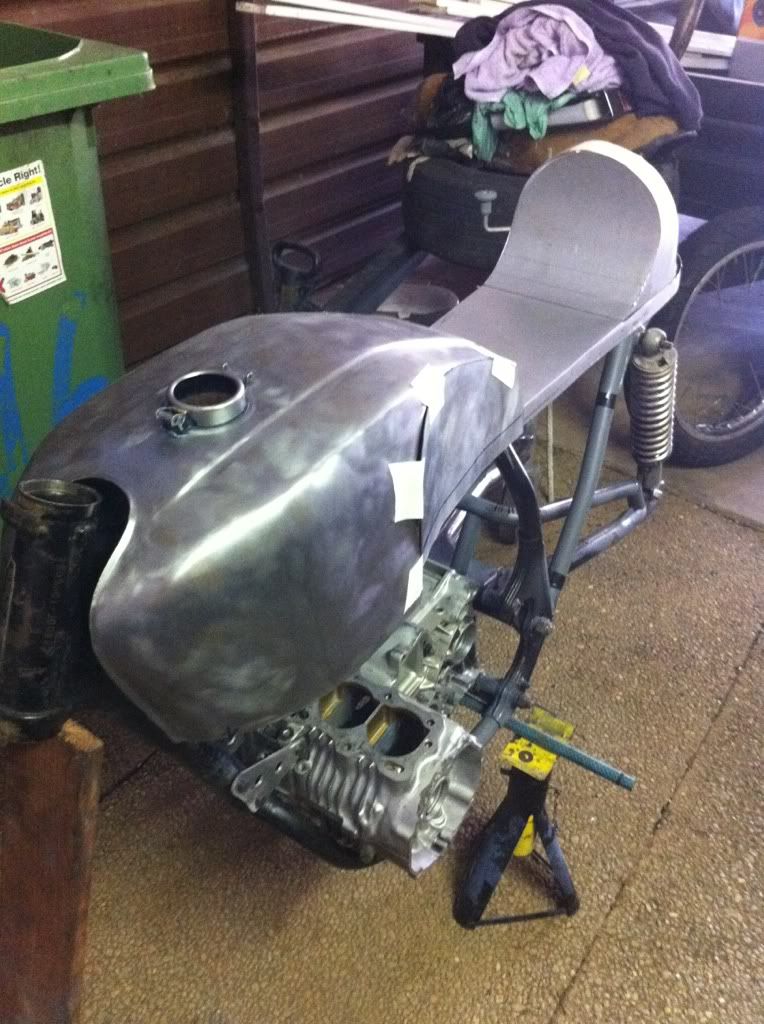
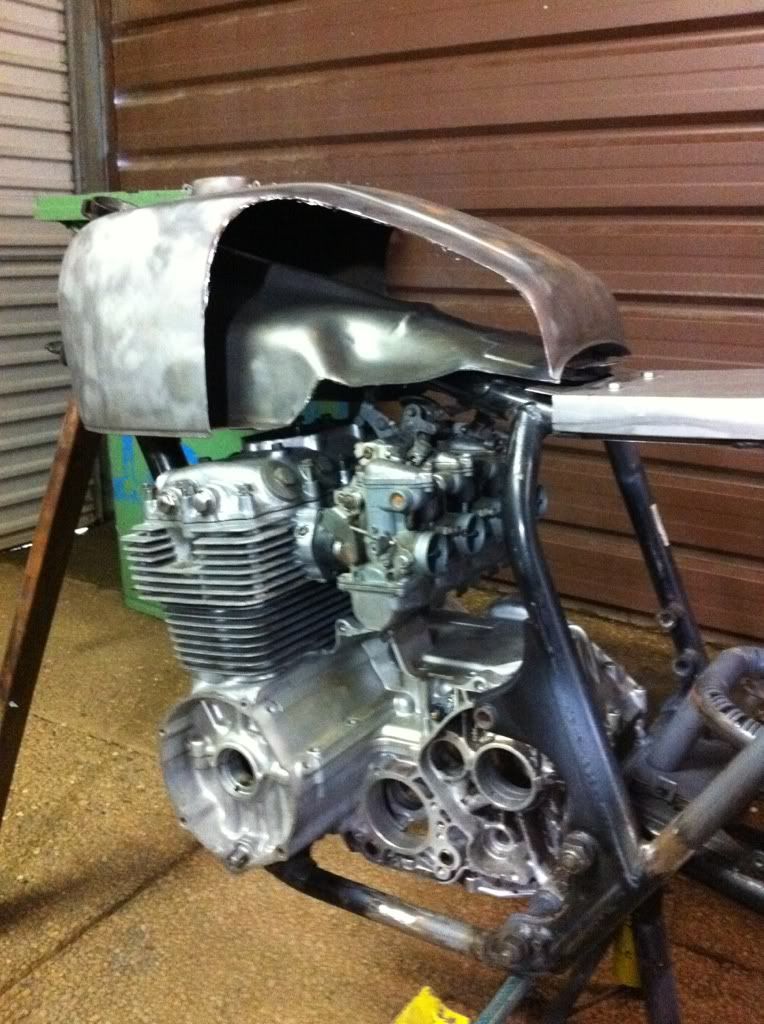
I also mounted the engine (now with studs removed :)
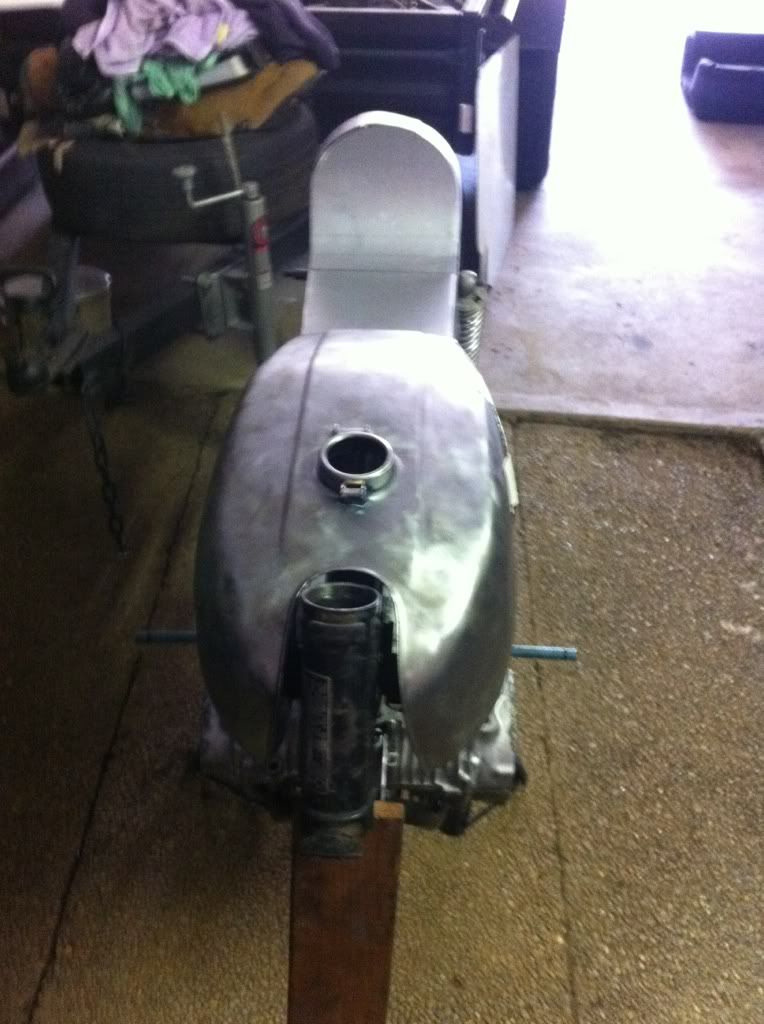
) and thought I would test fit the motor and carbs to get some thoughts around how I am going to get fuel out of the tank (as I have cut the original tap mount when I cut the knee scoops):

17aedd9f.jpg


03742466.jpg
 
Ive done smaller pieces without shot. cut the outline from dense hardwood. clamp the sheet in there (lots or clamps, a hell of a lot of force will be generated) and slowly hammer stretch the sheet out to the wanted shape. ive assisted with making blisters this way. many many years ago. the kind you put on old airplanes
 
youre just cutting the outline twice. clamp the anealed sheet between them, then hammer through one opening. , you will have to aneal a couple of times but you can control the shape very well. its an old school method. you basically hammer freehand, with only the outline being controlled. do a large bubble, then cut away one side and weld in the seatpan, or stretch to a straight line
 
I was hoping to hit out the rear bump with a rounded hammer once welded to get a reasonable shape, I will see if it works, if not I will bin it.

Swingarm brace is going to be redone with pre formed bends, much safer and stronger.

Not doing things the hard way to be noble, just making do with the tools and skills I have. Happy to trash it of it doesn't work or is unsafe.
 
Back
Top Bottom