
We noticed you are blocking ads. DO THE TON only works with community supporters. Most are active members of the site with small businesses. Please consider disabling your ad blocking tool and checking out the businesses that help keep our site up and free.
You are using an out of date browser. It may not display this or other websites correctly.
You should upgrade or use an alternative browser.
You should upgrade or use an alternative browser.
Carter's Cafe 360 (Vivian) (First Build)
- Thread starter bananaclip
- Start date
bananaclip
Been Around the Block
Re: Mr Carter's Cafe 360
Thank you Sir!
Thank you Sir!
bananaclip
Been Around the Block
Re: Mr Carter's Cafe 360
Oh yes! She is starting to look like a bike!

Loving those DCC billet riser bushings!


Oh yes! She is starting to look like a bike!
Loving those DCC billet riser bushings!
bananaclip
Been Around the Block
Re: Mr Carter's Cafe 360
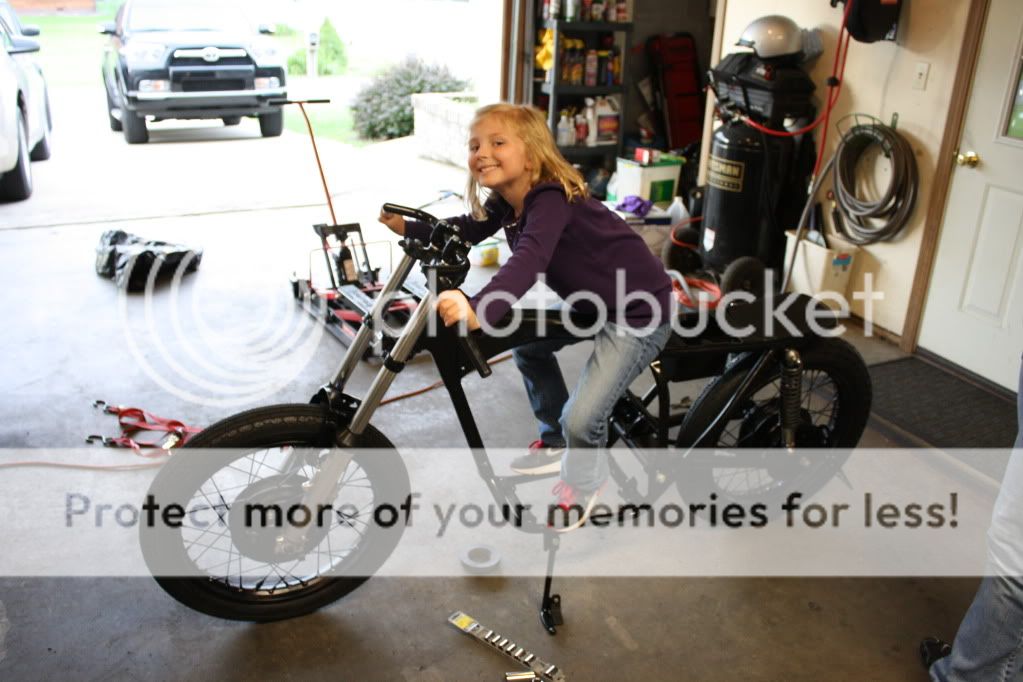
She is standing on her own. Installed new front and rear wheel bearings and installed my relocated kick stand. I was a little concerned about the angle of the stand since I moved it but it turned out great


My 5 year old showing her approval.
She is standing on her own. Installed new front and rear wheel bearings and installed my relocated kick stand. I was a little concerned about the angle of the stand since I moved it but it turned out great
My 5 year old showing her approval.
bananaclip
Been Around the Block
Re: Carter's Cafe 360 (First Build)
Guy's, I spent the night in the garage and got the engine in, put my carbs together, and rough cut my dash. I do have an issue. Somehow I misplaced the lower rear engine mount bolt,spacer,and nuts. I looked everwhere in the garage and nothing. This is the bolt that holds on the pegs as well. I found the bolt on ebay but it is in cali. I placed the order and hopefully it gets here soon. I will toss up some pics tonight.
Guy's, I spent the night in the garage and got the engine in, put my carbs together, and rough cut my dash. I do have an issue. Somehow I misplaced the lower rear engine mount bolt,spacer,and nuts. I looked everwhere in the garage and nothing. This is the bolt that holds on the pegs as well. I found the bolt on ebay but it is in cali. I placed the order and hopefully it gets here soon. I will toss up some pics tonight.
bananaclip
Been Around the Block
Re: Carter's Cafe 360 (First Build)
Oh yes.......The seed has been planted.

Oh yes.......The seed has been planted.
MotorbikeBruno
Over 1,000 Posts
Re: Carter's Cafe 360 (First Build)
Oh she's gettin all purdy now! Nice job so far.
Oh she's gettin all purdy now! Nice job so far.
Re: Carter's Cafe 360 (First Build)
Looking good. You may want to fix your clubmans though. The proper angle is to turn them forward about another 90°. The curved sections coming off of the risers should be parallel to the forks.
Clubman bars originated as a way to get around a "no clipon" rule in racing and so the angle of the control bars should mimic clipons. That is, the straight sections of the bars should look like they would join up directly to the forks if it weren't for the curve bringing it back up to the riser.
Not sure I'm describing this very well... Maybe this pic would help?
bananaclip
Been Around the Block
Re: Carter's Cafe 360 (First Build)
Bruno, thanks brother! Sonreir, I will defiantly adjust the clubmans. I am a super rookie to building and motor-scoots in general so tips from you guy's is greatly appreciated! Sonreir I cannot wait to get my gauge layovers and led's installed. I just received my tappet valve tools, feeler gauges, carb sync gauges, and ngk spark plug boots from z1. Tonight I am going to install my new points and condenser and start wiring. I also need to find a mounting spot for my hondaman ignition. Keep the comments and suggestions coming.......I am at the point where tips will be needed.
Bruno, thanks brother! Sonreir, I will defiantly adjust the clubmans. I am a super rookie to building and motor-scoots in general so tips from you guy's is greatly appreciated! Sonreir I cannot wait to get my gauge layovers and led's installed. I just received my tappet valve tools, feeler gauges, carb sync gauges, and ngk spark plug boots from z1. Tonight I am going to install my new points and condenser and start wiring. I also need to find a mounting spot for my hondaman ignition. Keep the comments and suggestions coming.......I am at the point where tips will be needed.
Re: Carter's Cafe 360 (First Build)
The Hondaman ignition was a tricky one to mount. It's just a metal rectangle with some wires coming out of it. First and foremost, the screws on the side are to hold the internal circuitry in place. DO NOT remove them (like I did). To mount it, I suggest something like zipties. Even better would be a proper bracket with some bungees; kind of like the stock battery box but much smaller.
The Hondaman ignition was a tricky one to mount. It's just a metal rectangle with some wires coming out of it. First and foremost, the screws on the side are to hold the internal circuitry in place. DO NOT remove them (like I did). To mount it, I suggest something like zipties. Even better would be a proper bracket with some bungees; kind of like the stock battery box but much smaller.
bananaclip
Been Around the Block
Re: Carter's Cafe 360 (First Build)
Sonreir, thanks for the tip. I am guessing screw removal has been an issue. The hondaman now comes labeled to not remove the screws") . Ok updates........I installed my new points and condenser, Polished my coil mount, installed some new ngk boots, soldiered my new rectifier, and made a pretty trick alloy tray for all my electronics.
. Ok updates........I installed my new points and condenser, Polished my coil mount, installed some new ngk boots, soldiered my new rectifier, and made a pretty trick alloy tray for all my electronics.
rectifier

Points/condensor

tray

mock up

cutting foam to line the edge of tray for cover and eliminate vibration

My winter project (78 T140V Cafe)

Sonreir, thanks for the tip. I am guessing screw removal has been an issue. The hondaman now comes labeled to not remove the screws
. Ok updates........I installed my new points and condenser, Polished my coil mount, installed some new ngk boots, soldiered my new rectifier, and made a pretty trick alloy tray for all my electronics.rectifier
Points/condensor
tray
mock up
cutting foam to line the edge of tray for cover and eliminate vibration
My winter project (78 T140V Cafe)
bananaclip
Been Around the Block
Re: Carter's Cafe 360 (First Build)
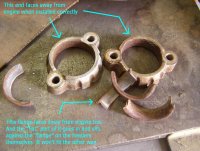
Question? I wrapped my headers last night and am a bit confused on the mount procedure. I have a full gasket set that came with the copper crush sleaves and that part is self explanitory. I dont understand the shim placement with the header collar. Does anyone have a pic for this old country boy?
Question? I wrapped my headers last night and am a bit confused on the mount procedure. I have a full gasket set that came with the copper crush sleaves and that part is self explanitory. I dont understand the shim placement with the header collar. Does anyone have a pic for this old country boy?
Re: Carter's Cafe 360 (First Build)
I f its like any other honda, the header has a flange the sits aginst the head. You should have 2 half (shim things) they have a plain end and an end with a flange. 1st Put header collar on the pipe, 2nd put the pipe in place, 3rd put the to half pieces on the pipe aginst the head with the collar piece facing away from the motor, last slide the collar up and bolt it down. Does that kinda explain it?
I f its like any other honda, the header has a flange the sits aginst the head. You should have 2 half (shim things) they have a plain end and an end with a flange. 1st Put header collar on the pipe, 2nd put the pipe in place, 3rd put the to half pieces on the pipe aginst the head with the collar piece facing away from the motor, last slide the collar up and bolt it down. Does that kinda explain it?
MotorbikeBruno
Over 1,000 Posts
bananaclip
Been Around the Block
Re: Carter's Cafe 360 (First Build)
Guy's she is moving along. I have had a few set backs but am still making some progress.
Started on my seat pan


One of my buddies volunteered to paint my tank. I went with BMW Space Grey. After he cleared it the paint seperated. I decided to scuff the paint and try my hand at painting. I noticed a small dent in the top so i applied some red bondo spot putty. The next morning I began sanding the putty smooth and the paint started coming off like hot bubble gum? I am guessing the spot filler reacted with the paint? Any advise? Tonight im going to sand blast the tank to get rid of all the paint and clear. SUCKS!
Guy's she is moving along. I have had a few set backs but am still making some progress.
Started on my seat pan
One of my buddies volunteered to paint my tank. I went with BMW Space Grey. After he cleared it the paint seperated. I decided to scuff the paint and try my hand at painting. I noticed a small dent in the top so i applied some red bondo spot putty. The next morning I began sanding the putty smooth and the paint started coming off like hot bubble gum? I am guessing the spot filler reacted with the paint? Any advise? Tonight im going to sand blast the tank to get rid of all the paint and clear. SUCKS!
JustinLonghorn
No Purple Hearts, No Blue Ribbons
Re: Carter's Cafe 360 (First Build)
Yep, I can dig it.
Yep, I can dig it.


