CB175 Cafe Seat

Fr_Gus

New Member
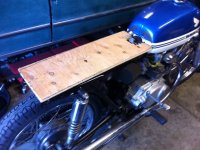
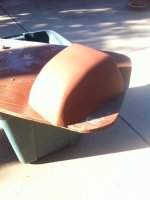
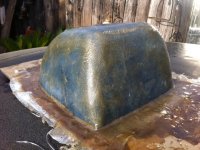
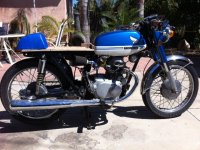
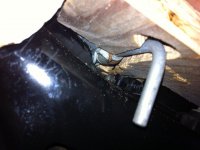
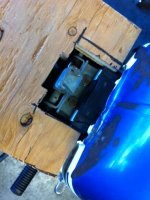
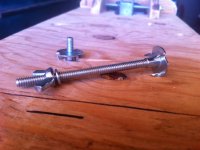
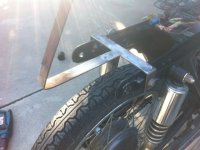
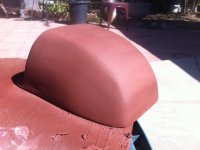
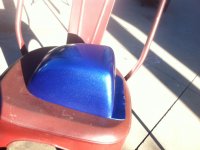
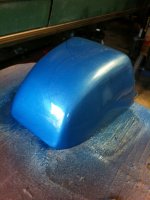
Hey guys, this is my first bike and first attempt at creating a cafe seat so please go easy on me. I'm not skilled like many people on here so I decided to use a wood base since it would be easier than steel, aluminum, or fiberglass. Cutting and shaping wood seems easier to me and later on once its done maybe I will improve on the seat with a steel version. I want this seat to still use the factory latch, since that's a simple way to secure and release the seat. After watching a lot of fiberglass videos I decided to make the rear hump out of fiberglass. Just got to bondo one more thin layer to get it smooth.
 

Attachments

  • seat.JPG
    seat.JPG
    141.4 KB · Views: 768
  • Seat hump.JPG
    Seat hump.JPG
    64.3 KB · Views: 759
  • fiberglass 2.JPG
    fiberglass 2.JPG
    150.1 KB · Views: 767
  • seat 1.jpeg
    seat 1.jpeg
    169.2 KB · Views: 758
  • seat 3.JPG
    seat 3.JPG
    41.4 KB · Views: 772
  • seat 2.JPG
    seat 2.JPG
    63.3 KB · Views: 753
Thanks Sherm! Added some bolts and wing nuts so that the seat can still be easily removed. The rear section of the seat is almost smooth. I also made a bracket to make the seat even more secure and also to bolt up the brake light and license plate.
 

Attachments

  • seat HDW.JPG
    seat HDW.JPG
    109.4 KB · Views: 716
  • LC bracket.JPG
    LC bracket.JPG
    117.4 KB · Views: 700
  • seat primered.JPG
    seat primered.JPG
    106.8 KB · Views: 708
nice work !!
you need more clearance to the tire especially when you get rid of the junk stock shocks and get some good ones
pull off one shock and ratchet strap down the shock side till it bottoms out to check clearance you need an inch from there, minimum, as most all good shocks have more travel than the stockers
 
Thanks xb33. The seat is almost done. The paint isn't a perfect match but it will do for now. I found a guy a few houses down from my parents house who does upholstery work. He is now retired but does small jobs to stay busy. He will be starting the seat later today or tomorrow.
 

Attachments

  • S F.JPG
    S F.JPG
    112.4 KB · Views: 636
  • painted.JPG
    painted.JPG
    107 KB · Views: 666
  • LP brkt.JPG
    LP brkt.JPG
    72 KB · Views: 651
Im going to stop by at lunch to check your seat out! Here is a preview of what the seat will look like. Seat install will be done later today so I will post pics tomorrow.
 

Attachments

  • seat  p.JPG
    seat p.JPG
    134.2 KB · Views: 627
  • seat l.JPG
    seat l.JPG
    58.6 KB · Views: 632
Seat has been done and Im really happy with it. My first attempt at color matching the tank failed but I have now found a color that's pretty close. I also added a cover to clean up the empty space behind the filters. I remembered my buddy (Marine) left his bio hazard mask at my parents house like 8 years ago, and the mask had a cool bag. The bag is now serving a new purpose. Im surprised the bag held up so well, it was in my dads 64 Barracuda that has been sitting in his back yard for a LONG time now.
 

Attachments

  • raw plate 2.jpeg
    raw plate 2.jpeg
    146.6 KB · Views: 583
  • plate.jpeg
    plate.jpeg
    134.2 KB · Views: 574
  • bag.JPG
    bag.JPG
    153.1 KB · Views: 578
  • new color.jpeg
    new color.jpeg
    96.6 KB · Views: 578
nice work mate! looks good. what's the paint code you used? i'm building a cb360 and thinking about going with a very similar color. cheers!
 
Thanks, sorry it took me so long to reply. I just used a can from local parts store. This is the color.
 
Back
Top Bottom