
We noticed you are blocking ads. DO THE TON only works with community supporters. Most are active members of the site with small businesses. Please consider disabling your ad blocking tool and checking out the businesses that help keep our site up and free.
You are using an out of date browser. It may not display this or other websites correctly.
You should upgrade or use an alternative browser.
You should upgrade or use an alternative browser.
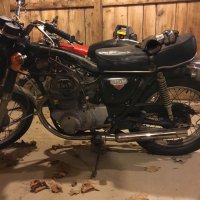
CB350 Cafe/Brat project
- Thread starter laroyster1984
- Start date
laroyster1984
New Member
laroyster1984
New Member
laroyster1984
New Member
This is the frame back from powder coat and starting of the tank. I didn't take any pictures of welding the back seat loop in, of detabbing the frame. Im very happy with how the frame turned out. The tank still needs a little sanding and prep before painting.
Attachments
laroyster1984
New Member
jwdmotorsports
Been Around the Block
Like how you cleaned up the back of the frame. I'm also working on a cb350 and hate the look of the back of the frame. Still trying to decide what I'm going to do with it to clean it up. Would love to see more pictures of the back of the frame if you have them to post.
Are the rear shocks shorter than stock length?
Are the rear shocks shorter than stock length?
laroyster1984
New Member
jwdmotorsports said:Like how you cleaned up the back of the frame. I'm also working on a cb350 and hate the look of the back of the frame. Still trying to decide what I'm going to do with it to clean it up. Would love to see more pictures of the back of the frame if you have them to post.
Are the rear shocks shorter than stock length?
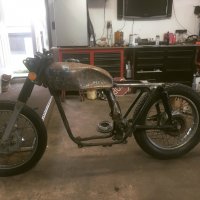
I can look for some more pics but I am not sure if I have them. I got the back hoop from dimecitycycles.com and then did some mods to weld it in. I did lower the back. The stock shocks are 13 inch, I am using 11.5 inch. Heres to hoping I have enough clearance!!
laroyster1984
New Member
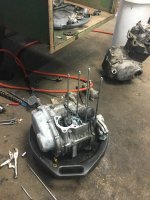
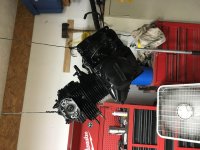
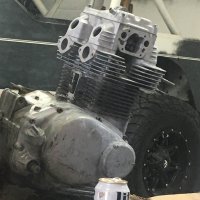
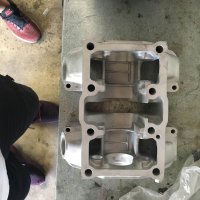
So I got the engine back from the machine shop and put back together. Im happy with the results.
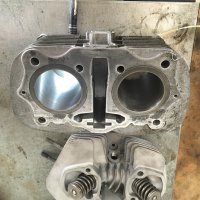
First thing was a valve job. I think they did a good job.
Next I had them hone the cylinders. They actually were in good shape when I tore the engine apart, but since I had it at the shop I decided to get it done.
I had the rest of the parts hot tanked and cleaned.
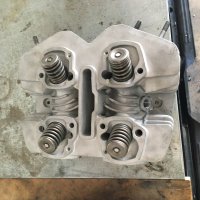
I added new piston rings and also the chain tensioner guide because it was chewed up pretty bad.
Lastly was reassemble and paint.
I am really happy with how it turned out. It looks great and is basically a band new engine. Everything inside has been cleaned, honed, or replaced. Im hoping to have the bike done in 4 week! Wish me luck!!!
First thing was a valve job. I think they did a good job.
Next I had them hone the cylinders. They actually were in good shape when I tore the engine apart, but since I had it at the shop I decided to get it done.
I had the rest of the parts hot tanked and cleaned.
I added new piston rings and also the chain tensioner guide because it was chewed up pretty bad.
Lastly was reassemble and paint.
I am really happy with how it turned out. It looks great and is basically a band new engine. Everything inside has been cleaned, honed, or replaced. Im hoping to have the bike done in 4 week! Wish me luck!!!
Attachments
-
 IMG_2282.JPG888.5 KB · Views: 266
 -
 IMG_2237.JPG547.1 KB · Views: 269
 -
 IMG_2238.JPG825.3 KB · Views: 249
 -
 IMG_2233.JPG985.2 KB · Views: 259
 -
 IMG_2234.JPG597.7 KB · Views: 257
 -
 IMG_2231.JPG802.4 KB · Views: 265
 -
 IMG_2229.JPG936.5 KB · Views: 274
 -
 IMG_2228.JPG741.4 KB · Views: 254
 -
 IMG_2227.JPG584.5 KB · Views: 266
laroyster1984
New Member
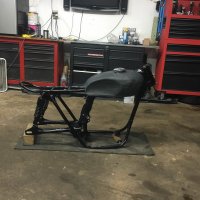
The front end of my bike is being built by Anger St. Kustoms. They do a lot of custom work and I had some questions about a front fork swap. After talking to them I decided to just have them build the front end. I cannot express how awesome they have been. They have fulfilled all my request and put up with me asking 10000 questions. IF you have any custom work you want done, I strongly suggest them.
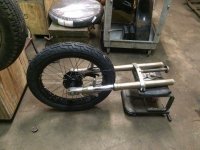
This is the front end. The forks are off a ZX9 (Ninja) and the front wheel is a XS650. I wanted to do the swap for an upgraded look and to be able to run disc brakes. There is still some work to be done as you can see but it is coming along.
Again I cannot thank Anger St enough, they have been great with this front end build.
Attachments
focusinprogress
City Limit Moto:Parts-Service-Apparel (716)8038606
Rusnak_322 said:
Buffalo, NY
")
focusinprogress
City Limit Moto:Parts-Service-Apparel (716)8038606
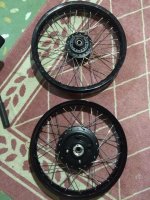
Here's a couple more pics since we all know DTT loves pics!
trueing the wheels

steering stem mods/swap


After making axle adapters/spacers and mounting front tire


as you can see doing the swap this way allows you to retain the speedo and the classic spoked wheel look. the xs650 hub was chosen for its 36 spokes to match the cb350 rear 36 spoke wheel, while being a readily available disc brake hub that also fits yzf750 320mm rotor bolt pattern to mate up with the 6-piston Tokiko calipers the zx9 runs. We are only running a single caliper....because 12 pistons of braking force on dual 320mm rotors would be insanely overkill.
The humble beginnings of a rotor spacer/adapter puck getting rough-cut on my 1973 atlas 12x54 lathe.

trueing the wheels
steering stem mods/swap
After making axle adapters/spacers and mounting front tire
as you can see doing the swap this way allows you to retain the speedo and the classic spoked wheel look. the xs650 hub was chosen for its 36 spokes to match the cb350 rear 36 spoke wheel, while being a readily available disc brake hub that also fits yzf750 320mm rotor bolt pattern to mate up with the 6-piston Tokiko calipers the zx9 runs. We are only running a single caliper....because 12 pistons of braking force on dual 320mm rotors would be insanely overkill.
The humble beginnings of a rotor spacer/adapter puck getting rough-cut on my 1973 atlas 12x54 lathe.
laroyster1984
New Member
Thanks for the heads up. The machine shop was actually the one who put them in. Looks like I will be making a call later today....
crazypj
Split personality, I fake being smart
Don't let them tell you it doesn't matter, it does.
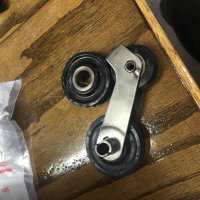
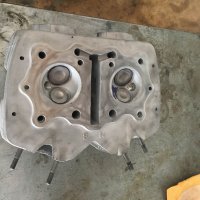
Just in case you don't know what your looking at, the closed coils are at the top of the valve instead of at the base as with the other 3.
It has the effect of adding weight and inertia which severely restricts rpm limits. Running like that will probably cause valve to contact piston or intake valve at high rpm (but still well before redline)
I doubt it was deliberate, but, when you broke it they would just say you over revved it as that is exactly how things would look


