Follow along with the video below to see how to install our site as a web app on your home screen.
Note: This feature currently requires accessing the site using the built-in Safari browser.
We noticed you are blocking ads. DO THE TON only works with community supporters. Most are active members of the site with small businesses. Please consider disabling your ad blocking tool and checking out the businesses that help keep our site up and free.
If you work out loading at 10,000rpm, the load reversal at TDC is measured in multiple tons.
The acceleration from TDC is real high, the only motor I know any numbers for is HD 'Sporty', piston goes from zero to 80mph in less than half inch from TDC @ 5,000rpm
Pretty sure if you weigh piston and top third of con-rod you can work out exact numbers (any engineer has to work stuff like that regular - at least while getting degree)
Rods tend to split or bend under combustion forces
It would seem to me that the major area of concern would be the change in direction of piston at the end of the exhaust stroke. The tensile strengths of steel is many times less than its resistance to compressive forces.
To me, it would seem that the major concern is overreving and not too much power.
end of exhaust stroke is overlap, no pressure in cylinder to cushion piston so rod has to do all the work preventing it 'escaping'
It's why I prefer lightest pistons that will do the job, Suzuki ones in 378 motor are quite a bit lighter than stock Honda, even though 2mm larger diameter (and why I'm not a fan of Wiseco - they are heavy)
I can now use more RPM without over stressing rods, or, use stock rpm and have a 'too reliable' motor (guess which I use )
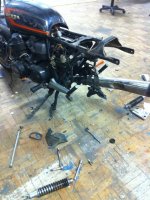
So here's where things stand now, the engine is pretty much all machined, got the gaskets in today and will be playing with it tomorrow, I really like the cycle-x primary chain tensioner, and I think the stock tensioner is why 750s are so noisy at idle, which is harmless but annoys me, so I'll be building my own. I scored a good deal on a zzr1200 front end and rear wheel with all the brakes and pretty new tires, originally my plan was to put new tires on the bike, but it actually came out cheaper this way, minus all the labor machining the parts to make the front end fit
but that fits the spirit of the build, which is to frankenstein a bike together which is high performance and as much scrounged and made to work as possible. the zzr rear wheel almost squeaked in the stock swingarm, but not quite, so I'll be building an aluminum arm for it, I also looked at the possibility of getting a cyclex offset sprocket to clear the bigger tire, but decided to machine down the hub instead, 530 chain should still clear the tire if my math is right, if not, 520 will be the ticket
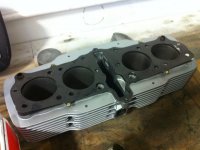
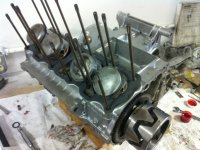
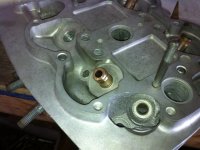
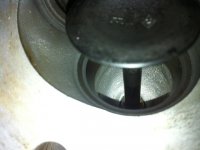
got the pistons on, and the block on, took a few tries, first realized the base gasket holes were too small, so had to pull the block and recut them, then realized I didn't have the chain wrapped through the tensioner ... looks like the pistons *almost* squeeze by with the head on, but I'm going to have to either recut the combustion chambers or the pistons. I think I'm going to recut the pistons because the chambers have very little material between the head and valve seat inserts, I made a piston lathe fixture a while back, so it shouldn't be too much of an operation
Had to machine the pistons, never be afraid to cut stuff up
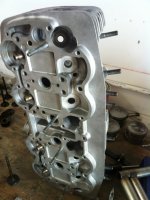
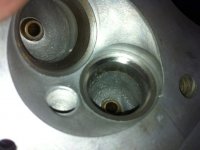
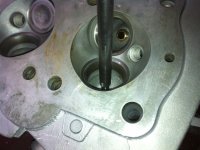
Also found the head I planned on using had shot to hell (looks like they were reamed way over for some reason) so I drove the guides out and will making a set out of bronze, looks like I'll have to recut the seats now too
You did heat the head before driving out guides?
If not,you may need to ream holes and make new guides oversize (pretty normal, you can buy aftermarket guides in 2 or 3 over-sizes
Get some drill rod to make pilot to drive bronze guides back in plus a 'cup' to make sure they go back at correct installed height
If you've never seen the tools send me a pm and I'll do some drawings
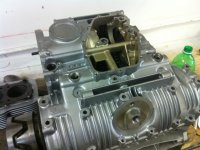
just really really cleaned around the guides, drove them out with a piece of s-7 I turned and had a friend throw in with a batch of stuff to be hardened, they came out really clean, the bores have practically a mirror finish on them. I'm debating losing the intake guides as well, seeing as how if I'm making 4, I might as well make 8...
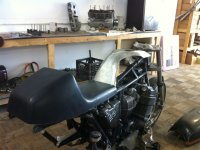
Started working on body stuff, carved the tank design in foam and started working it out in metal, I'm thinking ergonomics mostly, I think if the bike is very functional and fits the rider for racing, then it will be "pretty" in its own way
Sounds like they came out OK after everything was cleaned up, I've seen some major damage done when guides were knocked out cold.
Could be they were 'loose' end of tolerance?
If your doing exhaust guides you may as well do inlet ;D
I'll check but I think there should be 0.05mm interference between guide and head
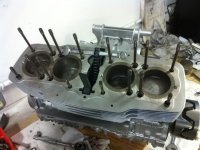
Got all the guides made and installed, went in way better this time, ordered a pilot and copy of s neway cutter off eBay, made myself a handle and started cutting in the seats, worked like a charm, did a quick lap to verify the seal and they held rubbing alcohol as long as I could leave it there without any spring... Guess that's a good seal
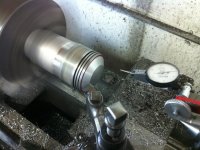
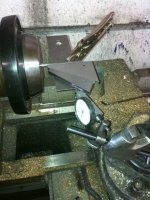
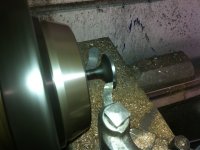
Also set up the lathe to cut the valves, always heard of grinding only but realized carbide is harder than whatever is on the valves so cutting should work fine, bit of an exercise getting the compound set to a real 45 degrees though, but when all was said and done it cut the valves but good... Gotta love making old tools really pump out nice work
That lathe was less than most people here buy project bikes for, I'd like to do this build to show what can be done with old tools and a little ingenuity
If your going to do a couple of cylinder heads it's probably worthwhile getting a ready made cutter blade then making a mandrel to hold it for different diameter valves
http://www.goodson.com/Valve-Seat_Cutter_Blades/
This site uses cookies to help personalise content, tailor your experience and to keep you logged in if you register.
By continuing to use this site, you are consenting to our use of cookies.

") )
)