Follow along with the video below to see how to install our site as a web app on your home screen.
Note: This feature currently requires accessing the site using the built-in Safari browser.
We noticed you are blocking ads. DO THE TON only works with community supporters. Most are active members of the site with small businesses. Please consider disabling your ad blocking tool and checking out the businesses that help keep our site up and free.
Hi Guys,
I've been a long time reader here on DTT and have messed around with a couple of bikes.
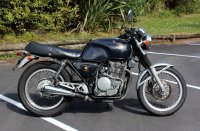
I've recently aquired a GB400 thats been in the familly since new however being a industrial/product designer I don't like to leave anything standard if I can make it better or faster.
I got the bike with a dual seat but seeing that it is loosely based on old Isle of Man TT racers, I think it looks much better with a single seat.
I have worked with fiberglass before on a number of projects before and am going to mould a custom seat for the bike.
The challenge is that I don't want to modify the frame in any as I would like to be able to return the bike to stock if required in the future.
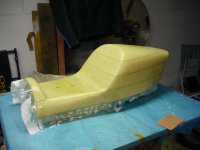
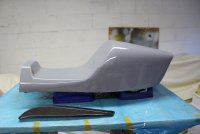
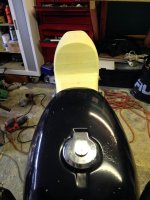
Here is a few shots of what I have so far, feel free to throw in your thoughts as i'd like to get some feedback before I commit to glassing the form. I will be making a 2 part mould so there may be the option of making more if people like the shape.
let me know what you think of the size, shape etc. sharp eyes may pick up that the rear of the right side is rounded off more than the left. i decided to keep the vertical edge at the rear rather than radius it off so ill build it back up on the right side once ive glassed it and begin fairing to produce the perfect blank to take the mould off.
The whole bike is destined for panel and paint and I already have a set of clipons and bar end mirrors on the way to replace the High risers and mismatched current mirrors.
The overall shape looks great! But in my opinion, you should give yourself a little more seat area. Leave it the same length, but make the spot where you sit a bit longer, and I think you're in business my friend!
For some reason the replies hadn't come through to my email, so I've been powering on with the design. Had I seen what had been suggested I think I would have made the seating area a bit bigger :-\ but I'm alot further along now so ill just have to see how it goes.
I didn't really mention in the first post that I want to create something that's a bit different from the usual cafe tail, hopefully a cross between a dedicated race tail and a cafe tail, something that combines old school and new school style. and something that will really aerodynamically match with the rider hence the larger size. not that I'm huge or anything...
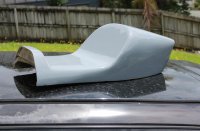
Since the first photos I have dropped the overall height by 5mm or so to match the curve of the tank better.
I've been taking quite a few photo's along the way, Here's a bit of an update of where I've got to soo far.
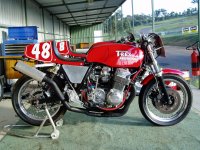
Firstly some of my inspiration, this is kind of the style that I want to mimic but customised to suit the style and curves of my bike.
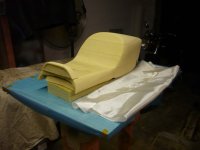
Following are some of the shots I've taken during the build.
Some build shots,
I'm struggling with getting the images to load up... I'm sticking to the size limits etc but it keeps failing, if anyone has any tips let me know
I'm getting this message all the time so have to try multiple times to get an image to load up:
Your attachment couldn't be saved. This might happen because it took too long to upload or the file is bigger than the server will allow.
Please consult your server administrator for more information.
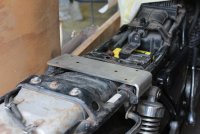
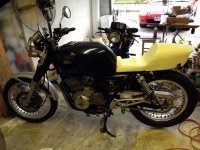
Doing the ton on the centre stand - size tesing.
Starting to agree with the suggestions regarding the longer seating area, just realised i haven't left much space for seat padding - Doh!
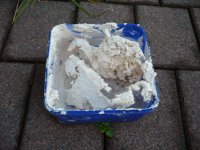
First big mistake of the build, mixed up 200ml epoxy and fairing powder to peanut butter like consistency, started fairing the blank and the pot went off wayyy to fast!
started smoking and nearly caught fire! had to fill the tub with water and put it out on the brick patio.
After this lot dryed, I started the sanding process, it doesn't sand very easily but was simple to build up areas.
Next lot of epoxy fairing I used a little less hardener and didn't mix it soo thick, it went on much smoother. I was thinking this stuff is awesome... but guess what... came down the next morning and it was still really soft... 3 days later, Still soft. I'm impatient so i just rasped it down and carried on building on top. after about a week and a half its hardened enough to resist a fingernail mark.
Using Polyester plastic putty now, much shorter hardening time and sands much easier.
so started the process of reshaping and refining the curves and edges.
I like the shape of the tail. I'll echo the seating room comments.
As for the picture uploads, you might want to downsize the dimensions to 1280 x whatever. Your image sizes(pixel) are pretty big even though the kb sizes aren't all that large.
Thanks for the image Tip CanyonCarver I'll give it a go.
@Moto Noob, I could easily fit a full size battery and all the electrical bits in the tail I reckon but I'm not going to for this bike as I really want to be able to easily switch between the single and double seat.
The Mrs likes to come out for a ride every so often and as long as she likes the bike I get to spend more time and money on it! so the idea is I will be able to switch seats with a single screw and the single seat will hinge just like the OEM.
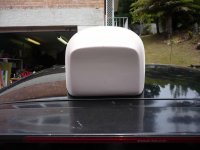
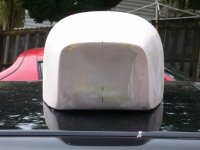
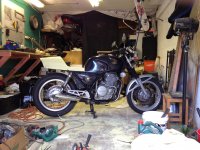
Here's some more pics of progress to catch you up to where I am now.
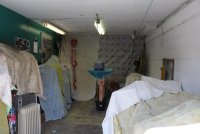
First pic is my garage in spraybooth mode.
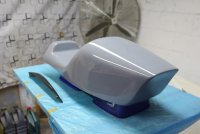
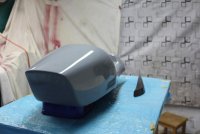
other pics are fresh clearcoat, the clearcoat will be the surface that I polish and then wax to ensure the blank will release from the mould (or at least that's the intention)
The carbon bits are custom eyelids that I made for my civic, the resin had yellowed from the UV so I took the chance to buff them back and lay some clear on them.
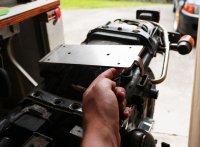
I got a mate that works for a metal fabricating company to lasercut and fold me some brackets that I designed on cad, so I can mount the seat and use the original hinge and latch, I got them made from stainless so I wouldn't have to mess with coating them but being 5mm plate they sure are solid and heavy. I asked him if he could make me 2 but he found a big enough bit of scrap and sent me 3!
I just need to weld a tube to the hinge side of the bracket to match the hinge screw.
So if anyone has a GB400/500 and likes the shape, depending how the mould goes, I may have a couple of bolt on aftermarket tails for sale shortly.
the finished unit will still be much lighter than the OEM seat.
This site uses cookies to help personalise content, tailor your experience and to keep you logged in if you register.
By continuing to use this site, you are consenting to our use of cookies.

")