
We noticed you are blocking ads. DO THE TON only works with community supporters. Most are active members of the site with small businesses. Please consider disabling your ad blocking tool and checking out the businesses that help keep our site up and free.
You are using an out of date browser. It may not display this or other websites correctly.
You should upgrade or use an alternative browser.
You should upgrade or use an alternative browser.
CL 360 'Beastie' Build
- Thread starter Distanceham
- Start date
Distanceham
New Member
Thanks Doc. I guess it would make sense, since my motor is still out- I haven't had the chance to see if anything was missing related to that.
DrJ said:Looks like a motor mount spacer.
You are correct sir, that is on the long bolt that mounts the lower rear of the engine.
#3 in the "frame" fische.
http://www.sportlandmotorsports.com/fiche_section_detail.asp?section=2450971&category=Motorcycles&make=Honda&year=1976&fveh=131082
Damn it. Another part my bike was missing when I got it.trek97 said:You are correct sir, that is on the long bolt that mounts the lower rear of the engine.
#3 in my "frame" fische.
deviant said:Damn it. Another part my bike was missing when I got it.
you guys will have better knowledge w all this once you've disassembled/reassembled it 100 times.
trek97 said:you guys will have better knowledge w all this once you've disassembled/reassembled it 100 times.
True story.
It has to be there in the first place to know it goes there when you put it back together. ;Dtrek97 said:you guys will have better knowledge w all this once you've disassembled/reassembled it 100 times.
Distanceham
New Member
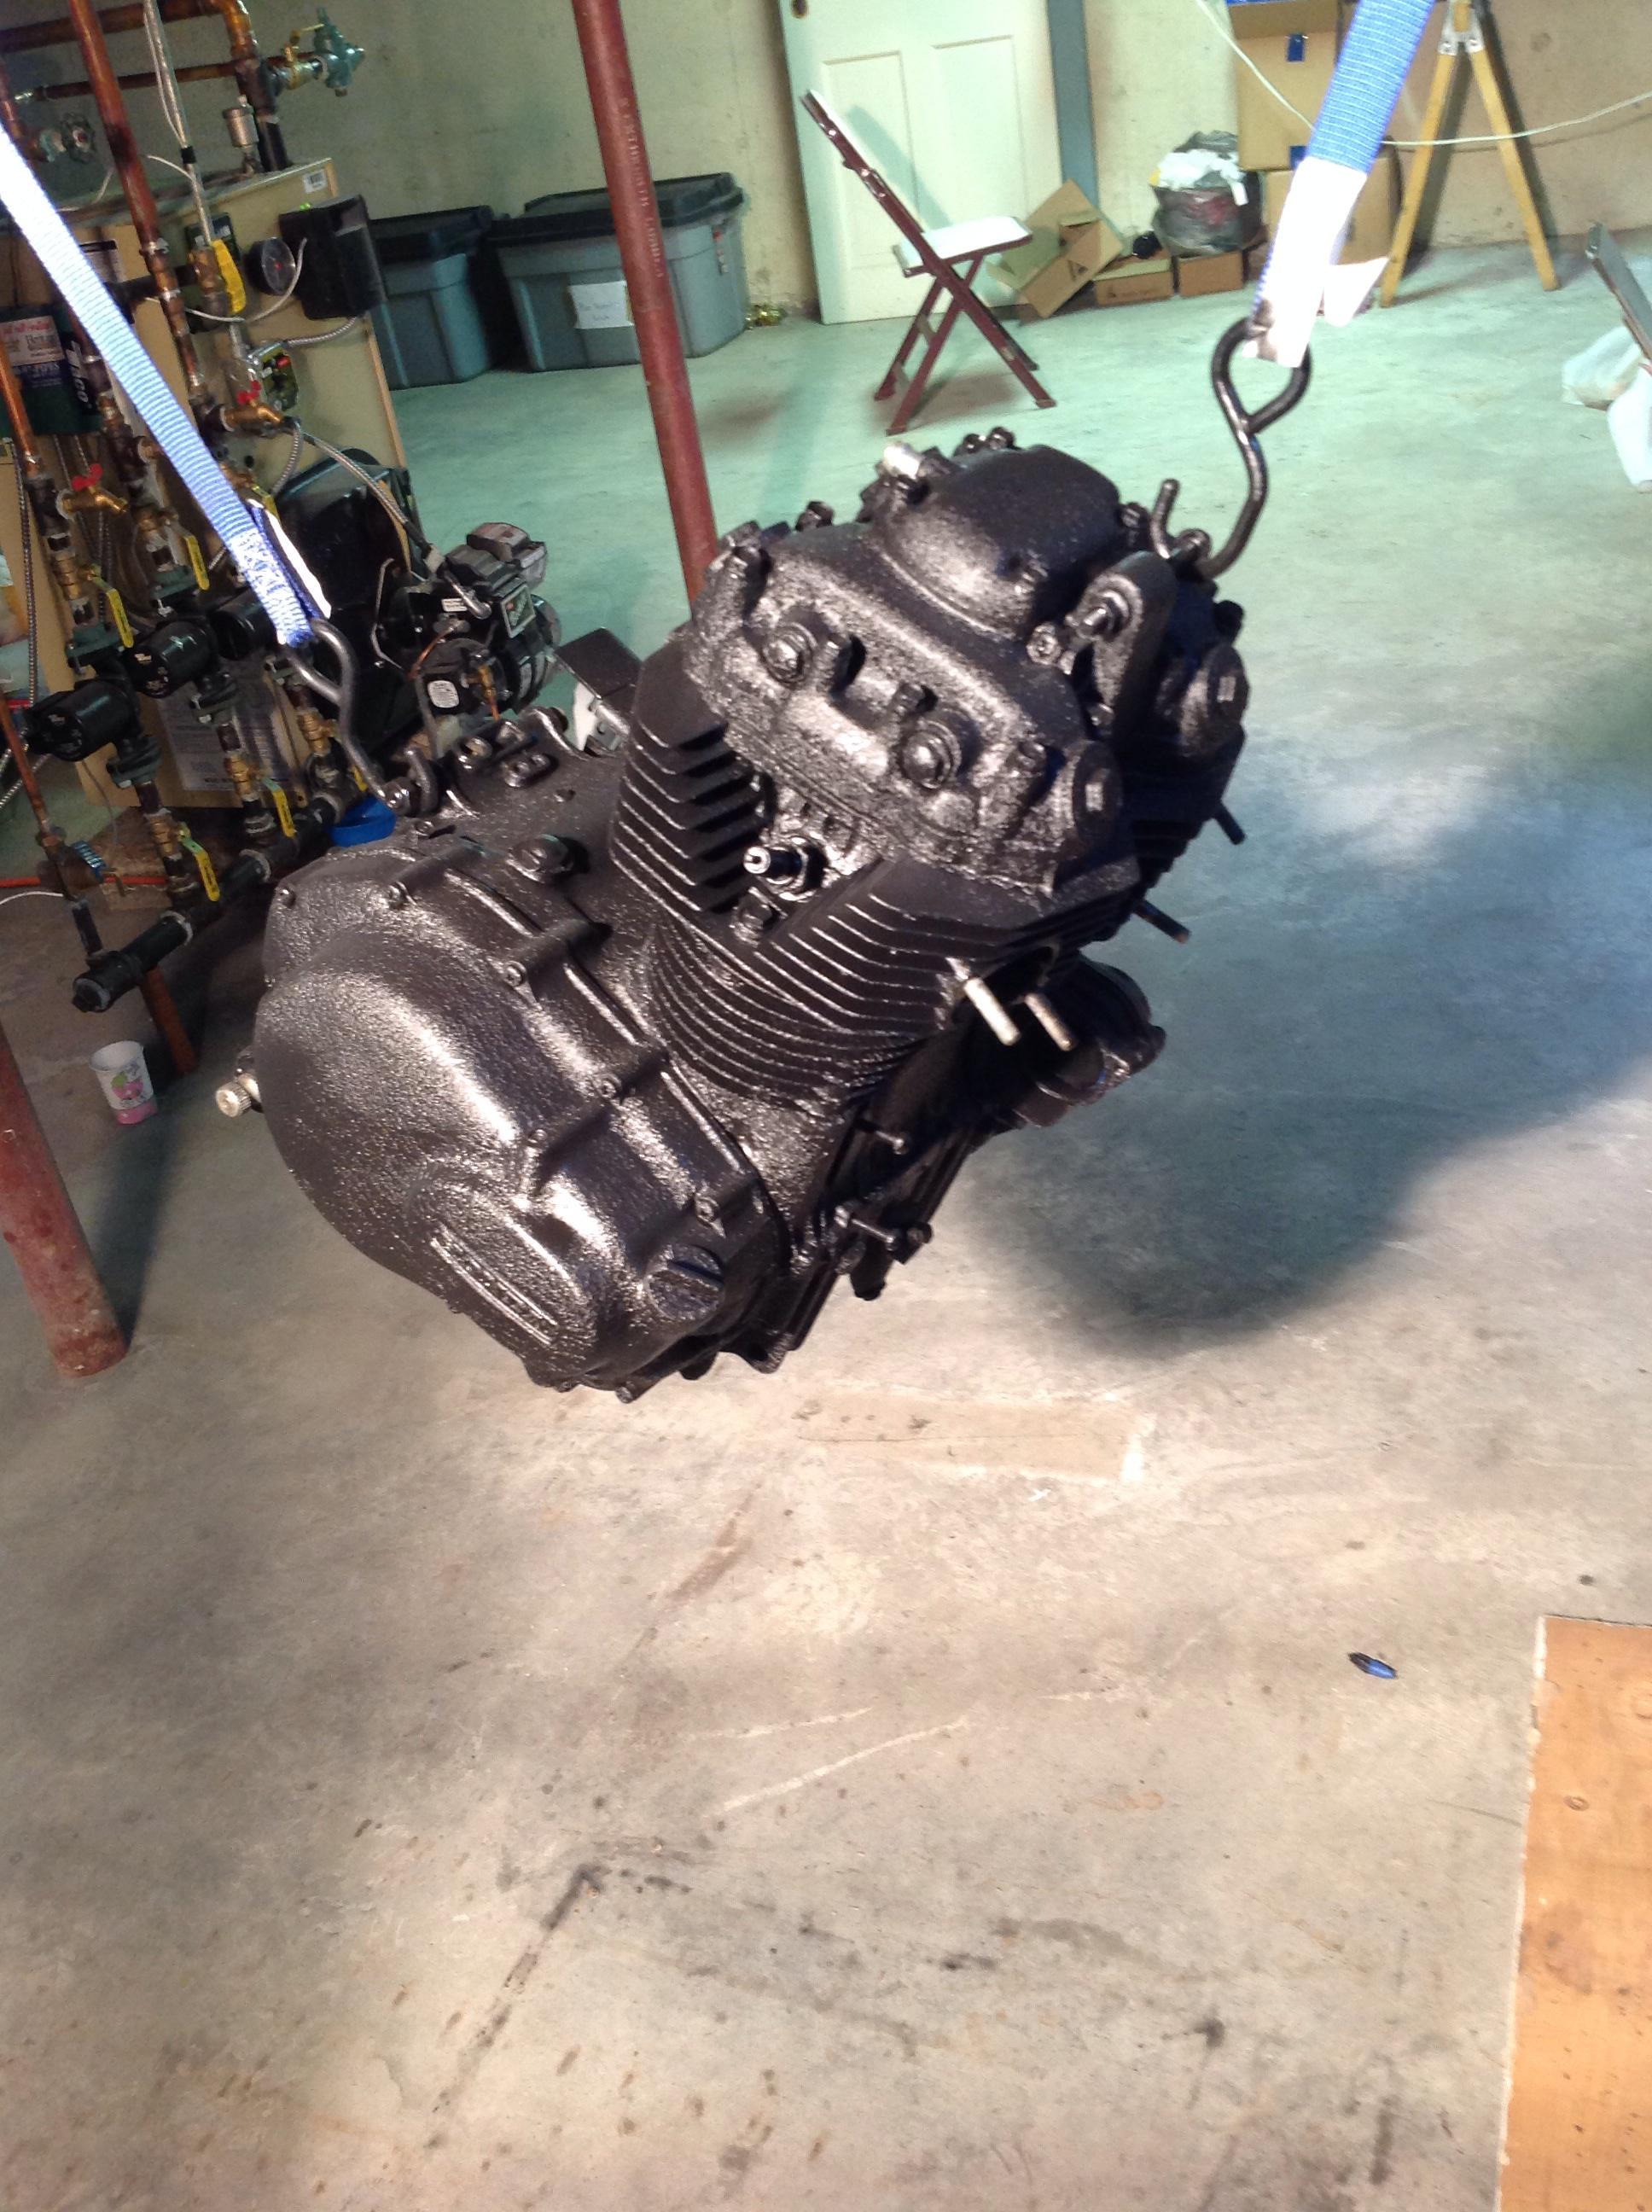
My mother in-law came to watch my daughter today so I took full advantage and got my motor painted in VHT wrinkle black. I'm pretty happy with the results, but here are a couple of spots (hard to reach/tough angles) that didn't wrinkle quite enough. I ended up using the whole can. I may just suck it up and live with it instead of buying another can to touch up.
Her she hangs.
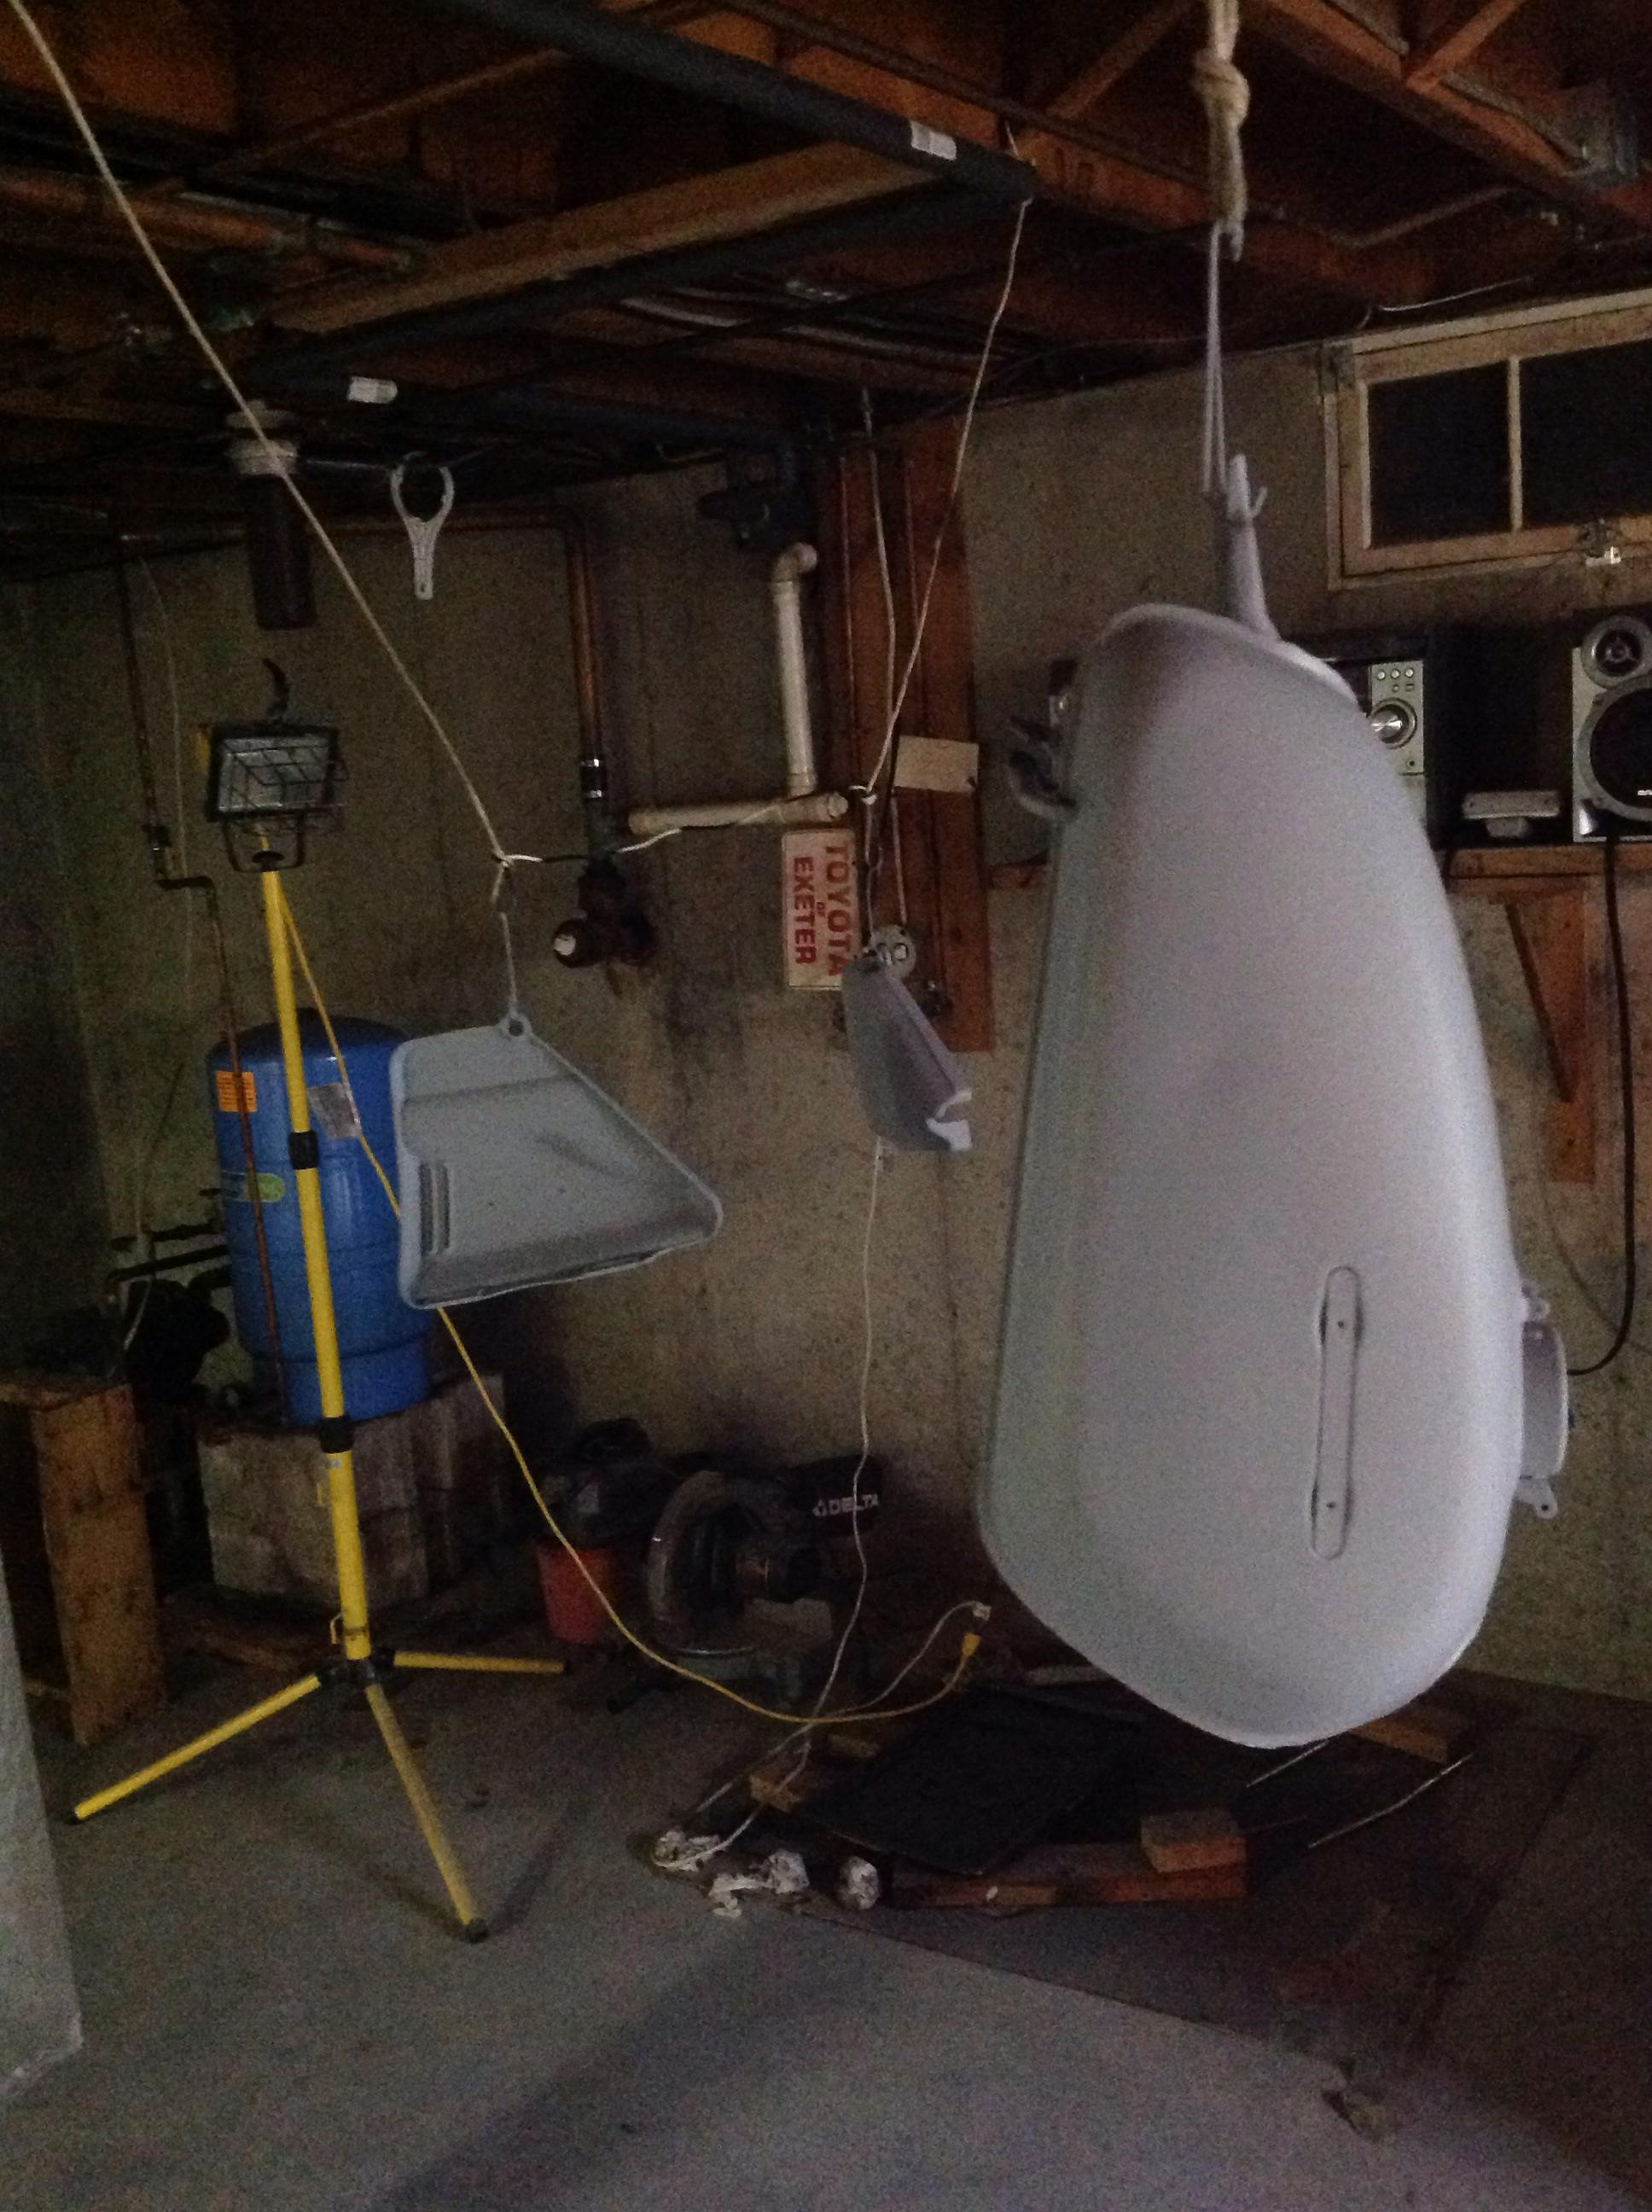
I also was able to get my tank and side covers in primer. I used 2 cans of high build primer and got a ballpark 10 coats in. I lost count in the third round. Gonna give it some time to set up over night and will be wet sanding tomorrow and hopefully laying some color. I bought 2 cans of color, but they are smaller than the cans of primer- debating on whether I need a 3rd can or not.
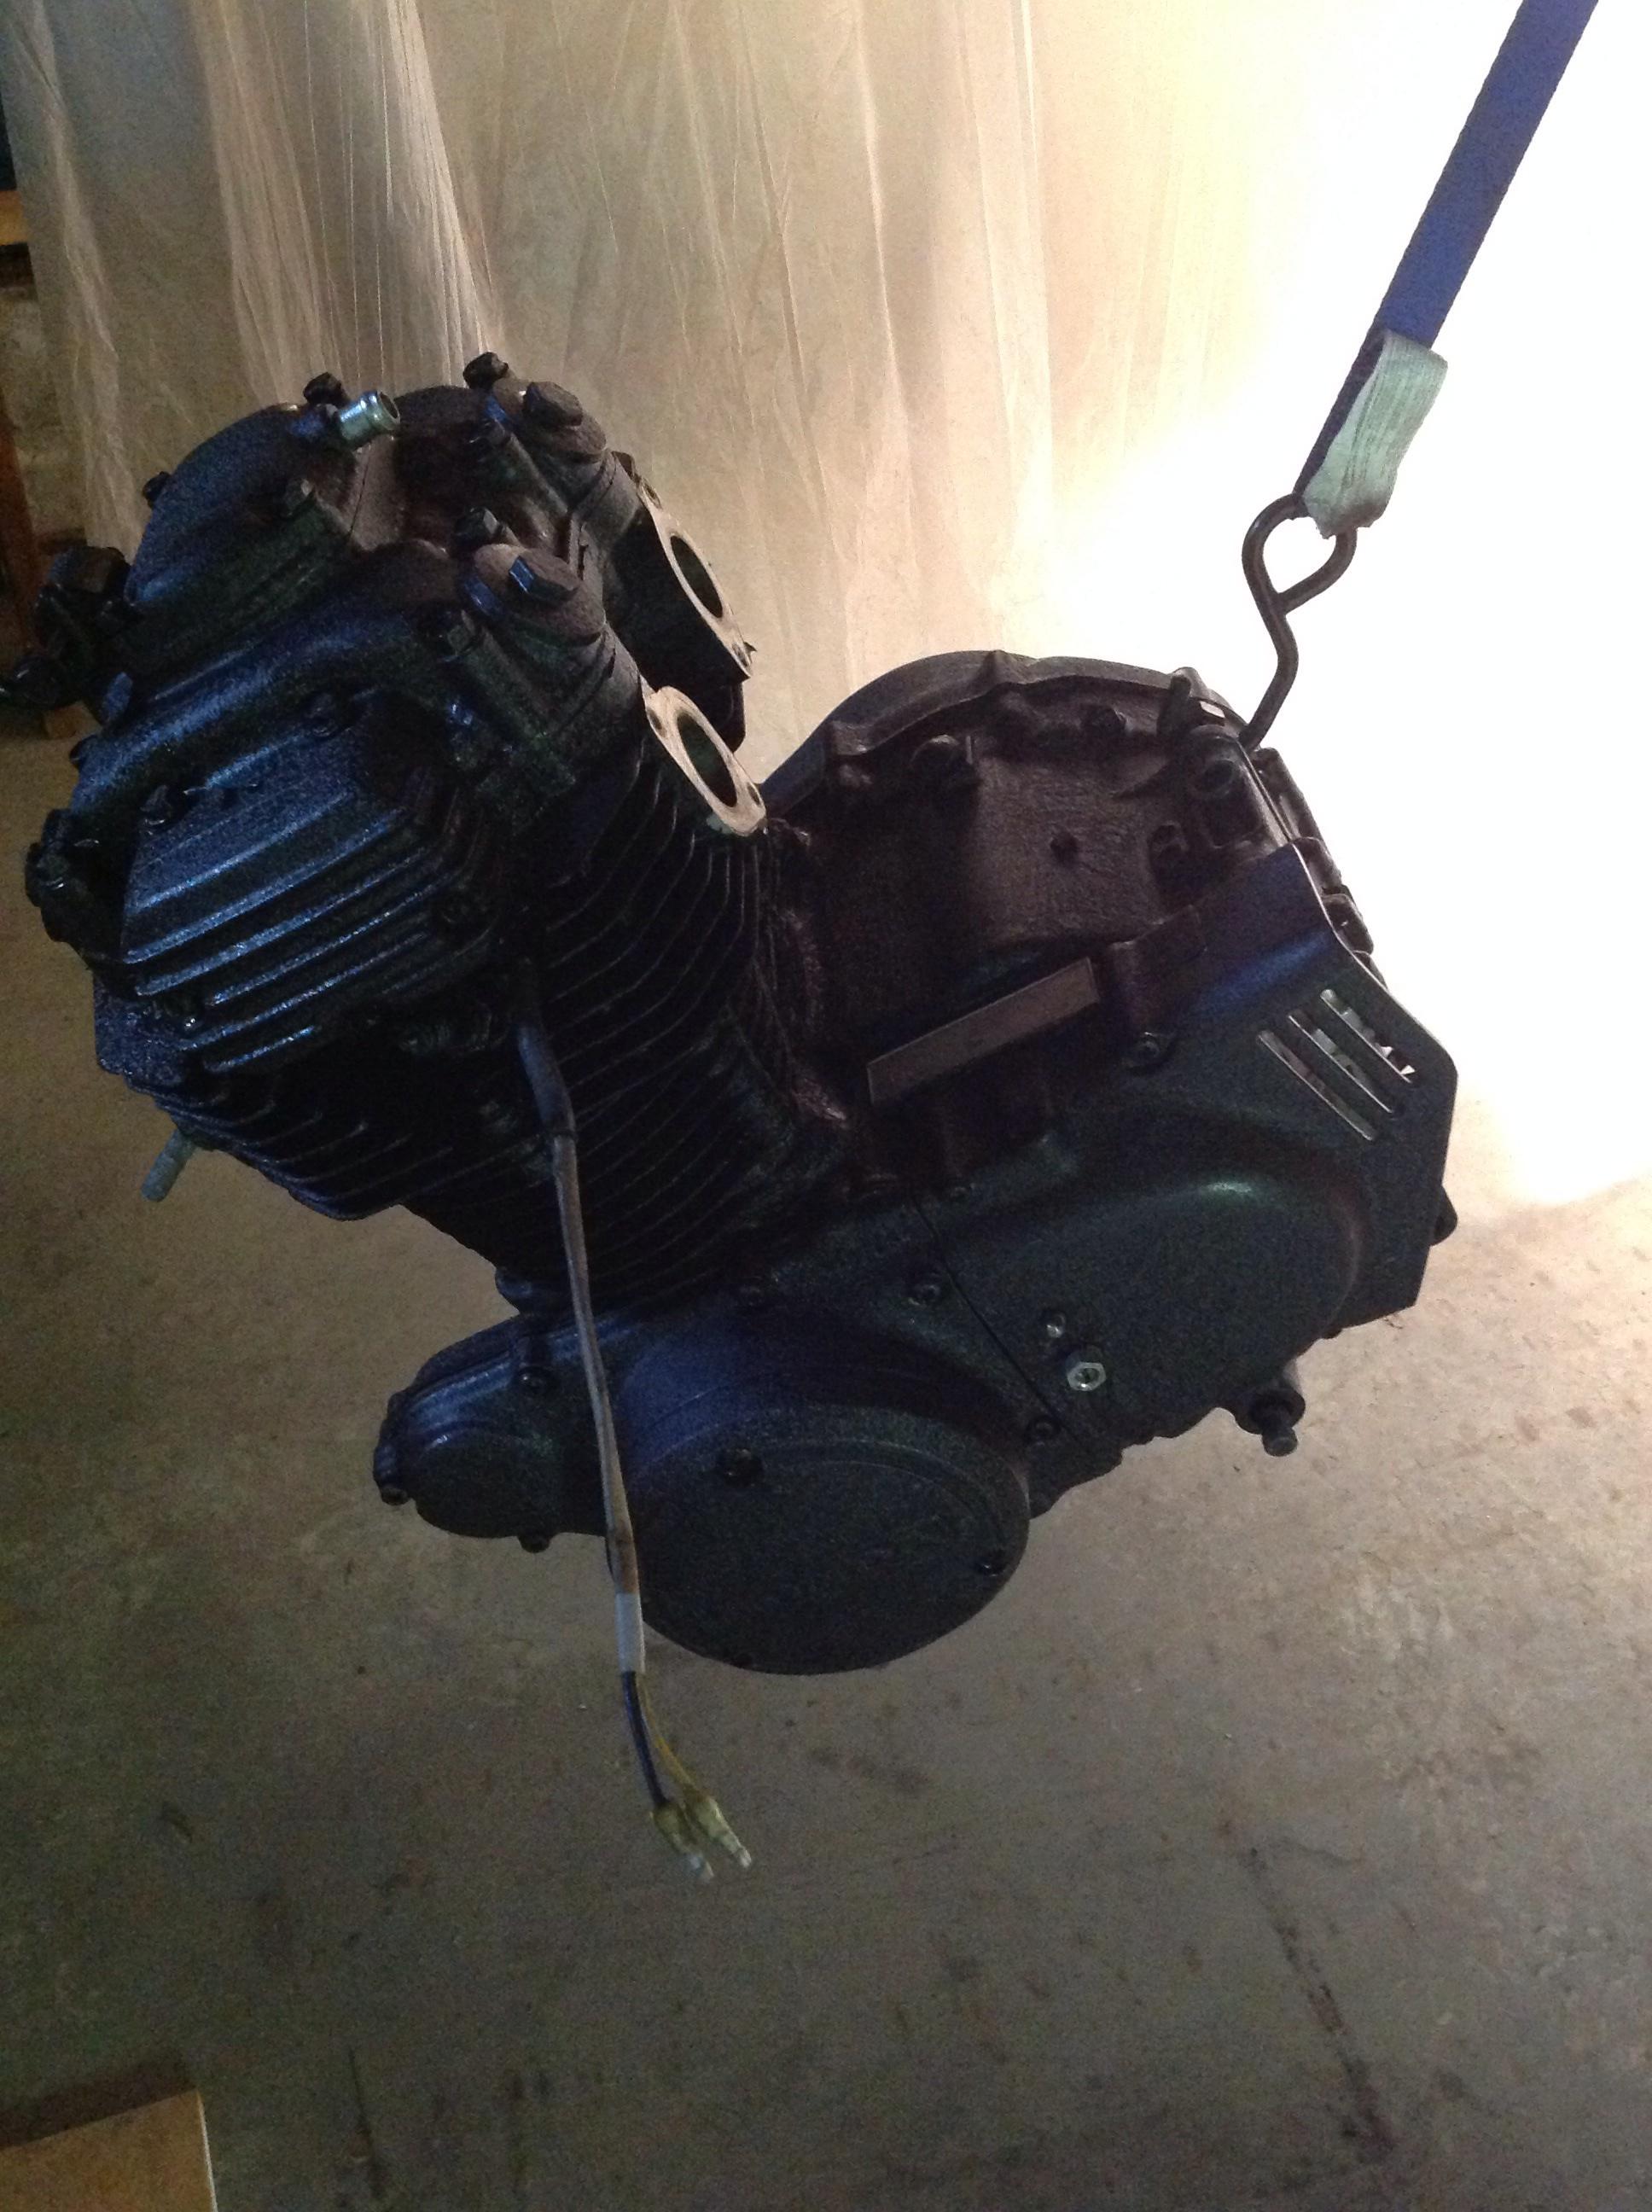
And from this angle to you can clearly see the dent I did not notice, nor will care to fix. This bike isn't going to be a show piece. It's going to get ridden hard and put away dirty.
Her she hangs.
I also was able to get my tank and side covers in primer. I used 2 cans of high build primer and got a ballpark 10 coats in. I lost count in the third round. Gonna give it some time to set up over night and will be wet sanding tomorrow and hopefully laying some color. I bought 2 cans of color, but they are smaller than the cans of primer- debating on whether I need a 3rd can or not.
And from this angle to you can clearly see the dent I did not notice, nor will care to fix. This bike isn't going to be a show piece. It's going to get ridden hard and put away dirty.
Distanceham
New Member
Distanceham
New Member
Thanks to all who for took a look at my mystery piece. With the help of folks here, it was identified as a piece that goes in the foot rest assembly.
I just laid 10 coats of paint this afternoon on my side covers and tank. Need to let it cure before sanding and laying down some accent color and clear.
Motor was painted wrinkle, and I swapped out most of the hardware for stainless Allen heads. I need to replace the screws that hold the started to the block, and if possible, the bolts that hold the starter itself together.
Once the starter is taken care of, I can put the motor back in the frame and really it's just waiting on carbs from PJ, a new harness from Sonreir, and cleaning up the exhaust and deciding what to do with it.
 ) the previous beating on them has made them pretty distinctive
 Distanceham
New Member
I wish I could take credit for the prior beating. The PO used to ride the bike on fire roads for months at a time in Wyoming or Wisconsin, I can't remember. I'm beginning to realize this things was put through it's paces and Micky Mouse'd back together out in the back country. Somewhere along the way a handful of 350 and other model parts found their way onto the bike as well.
Distanceham
New Member
Welp, got my carbs back from PJ and I couldn't be happier. Amazing what a good ultrasonic cleaning can do for them.
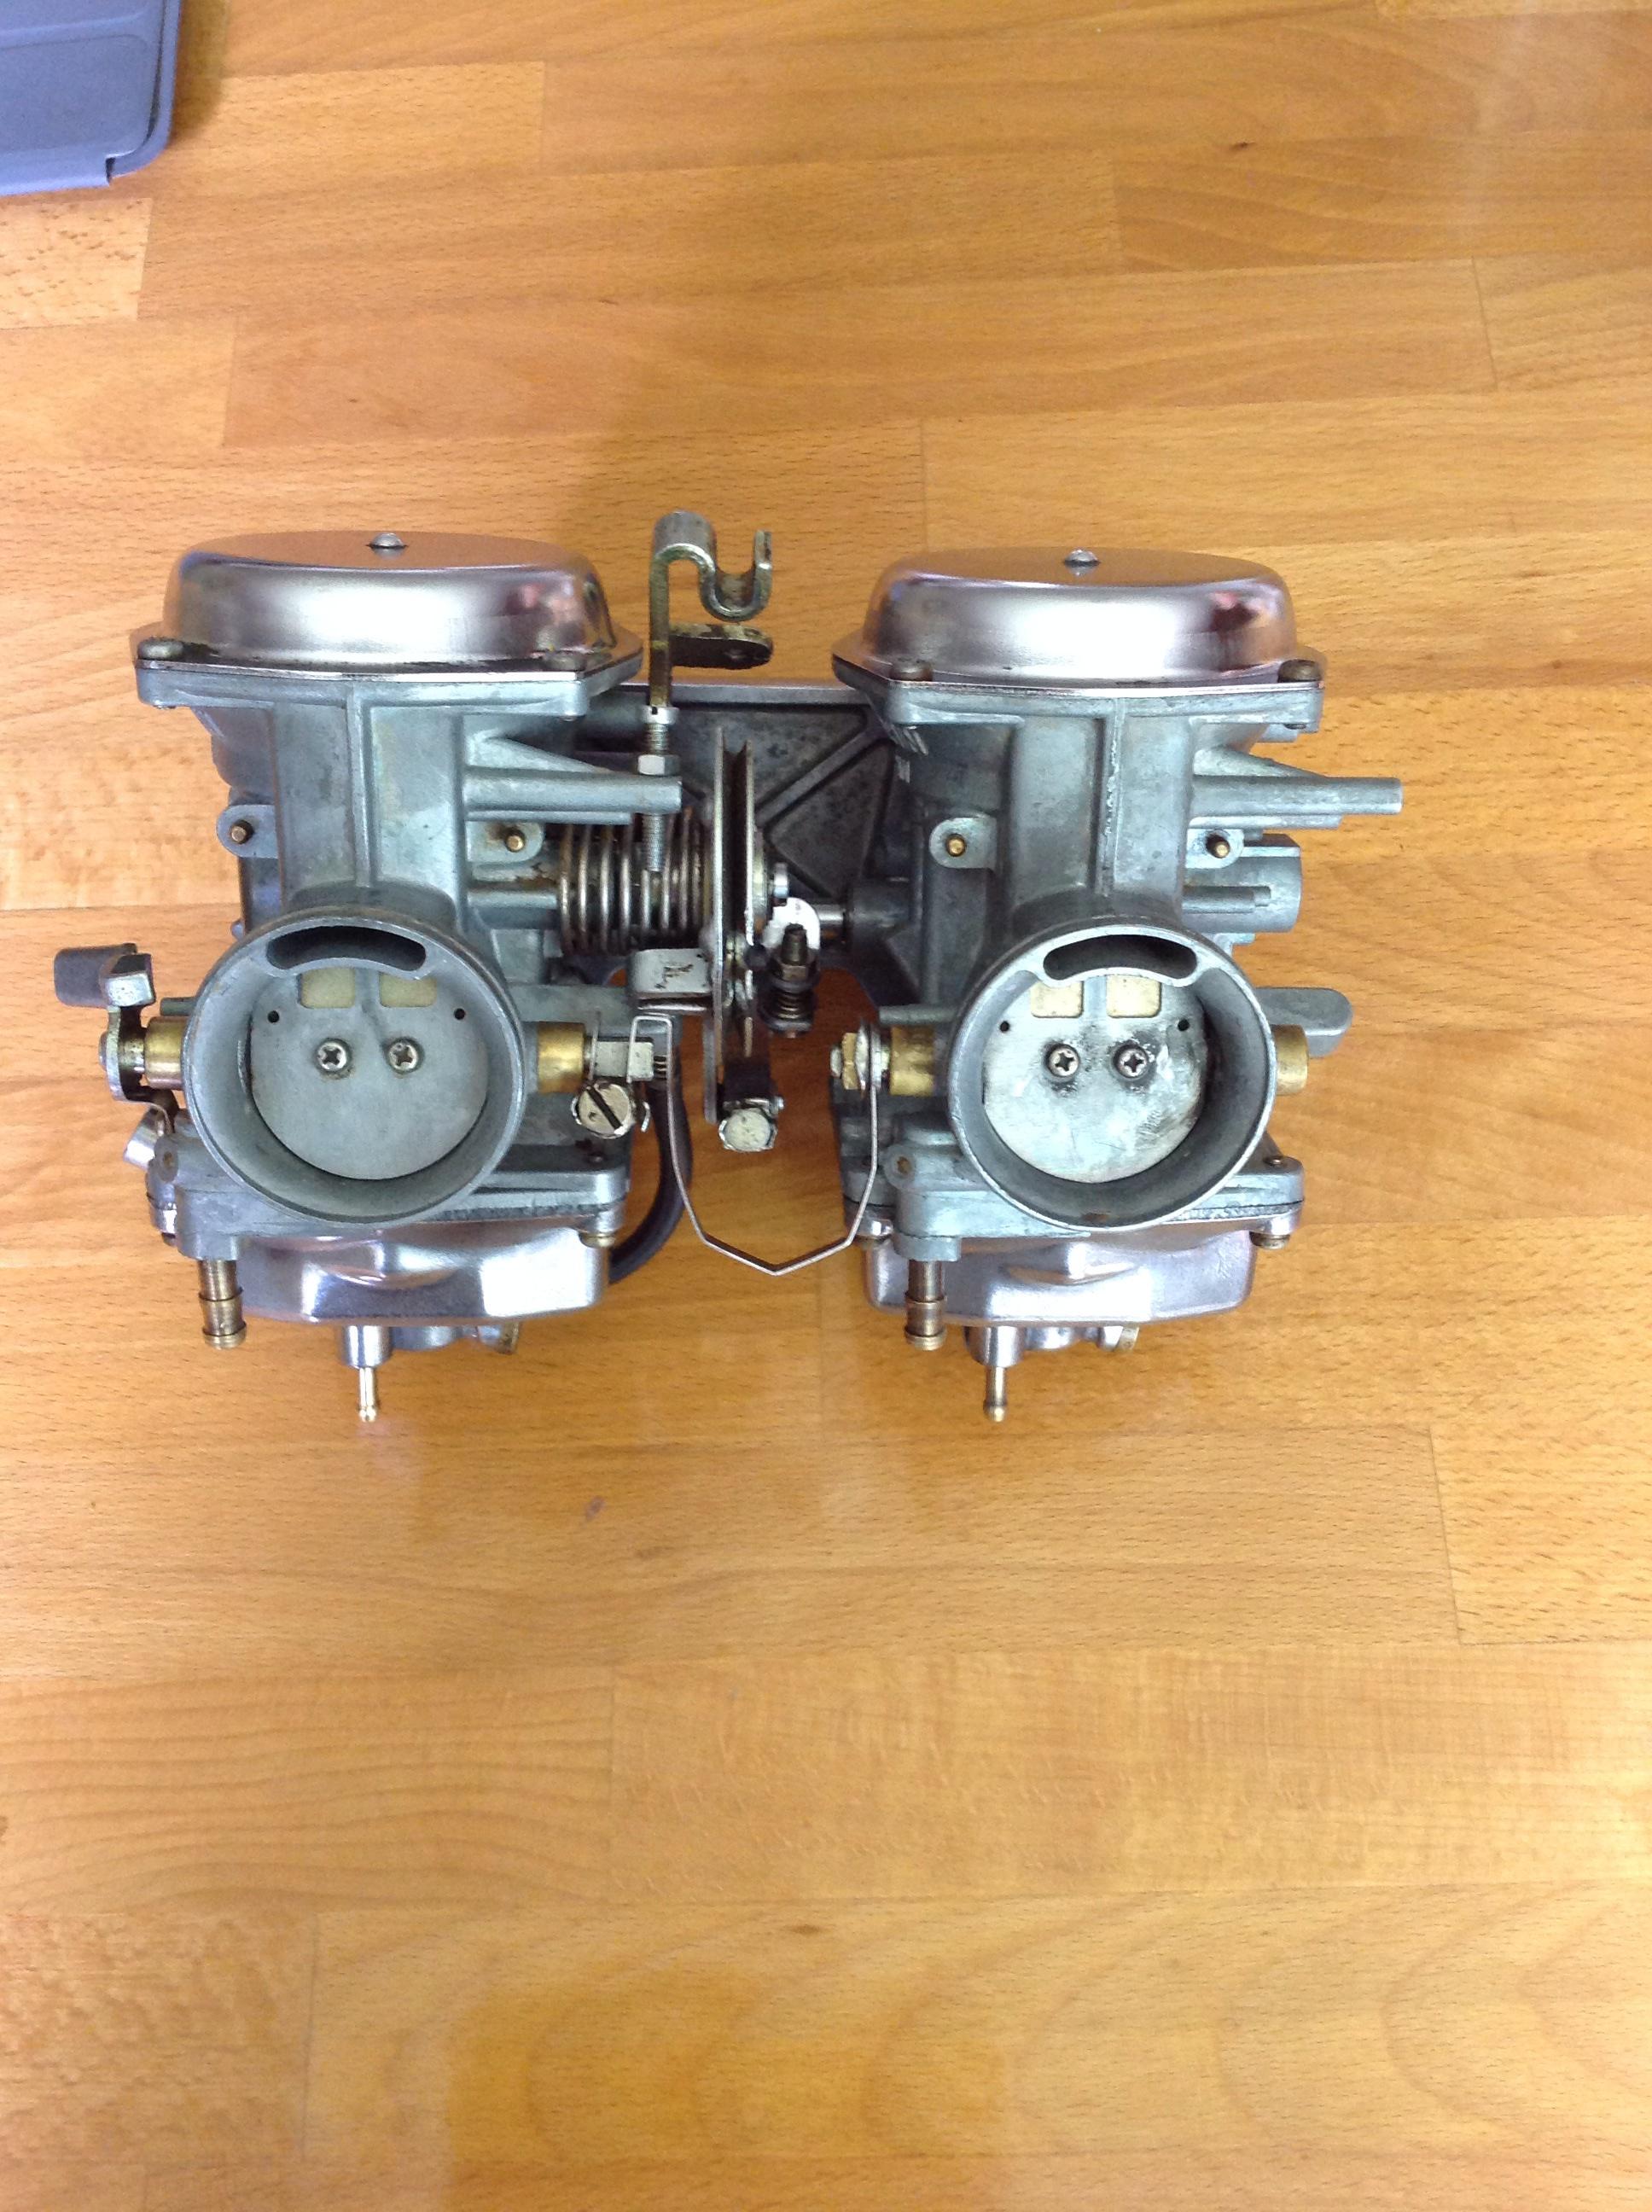
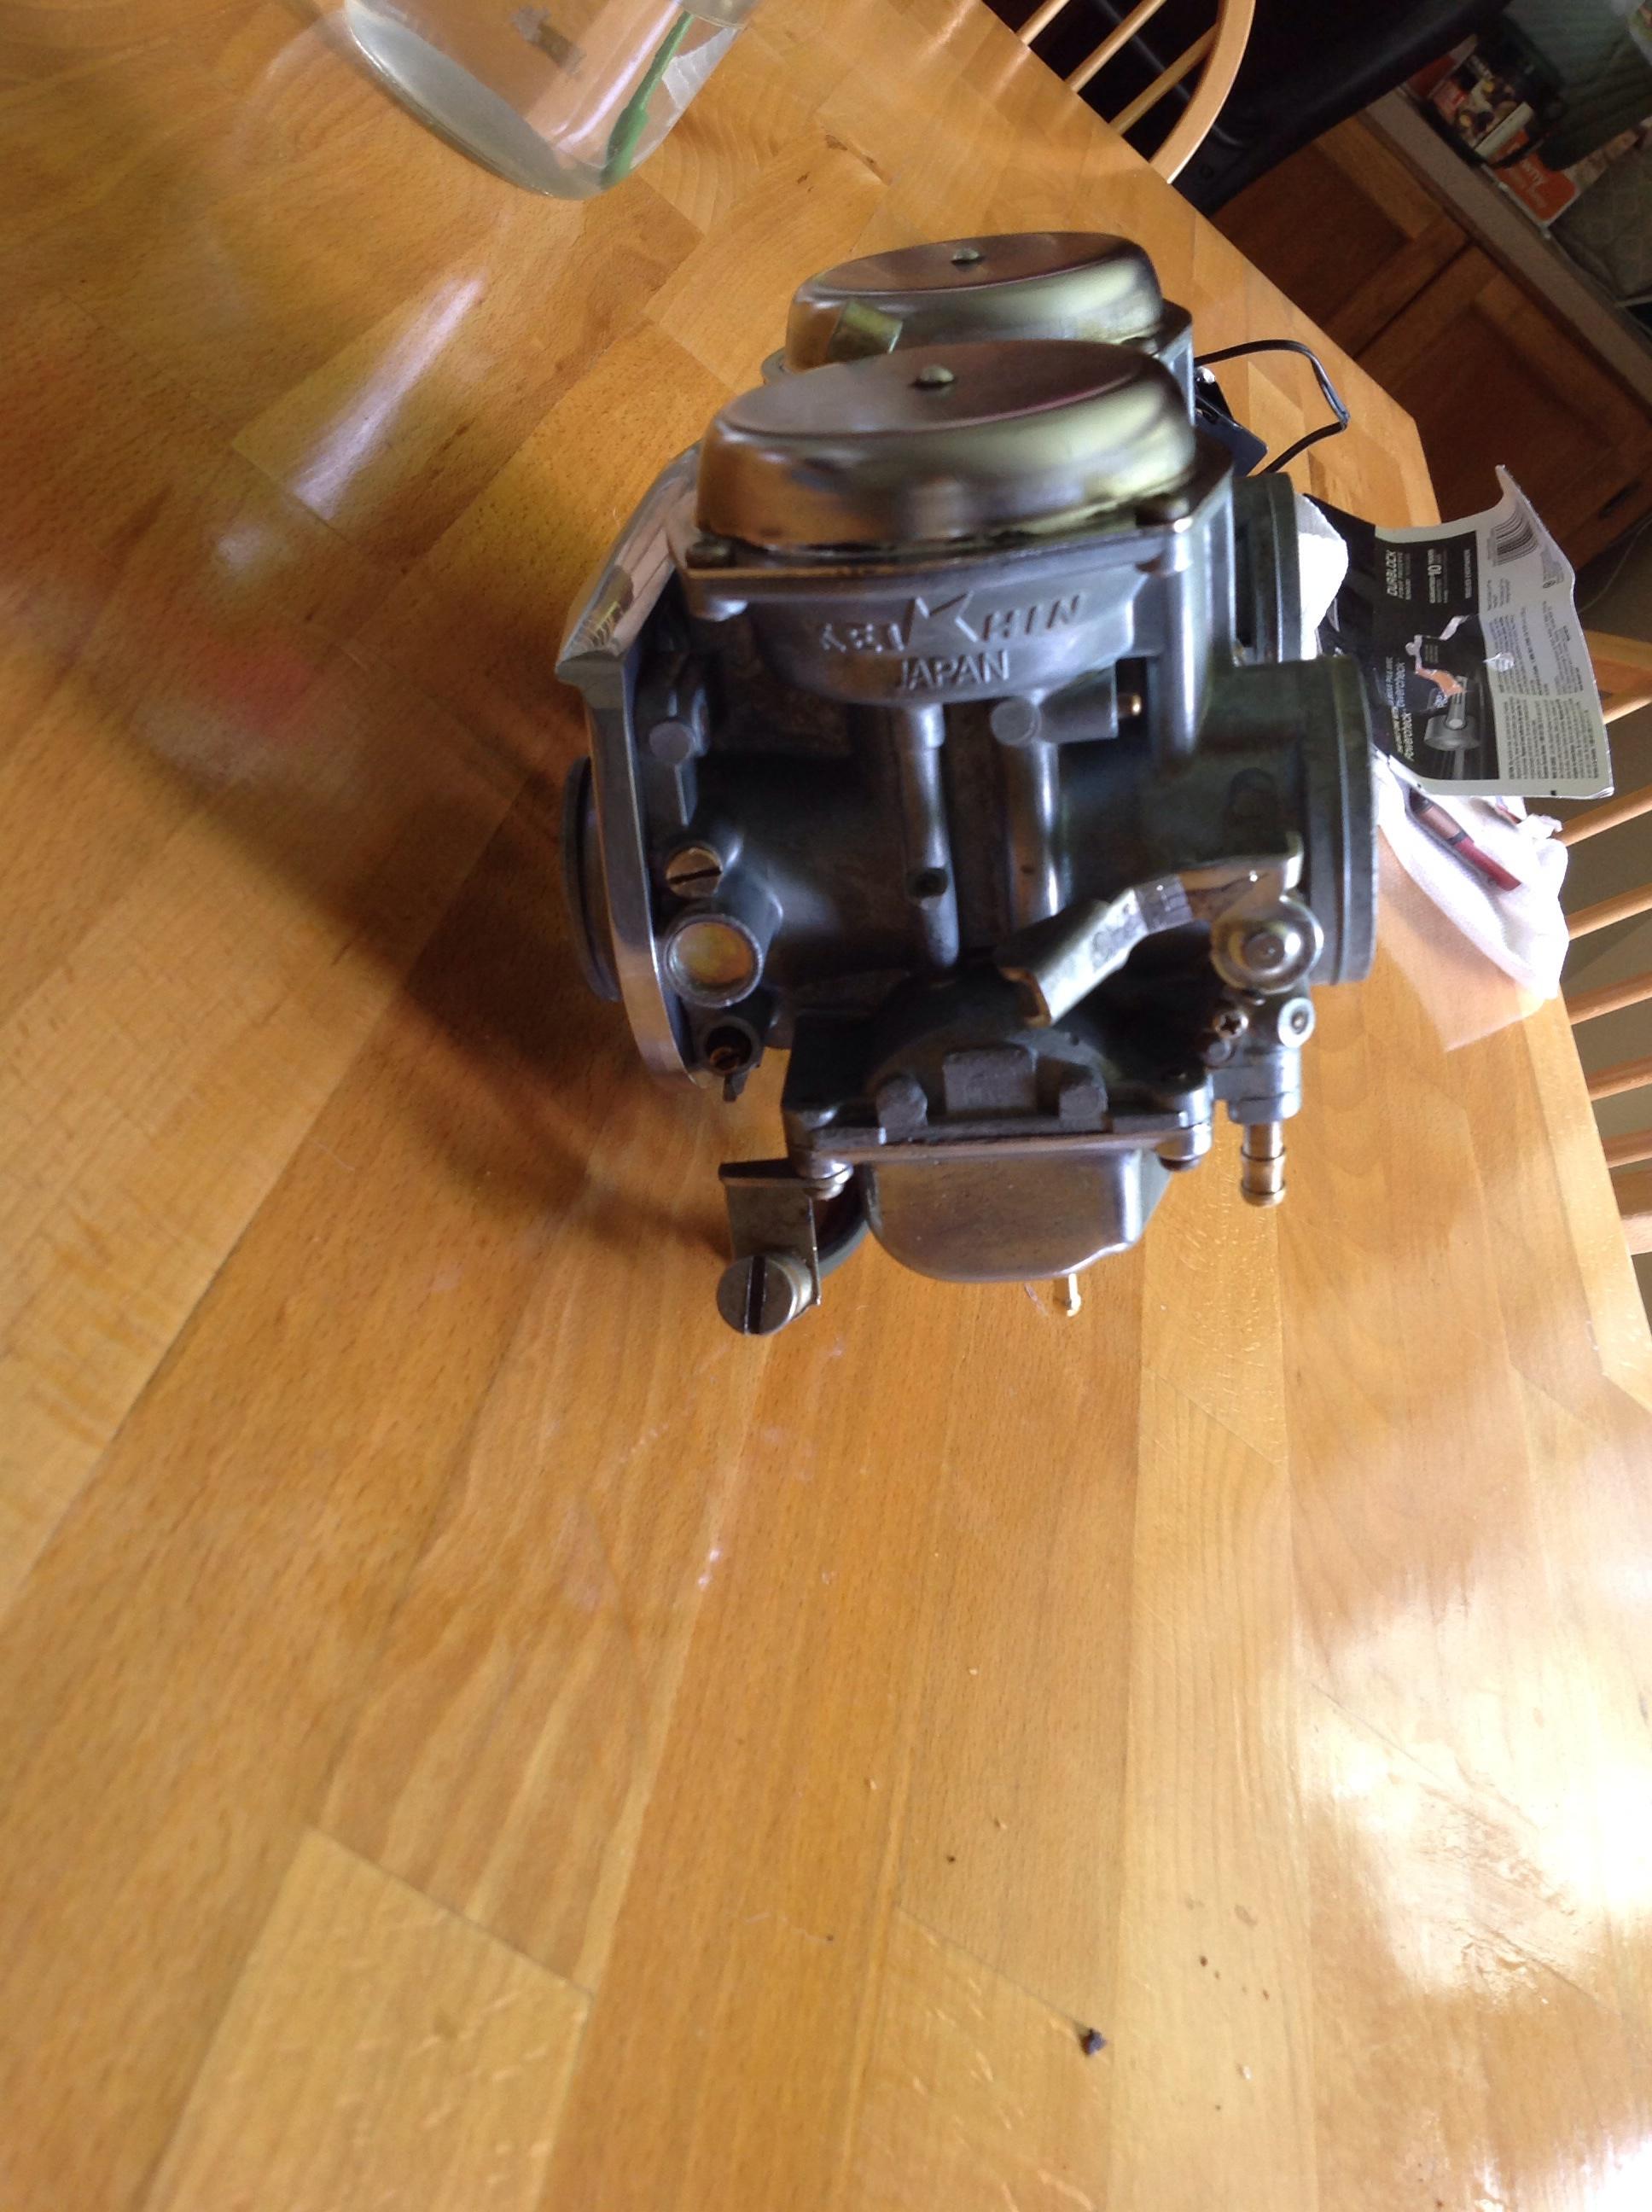
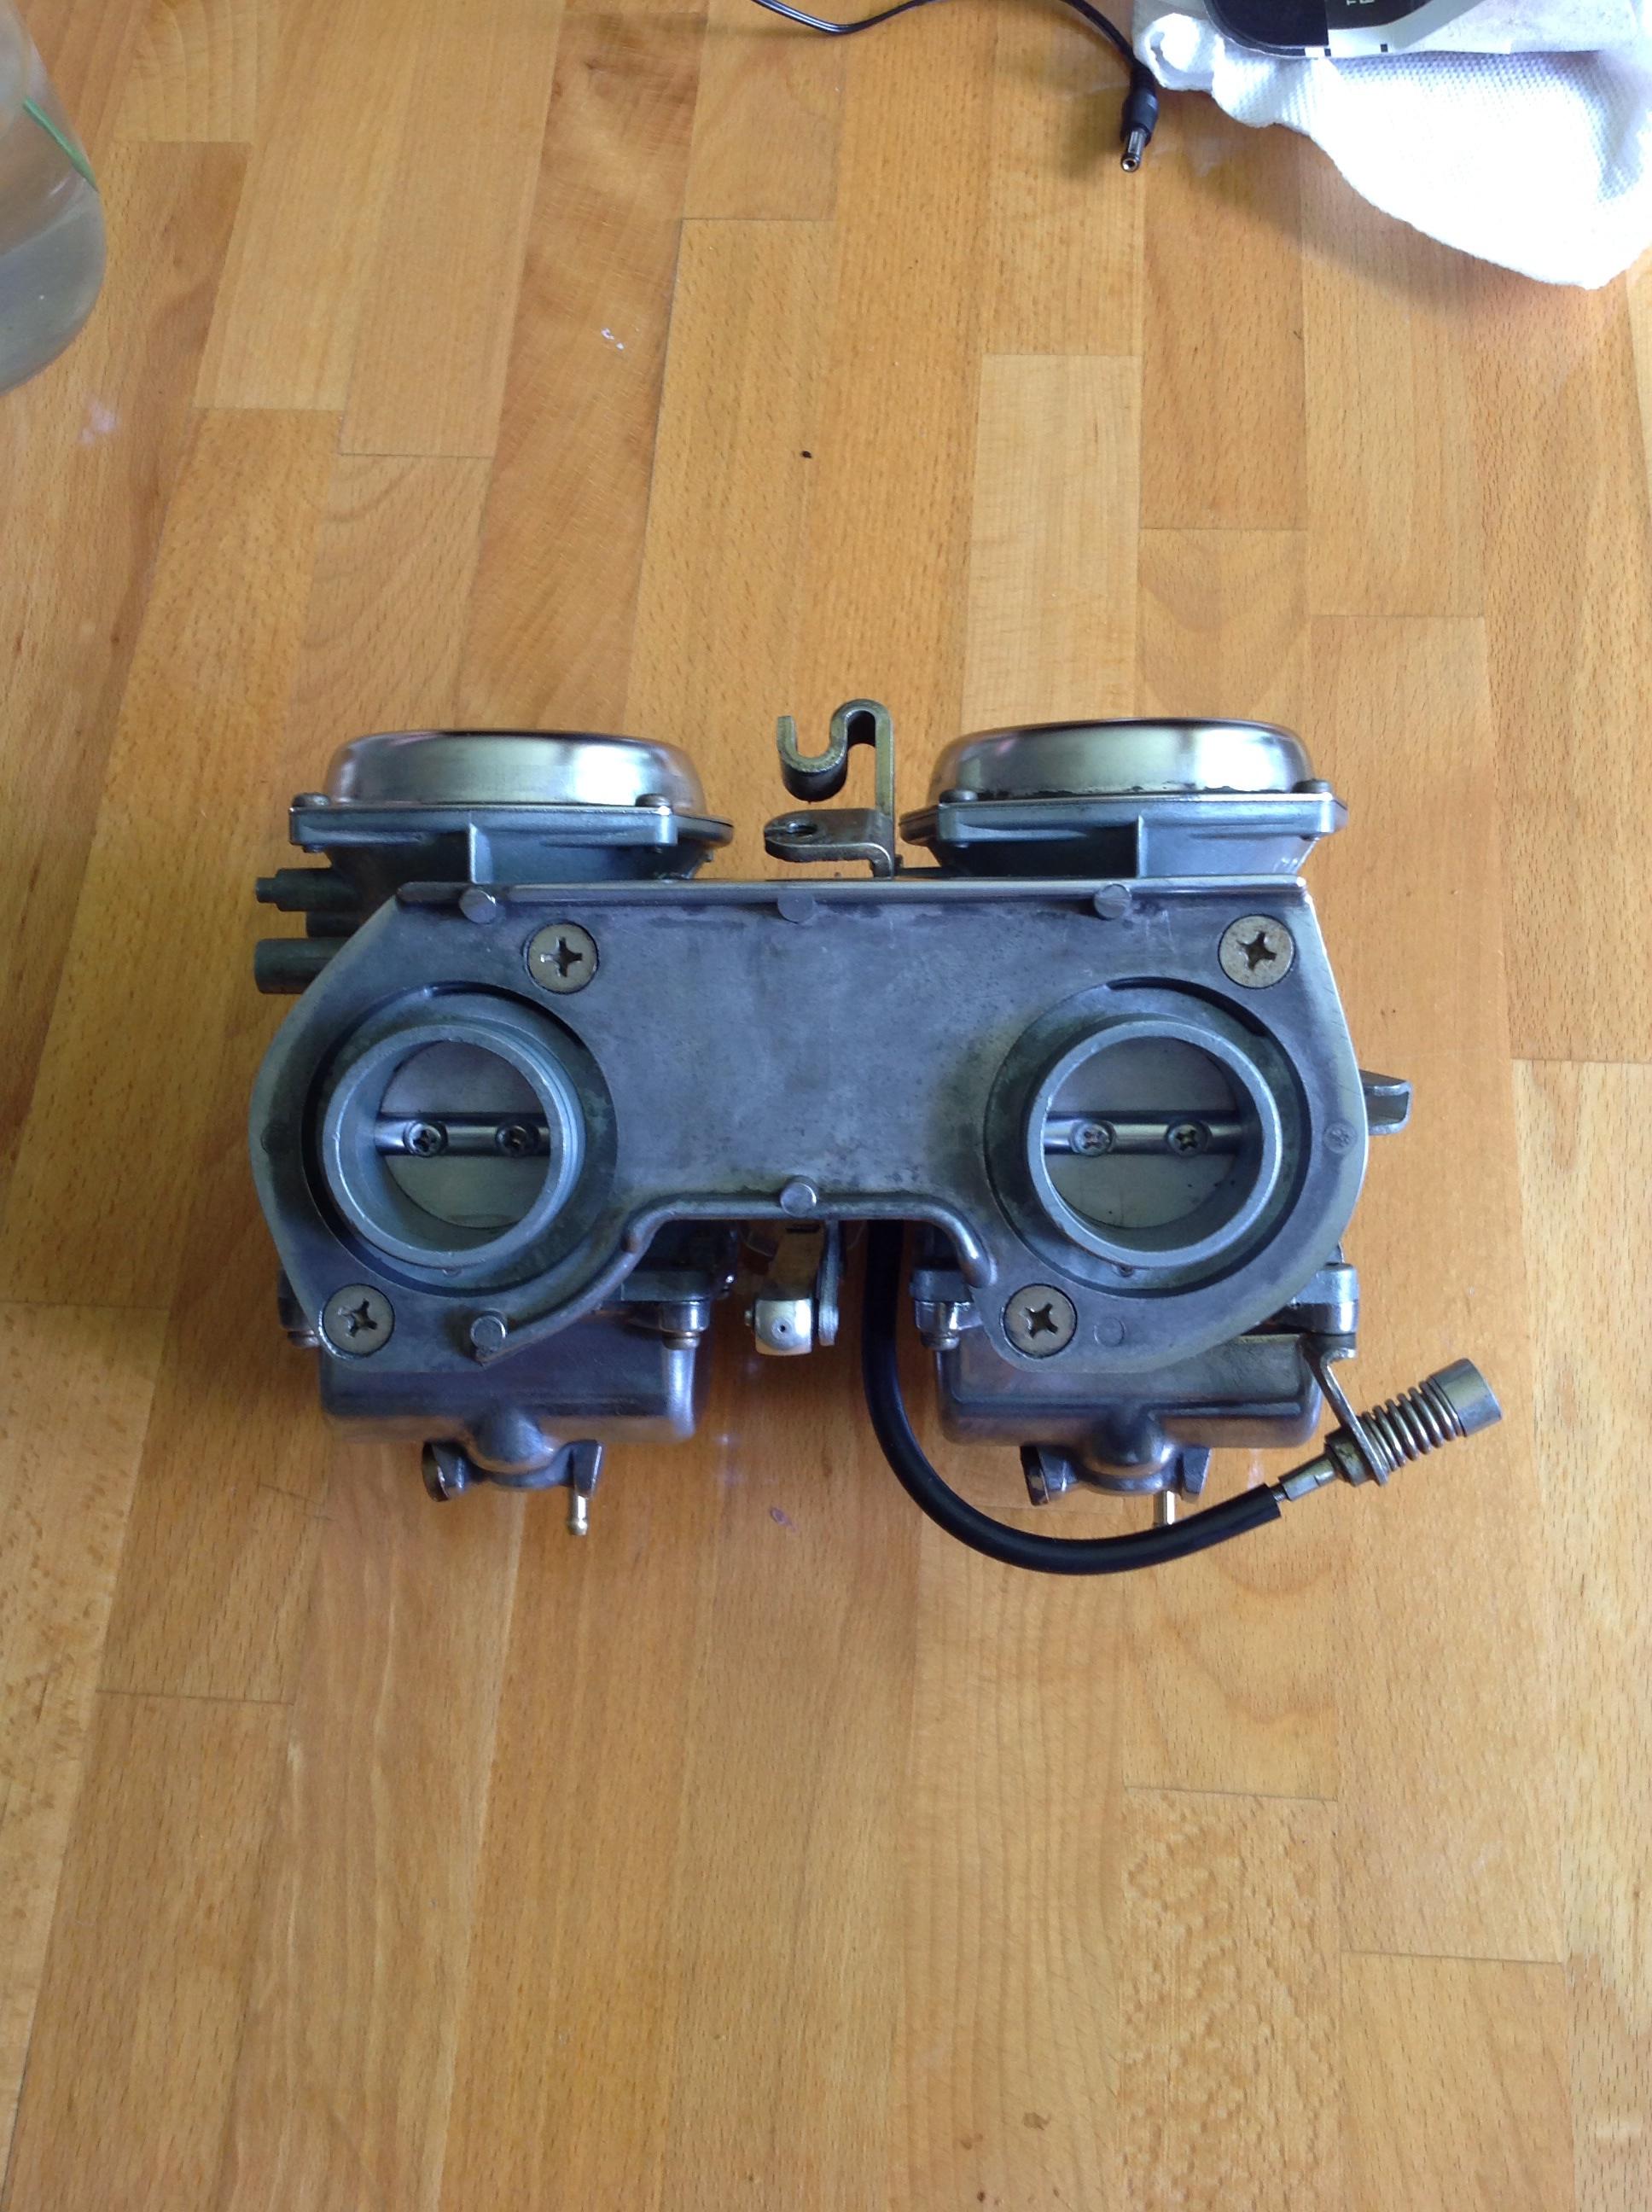
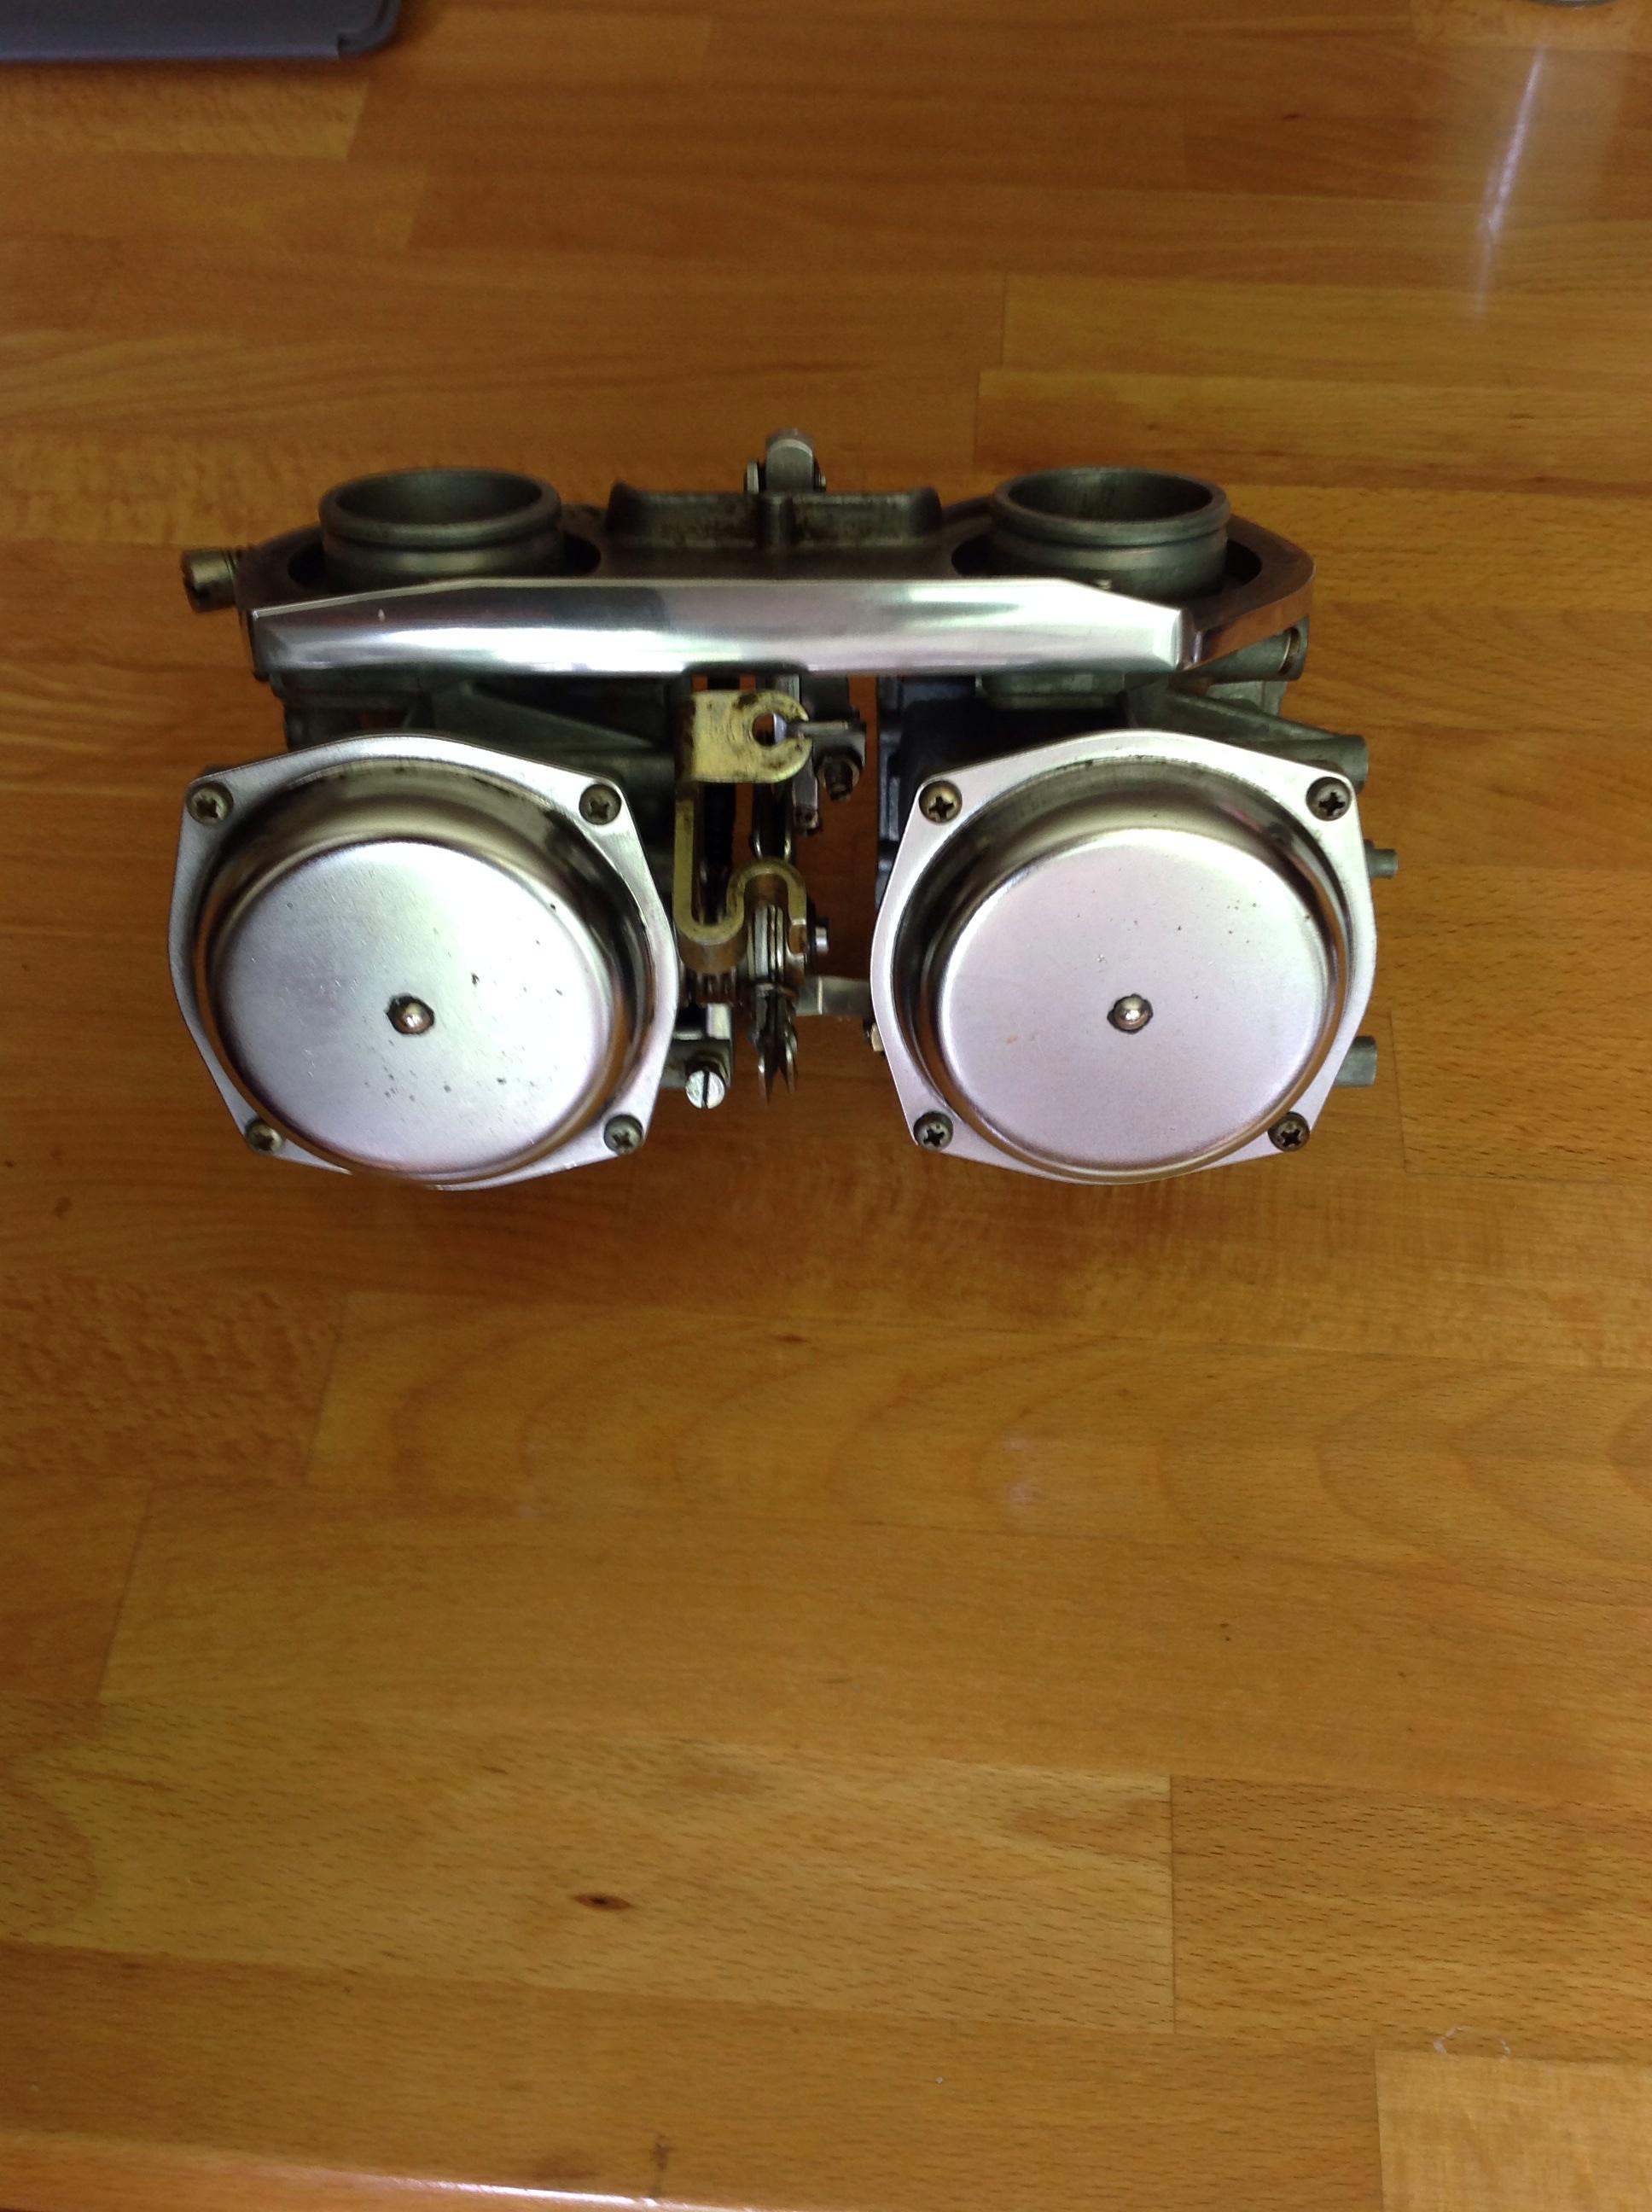
Had to order some new carb boots/insulators because they were dry rot/cracked through.
Had to order some new carb boots/insulators because they were dry rot/cracked through.
Distanceham
New Member
A big thanks to my brother who came up on his birthday to help me muscle in the motor back into the frame. We wrestled with it for a bit, thanks to the PO welding a few motor mounts in place, but we're ultimately successful despite needing a few touch ups on the frame and starter. I rewarded him with some Maine Beer Company 'Weez'. They call it an ale, but it's more of a dar/black American IPA. Pretty tasty.

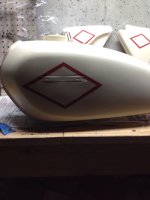
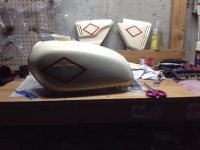
Just for kicks, I threw on the tank and side cover for a quick mock up. I hope to paint my accent colors this weekend, then get everything in clear.
My conservative hope is to be riding by September.
Just for kicks, I threw on the tank and side cover for a quick mock up. I hope to paint my accent colors this weekend, then get everything in clear.
My conservative hope is to be riding by September.
Distanceham
New Member
Pretty much screwed up my paint job. Long story short- the stencil/masking template I had done up at the sign shop sucked.mi had bleed through and the adhesive on the back separated and remained on my parts. My mask job wasn't great either and I got some splatter and bleed through. When I pulled the stencil, I tried to release and clean up jagged edges with an exacto and I ended up gouging the paint in 1 spot and have some deep cuts in others. I will try to touch up, and worse case scenario repaint. I'm now going to look into having UV resistant vinyl decals made up. Here's a couple of pics of the one decent side out of 4.
Attachments
samsquantch
Been Around the Block
These scramblers are the best! Good luck with the build!


