Cl360 Noob Colorado Racer Build

Bgoetzy

New Member
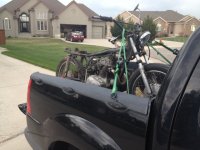
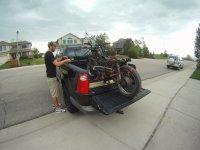
Alrighty everybody so I bought a 75 Cl360 a little while back as a sort of summer project. I had worked on cars previously and I used to have a dirt bike, but I never worked on it that much. Motorcycle building is something totally new to me and so I hope that I can get a little help from the experienced ones on this forum. As for now, I hope you enjoy following my build as it gets closer to being back on the road. Feel free to leave comments or suggestions. I would also like to meet some guys who know more than me about this stuff on here and who can help me through this project. Maybe even some guys out here in CO! Thanks, Brandon
 

Attachments

  • Image.jpg
    Image.jpg
    101.8 KB · Views: 283
Here are a few more pictures from the day I bought it. It looked a little rough but it had potential.
 

Attachments

  • GOPR0955.JPG
    GOPR0955.JPG
    1.9 MB · Views: 180
Here is a couple of pics once it was all unloaded and in its temporary spot.
 

Attachments

  • Image 1.jpg
    Image 1.jpg
    118.6 KB · Views: 290
  • Image 3.jpg
    Image 3.jpg
    96.6 KB · Views: 295
  • Image 4.jpg
    Image 4.jpg
    98 KB · Views: 289
  • Image 6.jpg
    Image 6.jpg
    112.2 KB · Views: 296
I went through the carbs and got them all cleaned out. Hopefully this was one of the main things keeping the bike from running.
 

Attachments

  • Image 20.jpg
    Image 20.jpg
    148 KB · Views: 285
  • Image 17.jpg
    Image 17.jpg
    127.5 KB · Views: 272
  • Image 14.jpg
    Image 14.jpg
    122.7 KB · Views: 278
  • Image 11.jpg
    Image 11.jpg
    136.6 KB · Views: 270
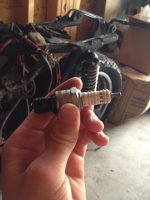
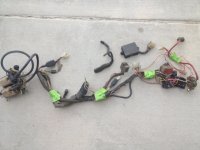
It looked like the old spark plugs were shot. No surprise there. I went and picked up some new B8ES which should do the trick. I read on here that there are some other plugs preferred over the B8ES because they foul out rather easily. Im going to give them a shot and see what happens then if I need to I will pick up some other ones. I stripped the wiring harness from the bike and I gave it its first bath.
 

Attachments

  • Image 27.jpg
    Image 27.jpg
    70.8 KB · Views: 283
  • Image 10.jpg
    Image 10.jpg
    125 KB · Views: 286
  • Image 1.jpg
    Image 1.jpg
    163.5 KB · Views: 298
  • Image 13.jpg
    Image 13.jpg
    144.6 KB · Views: 291
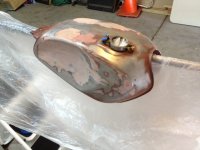
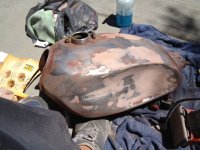
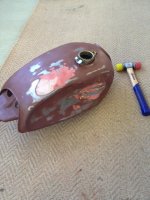
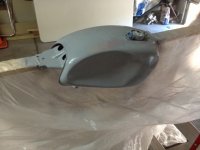
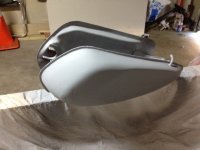
I decided I really wanted to dent the stock tank to give it that cafe look. I looked online to see how other people were doing it and I went out to the store and picked up a nylon hammer, some bondo, and some sandpaper.
 

Attachments

  • Image 27.jpg
    Image 27.jpg
    90.1 KB · Views: 271
  • Image 25.jpg
    Image 25.jpg
    117.5 KB · Views: 295
  • Image 24.jpg
    Image 24.jpg
    121.6 KB · Views: 285
  • Image 21.jpg
    Image 21.jpg
    128.8 KB · Views: 280
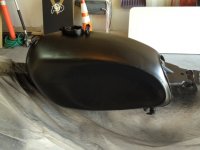
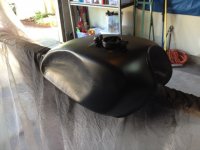
I primed the tank first and then sprayed it with some flat black spray paint. I think it turned out alright. Of course I could have gotten the tank a little smoother, but for my first time working with bondo I'm happy with the result.
 

Attachments

  • Image 28.jpg
    Image 28.jpg
    74.8 KB · Views: 286
  • Image 29.jpg
    Image 29.jpg
    88.2 KB · Views: 275
  • Image 33.jpg
    Image 33.jpg
    76.8 KB · Views: 280
  • Image 34.jpg
    Image 34.jpg
    82.6 KB · Views: 276
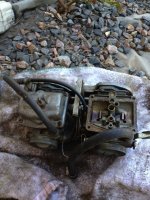
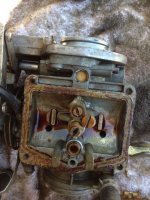
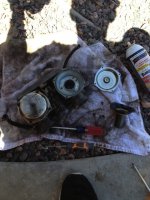
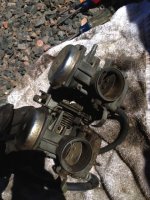
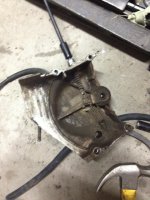
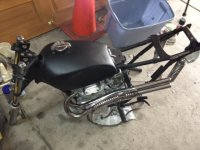
The petcock needed a little work so I took that apart to clean it all out. At this point, I had most of the bike disassembled and in boxes on my workbench.
 

Attachments

  • Image 39.jpg
    130.5 KB · Views: 274
  • Image 37.jpg
    121.2 KB · Views: 284
  • Image 36.jpg
    135.2 KB · Views: 277
  • Image 35.jpg
    127.4 KB · Views: 277
I took apart the rear disk brake to give it a good cleaning as well. Here is also a picture of how the bike looked at that stage of the build.
 

Attachments

  • Image 42.jpg
    Image 42.jpg
    99.3 KB · Views: 271
  • Image 43.jpg
    Image 43.jpg
    104.2 KB · Views: 262
  • Image 44.jpg
    Image 44.jpg
    105.2 KB · Views: 265
  • Image 45.jpg
    Image 45.jpg
    112.7 KB · Views: 272
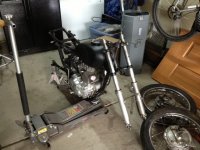
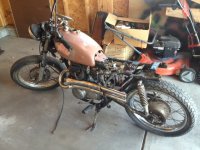
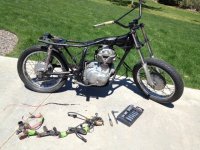
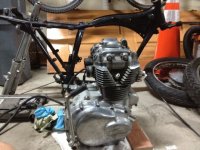
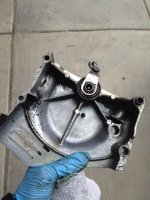
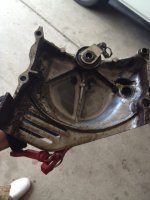
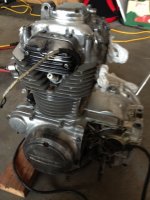
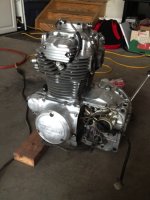
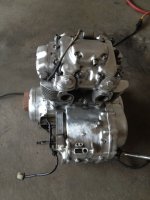
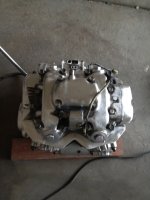
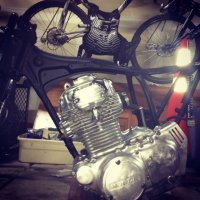
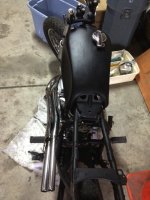
Shortly after that, I pulled the motor so that I could clean it up a bit and paint the frame. The bike has compression so I was hoping that I wouldn't have to delve into the motor itself. Hopefully I get lucky and it doesn't need any more work inside there. Anyways...more pics below
 

Attachments

  • Image 52.jpg
    Image 52.jpg
    120.5 KB · Views: 269
  • Image 51.jpg
    Image 51.jpg
    118.9 KB · Views: 255
  • Image 50.jpg
    Image 50.jpg
    131.8 KB · Views: 260
  • Image 48.jpg
    Image 48.jpg
    121.2 KB · Views: 262
I found some more areas that could use a little cleaning up and I got my wiring harness all ready to ship out.
 

Attachments

  • Image 54.jpg
    Image 54.jpg
    103.9 KB · Views: 255
  • Image 55.jpg
    Image 55.jpg
    109.3 KB · Views: 255
  • Image 56.jpg
    Image 56.jpg
    107.9 KB · Views: 262
  • Image 57.jpg
    Image 57.jpg
    103.7 KB · Views: 262
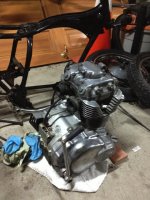
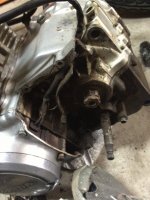
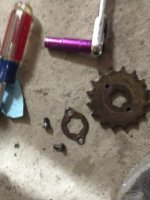
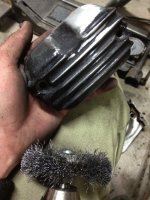
I got a few of those parts cleaned up and I started to use the wire wheel on a few things. My next step was to make the motor look as good as I could with my limited budget and materials.
 

Attachments

  • Image 68.jpg
    Image 68.jpg
    121.3 KB · Views: 254
  • Image 74.jpg
    Image 74.jpg
    96.2 KB · Views: 244
  • Image 73.jpg
    Image 73.jpg
    82.7 KB · Views: 283
  • Image 67.jpg
    Image 67.jpg
    114.5 KB · Views: 249
I ended up using the wire wheel on pretty much the entire motor. I really like the kind of brushed aluminum look it gave to everything!
 

Attachments

  • Image 75.jpg
    Image 75.jpg
    96.9 KB · Views: 256
  • Image 77.jpg
    Image 77.jpg
    91 KB · Views: 262
  • Image 79.jpg
    Image 79.jpg
    93 KB · Views: 247
  • Image 80.jpg
    Image 80.jpg
    87.8 KB · Views: 250
Here are a couple more pics of the end result. By the way, please forgive me I do realize the cover above the spark plug is on upside down in the pics. It has since been installed correctly. :p
 

Attachments

  • Image 83.jpg
    Image 83.jpg
    115.2 KB · Views: 266
  • Image 82.jpg
    Image 82.jpg
    78.8 KB · Views: 262
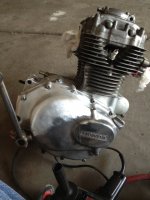
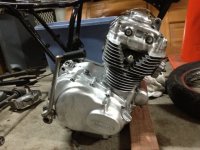
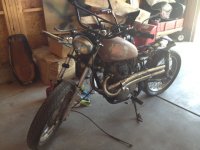
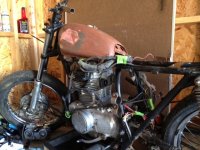
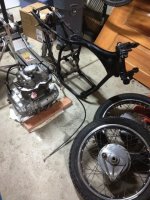
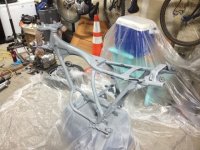
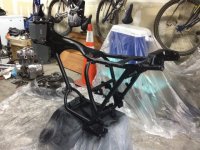
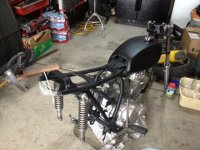
Next up was prepping the frame for paint and getting ready for the motor to be reinstalled. Once again, I used primer and flat black spray paint which I think turned out well.
 

Attachments

  • Image 85.jpg
    Image 85.jpg
    133.8 KB · Views: 256
  • Image 86.jpg
    Image 86.jpg
    134.8 KB · Views: 293
  • Image 87.jpg
    Image 87.jpg
    123.5 KB · Views: 286
  • Image 89.jpg
    Image 89.jpg
    154.5 KB · Views: 278
I got the motor back into its spot. Next up was prepping to get the wheels back on the bike.
 

Attachments

  • Image 93.jpg
    Image 93.jpg
    115.5 KB · Views: 483
  • Image 92.jpg
    Image 92.jpg
    121.4 KB · Views: 464
  • Image 91.jpg
    Image 91.jpg
    100.8 KB · Views: 457
  • Image 90.jpg
    Image 90.jpg
    106.9 KB · Views: 375
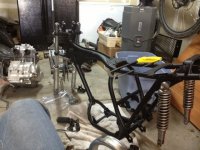
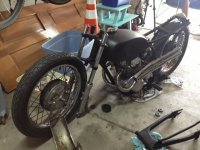
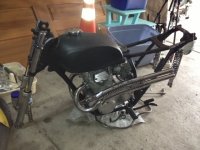
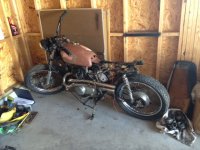
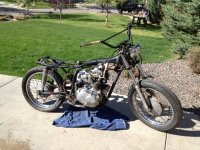
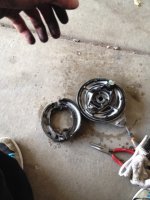
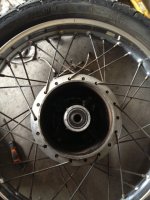
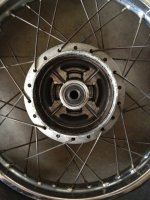
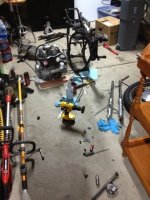
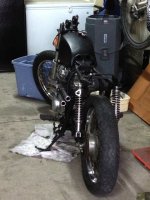
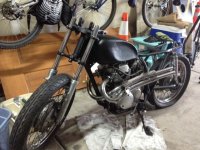
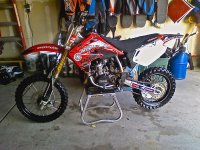
I got the wheels back on for the most part. I need to toy with the front wheel to get the bracket to line up correctly and then it should be good. These pictures are how the bike currently sits. I know I was a bit late on making a thread but better late than never I suppose. I would like to know what other people think of it so far. Feel free to offer up comments or suggestions. And I would always appreciate some help when I get into a tight spot on this build as there is still plenty to do. Thanks and I will try to be better about updating it as I go.
 

Attachments

  • Image 96.jpg
    Image 96.jpg
    126 KB · Views: 500
  • Image 98.jpg
    Image 98.jpg
    106 KB · Views: 502
  • Image 99.jpg
    Image 99.jpg
    129.5 KB · Views: 547
  • Image 100.jpg
    Image 100.jpg
    105.5 KB · Views: 549
Btw if any of you care to see my old projects feel free to check these pics out. The bottom one is my old Cr85 and the top ones are from my 99 Civic Coupe.
 

Attachments

  • Image 137.jpg
    Image 137.jpg
    321 KB · Views: 125
  • Image 141.jpg
    Image 141.jpg
    689.2 KB · Views: 125
  • Image.jpg
    Image.jpg
    865.3 KB · Views: 138
I'm 99% sure those mufflers are the same ones I bought for my cl450 cafe. Look and sound amazing. I think the only place that sells them is here: http://www.coolretrobikes.com/hondamechanical.htm

Good luck with the build.
 
Back
Top Bottom