Follow along with the video below to see how to install our site as a web app on your home screen.
Note: This feature currently requires accessing the site using the built-in Safari browser.
We noticed you are blocking ads. DO THE TON only works with community supporters. Most are active members of the site with small businesses. Please consider disabling your ad blocking tool and checking out the businesses that help keep our site up and free.
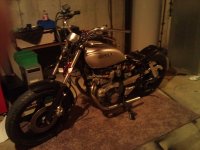
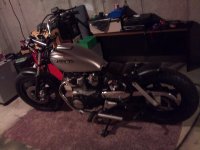
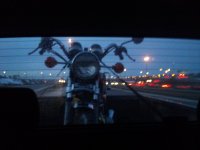
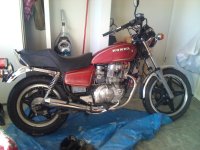
Hello everyone, been a member for a few months. Love the site... I am building a 1979 Honda CM400 T. I bought the bike from a local bike shop for 1300.00CAD. Nothing wrong with the bike, They did a compression test, changed all fluids, and checked the brakes. I could have rode her home except for the snow. The first two pics are out back of the bike shop.
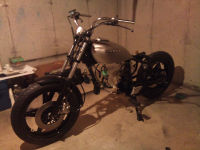
Here it is at home, I removed the seat and started to get it ready to chop the back end off, pull the engine and take everything downstairs to the basement.
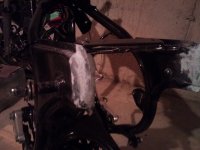
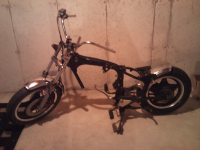
Strip it down the frame, sand and paint it.
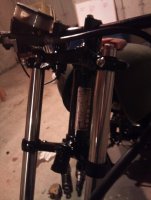
Lower the front end 3/4" to an inch.
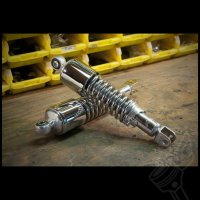
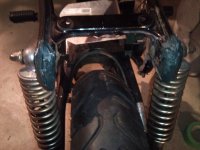
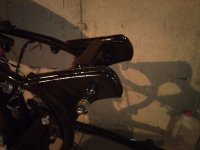
Switch rear shocks, to 11" shorty from DCC.
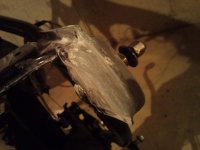
Chop rear fender.
Chop frame behind rear shocks.
Make aluminum battery box,
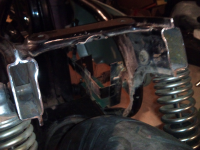
Make aluminum starer solenoid bracket.
Make Speedometer bracket (no tach gauge)
Remove airbox.
Relocate battery.
Relocate Ignition switch.
Install aftermarket run/off switch and push to start button.
Hide all the wiring.
I will be adding more pics shortly, I have to organize and resize them.
Thanks, I just undid the bolts and slid it down 3/4 inch, and here's the shocks I am going to order from Dime City Cycles on Tuesday. They R Chrome "Shorty" Eye to Clevis Shock Absorbers - (289MM/11")
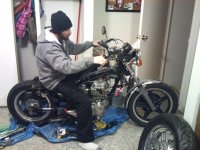
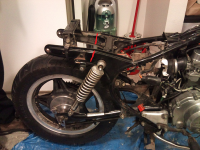
So the bike is in the basement and i finished the rear chop. here's some pics, used a saws all to cut the frame and used short strand fiber glass, packed the ends full and sanded them to look factory.
Here she is stripped to a rolling frame. I am going to chop the fender almost in half and bolt it to some hole already existing. I'm going to use rock guard on both fenders and the engines side covers.
I'm not going to use the factory tach gauge, just the speedometer, so i made a bracket for it and painted it silver also. Going to use the silver as a base coat, it will be stainless steel from a rattle can.
I finall got all the wiring complete,and everything is in its place I thought my neighbours would freak out when i started it in the basement, Man was that loud . I chopped my exhaust and bought 2 1 1/2" id car exhaust repair pieces from canadian tire for 22 bucks. Now i have to tear it apart and give her a final good coat of paint.
This site uses cookies to help personalise content, tailor your experience and to keep you logged in if you register.
By continuing to use this site, you are consenting to our use of cookies.


")