First Bike - 1980 CB750F

TheHead

New Member
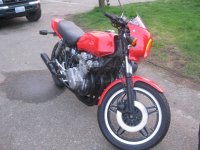
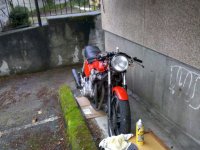
Got inspiration from my brother to buy a bike, so here we go.

Picked it up down in Olympia, WA and trucked it back to Seattle nearly on a whim just shy of a year ago. I've ridden my gf's scooter for years and I've been a bicycle guy even longer so it hasn't been too hard to learn the balance and heads-up requirements - I'm used to watching out for cars trying to run me over constantly on my bicycle as it is.

I'm loving every minute of riding regardless of weather, and now it's time to do some customizing. As much as I like an old blocky 80's bike, I think with a little TLC I can class it up here and there. It's going to be a slow, embarrassing learning experience, but I'm looking forward to it.


TheHead
 

Attachments

  • IMG_6614.jpg
    IMG_6614.jpg
    129.5 KB · Views: 237
  • IMG_6615.jpg
    IMG_6615.jpg
    110.9 KB · Views: 218
  • IMG_6625.jpg
    IMG_6625.jpg
    128.6 KB · Views: 210
After learning to ride in a parking lot, I finally took the bike home and parked it outside of my apartment. A few weeks later and I did 30 miles on the freeway and 30 miles back, in addition to rides all around the city. Tons of fun! Fortunately for me it was after I got home and parked the bike that I found out about my charging issue. Thanks to the universal fault finding diagram and some ham-fisting with a multimeter I figured out my rotor needed replacing.

Fortunately I work next door to a shop and got some after-hours help from a friend to put on a new one from Dennis Kirk. Works great months later, so there you go... first diagnosis and cure!

Next up was the loss of turn signals from three careless accidents.

1) I knocked the bike over while reaching across it while on the side stand. DOH.
2) Nice lady backed into my bike and knocked the bike over and drove off. Whoops!
3) Trying to re-adjust a slightly bent turn signal, I snapped the brittle plastic and ended up immediately throwing it in the trash.

I love a good 4 foot feeler on either side of my bike, but maybe it was for the best that those things came off. In their place, a set of dorky fake carbon fiber nubs to keep me from getting pulled over. Cost: $0 from a friend. But of course the turn signal relay didn't like the new blinkers, so a trip to the store for a freshie solved all my problems.


Of course during those knock-over accidents the side stand was bent, the fairing got a lovely crack in it (ghetto repaired), and the end of my brake lever snapped off. The bike wasn't getting off to a very good start with me, but I wasn't going to be deterred.


TheHead
 
Just a few pictures of inspiration.

Matching red. Sexy seat.

2186037524_09d9cdfe03.jpg


I love a good full fairing

122_0401_05_z%2B1969_honda_cb750%2Broad_racer_side_view.jpg


I need to do some chopping to make an ideal seat. The frame of the 1980 750f isn't flat below the seat. Lots of awkward angles and crap sticking out here and there. I think I'll have to spend most of the summer riding with the current seat though, I'd hate to botch it and be on something ugly all summer long.


Head
 
I like where you're headed with the inspiration, man. You've got my attention!
 
This brings us to present day.

Took fairing off, trim around rear seat, switched tail lights and am currently working on custom switches for turn signals/high beam/horn. Soldering isn't something I've done in my past so it was a real hoot to just make it up as I went along. Eventually I read some how-to sites online about proper technique and what do you know, it got easier, faster and less ugly.

Did clip on bars (after dinging up the tank a few times with ill-fitting sweep risers), separated throttle and start/kill switch and put on new grips and a basic clutch lever/perch. On the start/kill I had to re-order the wires in the wiring block. I wracked my brain for a while looking at the wiring diagram, but once I started to get a handle on the layout it worked out great. I really wish I had done some hobby electronics when I was younger, this all would be a lot easier now.

It's all coming along great now that I've finally gotten a hold on the wiring diagram in the back of my Clymer manual. I'm really excited to be making visible progress too, and the bike even starts easily now that I put in new plugs and did a basic carb cleaning. There's a slight bit of bogging down from idle to 1/8th, but it's not too bad. Air mixture screws? It wasn't idling very well either, but an adjustment to the idle screw helped that a bit - it was backed out so far that I turned it three or four times before it even made any difference. Any tips on how I've screwed up are appreciated, since I'm still wrapping my head around the whole mess.

Attached:
-Bike as it sits minus the tail light I added.
-Head-on, need to sort out that ignition sky scraper some time soon.
-Gross first attempts at soldering to bypass the clutch . Ew.
-Old dusty wires and connectors are great!


Head
 

Attachments

  • IMG_20110124_153441.jpg
    IMG_20110124_153441.jpg
    147.8 KB · Views: 218
  • IMG_20110124_153453.jpg
    IMG_20110124_153453.jpg
    131.7 KB · Views: 213
  • IMG_20110127_211919.jpg
    IMG_20110127_211919.jpg
    64.4 KB · Views: 223
  • IMG_20110125_212532.jpg
    IMG_20110125_212532.jpg
    86.3 KB · Views: 207
Thanks Chris. I love the first picture, has a nice simple elegance to it. I think I'll have to look into making a seat like that myself. As for a full fairing, it's hot, but obviously I have a ways to go before I can be trusted with one!


Head
 
I like the model of where your HEADing also ( had to pun). If your looking to replace the seat you might want to look at RocCity cafe racers here's the link : http://www.roccitycafe.com/store.php

Sean has a great selection and they're hand made,pure quality ( not a spokeman just a happy client )

Keep us posted !!
 
Man that looks great so far. I like the first inspiration pic. good luck on the build I will be checking in
 
Just a tip. I finally found these in Home Depot. I used to use them at an erospace company I worked for years ago. They are heat shrink tubes with solder in between. You just slip the wires in and hit em with a heat gun. Done instant solder joint and shrink tubed. Watertight connection and a lot less hassle. I will be using them for my new wiring harness.
http://www.homedepot.com/buy/electrical/electrical-tools-accessories/tyco-electronics/soldergrip-heat-shrinksolder-multiple-wire-butt-splices-22-18-15clam-98797.html


9ed8bd86-8391-4f42-90e1-f7d418dda292_300.jpg
 
mookieo2 said:
Just a tip. I finally found these in Home Depot. I used to use them at an erospace company I worked for years ago. They are heat shrink tubes with solder in between. You just slip the wires in and hit em with a heat gun. Done instant solder joint and shrink tubed. Watertight connection and a lot less hassle. I will be using them for my new wiring harness.
http://www.homedepot.com/buy/electrical/electrical-tools-accessories/tyco-electronics/soldergrip-heat-shrinksolder-multiple-wire-butt-splices-22-18-15clam-98797.html

Those are awesome! I might have to pick up some to tidy up my current harness.


9ed8bd86-8391-4f42-90e1-f7d418dda292_300.jpg
 
Very Cool. I am working on a project bike, much smaller than yours, and once it is running Ill be learning to ride.
 
Mookieo those are awesome, I'm going to look into using some of those for the tail light area since it's a little more exposed to the elements. Did some good progress on a headlight switch today so I'll get some pictures up of that.

Still need:

Button for horn
Fix fuses. Currently just dangling behind the headlight
Bar-end mirrors that actually fit (smaller inner diameter on these clip-ons)
Tune engine better. Bogging down from idle to 1/8th throttle
Secure choke control. Currently wedged against top of triple tree
Remove copious amounts of rust
Black out tail light hardware and under seat area to fit surrounding color scheme
RIDE more!


Head
 
Back
Top Bottom