Follow along with the video below to see how to install our site as a web app on your home screen.
Note: This feature currently requires accessing the site using the built-in Safari browser.
We noticed you are blocking ads. DO THE TON only works with community supporters. Most are active members of the site with small businesses. Please consider disabling your ad blocking tool and checking out the businesses that help keep our site up and free.
Hello everyone! Im new here in the site and this is my project going now Im from Finland so don't wonder if my english is a bit weird
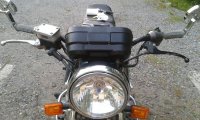
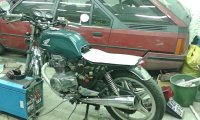
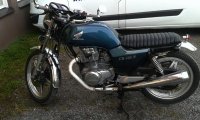
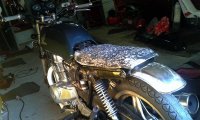
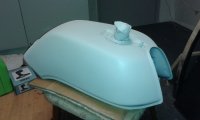
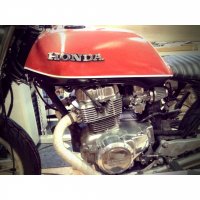
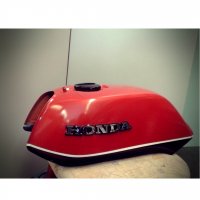
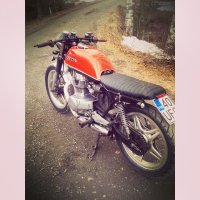
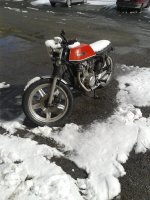
So I bought Honda cb400n (which is in practice same as T model) last summer and I thought brat style looking bike would be cool. So little by little Im building it. Last summer I was pretty busy cause the bike was my only vehicle so I could only do little modifications at time.Now here is winter so now I have done little bit bigger things. Here is some pics of bike in orginal condition.
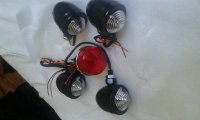
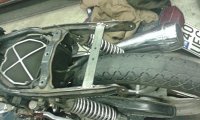
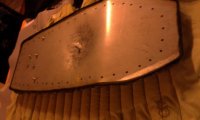
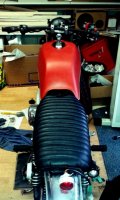
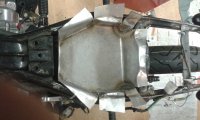
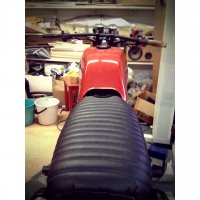
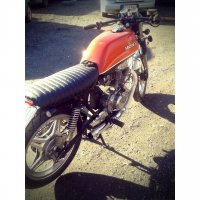
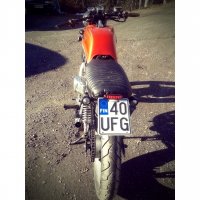
First thing I done was new seat. So first I had do modificate the frame. I cutted some pieces off so I could fit new thinner seat. I made the seat bottom of plate panel. All so added new rear fender, rear light and blinkers.
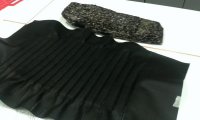
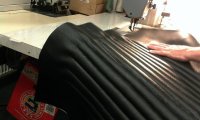
Next step was seat padding and draping. I usead "soundproofing carpet". Its quite good for seat because it doesnt flatten over time, and its however soft enough. Also very cheap material. I glued carpet to the bottom and the shaped it. In draping I used thick leather. After that I thightened it to bottom with pop rivets. Bottom plates edges was a bit sharp so I glued leather to these when it wont rub through the top leather. I hadnt any earlier experience of draping or doing this kind of things but results supriced me!
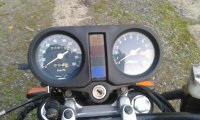
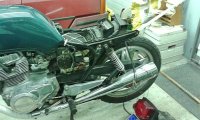
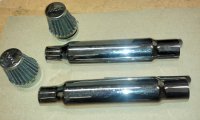
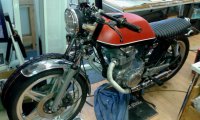
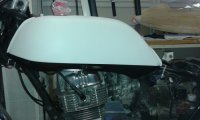
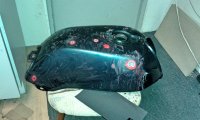
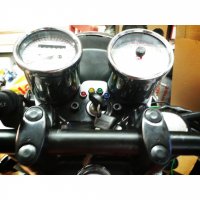
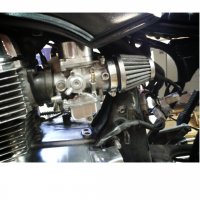
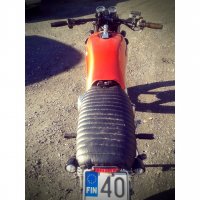
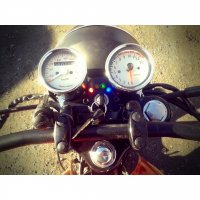
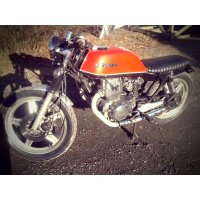
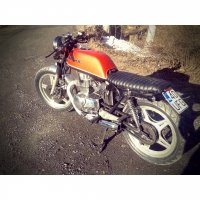
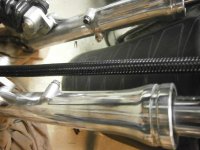
Those previous thing I done last summer. Next changes Ive done within month. Now Ive had some painting in the making. I have always liked kind of retro orange so it wasnt hard to decide what would the colour be. Because the tank of honda cb400n models has a bit strange shaped tank I wanted to add some black and white also. So it makes little illusion that tank is more rounder So I sanded and puttied the tank, then base coat and so on. I swiched new hande bar and vintage style grips. I decided to go with drag bar because I think clip ons would be little too low to me. Also ordered some more parts like new mufflers, intake filters, speedo and tachometer (stock meters was horrible!), fork gaiters and honda badges to tank.
Now I am waiting for that rest of parts arrival. I guess Ill get speedo and tachometer next week so I can put these next weekend. Before summer I have to do:
- Put meters to bike and modify the indicator lights near meters
- Paint rims black and change tires
- Paint some bad (ect rusty) spots in frame.
- I have to re-jet carburators because of new intake and mufflers. ( I think this will be the most time-consuming thing)
- Put the fork gaiters.
- And ofcourse clean and polish whole bike
Speedo and tachometer arrived yesterday! Tachometer is electrical, but the old one was with wire cable so I have to find out if it fits? ??? Ill post pics soon also
She's coming on a treat real clean look 8) good to see you can turn your hand to seat stitching saves a lot of money did the same myself look forward to more updates sounds like your gonna be up & running well before summer keep goin mate
Thanks! Shape of the tank was big problem at the beginning. I thought I have to buy new tank or something but then I saw picture of that kind of paiting and problem was solved 8) Project is going forward nicely. Speedo and tachometer is almost attached. Ive made small plate for indicator lights and ignition swich. Ill send pictures next weekend when I get to computer. For some reason cant add pictures with my phone ???
Dowloaded tapatalk so lets try if I can add pics now. So heres few bad pics of new speedo and tachometer. I think they look very good compared to the earlier box. Ill get some better pics next weekend.
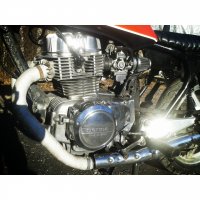
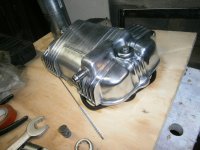
Didnt get much done this weekend. I was planning to get new tires swapped but there wasnt any bike or tire shop open in saturday. I just cleaned out garage, cleaned bike a bit and buffed whole left side of engine. Im happy with the results anyway. Hoping that I get tires swappes soon and project will go on. I need only put wheels back, relocate battery and electrics and re-jet carburators and bike is ready to ride. Sure there is alot of small things to do but I can to them when no riding. Summer is comining
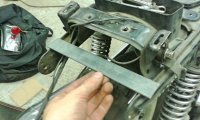
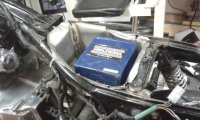
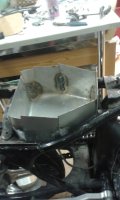
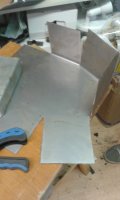
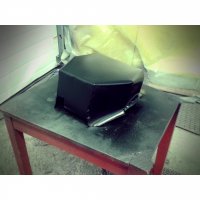
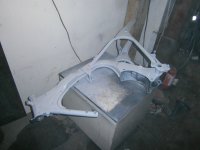
This weekend Im working on battery box. Not ready yet but the shape is good now. I painted it today and it will be ready soon.
I bought some jets to carbs today and hoping to get bike running soon!
Friend of mine bought bike some weeks ago but he havent bike license yet. We took a test run so I got my first ride for this season
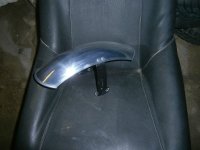
Ah yeah! Now she is running! I putted battery case and front fender to it so its ready to ride now! I also got new tail light. I took little ride and carbs feels good. I know there is people who want to know jettins so what I did do is I used bigger main jet 125 and smaller main jet 95. Also raised needles with 0,5mm small shims. Pretty happy now huh! Now there is only some little things to do.
Hello. Winter is coming and roads are icy. Its good time to continue project. I've not done much yet. Polishing and ect. I had just small garages ground floor where Ive been building this project. But I really get lucky. My good friend found that there was big garage hall was for rent . There is about 120m2 hall area, and 30m2 kind of bar/social room. Also its really near city center (2-3km) so its a dream. So now we've alltogether 7 guys as partner, some of these building cars, some bikes and so on.
Ill take pictures of hall soon, and also project will go on. Here is up to now.
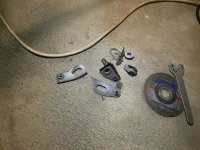
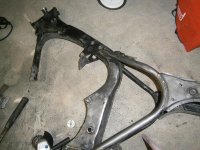
Frame has orginal paints on it so I think its time to paint it again. So Ive removed all junk pieces of it and grinded it up to metal. At some point Ill paint it black but first have to build some kind of painting room to hall. I guess my friends wont be happy if there is car full of little black spray dots
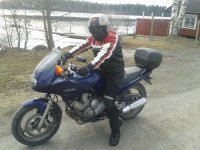
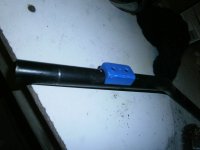
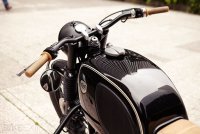
I've always loved kind of plain handlebar and controls. Like the BMW bellow. I try to same. Electrics is purposed to go inside the hande bar, and ill remove every control i dont need really. So there will be flashers, ligh low and high beam, engine start and kill.
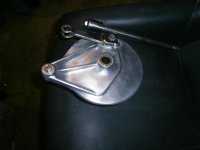
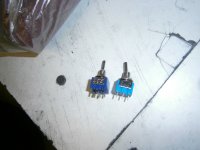
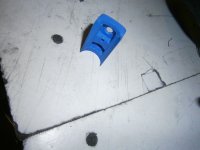
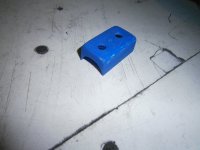
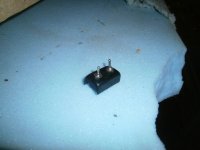
So I want it to be as plain as possible and only little control switch. Im able to use 3D- printer in school so of course Ill use the opportunity I desingned small handle control panel where I can mount two small swich components for flashers and lights. Ive to sand it to good shape and paint it black now.
This site uses cookies to help personalise content, tailor your experience and to keep you logged in if you register.
By continuing to use this site, you are consenting to our use of cookies.

") Im from Finland so don't wonder if my english is a bit weird
Im from Finland so don't wonder if my english is a bit weird