
Odontologist
Umina Beach, Australia....Where does that part go?
I recently started a build thread for a 1982 Honda CX500 cafe racer.
It's my intention to change the front end for a GSXR with USD forks.
It's actually my first build and I have very little experience in tinkling with bikes.
Because of my lack of skills in fabrication, I have purchased several components, like the seat module and rear hub conversion to spokes from Cafe Racer Kits, and a front end conversion hub and stem form Cognito Motors. I plan to expand my skills for my next build, should I succeed in this current one.....I'm hooked!
The build thread is a work in progress and will take a few more months to almost finish (they're never finished....right?)
Because of my lack of knowledge on things mechanical, I decided to pull the engine apart, and rebuild it with new seals, gaskets, and bearings wherever they were needed and available.
I believe the engine did not need the rebuild, but I did..... otherwise I would learn nothing about the workings of what is the heart of this motorcycle, and would not become worthy of contributing to, or being part of this community.
I was encouraged and inspired after reading the "Engine Inspiration thread" and the many stories and experiences form other DTT contributors, so with the help of this site and a manual, and a few extra tools, I started.
Although this sort of thing is probably second nature to many of the DTT membership, it was uncharted waters for me, and frightening thinking that I would stuff it all up. In the process, I have become a great fan of this engine, of which I knew nothing about previously. I haven't managed to start it, but everything rotates freely....so that must be a good sign.
I get a good feeling when I'm working on this engine, and I feel chumped that I got it to the stage it is.
I'd like to share it.
After pulling it apart, comes the long process of cleaning. Keeping thins separately and not losing parts is a real challenge.
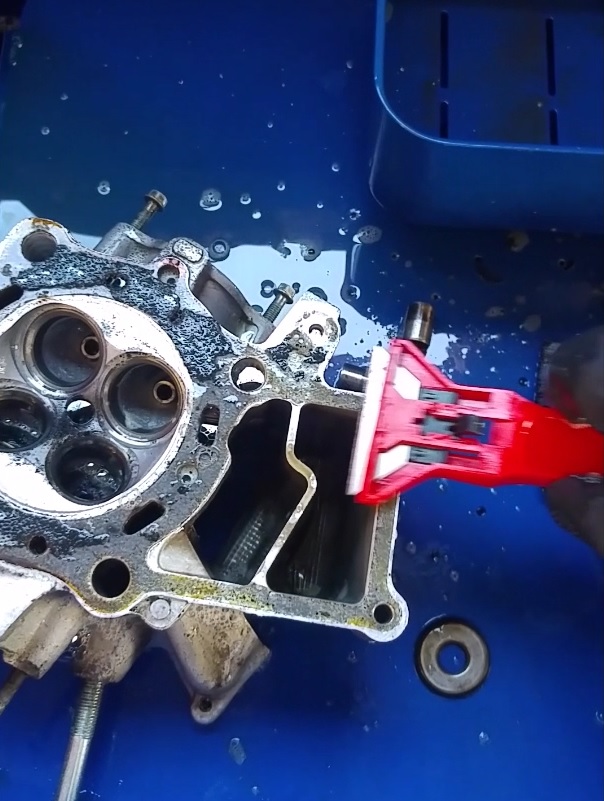
Scotch-brite scourers and hours of scrubbing. If the wife saw how much effort I put into this compared to the housework........let's not think about it.
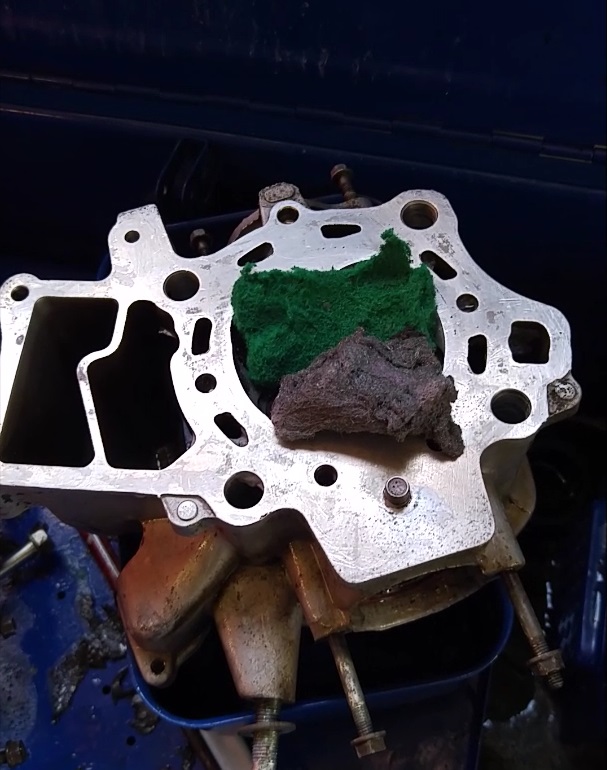
But the results are worth it.
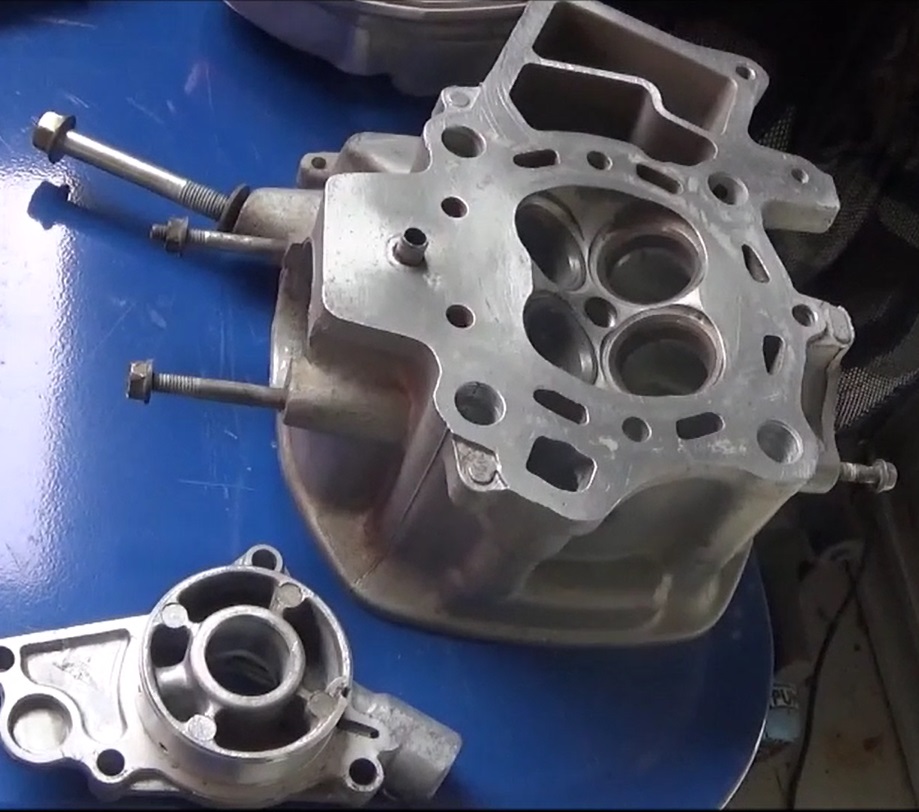
I got myself a sandblasting cabinet and used walnut shell to clean things up nicely, washed with a household Gurney (pressure washer), dried, and started taping up in preparation for painting.
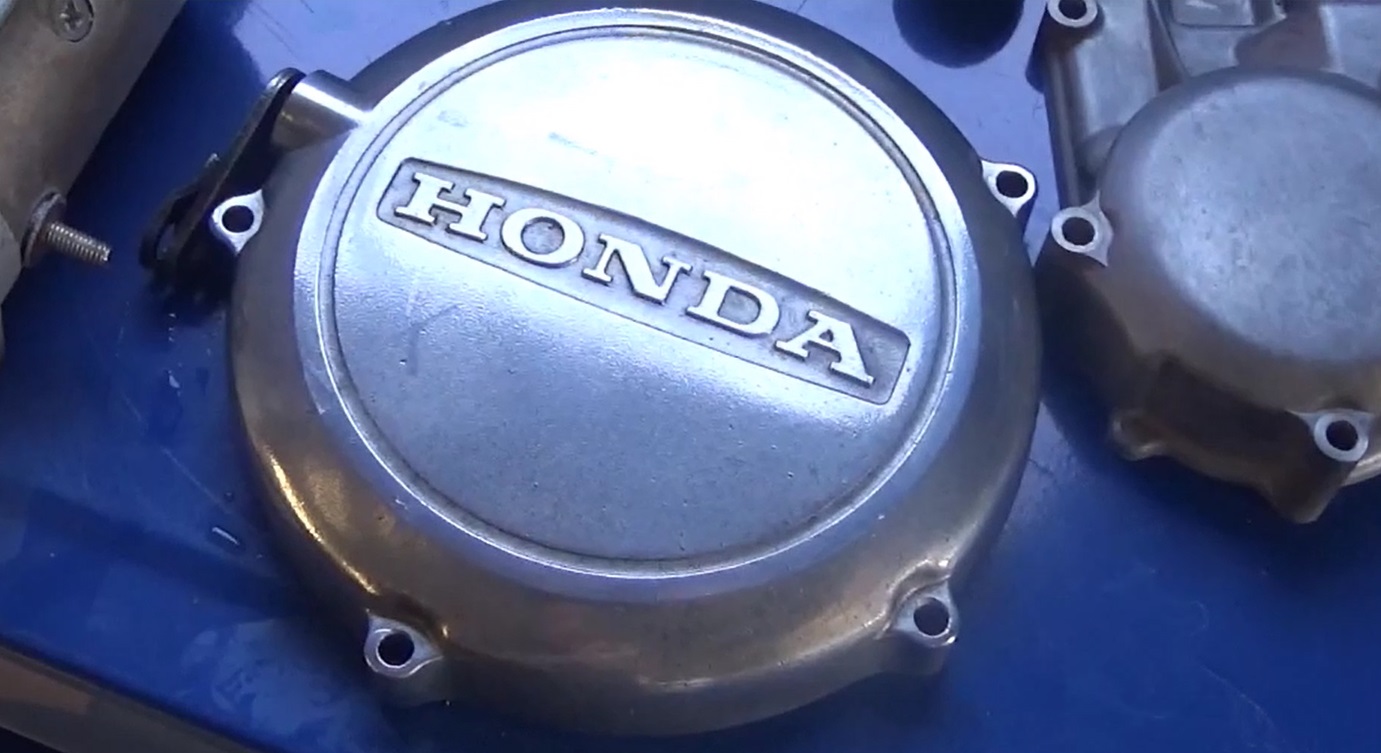
Some parts I didn't want to paint. I used a bench lathe I have for my work, and using different cutting compounds, tried to get some shine going.
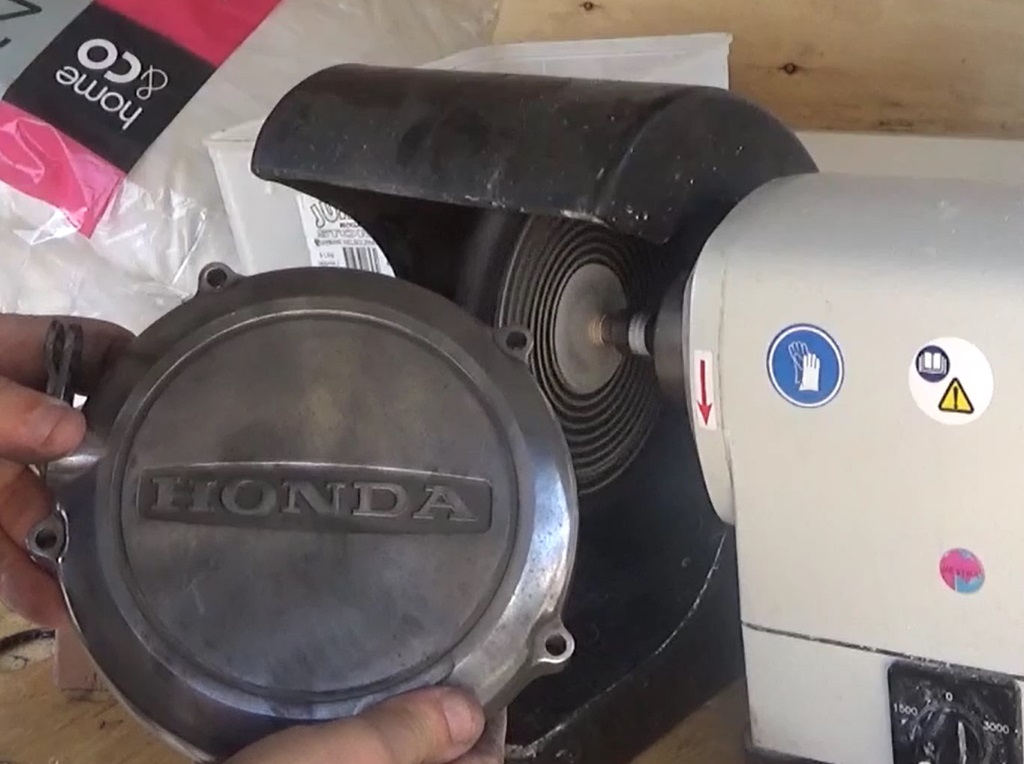
It's not mirror finish, but I was happy with result.
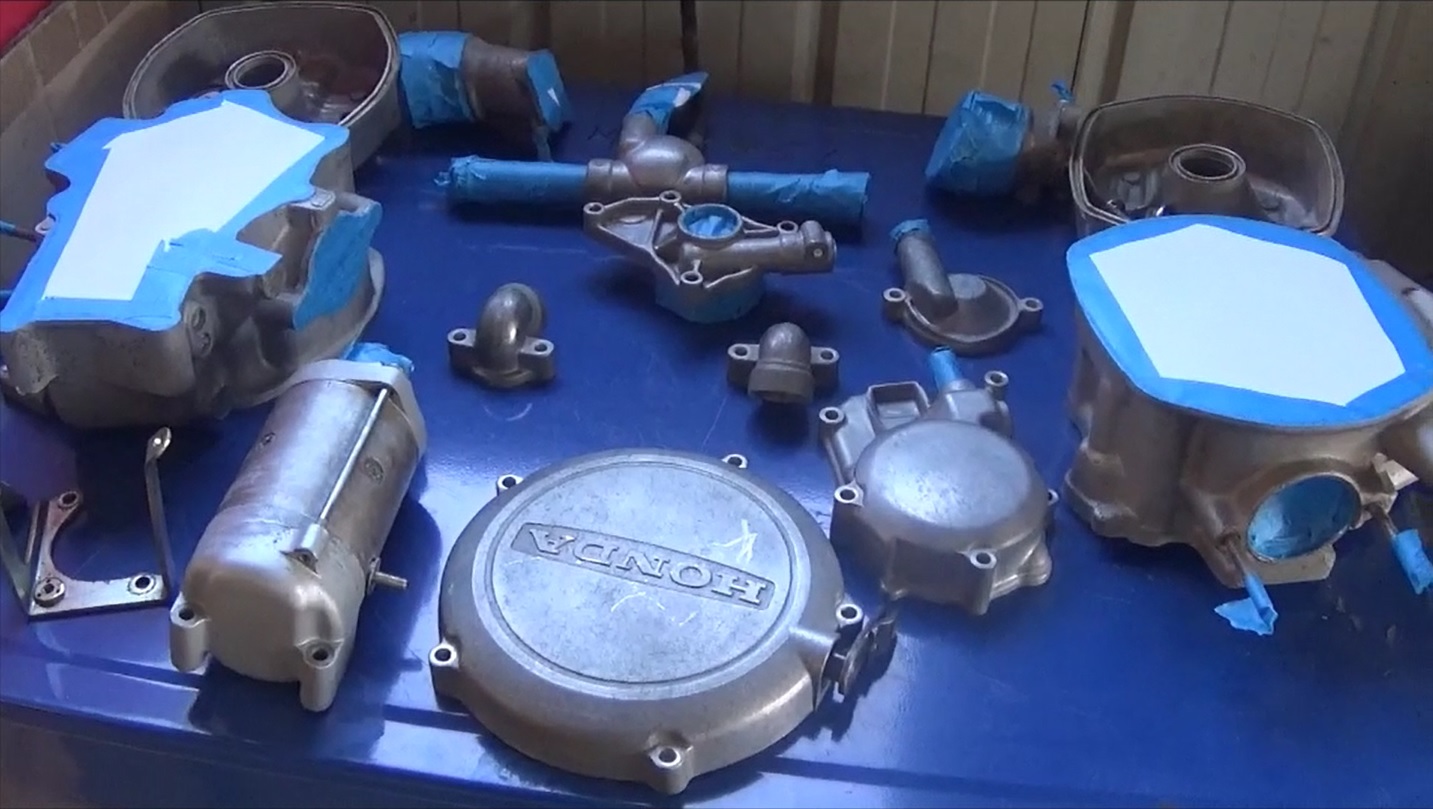
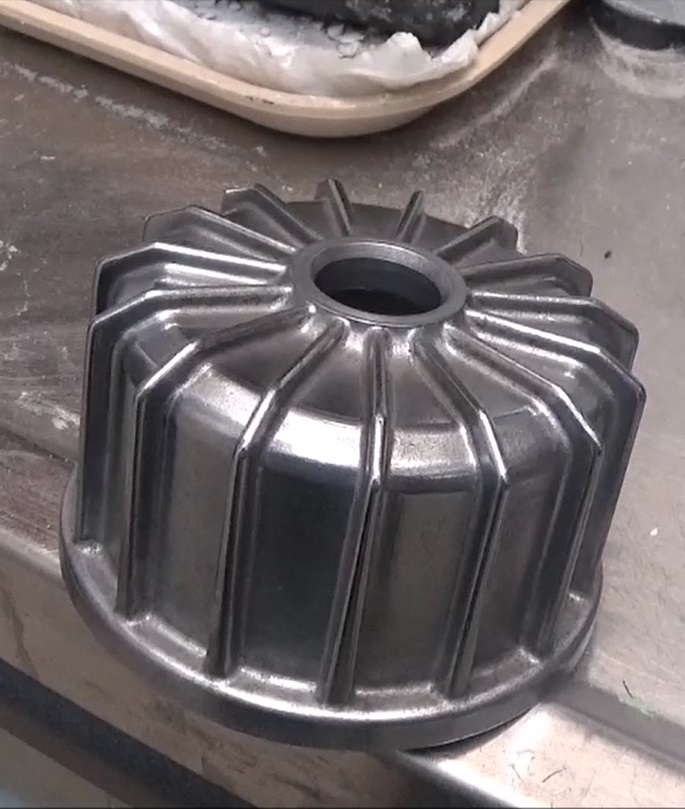
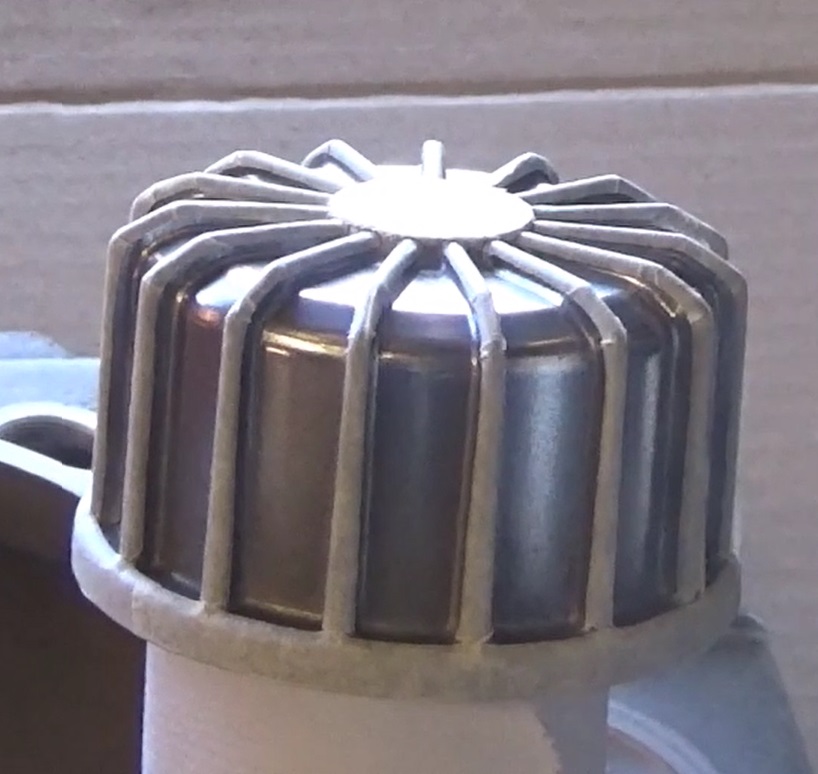
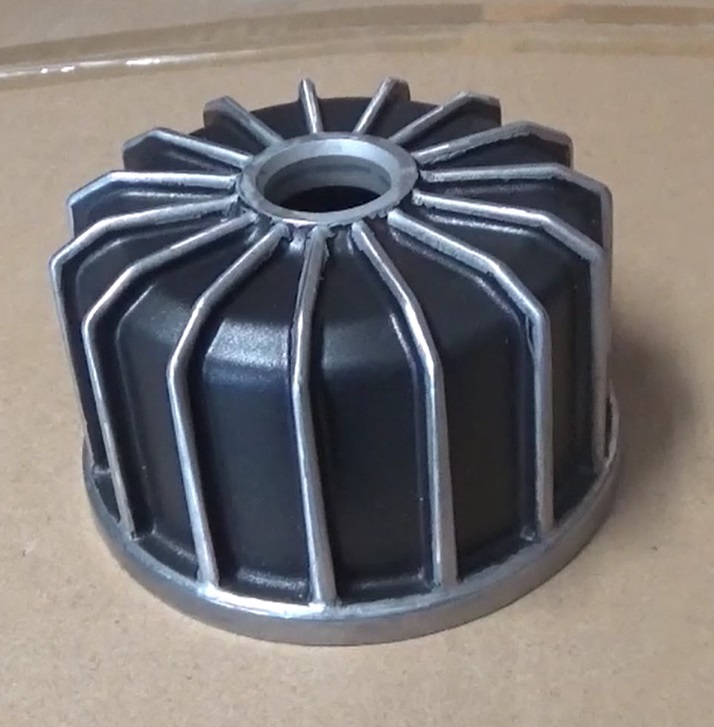
Polished the fins of the oil filter housing, and some on the engine block.
Taped to block out for painting.
VHT Engine enamel primer x 3 coats and VHT Black Pearl x 3 coats, followed by 1 hour in oven at around 90 degrees celcius. After removing tape I had to detail using some wet'n'dry to get rid of the burred finish at the edges (not done yet in photo).
Other parts getting same treatment.
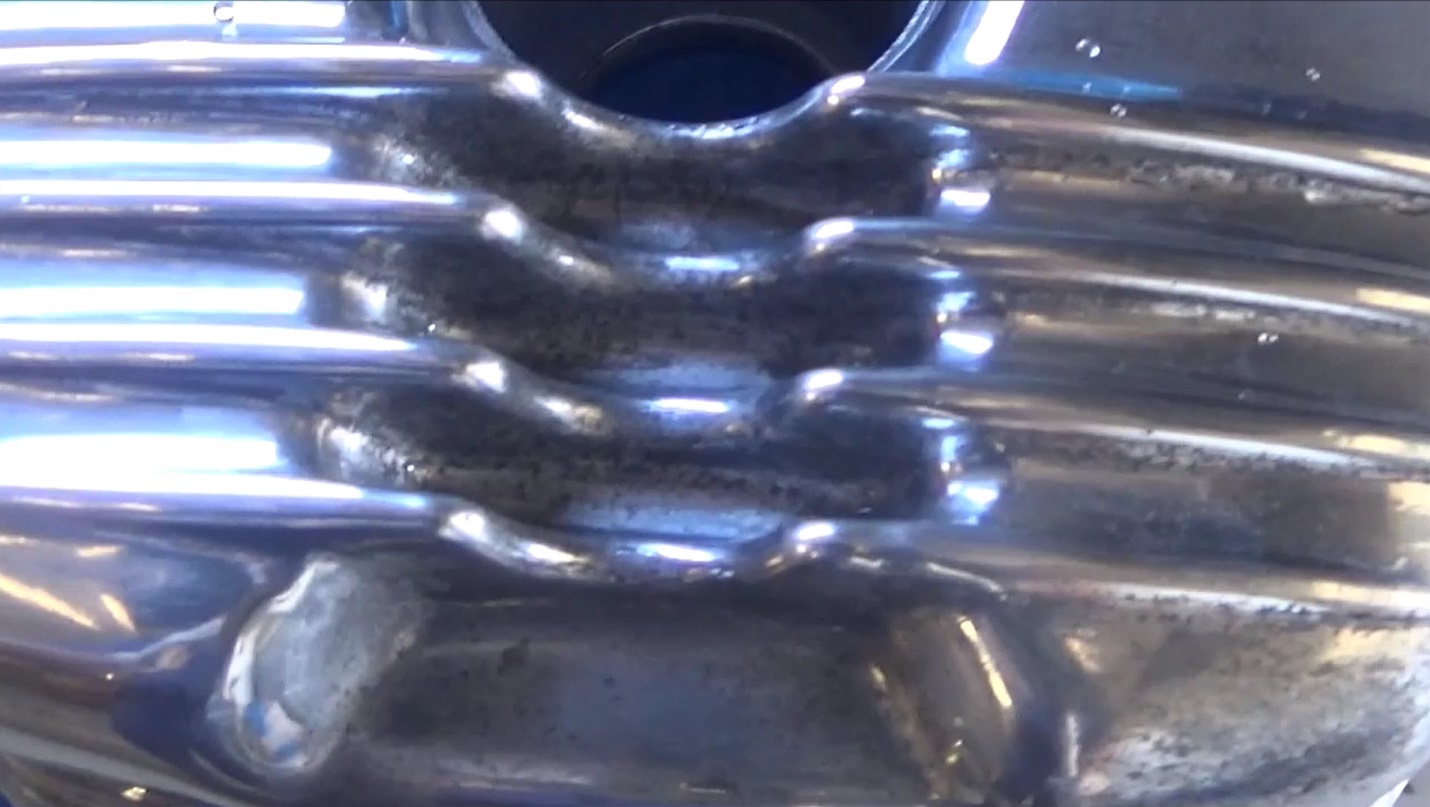
Rocker cover on right polished on bench lathe also.....but....
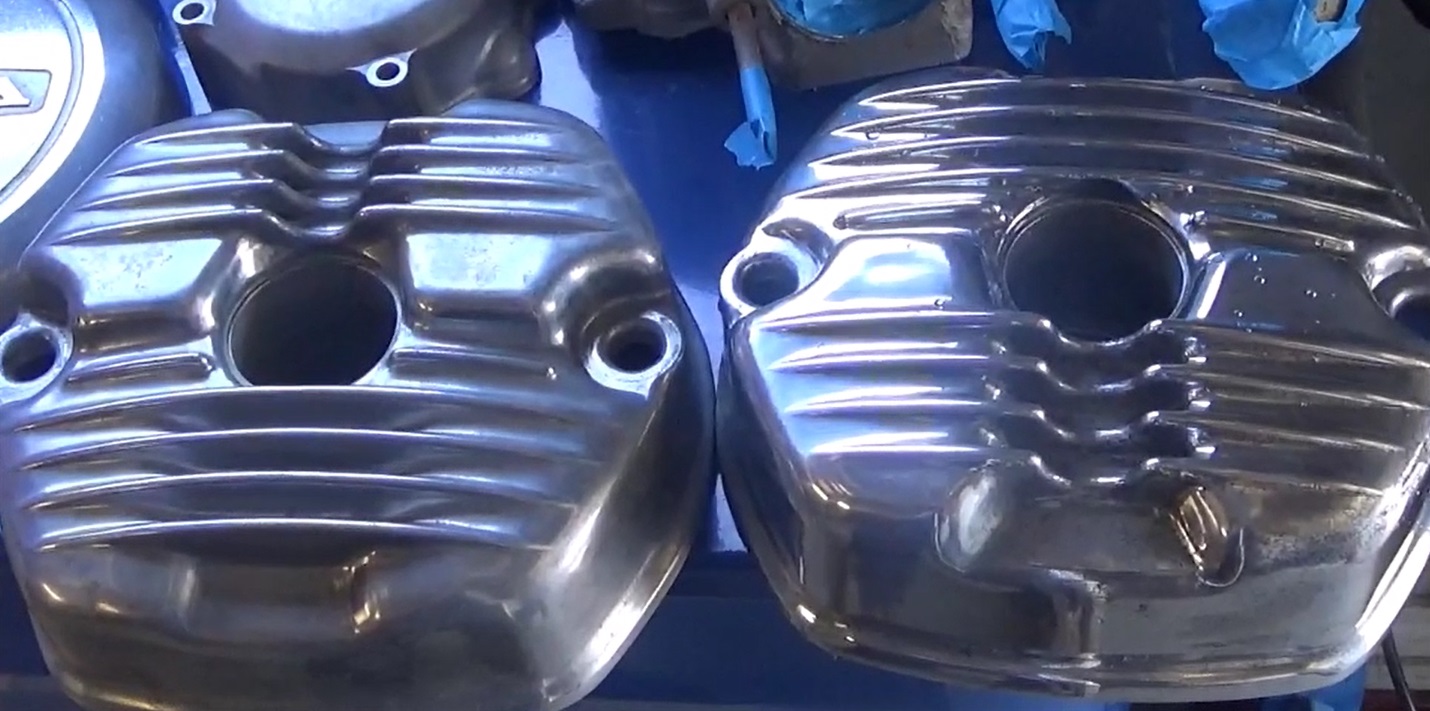
......couldn't polish in between the fins. Any suggestions??
Started to check all the parts that have specs against the figures in the manual to see if any parts needed replacing.
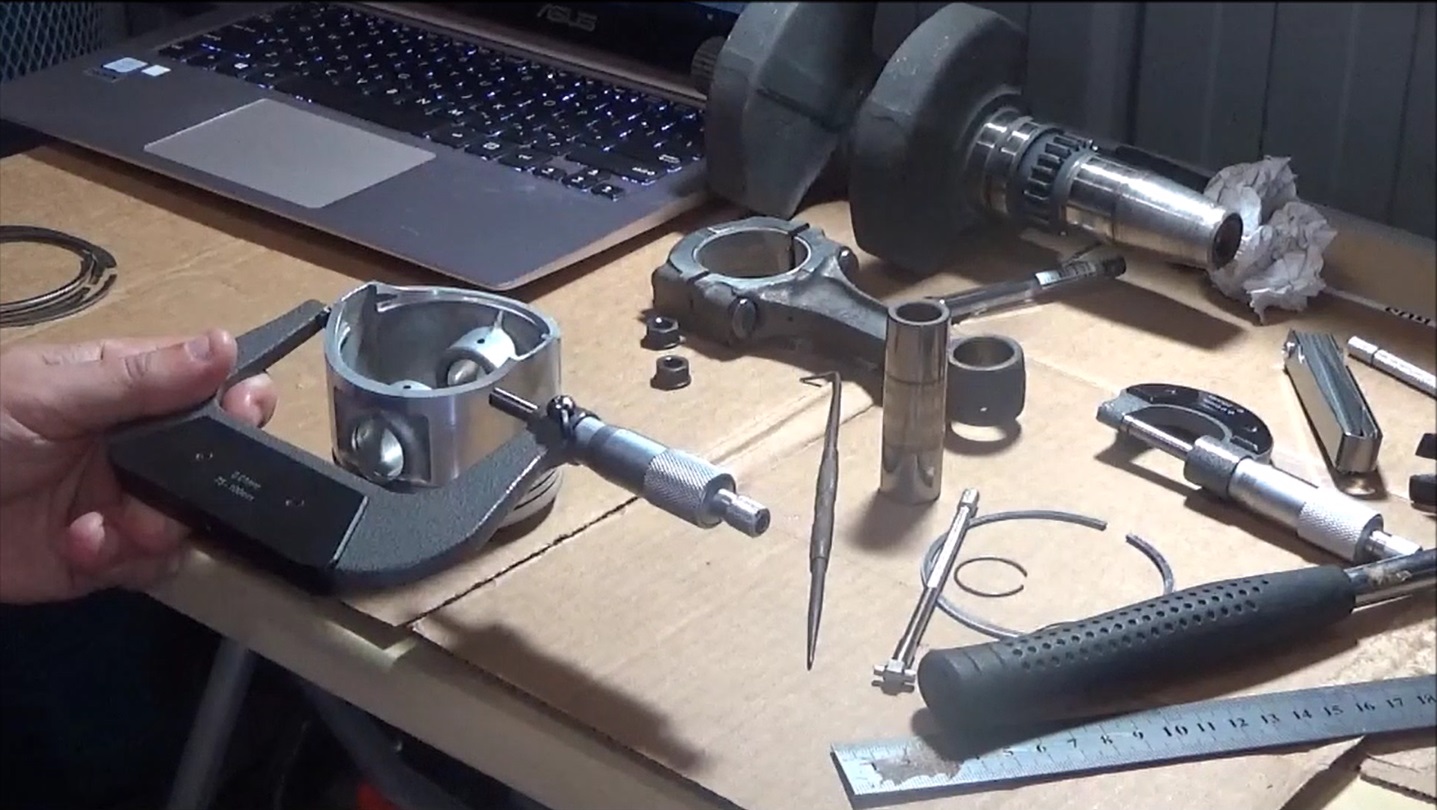
It turned out that after 85,000Km over 35 years, there was no significant wear on any parts measured.
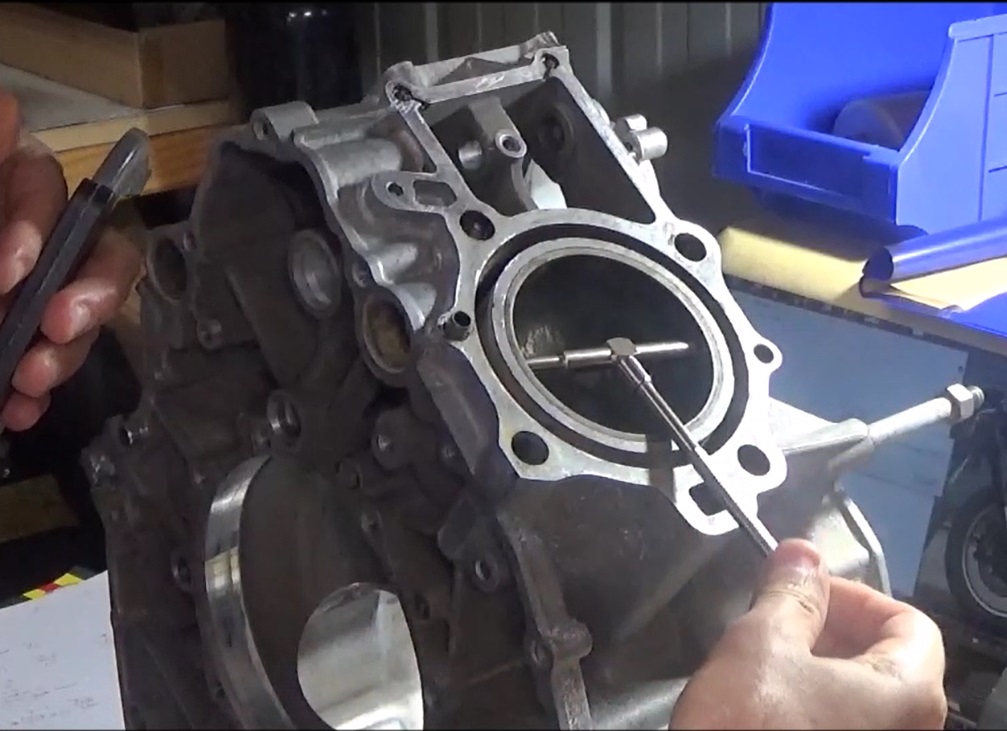
But I still changed bearings where I could find them. Big end shells are not easy to find by all accounts. I managed to find some that did not correspond to my bike's specific codes found on the crank shaft and conrods.....
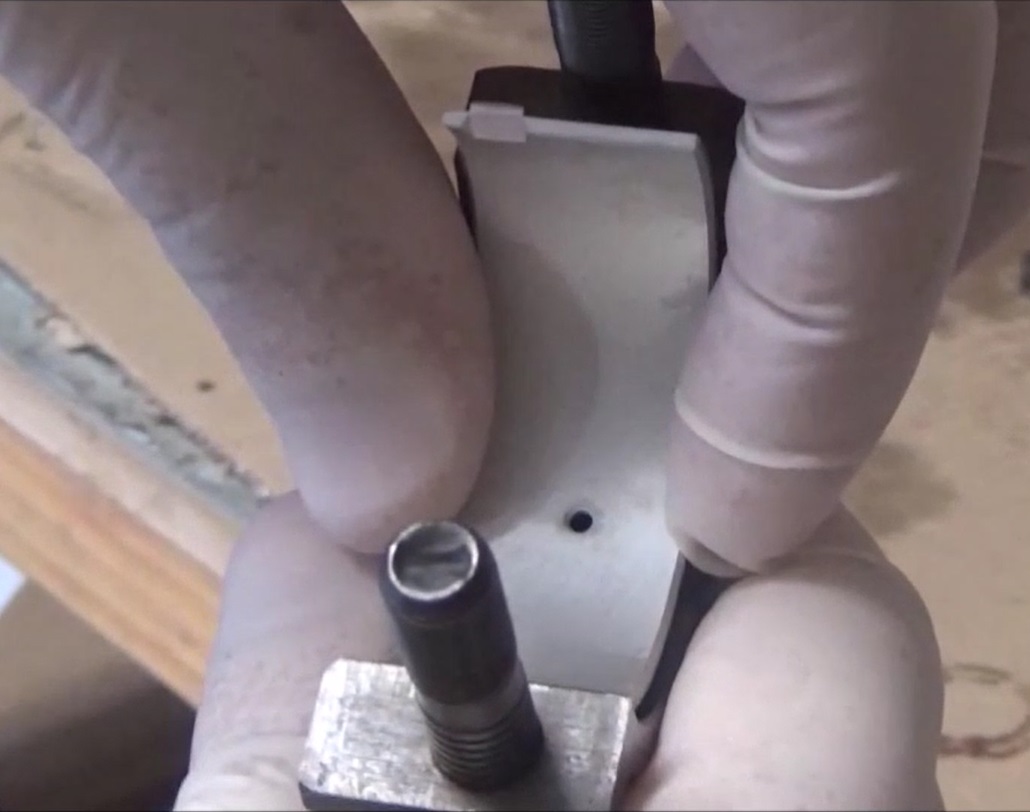
...but after trying them on and using Plastigauge to check oil clearance at crank pin and bearing interface, I found that the clearance was at low end of acceptable clearance.....and that's what matters.....doesn't it?
New piston rings
Honing cylinder with an inexpensive honing tool and my cordless drill
Honing criss-cross pattern visible.
Pistons and con-rods going in
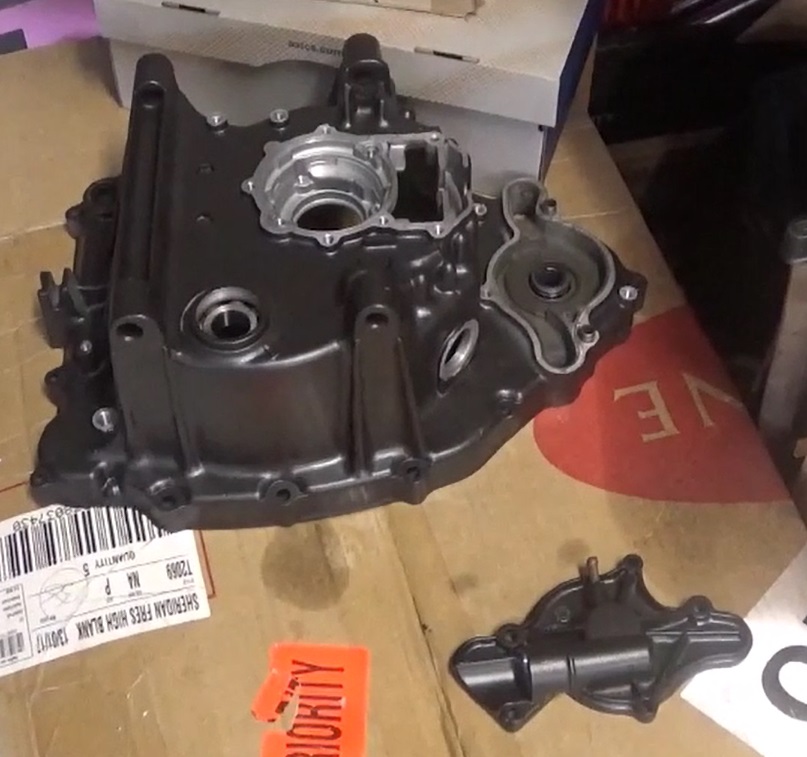
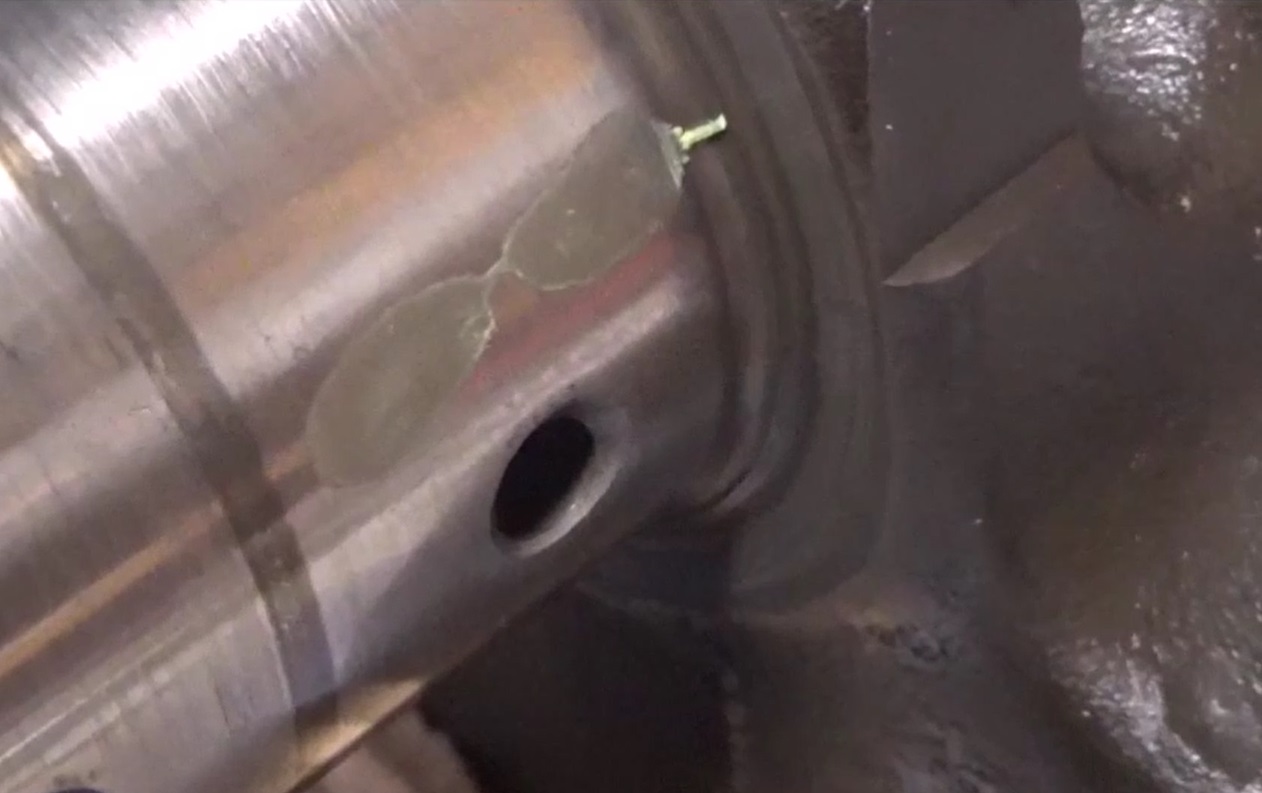
This is the rear crank-case cover, which is a pressure fit, and required great care to remove and not damage the oil bearing. This one is damaged. It could have been me during removal, but it also looks like pitting
Again I had to source bearings, which again were not the exact match to my engine. This oil clearance can't be measured as far as I know, so I took a chance on a slightly tighter fit, counting on some minor wear to work in my favour. It will either run, or burn up if insufficient clearance is available.
You will notice I put some tape around the crank-shaft teeth to protect the bearing during refit of back cover.
New mainshaft and countershaft bearing in transmission holder....
....and in the transmission case.
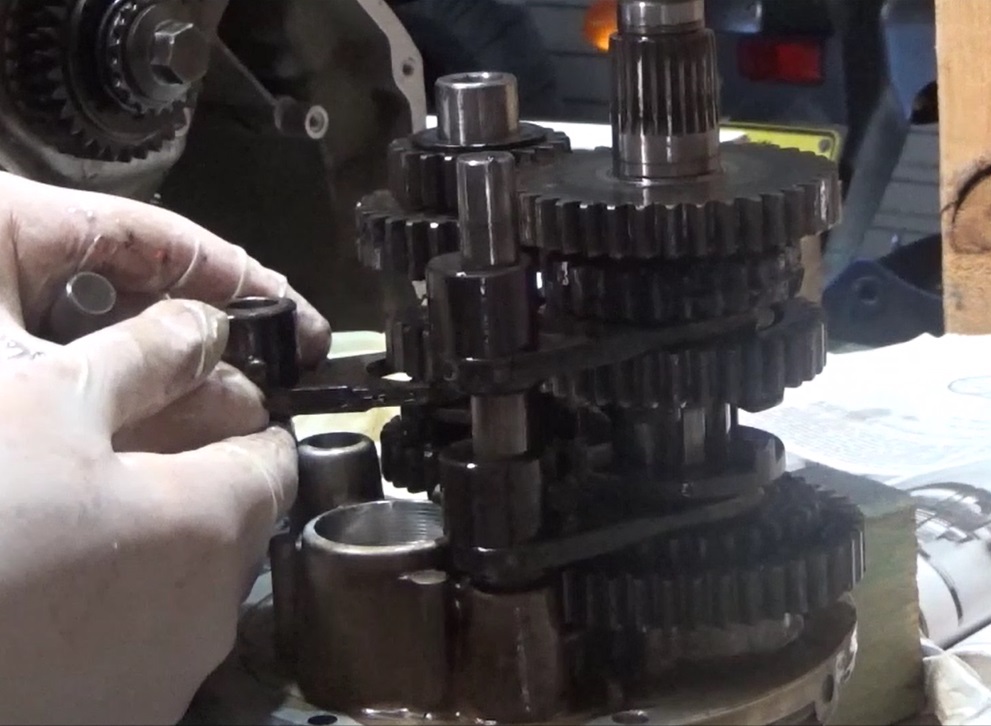
Assembling the transmission.
New clutch friction plates and springs.
Made a tool to lock the crank-shaft so I could tighten clutch lock nut to the high torque specified.
Oil pump in place. Preparing to close the front cover. New gasket will be placed, and note all the little pieces of the puzzle that can soooo easily get lost in the many months that the engine is in pieces.
I used new stainless steel hex head bolts. The look quite good against the black background.
Cam followers in place and well lubricated.
Well greased cam-shaft going in. Where the bloody hell is the drive pin??? Took me 3 days to find it. It was hiding under the flap of a cardboard box where I had placed all the related components.
Cam mechanism in place. New cam chain. This is an automatic tensioner. I'm showing all the parameters that need to be in place to have timing correct. All from the manual.
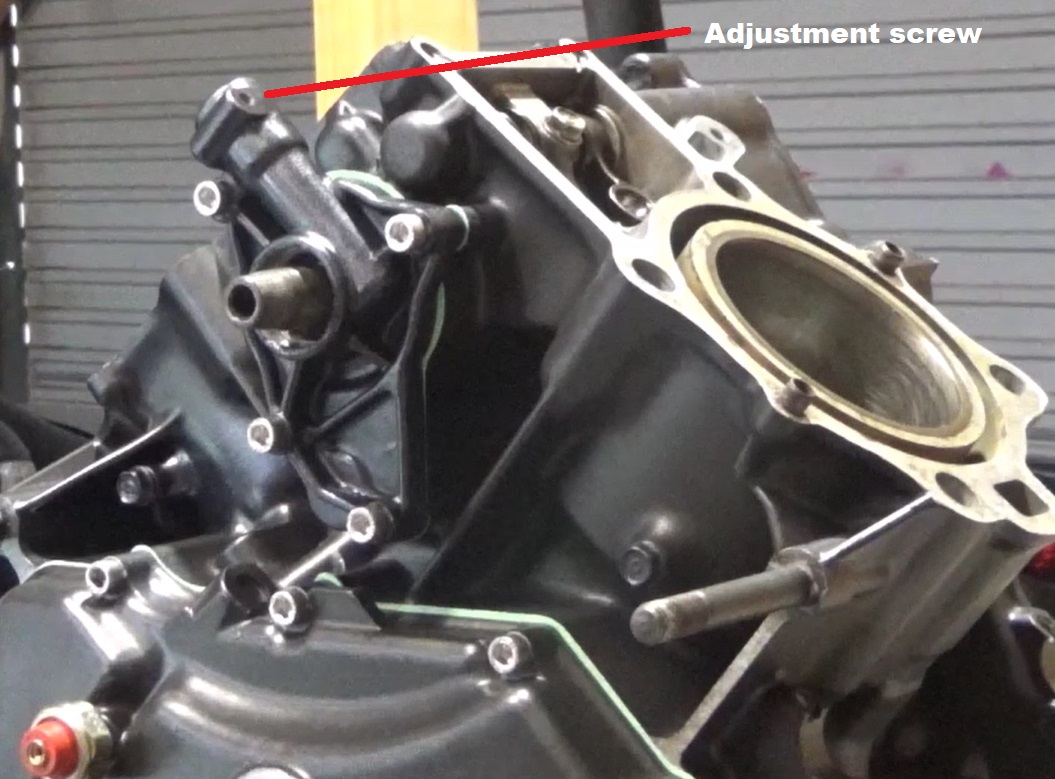
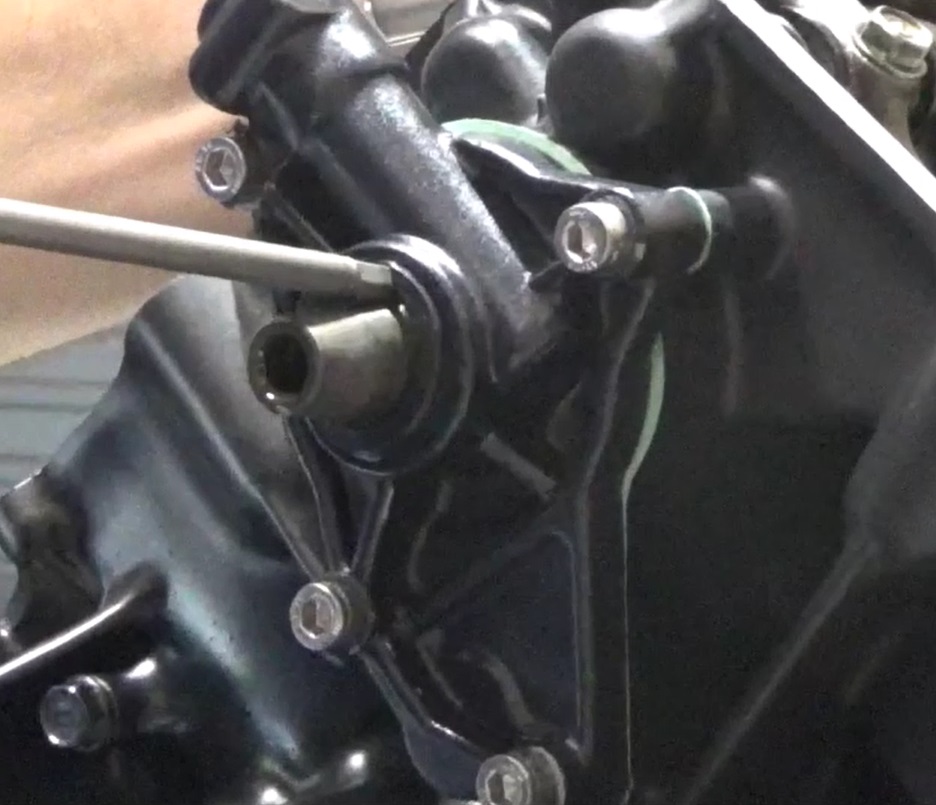
Tacho gear. I read that this is a good time to replace the tacho gear adjustment screw (phillips head from factory) with a hex head, as there is very little access when bike is assembled.
New oil seal. The mechanical cam-driven fan goes on the protruding portion of the cam-shaft. I am looking at replacing for an electric fan which means cutting this protruding section to allow fit of fan assembly.
Clutch cover in place. Still touching up oil filter housing.

Flywheel and gear shift linkages.
New final shaft and gear shift spindle seals. Note some chipping paintwork form over-handling. Will need to touch up once engine assembled.
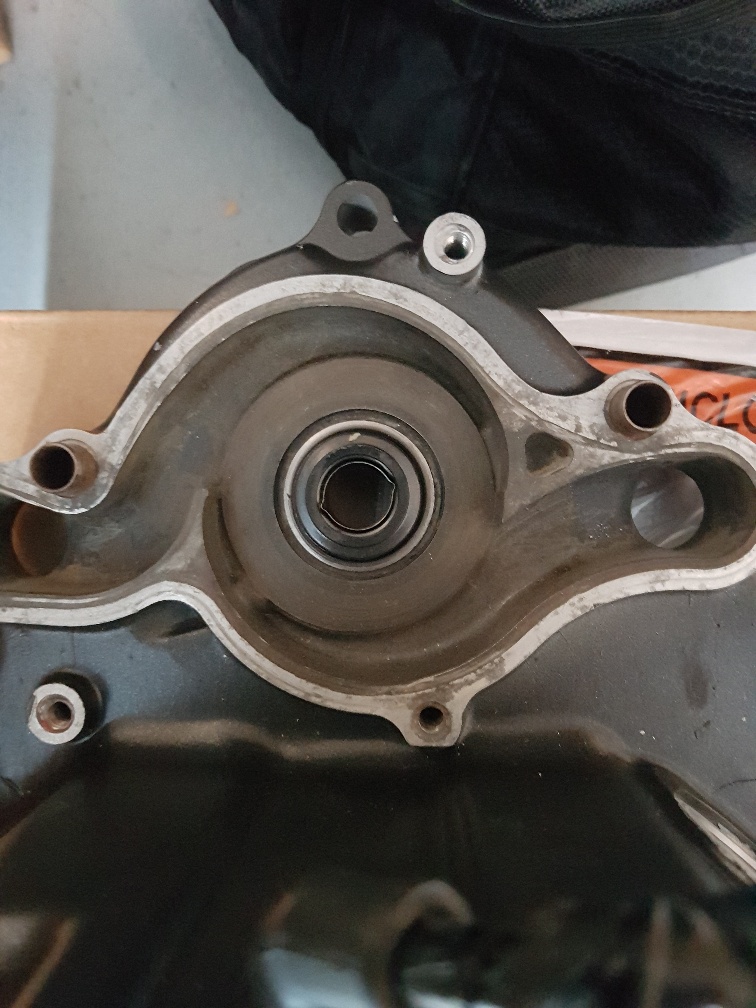
Excellent opportunity to change the mechanical and oil seals on the water pump.
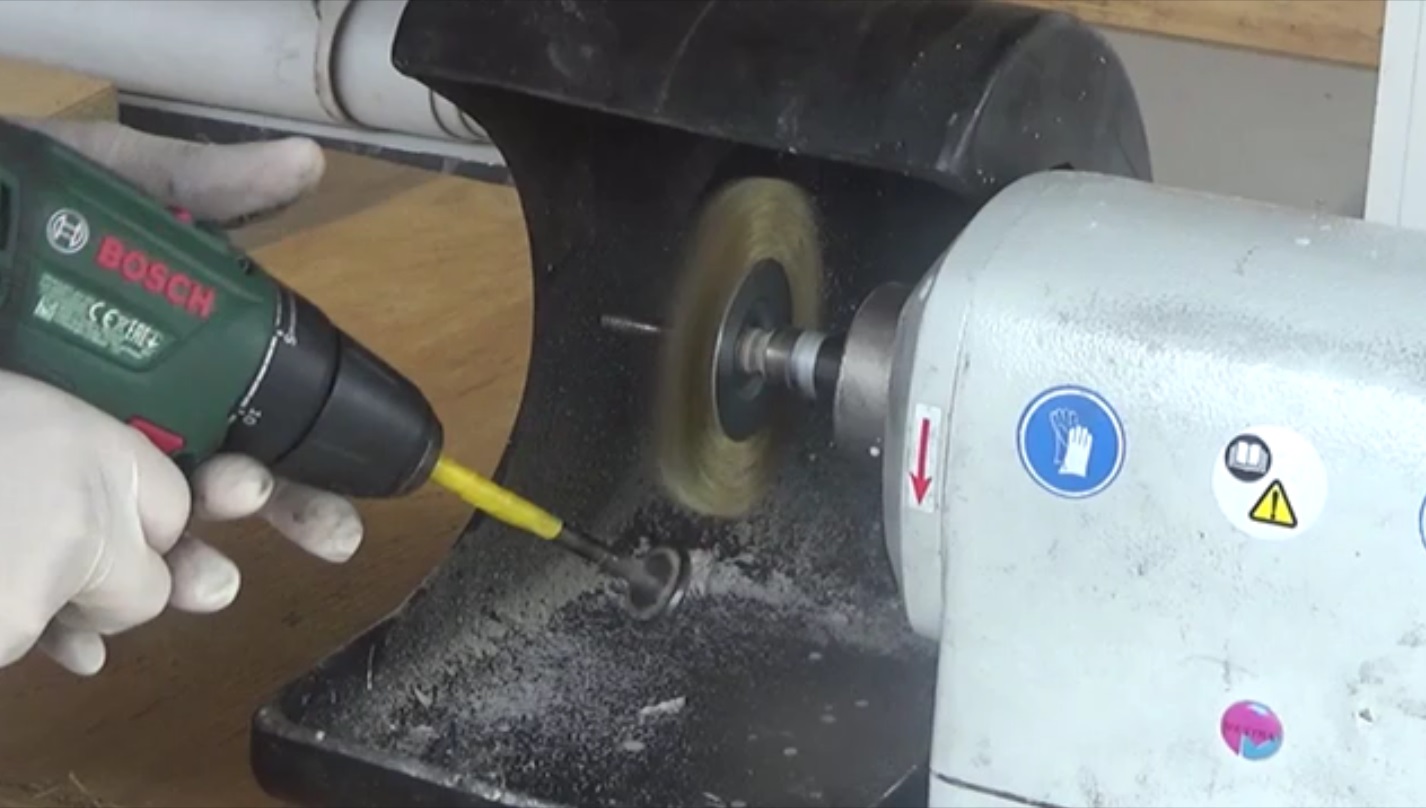
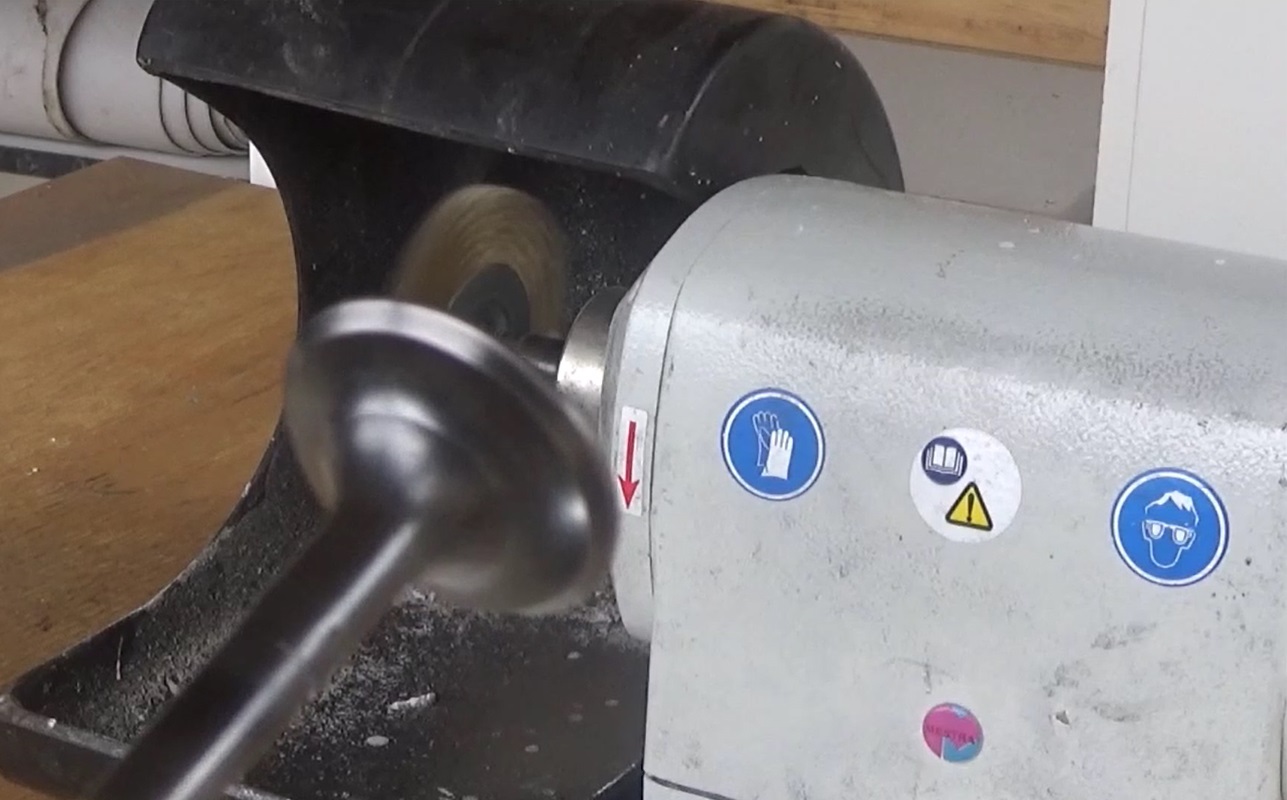
Cleaning the valves. I saw this technique on a youtube video by The Workshop, where he dismantles a CX500 engine, but never gets around to putting it back together. He says that his sole purpose was to explain the workings of a four stroke engine. As a novice myself, I learned much more when I put it together than when I pulled it apart.
But they did come up pretty good.
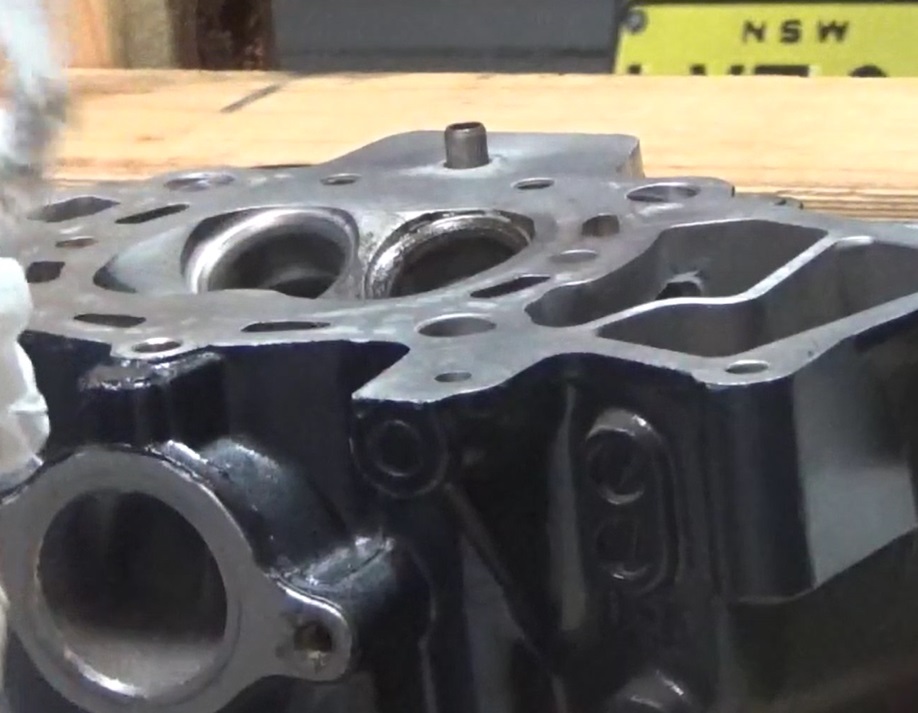
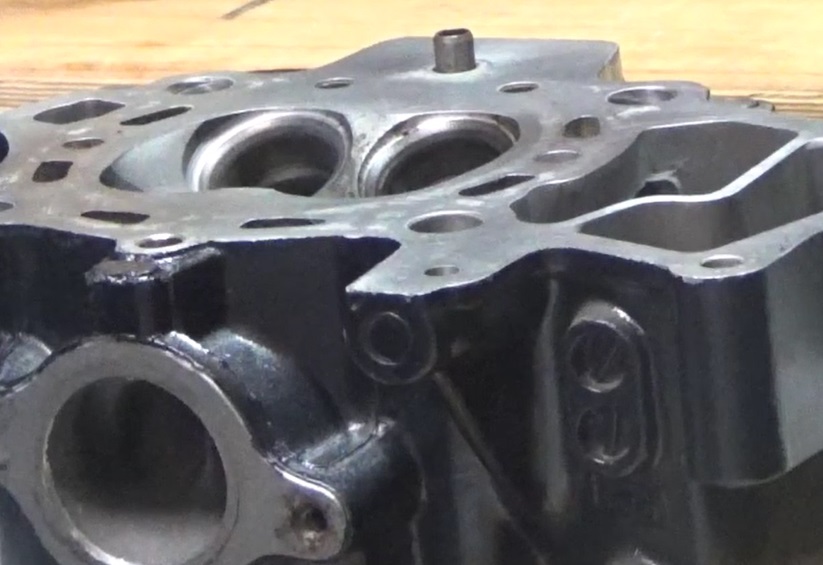
The valve seat cuts looked in a good state, but dirty and carbonised, especially on the exhaust ports.
After lapping, they came up clean and shiny. Valves seated well.
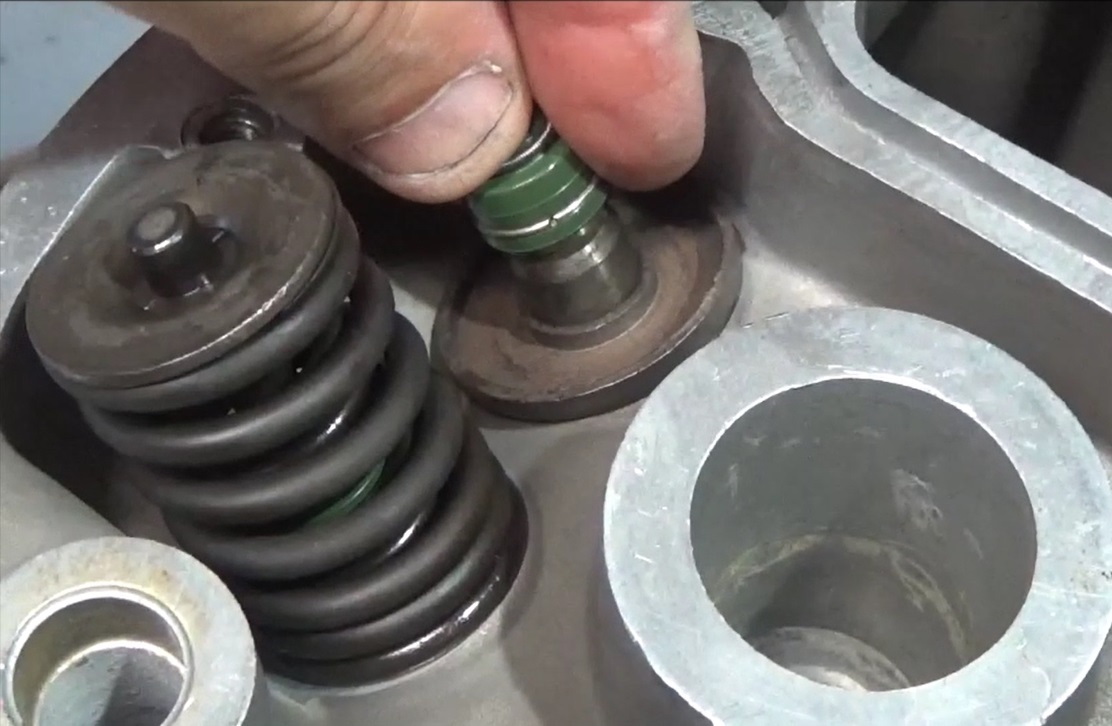
New valve stem seals.
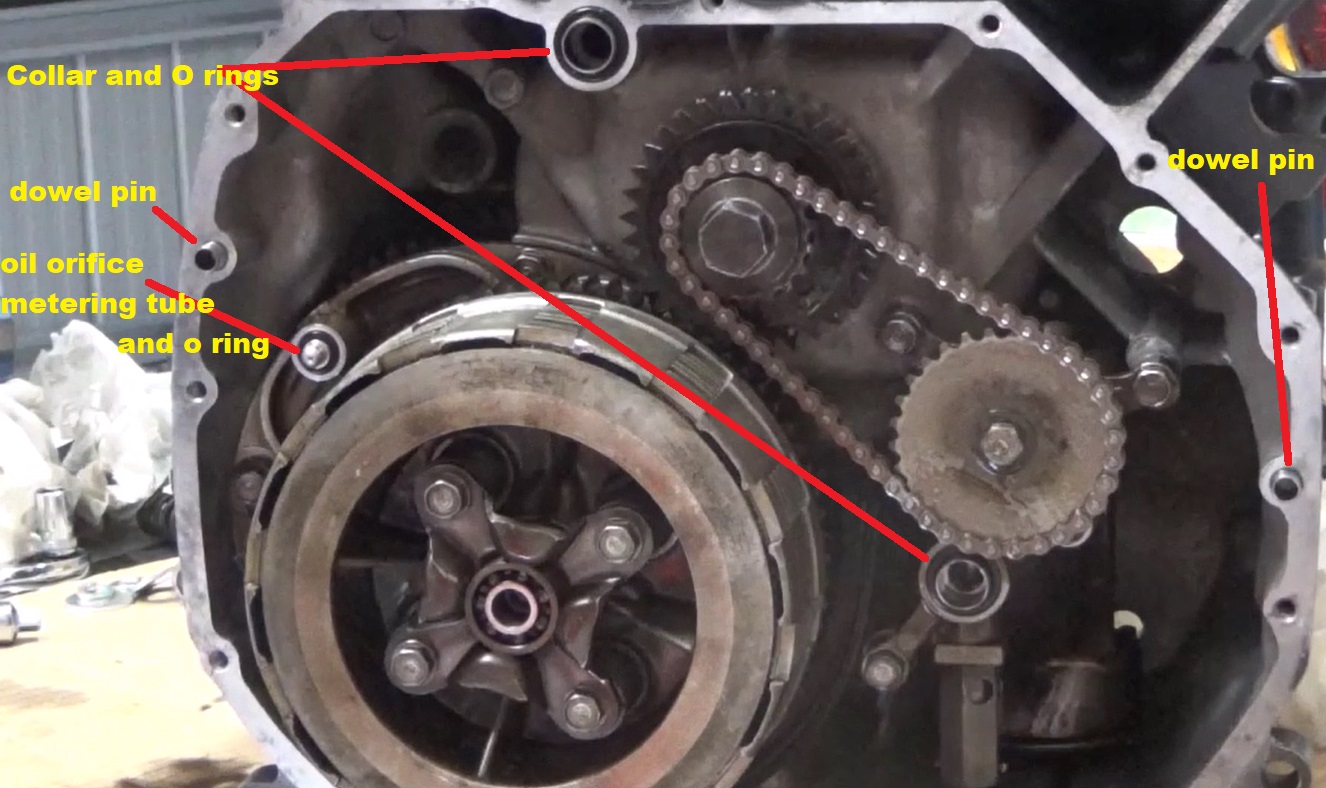
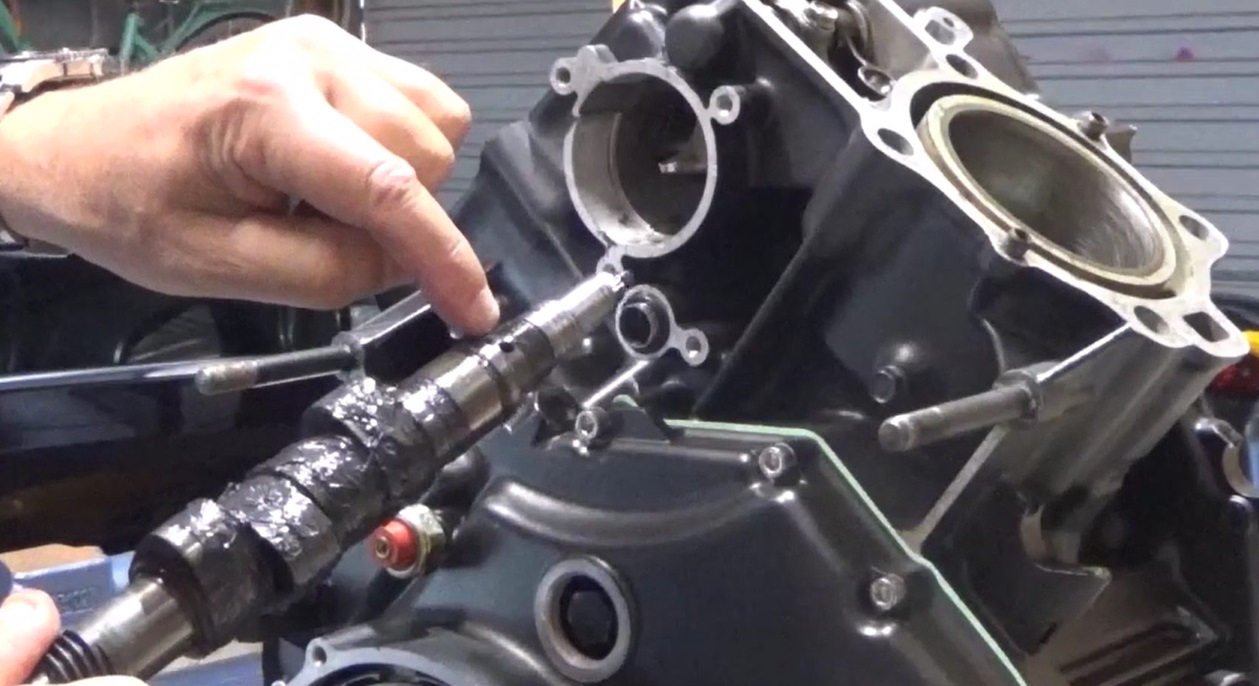
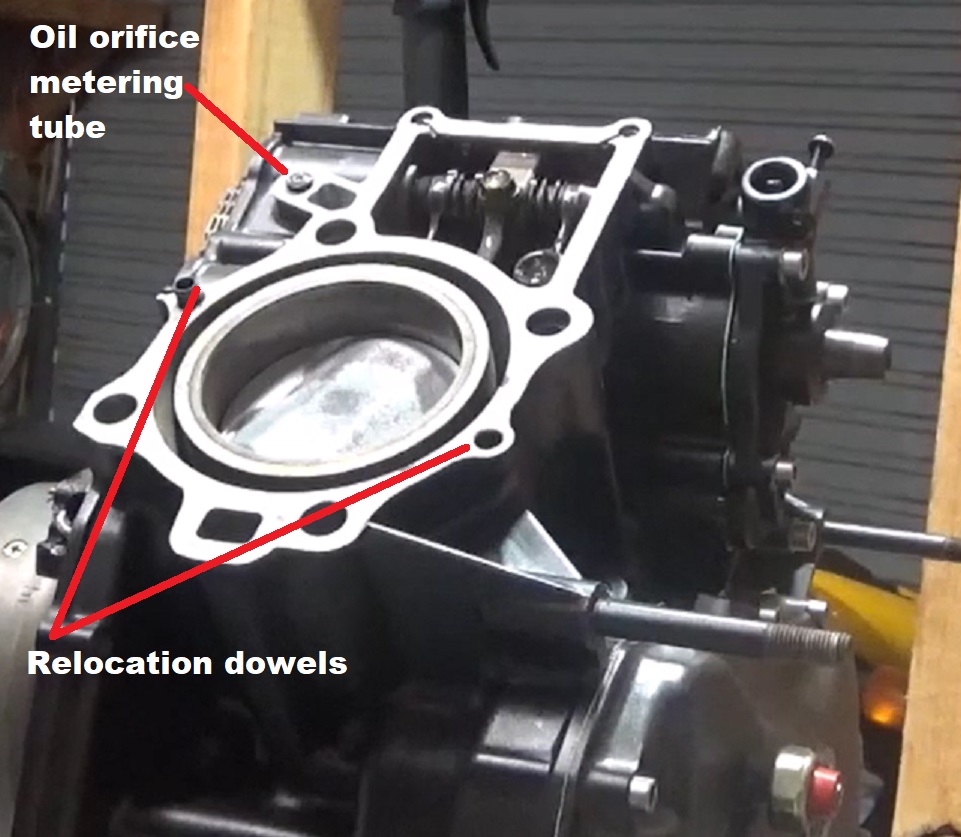
Preparing the block to receive the heads. Once again, hold on to all the little parts so they can go back on. New O rings where old ones were removed, like the oil orifice.
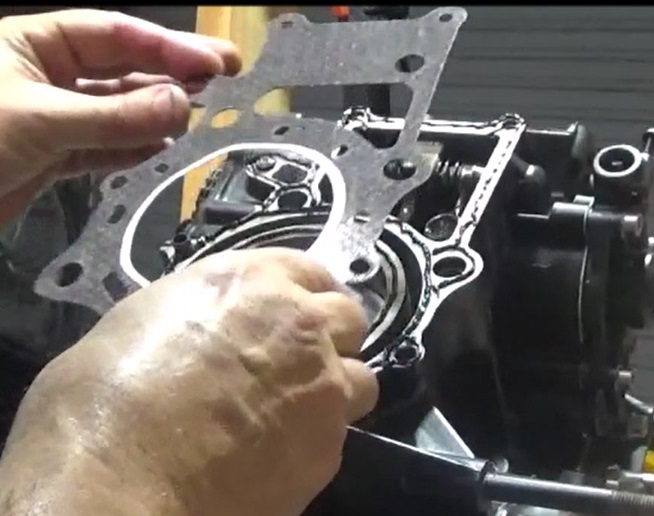
New head gaskets and sealant.
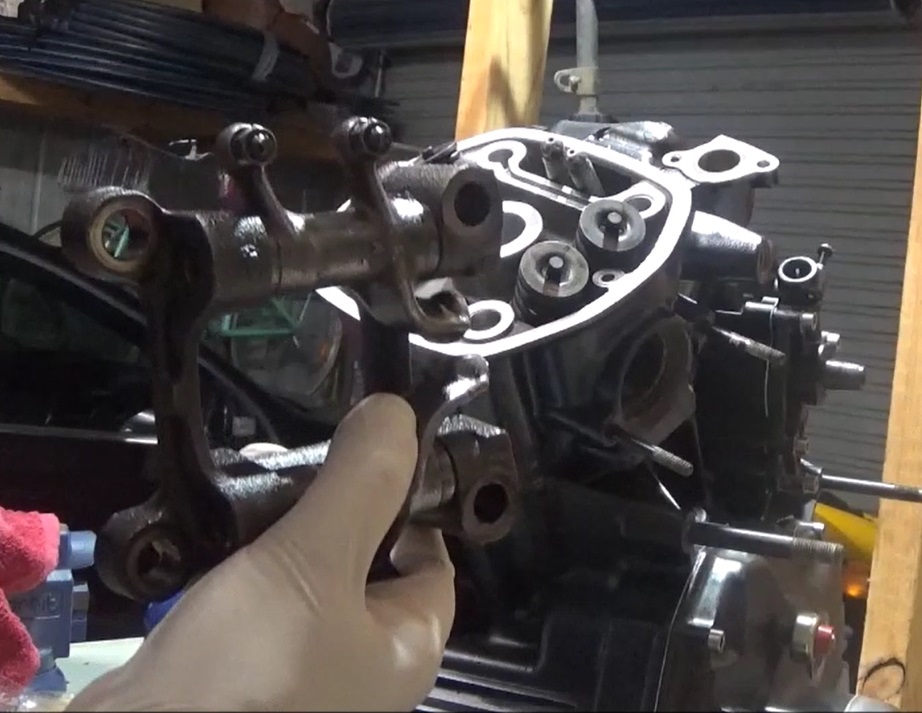
Push rods and rockers.
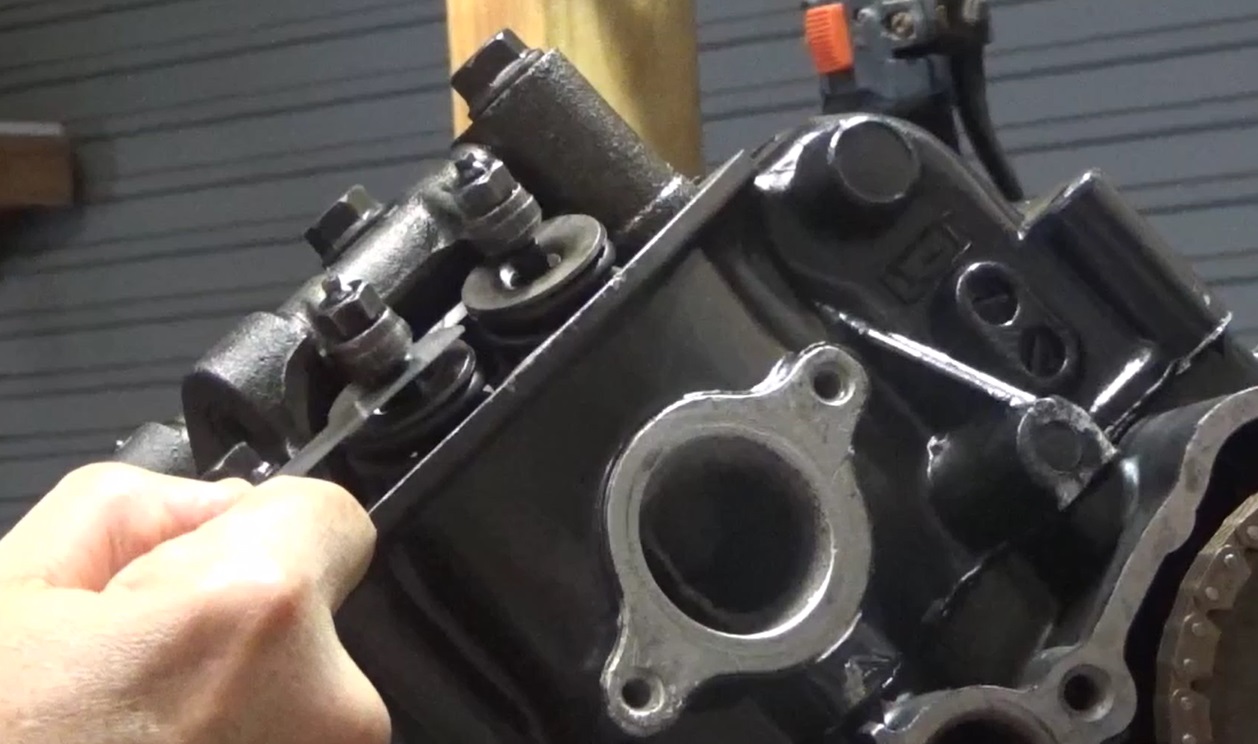
Tappets set.
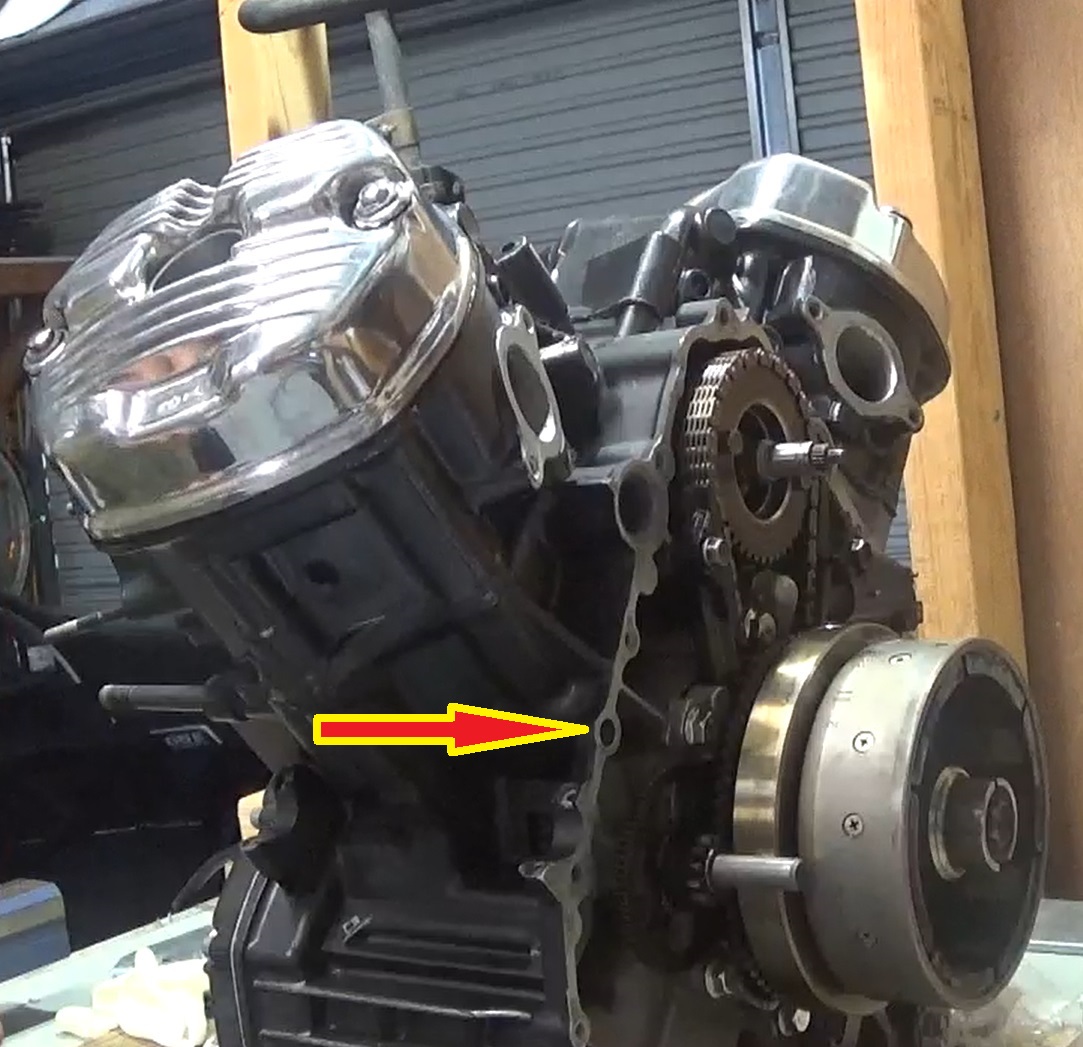
Rocker cover back on. Almost done but I did lose a locating dowel as shown. I'm waiting for it to arrive and then back cover can go back on.
It's my intention to change the front end for a GSXR with USD forks.
It's actually my first build and I have very little experience in tinkling with bikes.
Because of my lack of skills in fabrication, I have purchased several components, like the seat module and rear hub conversion to spokes from Cafe Racer Kits, and a front end conversion hub and stem form Cognito Motors. I plan to expand my skills for my next build, should I succeed in this current one.....I'm hooked!
The build thread is a work in progress and will take a few more months to almost finish (they're never finished....right?)
Because of my lack of knowledge on things mechanical, I decided to pull the engine apart, and rebuild it with new seals, gaskets, and bearings wherever they were needed and available.
I believe the engine did not need the rebuild, but I did..... otherwise I would learn nothing about the workings of what is the heart of this motorcycle, and would not become worthy of contributing to, or being part of this community.
I was encouraged and inspired after reading the "Engine Inspiration thread" and the many stories and experiences form other DTT contributors, so with the help of this site and a manual, and a few extra tools, I started.
Although this sort of thing is probably second nature to many of the DTT membership, it was uncharted waters for me, and frightening thinking that I would stuff it all up. In the process, I have become a great fan of this engine, of which I knew nothing about previously. I haven't managed to start it, but everything rotates freely....so that must be a good sign.
I get a good feeling when I'm working on this engine, and I feel chumped that I got it to the stage it is.
I'd like to share it.
After pulling it apart, comes the long process of cleaning. Keeping thins separately and not losing parts is a real challenge.
Scotch-brite scourers and hours of scrubbing. If the wife saw how much effort I put into this compared to the housework........let's not think about it.
But the results are worth it.
I got myself a sandblasting cabinet and used walnut shell to clean things up nicely, washed with a household Gurney (pressure washer), dried, and started taping up in preparation for painting.
Some parts I didn't want to paint. I used a bench lathe I have for my work, and using different cutting compounds, tried to get some shine going.
It's not mirror finish, but I was happy with result.
Polished the fins of the oil filter housing, and some on the engine block.
Taped to block out for painting.
VHT Engine enamel primer x 3 coats and VHT Black Pearl x 3 coats, followed by 1 hour in oven at around 90 degrees celcius. After removing tape I had to detail using some wet'n'dry to get rid of the burred finish at the edges (not done yet in photo).
Other parts getting same treatment.
Rocker cover on right polished on bench lathe also.....but....
......couldn't polish in between the fins. Any suggestions??
Started to check all the parts that have specs against the figures in the manual to see if any parts needed replacing.
It turned out that after 85,000Km over 35 years, there was no significant wear on any parts measured.
But I still changed bearings where I could find them. Big end shells are not easy to find by all accounts. I managed to find some that did not correspond to my bike's specific codes found on the crank shaft and conrods.....
...but after trying them on and using Plastigauge to check oil clearance at crank pin and bearing interface, I found that the clearance was at low end of acceptable clearance.....and that's what matters.....doesn't it?
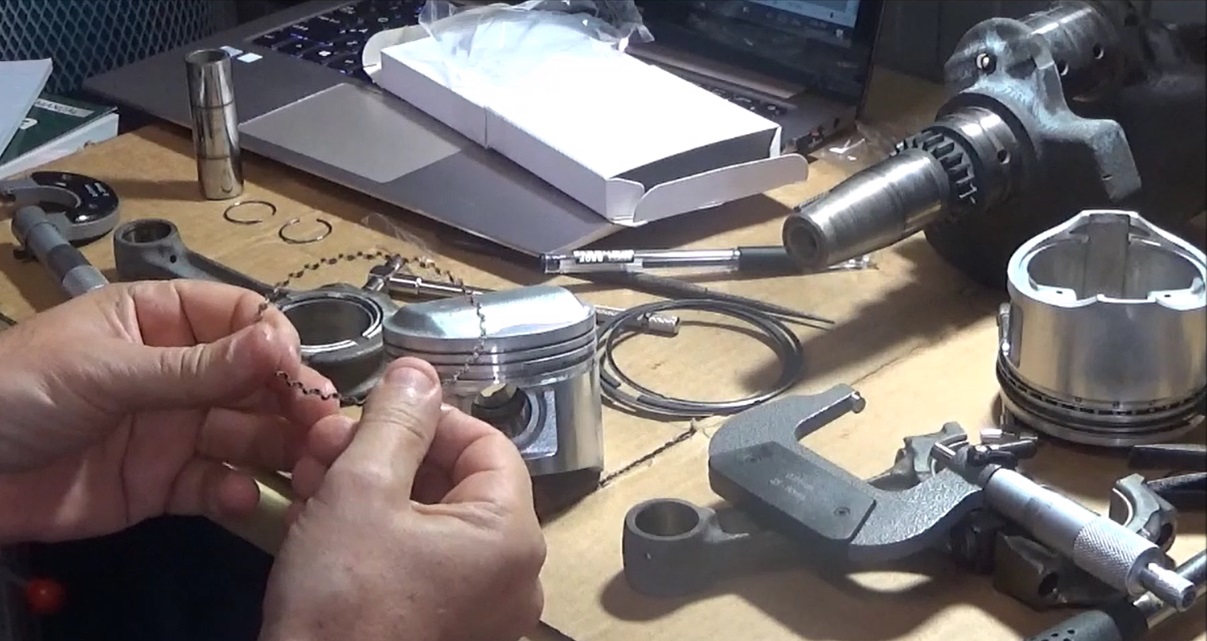
New piston rings
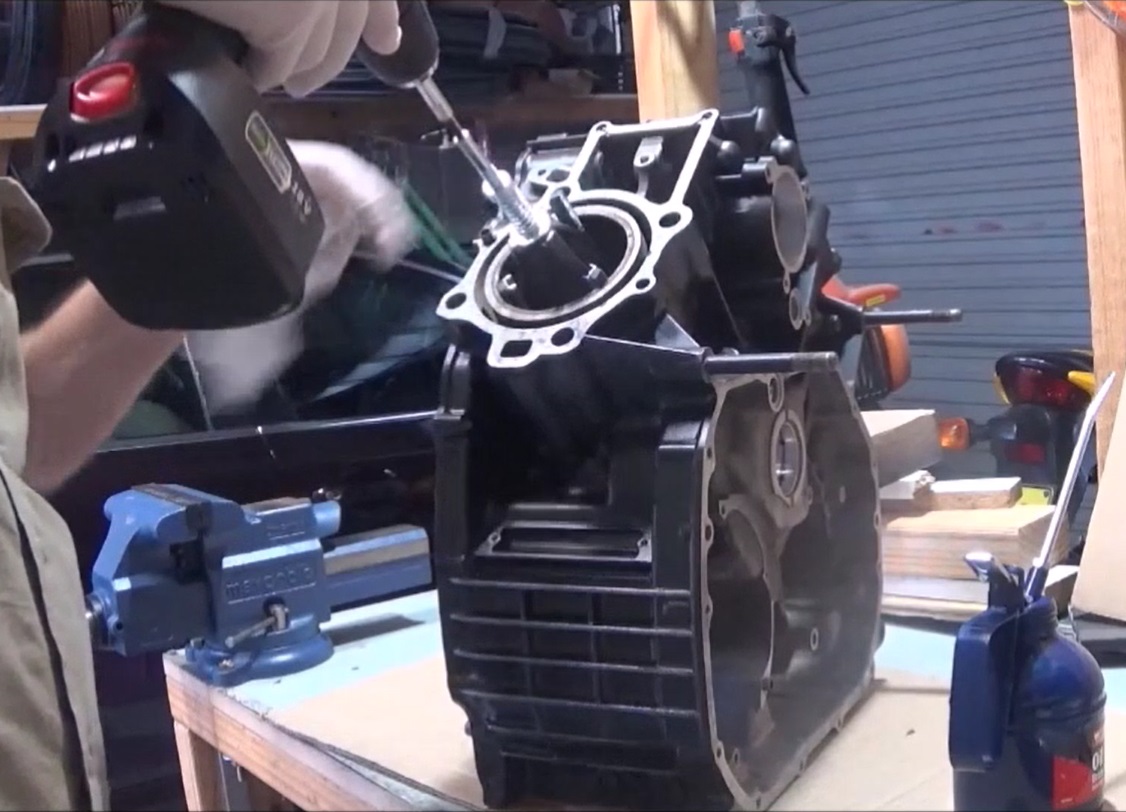
Honing cylinder with an inexpensive honing tool and my cordless drill
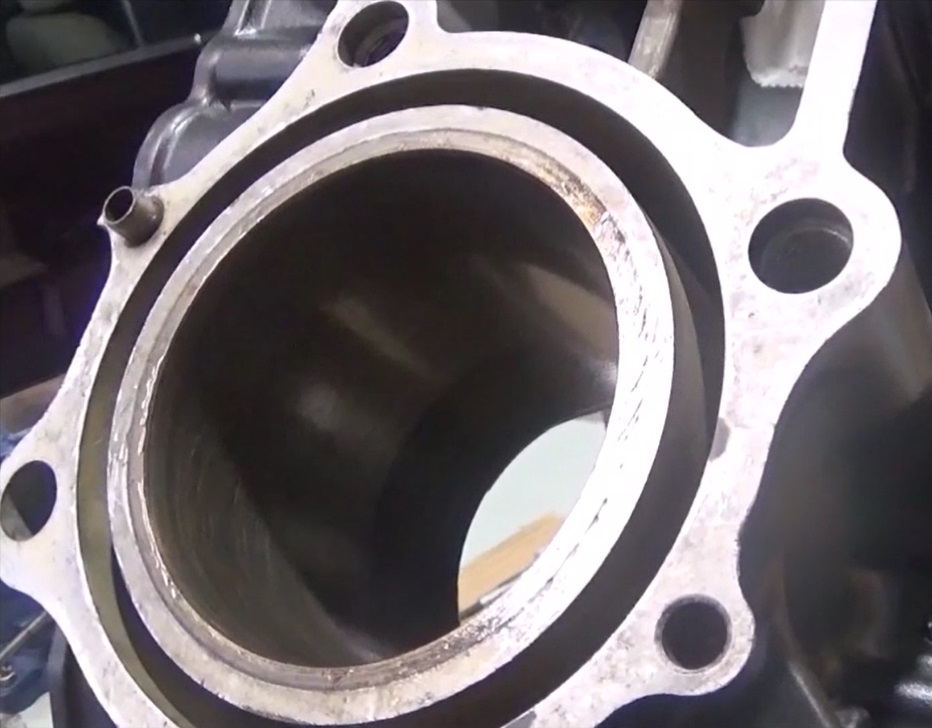
Honing criss-cross pattern visible.
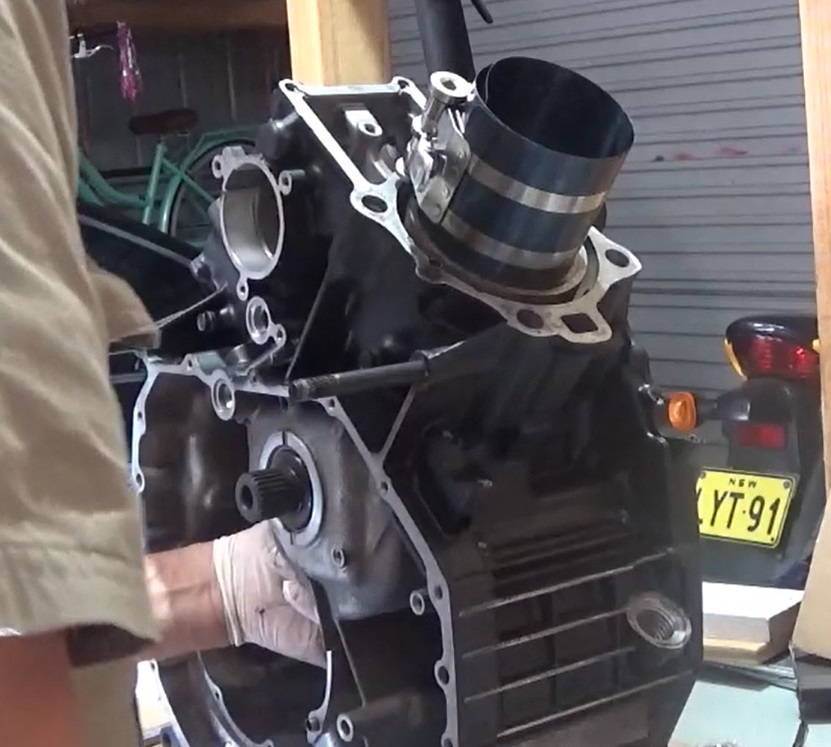
Pistons and con-rods going in
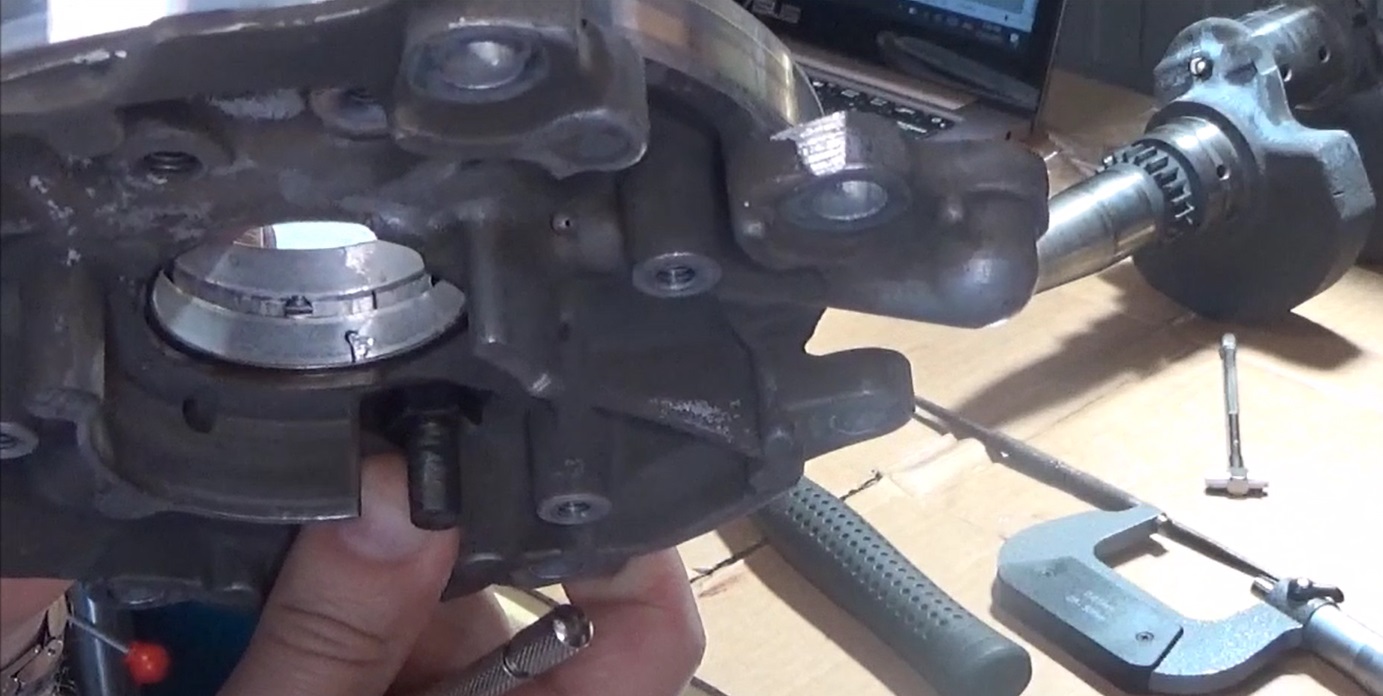
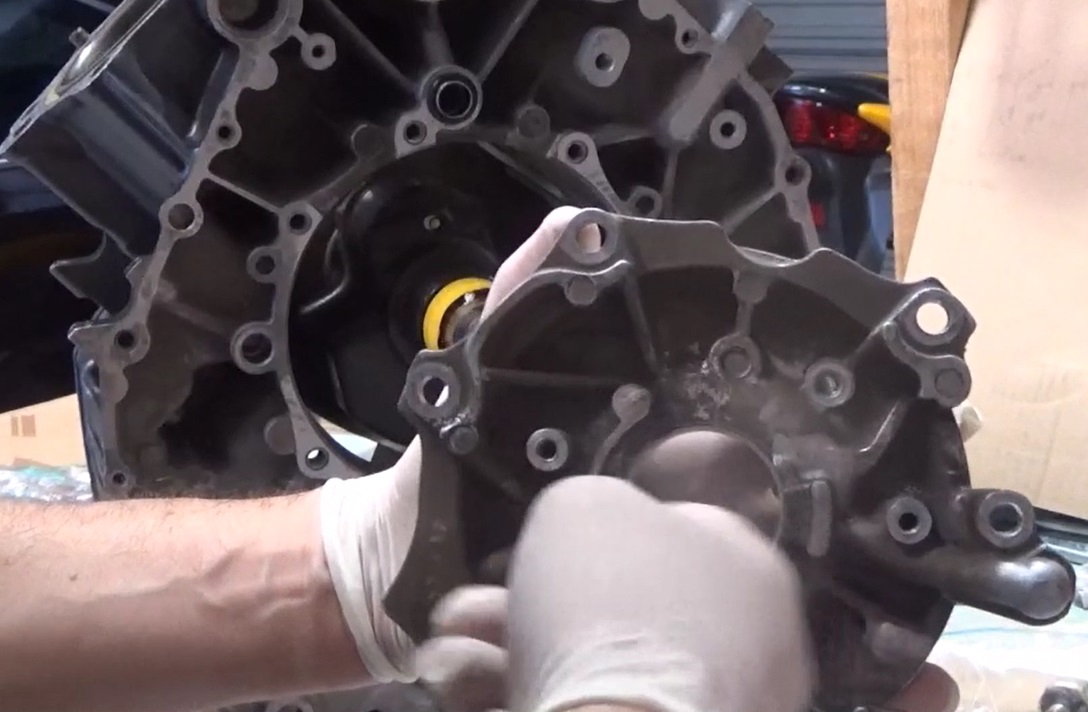
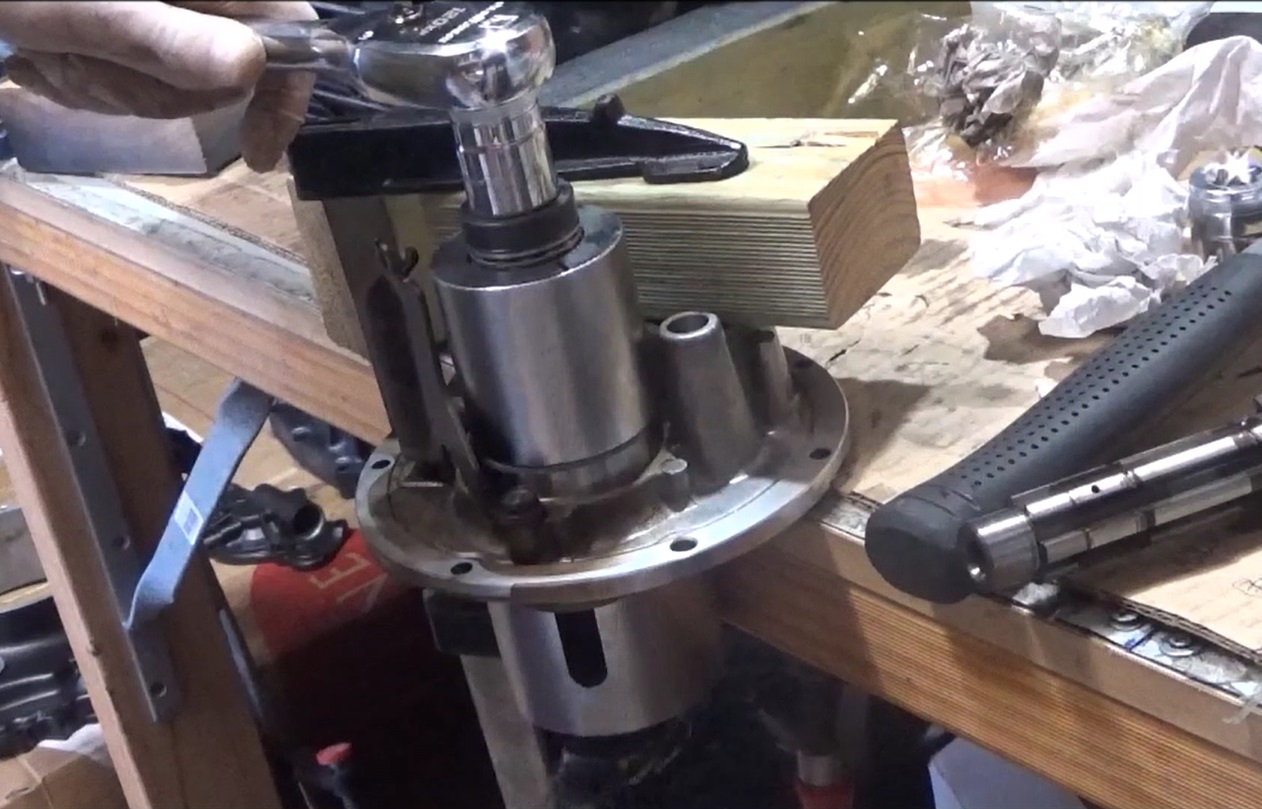
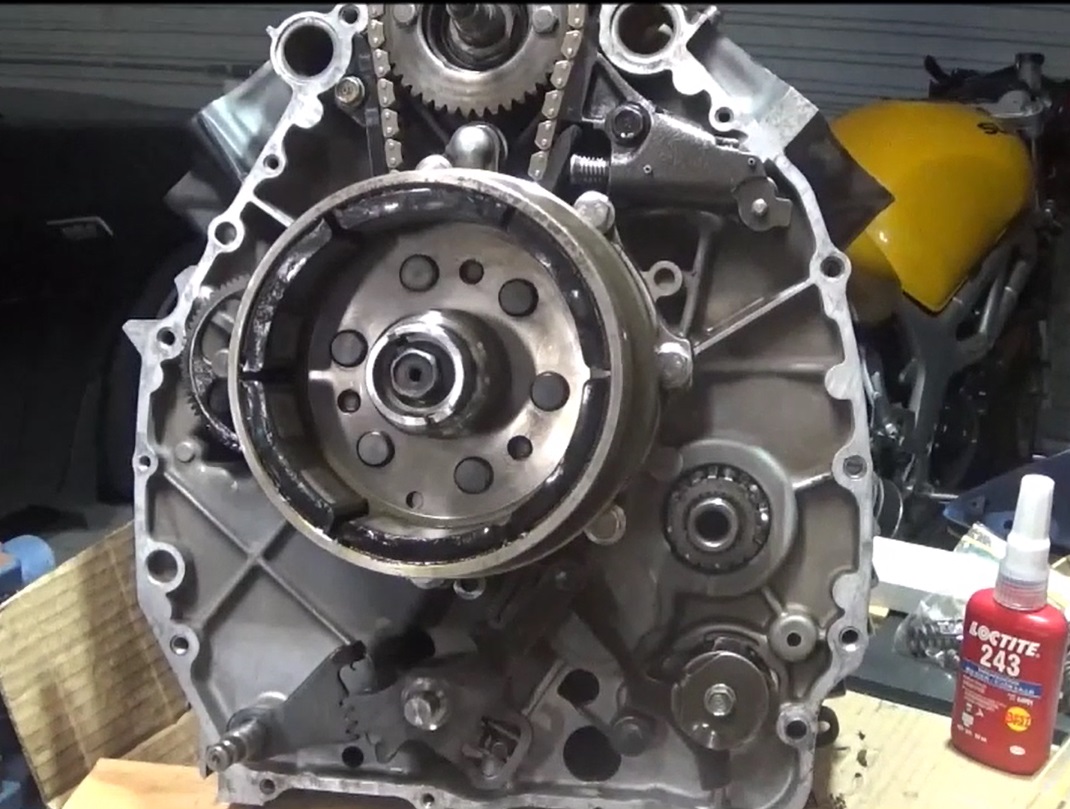
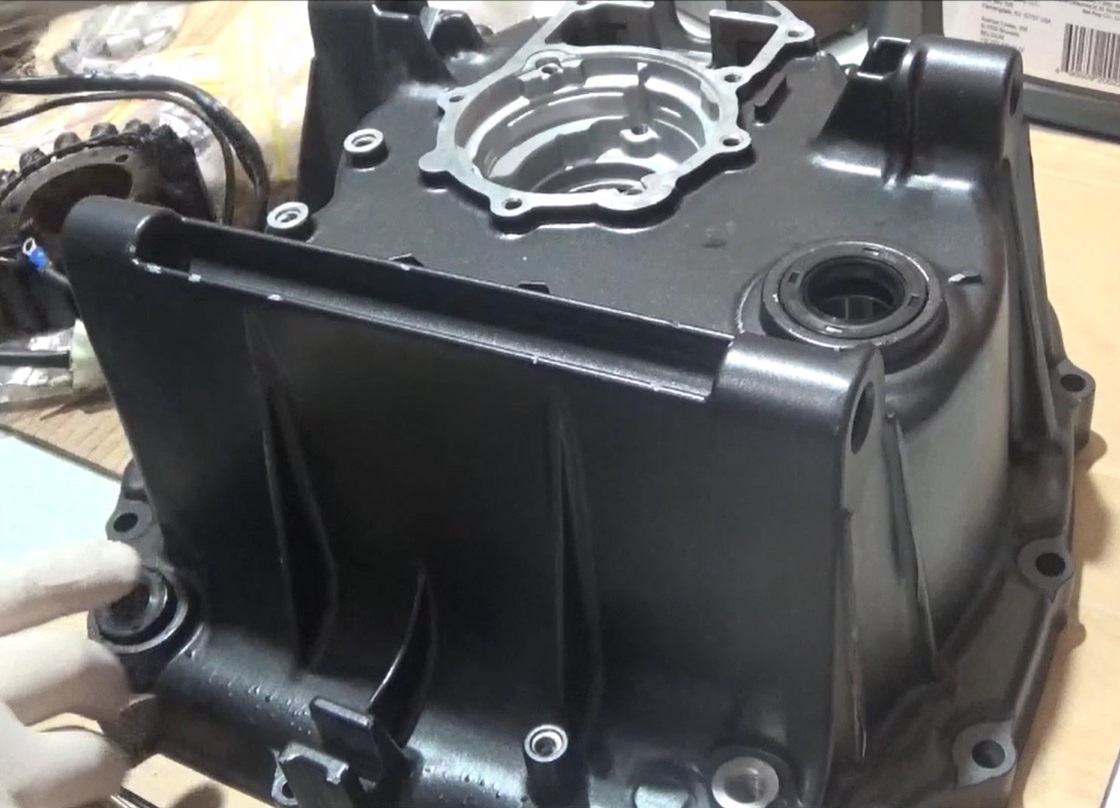
This is the rear crank-case cover, which is a pressure fit, and required great care to remove and not damage the oil bearing. This one is damaged. It could have been me during removal, but it also looks like pitting
Again I had to source bearings, which again were not the exact match to my engine. This oil clearance can't be measured as far as I know, so I took a chance on a slightly tighter fit, counting on some minor wear to work in my favour. It will either run, or burn up if insufficient clearance is available.
You will notice I put some tape around the crank-shaft teeth to protect the bearing during refit of back cover.
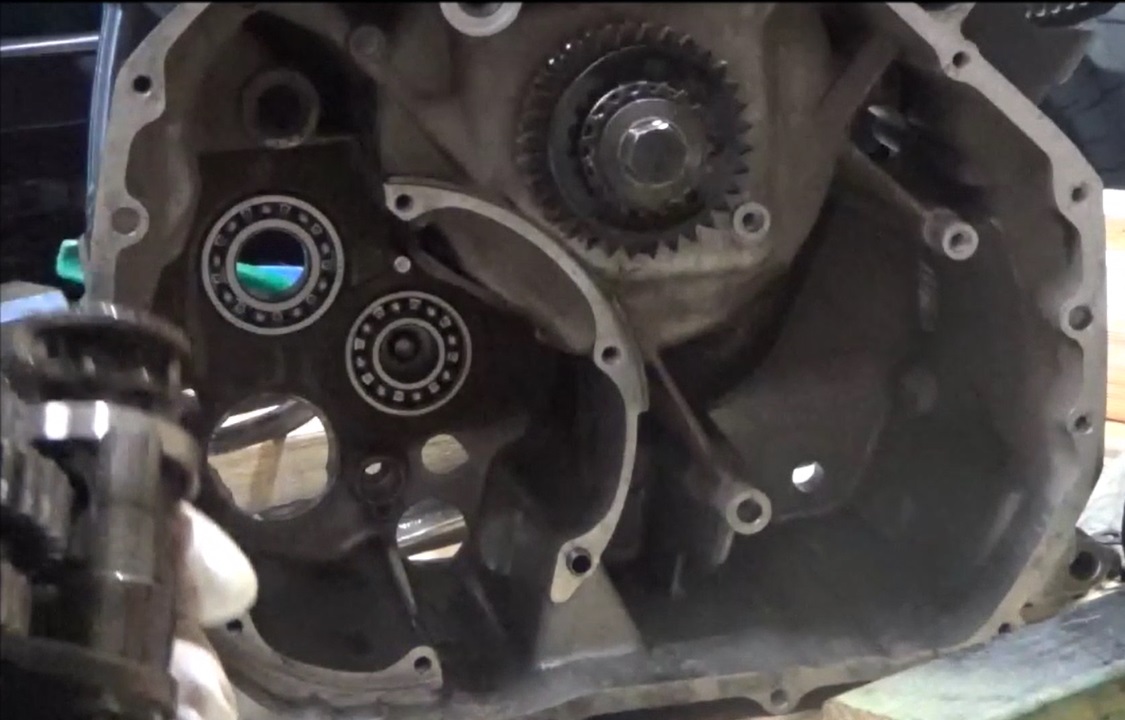
New mainshaft and countershaft bearing in transmission holder....
....and in the transmission case.
Assembling the transmission.
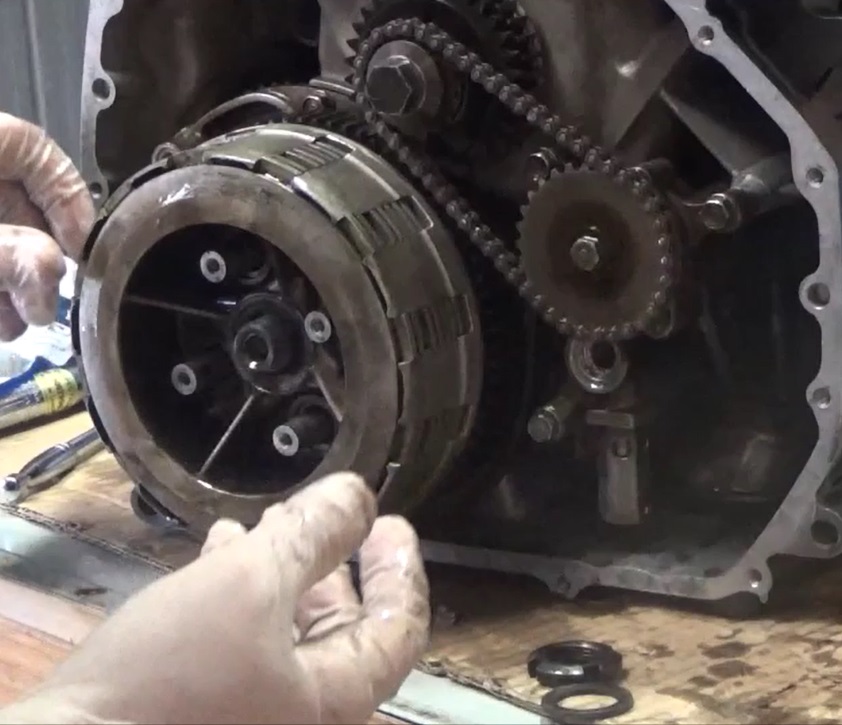
New clutch friction plates and springs.
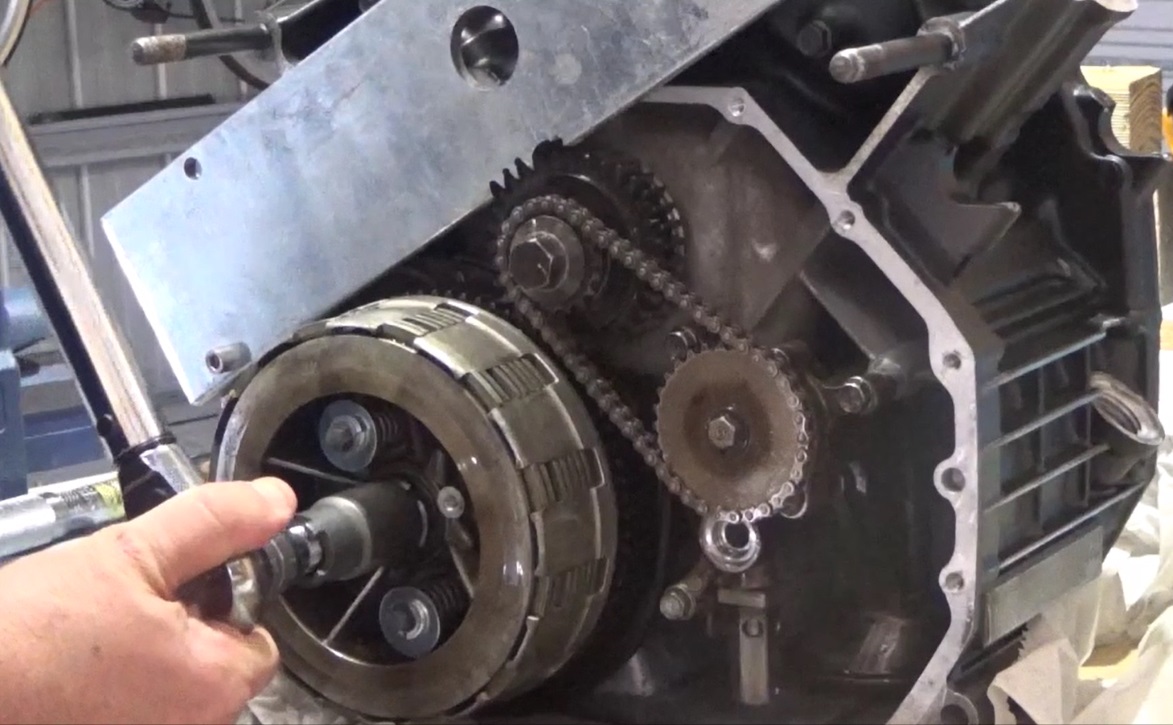
Made a tool to lock the crank-shaft so I could tighten clutch lock nut to the high torque specified.
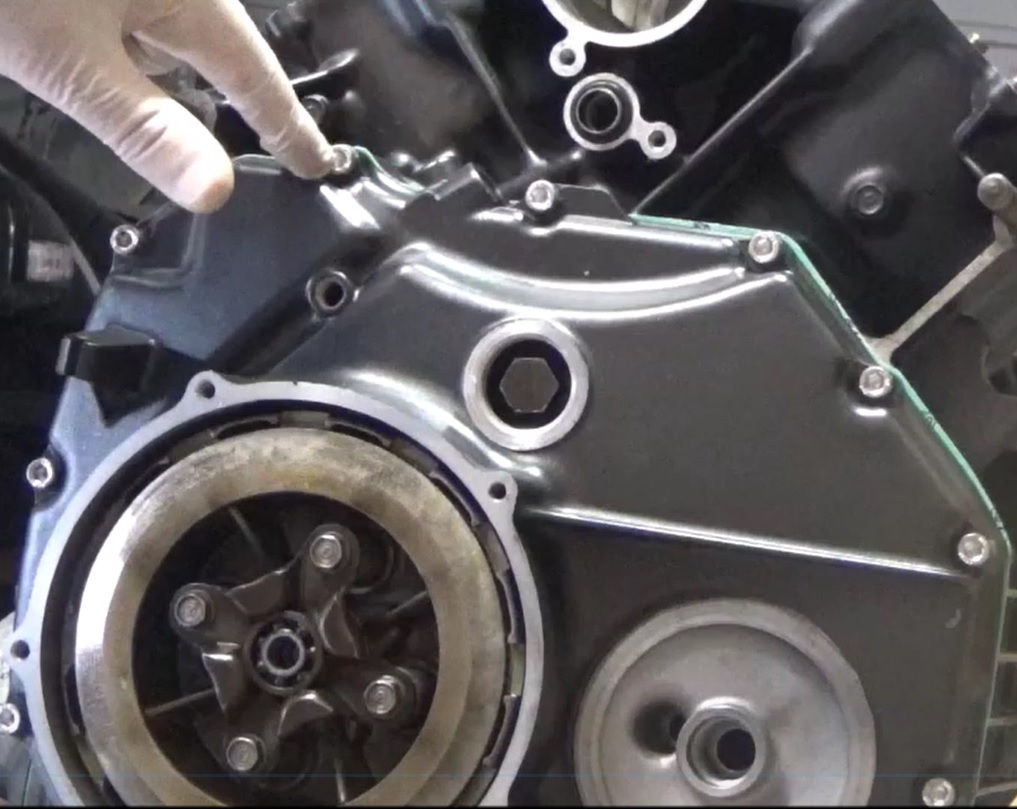
Oil pump in place. Preparing to close the front cover. New gasket will be placed, and note all the little pieces of the puzzle that can soooo easily get lost in the many months that the engine is in pieces.
I used new stainless steel hex head bolts. The look quite good against the black background.
Cam followers in place and well lubricated.
Well greased cam-shaft going in. Where the bloody hell is the drive pin??? Took me 3 days to find it. It was hiding under the flap of a cardboard box where I had placed all the related components.
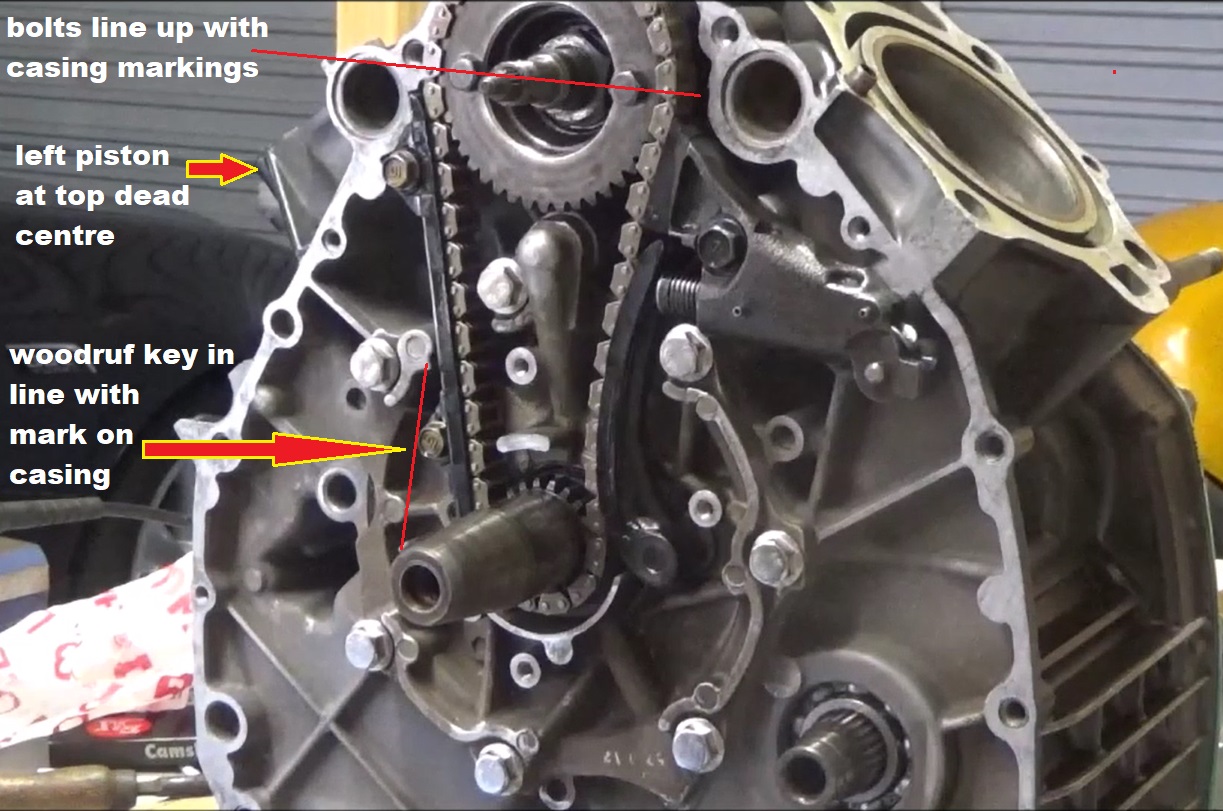
Cam mechanism in place. New cam chain. This is an automatic tensioner. I'm showing all the parameters that need to be in place to have timing correct. All from the manual.
Tacho gear. I read that this is a good time to replace the tacho gear adjustment screw (phillips head from factory) with a hex head, as there is very little access when bike is assembled.
New oil seal. The mechanical cam-driven fan goes on the protruding portion of the cam-shaft. I am looking at replacing for an electric fan which means cutting this protruding section to allow fit of fan assembly.
Clutch cover in place. Still touching up oil filter housing.
Flywheel and gear shift linkages.
New final shaft and gear shift spindle seals. Note some chipping paintwork form over-handling. Will need to touch up once engine assembled.
Excellent opportunity to change the mechanical and oil seals on the water pump.
Cleaning the valves. I saw this technique on a youtube video by The Workshop, where he dismantles a CX500 engine, but never gets around to putting it back together. He says that his sole purpose was to explain the workings of a four stroke engine. As a novice myself, I learned much more when I put it together than when I pulled it apart.
But they did come up pretty good.
The valve seat cuts looked in a good state, but dirty and carbonised, especially on the exhaust ports.
After lapping, they came up clean and shiny. Valves seated well.
New valve stem seals.
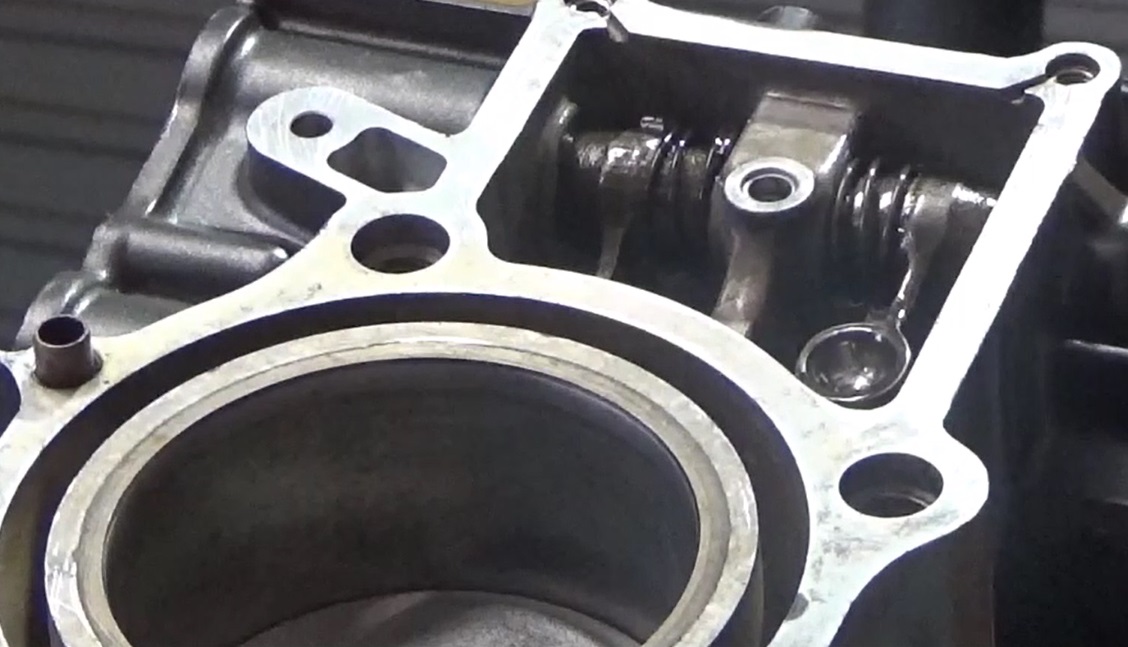
Preparing the block to receive the heads. Once again, hold on to all the little parts so they can go back on. New O rings where old ones were removed, like the oil orifice.
New head gaskets and sealant.
Push rods and rockers.
Tappets set.
Rocker cover back on. Almost done but I did lose a locating dowel as shown. I'm waiting for it to arrive and then back cover can go back on.


