
We noticed you are blocking ads. DO THE TON only works with community supporters. Most are active members of the site with small businesses. Please consider disabling your ad blocking tool and checking out the businesses that help keep our site up and free.
You are using an out of date browser. It may not display this or other websites correctly.
You should upgrade or use an alternative browser.
You should upgrade or use an alternative browser.
How are custom seats attached to the frame?
- Thread starter Hetzer
- Start date
Titan performance
Titan cafe racer builders.
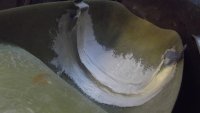
We use mild steel strapping, about 2" wide, bend it to follow the shape of the seat, and bond it in. If needed, we sometimes bond in some ply, to add strength to the seat unit.
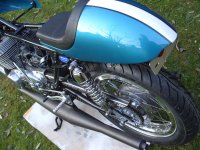
I think it's essential for the overall appearance of the machine, that the bracketry (is that a word?) is all kept out of sight.....
I think it's essential for the overall appearance of the machine, that the bracketry (is that a word?) is all kept out of sight.....
Attachments
mathil
Been Around the Block
gtermi75 said:What kind of adhesive do you use? How does it hold up, I used some 3m panel adhesive on a tail section and you can now see the line where the steel strap is.
The fiberglass is flexible, and fairly thin, so it needs some sort of "padding" to keep it from printing through where the support is. Ideally this is worked in to the core design of the seat, but you can add it after. Best practice is to expand the contact patch of the support, and to taper the supports thickness from full thickness to nothing over the largest area possible.

Slantyface
Been Around the Block
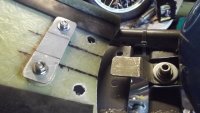
I mounted some melamine plywood specifically cut and routed to the shape of the underside of my seat. I mounted the plywood to the frame. Then, a healthy amount of industrial strength Velcro on the underside of the seat and on top of the plywood. If I could go back I would reconsider using so much Velcro. It actually threatens to break the seat as I pull it off...


