Kill Switch Knob Resto Question

jchek779

Leave the gun. Take the cannoli.
Hey Guys,

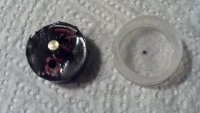
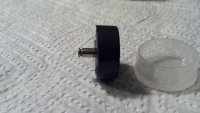
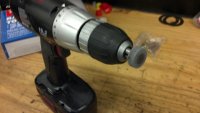
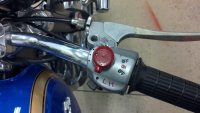
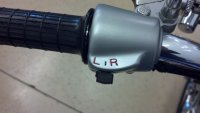
I picked up set of CB450 controls from eBay in which the right side kill switch knob had been a bit chewed up. Since this knob/post is a "unit" I was thinking I could make a mold (coke bottle cap) or something similiar in which I could pot epoxy to a net shape around the existing knob. Then I could sand/shape the cured epoxy, paint, reinstall, and go on with life.

My question is, do any of you guys have any first hand knowledge of something I could spray on the inside of the mold so that something like JB Weld wouldn't adhere? PAM cooking spray? Mold release? Crisco?
I'm also open to other ideas for solving this problem, so feel free to bounce them my way.

Thanks
Jay
 
Petroleum jelly usually works well to keep epoxy from sticking.

Seems like a lot of work when you could probably just find another kill switch on eBay
 
I wanted to follow up on my question with some results. I ended up finding a cap around the shop that was just about the right diameter. I sprayed the inside with PAM cooking spray, then filled the cap with JB Weld quick set, then placed the remains of my kill switch knob in the potting. I made sure to prevent the JB weld from oozing into the cavities for the switch contact and detent balls. After a few minutes of baby sitting, I was good to let it sit and cure.
When I came back in 5 hours, the button slid right out of the cap without much resistance. The surface looks pretty good - there are a few spots where air was trapped. I'm going to chuck this in my poor mans lathe and give it some shape. When I'm done, I'll probably drill/tap a small hole in the side, such that I can add a small set screw. I'll add more epoxy around the set screw, then sand and shape it to give it a bit of lever on the inside.
 

Attachments

  • IMG_20131208_205756_632.jpg
    IMG_20131208_205756_632.jpg
    737.9 KB · Views: 193
  • IMG_20131208_205809_438.jpg
    IMG_20131208_205809_438.jpg
    653.3 KB · Views: 207
  • IMG_20131209_190503_344.jpg
    IMG_20131209_190503_344.jpg
    611.3 KB · Views: 197
Wow, man. That is dedication. Very impressive to this "find another one on eBay" kind of guy.
 
To close the loop, I want to report out the rest of what I did to finish this kill switch knob restoration.

I drilled/tapped a radial hole for a 2-56 set screw. Then I added a few more layers of JB Weld to create a lever for the thumb to cycle through the switch detentes. I figured this was a must have in case I ever need to kill the engine in an emergency.
I did some filing and sanding to shape things, then a coat of paint, and then I finally touched up all of the recessed lettering in the top of the controls.
The picture makes the top look 1000x worse than what it really is. If this was a trailer queen show bike, a final skim coat of bondo and some sanding would have made the top look 100%.
 

Attachments

  • IMG_20131231_163447_462.jpg
    IMG_20131231_163447_462.jpg
    590.4 KB · Views: 189
  • IMG_20131231_163454_000.jpg
    IMG_20131231_163454_000.jpg
    497 KB · Views: 186
I had used a process like this to cast antique radio knobs once...

I used a silicone RTV to make the mold, and jb weld to cast the knob.
Looks good!
 
Back
Top Bottom