Follow along with the video below to see how to install our site as a web app on your home screen.
Note: This feature currently requires accessing the site using the built-in Safari browser.
We noticed you are blocking ads. DO THE TON only works with community supporters. Most are active members of the site with small businesses. Please consider disabling your ad blocking tool and checking out the businesses that help keep our site up and free.
My new shorty muffler came in. I had to reduce it down to 1-3/8" and it's still a little big, so I made a shim for it. Hopefully it's tight enough for a clamp to close the gap. Do I need a band style clamp to bridge the joint, or should a good quality clamp tighten it up?
Gotta love the wee machines
I have a Yamaha 250cc Cafe. It's a great "around town" bike. And "It's more fun riding a slow bike fast, than a fast bike slow".
In regards to the muffler fitment... you could also try bringing your headpipe to a muffler shop and see if they could expand the end enough for a proper fit.
In regards to the muffler fitment... you could also try bringing your headpipe to a muffler shop and see if they could expand the end enough for a proper fit.
Well, here's how she sits today. My total investment to this point is $405 CDN.
I think the only additional costs now are in painting the tank and seat, and I'll probably buy a new chain for her. The next little while will be spent mounting the seat and tail light. Then once my ignition and key arrives in the mail, we'll fire her up.
Thanks for the compliments guys, but I don't want to give the wrong impression. I got this bike in December, so it has actually been 5 months to get to this point. When I decided to start a thread, the engine was already in, as were the brakes and bars and the wiring. I'm happy with the progress, though. My goal for the first ride is Friday, July 13 when I'll see if she'll make it to Port Dover, Ont.
I started playing with seat mounts today. Bear in mind, I don't even have a vice, let alone a welder so I made made some clamp-on polyurethane blocks that clamp around the rear cross member. I think I'll fasten another PU bar across the two blocks for a solid surface. The problem is at the front, there is no cross bar, so you would see too much of the block under the seat.
For the front, I think I may buy a couple of 7/8" mirror mounts and mount them on the frame rails. Then I could put a bar across them.
The seat is on hold for a few days. I have four mirror clamps on order instead of the polyurethane. In the meantime, I mounted my tail light with a couple of brackets from the hardware store. It clears the seat nicely and I like the integrated signal lights. To take care of the "fast flash" or "no flash", I just bought a special flasher unit from ebay that will flash normally on the draw from LED's. Cost 5 bucks.
I decided that the polyurethane blocks are not the way to go. They're a bit large and aren't easily adjustable, so I ordered four mirror clamps. These are meant to clamp on 7/8" handlebars and have a 10mm thread in them to mount a mirror. It turns out that the KZ200 frame is 7/8" as well. I think they look a lot better and the best part is that I can adjust all four mounting heights by using nuts and washers. I think the only downside is that the 10mm studs are a bit large (diameter), but that's ok. I have fender washers under the seat to distribute the load. To secure it from the top, I'm going to pick up some 10mm jam nuts to keep it as low-profile as possible and then cover it.
I painted the tank and seat yesterday with Acrylic enamel. It's a factory match colour mixed by NAPA. The quality of the paint is pretty good. The quality of the painter is a bit sketchy. It looks decent, but not quite as good as I want so I plan to apply some SprayMax 2k clear coat on it so that I can cut it and buff it.
I'm waiting for my enamel to cure. After that, I plan to use this clear coat. Everyone I've talked to says this is the best you can get out of a rattle can.
In the meantime, I installed my mirrors.
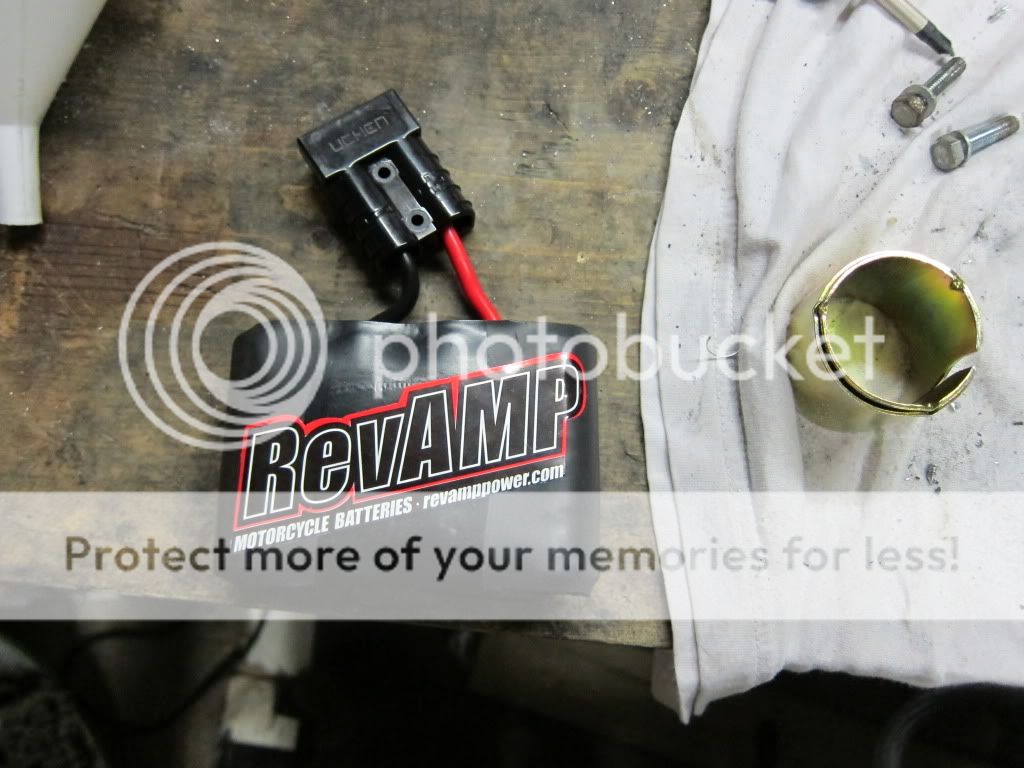
My battery also came in, so I need to think of a good way to mount it. It's only 2.3AH, but I opened the package, plugged it in, and the bike cranked all day long so it should be fine.
The last job yesterday was to secure the shorty muffler. This one can be mounted in either direction, so I had to cut my own slots in it to get it to clamp down right. I'm interested to see how this thing sounds - there's not much to it.
I want to do a nice job upholstering the seat next, but I'm not interested in making a custom pan for it quite yet. Can anyone recommend a place to get some cheap, closed-cell foam that I can velcro on for now?
Glad to hear it did you well with a KZ200 - I've read a few stories about dry cam bushings, but it should do me fine to putt around town. Do remember what the top end was? The original owner told me she'll do 70.
This site uses cookies to help personalise content, tailor your experience and to keep you logged in if you register.
By continuing to use this site, you are consenting to our use of cookies.


")