Follow along with the video below to see how to install our site as a web app on your home screen.
Note: This feature currently requires accessing the site using the built-in Safari browser.
We noticed you are blocking ads. DO THE TON only works with community supporters. Most are active members of the site with small businesses. Please consider disabling your ad blocking tool and checking out the businesses that help keep our site up and free.
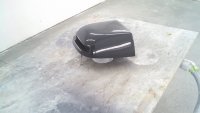
Looks like the next notable mile mark was the rear cowl. My brother had a bunch of this foam laying around so he let me glue some together. I chopped a basic shape them fine tuned it with some 80 grit DA paper stuck on my hand. Next step was wraping it in some wally world fleece and drowning it in fiberglass resin. You can also see the beginnings of my seat.
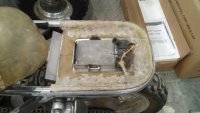
I see I am sooo bad at taking picures to document progress. These are what I have for the making of the cowl. I used the bike as a mold for the bottom of the cowl. Then cut it out to go over the battery, this isn't the final cut. There were some other mods to let the wires in that I didn't get pictures of. Then I glassed the 2 pieces together, cut a slot and slid in a scrap piece of J-track from the shop siding to hold my tailight. So frustrating! There was a lot of work I didn't get pics of. 2nd picture is final product before color.
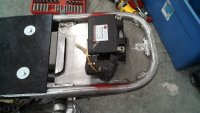
Found some more pics to show how the cowl works. Pic 1 shows the lip in front of the battery, the bottom piece of the cowl slides under that to hold the front down. Then there is a bolt that goes through the hole behind the battery to hold the back down. Pic 2 shows the J-track and how the seat pan buts to the cowl. I'll get into the seat build next.
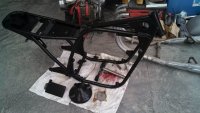
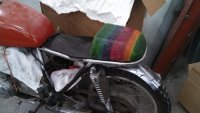
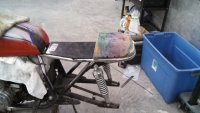
On to the seat and as usual I don't have as many pics as I'd like. The pan is some "HDPE" plastic I got at Grainger's. The front bolts go through to a Z shaped piece of metal I bent in a break. The back 2 bolts go through the pan and go into a bracket welded to the frame and bolt with wing nuts. I did make a rectangle piece of metal for the back bolts then ground the heads thin and welded them to the rectangles.
Shoot for a 2 for 1 here. I wanted a mud guard since this bike will be "ridden not hidden". I came up with this design and used the same plastic as my seat pan. If you zoom in on pic 2 you can see the rod for the front seat mount that the Z hooks to and the bracket with the holes for the rear seat bolts. Then under the seat on the angled frame tubes are the long tabs with 2 holes each to mount the mud guard.
nice project but you have a common fail the rear tire doesnt have enough clearance it will hit the tray and also the inner fender panel is likely to hit at or before full bump as well did you bottom out the shocks with the springs removed ? it is the very first thing needs to be done .
I did end up shortening the mud guard because it was too close to the swing arm. When I cycled the suspension without the shocks it would hit, so I took about 2 inches off. I've been riding the bike since January with no clearance issues
You got me worried now xb. I did everything with the dirt tires that came on the bike. I've been riding with no issues but I just bought new street tires and they are a bit bigger. I have the new front tire on but haven't got the rear on yet, I'll know if I have a massive problem by this weekend. :-\
Unfortunately I found out I have tapped my pan and mud guard with the rear tire :'( , I've hit some big dips at speed and it hasn't hit very hard. Good news is my new rear tire is wider but not really taller. Plan is to get some longer shocks to give some more clearance. I know this will alter the geometry but it should make it turn quicker, time will tell. If I have to cut back into it I will.
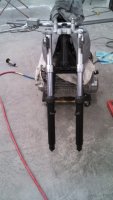
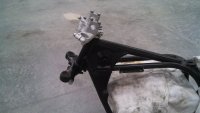
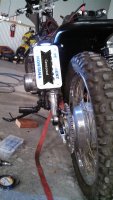
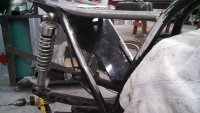
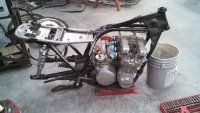
On to what I've already done... that looks like the last of the fab work. Next was cleaning up welds and off to the powdercoater for some satin black. I also took apart the forks, cleaned and resealed them and painted the lowers.
Thought I would comment on the front master cylinder since it's shown off in that last picture. The original was HUGE and full of gunk, so I started looking for a replacement. I heard of guys using one off of a yamaha raptor so I bought this off eBay for $20. It's much smaller and runs 2 small discs on a heavy quad. I cleaned it up, modified a kz650 lever then had some brake lines made up, it works great.
you have done a terrific job on the kwaka
bummer about the tire hitting ,1" longer shocks may cure that issue depending on the shock brand and shaft travel. easy way to check is remove one shock,set the remaining shock on softest spring setting,then put a ratchet strap close to the shock mounts (near the shock)and ratchet that puppy down to the bumper HARD from there you really should have an inch to the pan .
if you are set on longer shocks do the test with them as well
make sure the spring rate is correct for your riding weight,including static and rider sag
i would recommend that you drop the forks down as far as they can go, you can safely cheat a mm or 2 below the tope yoke.the other thing is make sure that you have the correct minimum front static and rider sag which basically means the correct spring rate,
what you have now is probably sagging a bit
this will help balance out the jacked up rear a bit
the bonus being increased lean angle clearance
Thanks xb. I'll try that when I get the new shocks. I wanted to change them anyways because the stockers don't look very good. Expected delivery isn't until next week :'(
Haha...no. I bought it in a small town where the owner planned on riding on dirt roads. They were almost brand new so I've been doing burn outs to enjoy them.
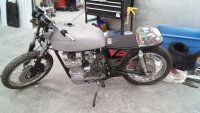
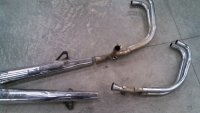
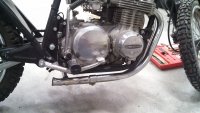
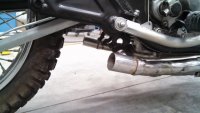
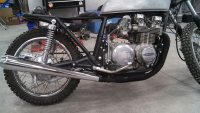
Next project was the exhaust. I like the 4 into 2 but the new systems are all 4 into 1. Stock mufflers are banged up and rusty so here is what I did. Dime City has some slip on that look like the stockers but stock exhaust is 1 piece. I cut the mufflers off where the headpipe starts to bell out. I slid some 1 1/2 tubing in the new mufflers then trimmed the headpipes to where the bell was big enough to accept the 1 1/2 tubing. Then set the mufflers where I thought looked good the tacked the tubing to the headpipe, removed everything and welded the tubing solid. Now it accepts slip on mufflers. The mufflers mounted with the supplied straps in the stock position. The headpipes weren't horrible but not perfect either so I wrapped them to hide any issues, I like header wrap anyways. The bummer is after I had these done I saw Dime City now has a shorter set of mufflers that are black. I finally decided to just eat the cost of these and get the black ones and they are out of stock...suck.
This site uses cookies to help personalise content, tailor your experience and to keep you logged in if you register.
By continuing to use this site, you are consenting to our use of cookies.


 the rear tire doesnt have enough clearance it will hit the tray and also the inner fender panel is likely to hit at or before full bump as well did you bottom out the shocks with the springs removed ? it is the very first thing needs to be done .