Modern"ish" Cafe CBF250

stormy

New Member
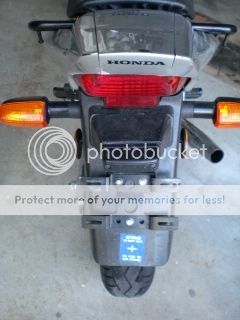
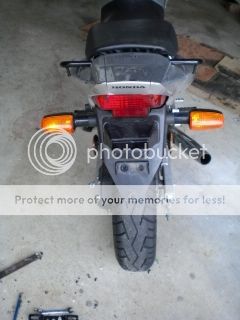
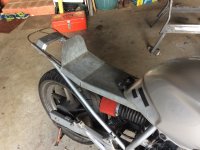
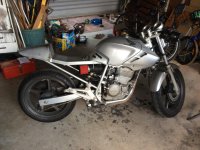
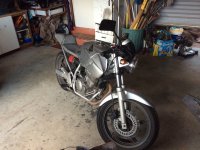
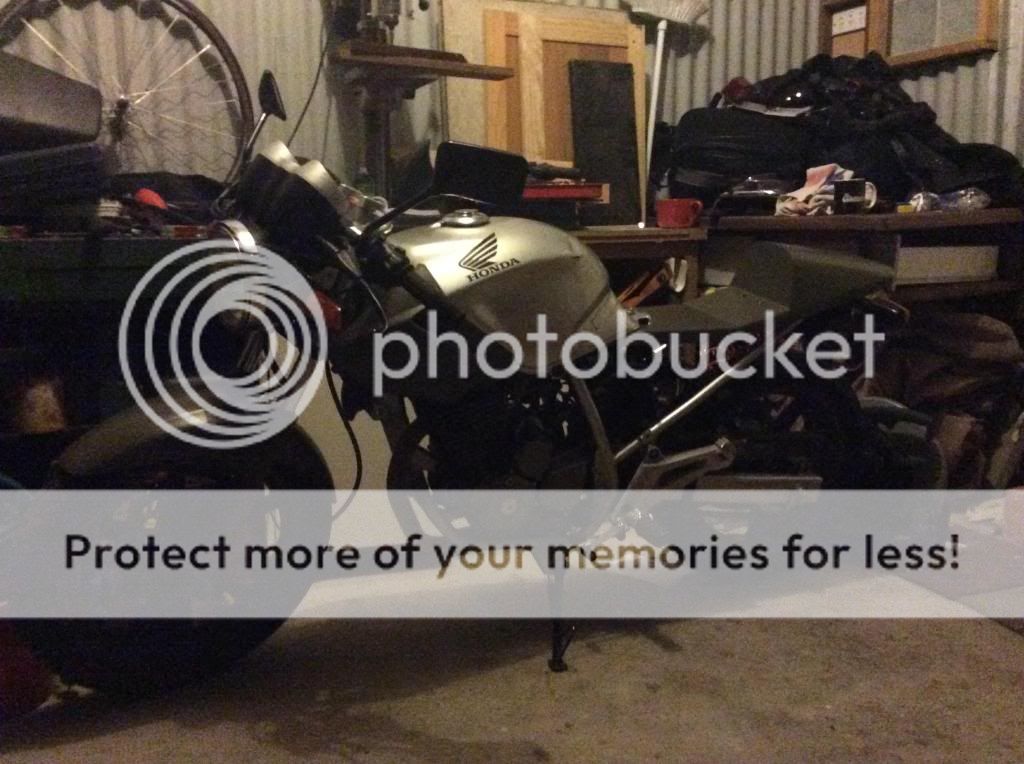
Here's some photos of my build so far. Bikes a CBF 250 2006 model. CBX 250 twister for people living in the N and S America

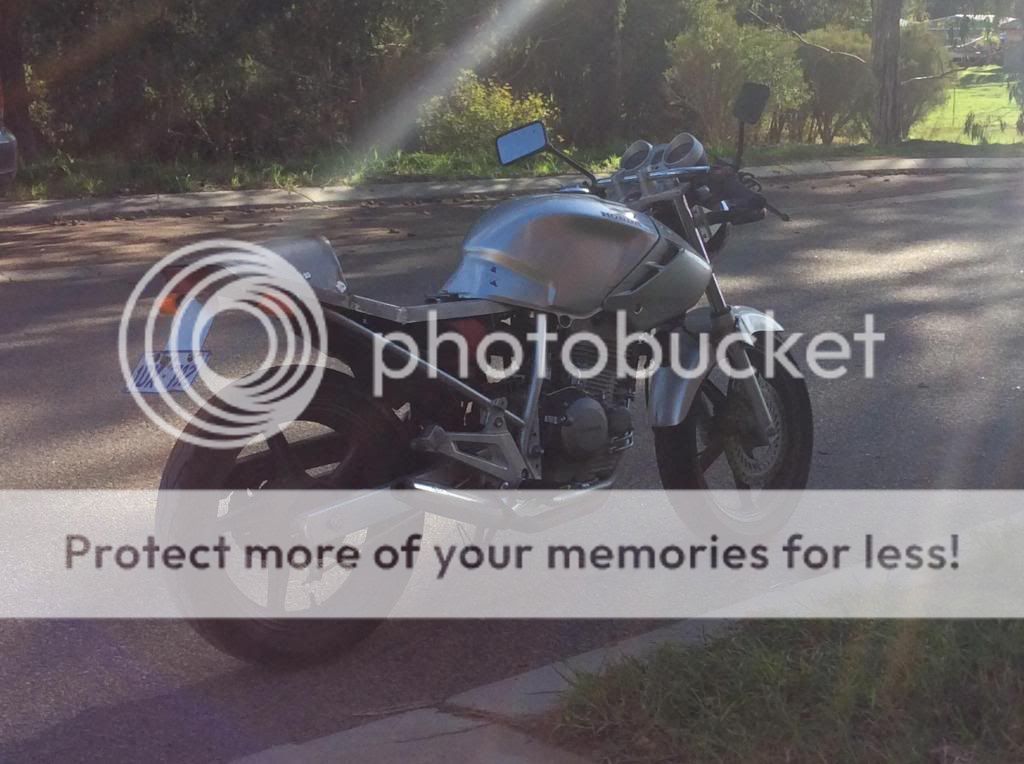
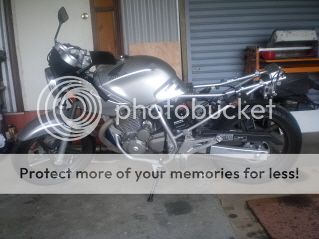
here's a photo that inspired me to do the build from a forum in Argentina. Here's the link http://www.clubtwister.com.ar/foro/viewtopic.php?f=49&t=12745

viewimage.php


bth_hb5_zpsd7051ff2.jpg


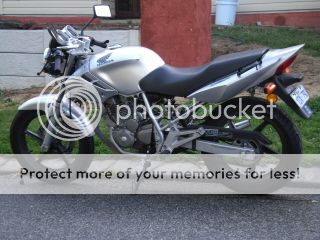
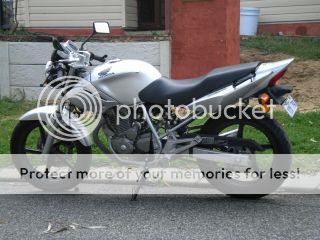
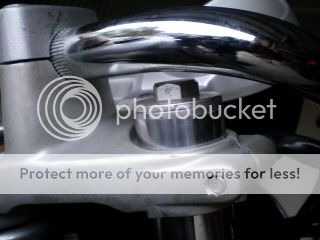
First up Eliminator Bars installed. $60 and 1hr to install for a great improvement on handling and no more sit up and beg riding style.

bth_beforecutting_zpsae0a6643.jpg
bth_beforecutting2_zps49059f7a.jpg
gearside_zps41c42252.jpg


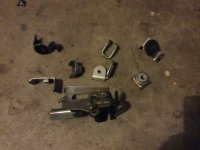
Chunky foot peg setup trimmed down and pillion pegs removed.

bth_brakeside_zps2f169278.jpg
bth_newairbox_zpsea3e379c.jpg


Airbox removed and hose and pod filter will replace. Still need to get filter and hose will get the chop to slim it down.

bth_customex_zps542d5451.jpg
bth_muffler1_zps7c512a7b.jpg

bth_bafflewasher_zps133957b0.jpg
bth_muffleronbike_zps603fc974.jpg


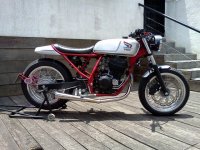
Tried the first style of slip on but even with custom baffling inserted to quieten it down was way too loud. In the interest of my hearing tried something else. While at a exhaust centre looking in a scrap bin for exhausts I could salvage some baffling from came across this exhaust. It's from a Mitsubishi and it slipped perfectly on my bike. It sounded absolutely mint with a real deep growl any big bike would be proud of. Lots of cars got out the way while filtering. Sadly still too loud for any distance so created my own baffling by welding a washer to some spare baffling, on the other end welded a smaller washer so some gas now must pass through the baffling and then welded to the exhaust. Sounds a bit more racier now, is a weight saving and flows better than the restrictive original. Just needs a paint and some clamps.

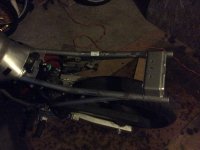
I've cut out some plywood to use as a base and just need to trim it to shape and the rest of the bike has allsorts of things that need finishing but it's a start.

Total cost so far 60 for bars, 40 for the first slipon, 20 for jets and 20 for a platinum spark plug and I'm hoping to keep it under 500 bucks for build.

Keep yaz posted and thanks for viewing. ;D
 
Hey Stormy! I am from México and that bike shares engine with the XR250 Tornado. (A bike which I own and love)
What about this one for inspiration?
Cheers man!
 

Attachments

  • 59345_303192679793065_928588058_n.jpg
    59345_303192679793065_928588058_n.jpg
    86.3 KB · Views: 19,668
Hello Juan and thanks for the picture. It's a sweet ride and I really like where the builder has gone with this bike. Very retro with the wheels and tank. Only thing that gives it away as a twister is the engine. I think it would fool many people in thinking that it was from the 70's 80's. Very cool idea. 8)

I just saw your picture of the tornado. Makes me think that the engine will be good for quite a few more years if it can live up to the punishment of off road riding. ;D

Your cg125 project was a little of an inspiration for my build as well. I was reading the cv carb pod thread and I saw you had used a hose to run a pod filter and I thought this was a good idea. Seems to work well so far, I could notice the difference it made when I put it on and rode up the street. So hopefully it goes just as well when the filter is on the end of it.
 
Hey Stormy.

I've just began the exact same build as yourself on my CBF 250 but I'm planning a raw alloy finish. Just wondering where you snatched those Eliminator handlebars from?
Also, do you have much space between the bars and the tank when in full lock? Cheers for the forum, love what you've done so far. I won't be far behind haha :)
 
The eliminator bars I got from a local store just up the road from me. Sorry not sure if you can get them from the net if that's what you were chasing? No problems with the tank as long as they're not set too low. Cool to hear your doing a cbf build. I'll be interested to see how your polished look turns out. Good luck with it and make sure you post it so I can follow.

Just a couple of photos of the filter in now.

bth_airboxandfilt_zps0dc8041a.jpg
bth_filter_zps8144d024.jpg


You can see the airbox on top of the bike in the first photo. Bit of a weight saving there. Seems to work well so far just for short bursts up my street to second gear top. I'll have to check the jetting out again.
 
Couple of photos where I'm up too.

bth_frontshot_zps394906c5.jpg
bth_sideshot_zps9020fbb5.jpg


Pod and exhaust set up has worked well. Power used to be only 5500 to 8000 rpm, now 5000 to 10000rpm and probably beyond 8). Real difference. Just now my cheap brakes can't keep up. ::)
Jets on the main went from 142 to 172 put a spacer to lift the needle and other jet from 42 to 60 I think.

Made some better baffling for the pipe that's on now. I changed back as I think it looks a little sleeker.

Funds are low so it will stay this way for a while but it doesn't look to bad as is I think.
 
bth_filter_zps87f24df4.jpg
bth_filterin_zps6d23dcdf.jpg
cc2a530d-7b06-43af-ba49-2c794e1d5cb4_zps544b4395.jpg
chopfend_zpsd7e3a116.jpg
fend1_zpsfcef029c.jpg
fend2_zps76242a37.jpg
bardrop_zps6642b808.jpg
Couple more things done this morning. Filter for the crankcase breather. Chopped the fat arse fender. Bit sleeker and you can see what the other side will look like without the battery in the way. I took it out to install the filter. Still in the 45 degree for legal. Also dropped the bars through the forks to see if the front end handling would improve. Yet to test it though. Will probably just hurt my wrists more and I'll end up changing back. So far costs are about $270 (handlebars, exhaust, filters and oil, platinum spark plug, jets x 6) but could have been a bit less without the jumps up in jet sizes.
 
Hey mate.
Looks like it's coming along nicely and fairly cheaply too.
My build is a bit more pricey, I couldn't resist getting some tasty looking Woodcraft clip-on bars and Rizoma mirrors.
Anway, I have a few questions if you don't mind.
Where have you tucked away that ugly ass battery?
And also, what exactly have you got to replace the chunky old air box and how did you go about doing it?

Thanks pal. Keep up the good work.
 
La Maurevzie said:
Hey mate.
Looks like it's coming along nicely and fairly cheaply too.
My build is a bit more pricey, I couldn't resist getting some tasty looking Woodcraft clip-on bars and Rizoma mirrors.
Anway, I have a few questions if you don't mind.
Where have you tucked away that ugly ass battery?
And also, what exactly have you got to replace the chunky old air box and how did you go about doing it?

Thanks pal. Keep up the good work.

Where Honda put it really sucks. I just took the battery off for the photo. I was planning to install a lithium battery once the one I have now dies. Should have enough room under the seat for it to be tucked away nicely. Here's a café racer vid with a lithium battery. I can get a battery from my local for about $100 http://www.youtube.com/watch?v=JgIQ-21LgEc&feature=player_embedded

The piece of hose I got from my father in laws back yard. He's a collector of things and this just happened to be there. Not sure what it is. Any piece of pipe will work though. All it does is smooth out the airflow so that the pod will work with the cv carb. Just grab what you can, make fit. The length of the pipe I've been told will give your engine different characteristics. Top or bottom end power depending on length. Not sure what way this goes though.

The airbox was a little bit of a pain to get out but not too hard. Just remove the suspension, unbolt and be careful of the rear brake cable running on the right side.
If your going to install just the pods first then I'm not sure how it will go. The way I got mine to work was, upgraded the spark, installed a more free flowing muffler, and then the pod. Also I upped the jetting to suit through all the upgrades. You will really notice the difference to the engine once the original exhaust is removed. It's like it had asthma before. Just be sure you have some back pressure or you will actually go slower. I had to do some alterations to my exhaust to get some backpressure and quieten it down. I think the new cbr exhausts would work for the cbf I just don't have the money for one at the moment.
 
Been some time since my last post however finally got round to creating something new for the bike. Enjoy the photos.
 

Attachments

  • image.jpg
    image.jpg
    1.2 MB · Views: 656
  • image.jpg
    image.jpg
    1.2 MB · Views: 593
  • image.jpg
    image.jpg
    453.4 KB · Views: 606
  • image.jpg
    image.jpg
    1.2 MB · Views: 636
  • image.jpg
    image.jpg
    587 KB · Views: 6,830
  • image.jpg
    image.jpg
    1.5 MB · Views: 841
http://i1347.photobucket.com/albums/p701/simmrr/imagejpg6_zpsd0a9a0eb.jpg[/IMG]][/url]

Just made the rear light unit today. Light is from a XR250. Looks a little plain on the whole but hopefully blends in with it being painted.

Talking of paint picked some up today from the auto paint supply shop. Going to go with a satin 1942 army green colour replacing the silver with a bit of black here and there. Looking to add some Aussie army graphics to it as well. Bit of internet hunting might bring up something interesting.

Did some weighing of the parts that have been removed. 16 kgs all up. All that has been put back on is 4 kgs plus some seat foam yet to go on which will weigh F.A. so total weight reduction has been 12 kgs so far.

Can probably find a bit more with swapping the battery when it dies for a lithium one, smaller/lighter tank and slimming down the peg units. Perhaps a bit of drilling here and there could also free up a bit of weight but probably not much. Pretty stoked with that.

costs of all this. 20 bucks for steel, 2 for aluminium, 50 for paint (will be enough for whole bike), 10 for light unit, 10 for electrical sockets and replacement bulb, 10 for fasteners and about 30 for tools. So all up now 400 bucks spent and all good too.

Can't wait to get some paint on her tomorrow.
 
Dam fine job! I kinda thought the stern of that thing was hopless, but you Nailed it! Can i recommend a ribbed seat?
 
Cheers attatoy,

Not sure if I could make one of those ribbed seats. Would look pretty good. I was initially just think of going down to a local rubber joint and rigging something simple, cheap and light up. Don't know yet? Thanks for the idea though.

Did a little spraying today however and the colour is right on.

Graphics so far will be oz army red kangaroo and " danger ejection seat " you see on fighters. Going to find some more down the local military museum.

imagejpg5_zps9b75c8b6.jpg
 
Back
Top Bottom