detto
Adelaide, SA
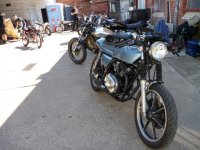
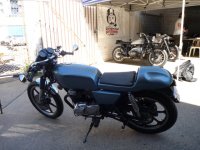
Re: My Pile of Rust - Kwaka Z250
Hey mate, congratulations on your purchase. One thing I noticed about the Kawasaki z250's is they are only electric start, real bummer however if you do some fine tuning she'll start first time everytime.
In regards to your bikes starting difficulties.. I think first you should inspect your electrical system (starter, switch, breaker and points, battery, connections, solenoid, regulator, coils, starter clutch.) Then check your tappet timing clearances, advancer, fuel, carbs and most importantly jetting. (Your problem could be related to incorrect jetting)
And on a side note I personally think your regulator/rectifier is not charging your battery. Use a multimeter to check the charge output. (Just a guess)
Thanks for following mate, the more the merrier!
P.S. If you ever need any information and specifications in regards to your bike I got a service manual. Just pm me.
turbocrow said:ohh very interesting build I too have just purchased a Z250 1984 (belt driven with uni shock) and I will be following this thread closely.
I get to take mine home in the next few days and I will be converting it into a Cafe racer also. (although the one I am buying is so hard to start and if you stall it then it just won’t start at all lol)
so ill have to get it running first too !
Hey mate, congratulations on your purchase. One thing I noticed about the Kawasaki z250's is they are only electric start, real bummer however if you do some fine tuning she'll start first time everytime.
In regards to your bikes starting difficulties.. I think first you should inspect your electrical system (starter, switch, breaker and points, battery, connections, solenoid, regulator, coils, starter clutch.) Then check your tappet timing clearances, advancer, fuel, carbs and most importantly jetting. (Your problem could be related to incorrect jetting)
And on a side note I personally think your regulator/rectifier is not charging your battery. Use a multimeter to check the charge output. (Just a guess)
Thanks for following mate, the more the merrier!
P.S. If you ever need any information and specifications in regards to your bike I got a service manual. Just pm me.