Project "NimRod" - 1983 GS1100L-Shafty

Awall

New Member
Well I have embarqued on my first cafe style build with, of all bikes, a 1983 GS1100L Shafty. Started today with a 10 hour day of driving for this beauty. She is very clean and well taken care of and I aquired her in a straight up trade.

Project Goals:

-Model after some of my favorite designs by Wrenchmonkees and other online beauties.

-Incorporate a convertable solo seat to dual seat to accomadate a passenger.

-Build a simi-comfortable bike that will deal with my 6'1" 250lbs stature

-Do it all with minimal moneys and alot of elbow grease (like they did in the good ol' days).

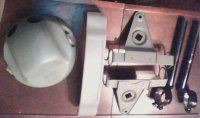
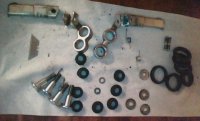
1100cc isnt the best for a good cafe build but I wanted a bigger bike to handle my build. I believe that a larger bike can handle like a smaller/lighter bike if the driver has the weight to throw it around. This GS is pretty clean and mostly stock as seen in pics.
 

Attachments

  • securedownload[1] (2).jpg
    securedownload[1] (2).jpg
    34.6 KB · Views: 400
This thing is a nice machine and it was hard to start chopping, but I like doing something not many people have done. I really don't have anything into the bike yet so its not to much of a heart ache. The final project isn't going to be a text book cafe racer..but maybe more of a hulk cafe cruiser. As the name of the project implies...it will be a hot Rod of Minimal weight.

So far today I have removed:
Windscreen
Front turn signals/reflecters
Mirrors
Cruise control
Seat Bar/wrack
Crank case crash bars (forget what you call them)

Next on the list:
Remove stock bars and add black CBR F4 clip ons
Remove old grips and add new black metal grips
Black out/refresh triple tree clamps, lower forks and wheel spokes
Remove speedo, tach cluster.
Start on new seat and removable cowl
 
It's chopped up! Waiting on bars. Next on the list is to relocate the battery and electric panel. I want that open space in front of rear tire. I'm running no gadges but am kicking around the idea to build a removable mount on the unused handle bar clamps to accept my Sprint Evo runnning a heads up display for GPS and GPS Mph. It's to modern for a cafe but it will stay with me when I get off the bike so no one will know. Seat mock up is next.
 
got some engine block black gloss paint and etching primer to freshen engine and black out headlight, lower forks, used cbr clipon bars, controls and frame. Ill be painting on monday...and hopefully getting started on the seat. Once the bars are on I'm going to work on foot pegs and position.
 
Looking forward to the build. I have a similar project a kz1100 shafty. I finally just ordered the steel to get rid of the dip in the seat frame. gonna throw some dirt tires on it.
 
Cool build! I've got a GS1100G which is the more standard version of the shaft driven.

Imageshack or Photobucket is the best way to post pics here. There is a sticky on how to do it if you're unfamiliar. You can get good sized pictures right in the thread though.

Be sure to change the secondary and final drive oil. If your previous owner was anything like the PO of mine, they haven't been changed in a while. You'll also want to make some electrical mods if they haven't already been made. These bikes are famous for charging issues. I just dealt with one of these issues. One last thing, the next time you have the back tire off, check out the spline. They switched to a softer metal on the rear spline of these in '82 (I believe) and only used them for a couple of years. The newer models and the older models are made up of much stronger metal.

I can also point you in the direction of the Suzuki shop manual if you haven't already downloaded it.

More pics man!
 
mookieo2 said:
Looking forward to the build. I have a similar project a kz1100 shafty. I finally just ordered the steel to get rid of the dip in the seat frame. gonna throw some dirt tires on it.

I hear ya. I'm working on a 82 Yamaha Maxim, same basic style metric cruiser. In a place filled with TONS of Honda CBs and the like, I am attracted to these bikes, I think, cause turning them into a Cafe isn't a easy. So much out there for the CBs to simply bolt right on, so I appreciate the challenge in these. Then again, that's me! I never do anything the EASY WAY! hehe!
 
Thanks for the suggestions Indie...before it gets back on the road it's getting all fluids refreshed and I'll be sure to check the back wheel. I feel the same since of challenge you do Roadrash. Mookieo, my frame has a slight dip in it two but not bad at all. I have an idea where the seat will fit on top of the dip..then fit slightly in the frame toward the back where the convertable bump stop will be to give it that straight line.

Ill make sure to get some pics up Monday evening. I hate threads and builds that don't have tons of pics..sorry.
 
Sorry guys...i've been out all weekend. I'll get some pics posted tomorrow and tuesday of my progress. I got my cbr clip ons from ebay which need some spacers as the fork tubes are smaller than the clip ons. I'm going to Lowes tomorrow for ideas. Any suggestions are welcome. My goal is to get lower fork tubes, head light, headlight mount, clip ons and spacders and air box side covers painted black. Purchased etching primer for all chrome surfaces. Most of the work will be sanding to accept the primer. Using engine block rattle can from Advanced Auto.

One thing I really would prefer is a different tank. I'de like a more square, cafe tank from the sportier models. I'de trade if someone has something better for this build. I've got my sprint gps tach and speedo ready to go and tested today. So away goes the gadge cluster! I'm debating on a tank and bump stop color..maybe white with a black panel and red striping. I don't know.
 
RoadRash said:
I hear ya. I'm working on a 82 Yamaha Maxim, same basic style metric cruiser. In a place filled with TONS of Honda CBs and the like, I am attracted to these bikes, I think, cause turning them into a Cafe isn't a easy. So much out there for the CBs to simply bolt right on, so I appreciate the challenge in these. Then again, that's me! I never do anything the EASY WAY! hehe!
Alright! Another XJ! I'm working on a 83 Seca 750r (Project Cheap Racer). I'm keeping my eye on this one.
 
Yeah, I've been keeping tabs on your build. I SHOULD have a SECA tank coming in the next month or so (fingers crossed), and am been toiling away on a custom seat, not much different than yours, really. I cut up an original Maxim tank rear section for the bum stop and used aluminum for the pan. Just trying to finalize the shape of the cowl at this point.
 
Not getting much done today..it's raining and I'm doing this build out of doors. I solved the cbr clip on size issue though. Went to Lowes and got some pvc pipe that I'm using as internal spacers. I don't see why they wouldn't hold up and they give the clip ons the approximent 1 3/8 inside diameter to match the fork tubes...before bolts are tightened down all the way. I split the pipe into two halves and cut them to the clip on width. Picture shows both halves taped inside to get final measurements. Also got a 1x8 poplar board to use as a seat pan mock up. It is the perfect 7 1/4 width to match frame. Spent $5 on the pvc and board and $17 dollars on Ebay for the clip ons

You can also see more pics on my build thread at http://www.thegsresources.com/_forum/showthread.php?t=170573
 
Removed the fork tubes from the tree today. Removed the headlight, headlight mount and lower tree trim cover. Prepped and painted both levers, brake fluid resivour and triple tree clamps. I used the same black gloss engine paint with ceramic on all parts including clipons. This paint is pretty good and I'm very happy with the results. The etching primer covers very well too. I have taken apart the front foot pegs and decided to remove the rubber pads from the pegs. I wanted exposed metal pegs but haven't decided if Ill be leaving them raw or paint them. Might add some holes in the sides for something different.
 

Attachments

  • Picture1157.jpg
    Picture1157.jpg
    51.9 KB · Views: 211
Foot pegs without rubber. Don't know what I'm going to do with them yet.
 

Attachments

  • Picture1161.jpg
    Picture1161.jpg
    55.3 KB · Views: 207
Ill post pics tomorrow but here's what I wrenched on today.

Finish painted headlight, headlight mount, throttle housing, turn signal housing and triple tree trim cover with "suzuki" emblem removed.

Installed headlight mount and used CBR clip ons. I had to notch out a 1x1 inch in the headlight mount near the top hoop. I did this to leave some clearance for the clip on tightener bolt. OH, by the way...I flipped the headlight mount upside down to slightly lower the light and leave more than enough clearance for the clipons. All of the cafe racers I like had a lower headlight than the stock one on my bike.

I re-installed the fork tubes in the trees...about crushed 4 fingers! OUCH. I am setting the tubes approximately 1 1/2 to 2 inches above the tree.

Next on the list:

Finish installing spacers inside clip ons and find right riding angles. Install all forward controls and new black rubber and black aluminum grips.

Install headlight and birds nest of wiring inside.

Man..I wish I had a garage...doesn't seem like I got much done today but I also got my new plate, got my license and sold my tahoe. Busy.
 
Awall,
I'm currently building a 80' gs 1000 shafty and it came with some clip ons that were not on the bike. I've read how you shimmed yours to fit. Do the clip ons clamp tight enough to be safe. I really want to use them but I'm worried that they won't get tight enough around the fork. Let me know what your thoughts are please. I know how you feel about not having a garage. I'm building mine on my back porch thats only a 6x6 pad of concrete.
 
I got the clipons on today with the pvc shims. I had to open up the clipons alittle to get them on. So I had alot of room for tightening which helps. I had them tightened where I thought they would work but they slipped out of position. After further carefull tightening they have not moved at all. I have better pics on gsresources.com
 
Back
Top Bottom