
We noticed you are blocking ads. DO THE TON only works with community supporters. Most are active members of the site with small businesses. Please consider disabling your ad blocking tool and checking out the businesses that help keep our site up and free.
You are using an out of date browser. It may not display this or other websites correctly.
You should upgrade or use an alternative browser.
You should upgrade or use an alternative browser.
Shake the Box CL360/378 - The Hedgehog - Done
- Thread starter ridesolo
- Start date
Re: Re: Shake the Box CL360/378
You could be right. AND if I had been paying attention to the vid I would have seen the SPOKED wheels! Duh!
teazer said:I suspect that the brackets are to fit those calipers to H1 or H2 or Z1 forks.
You could be right. AND if I had been paying attention to the vid I would have seen the SPOKED wheels! Duh!
Re: Re: Shake the Box CL360/378
Yep.
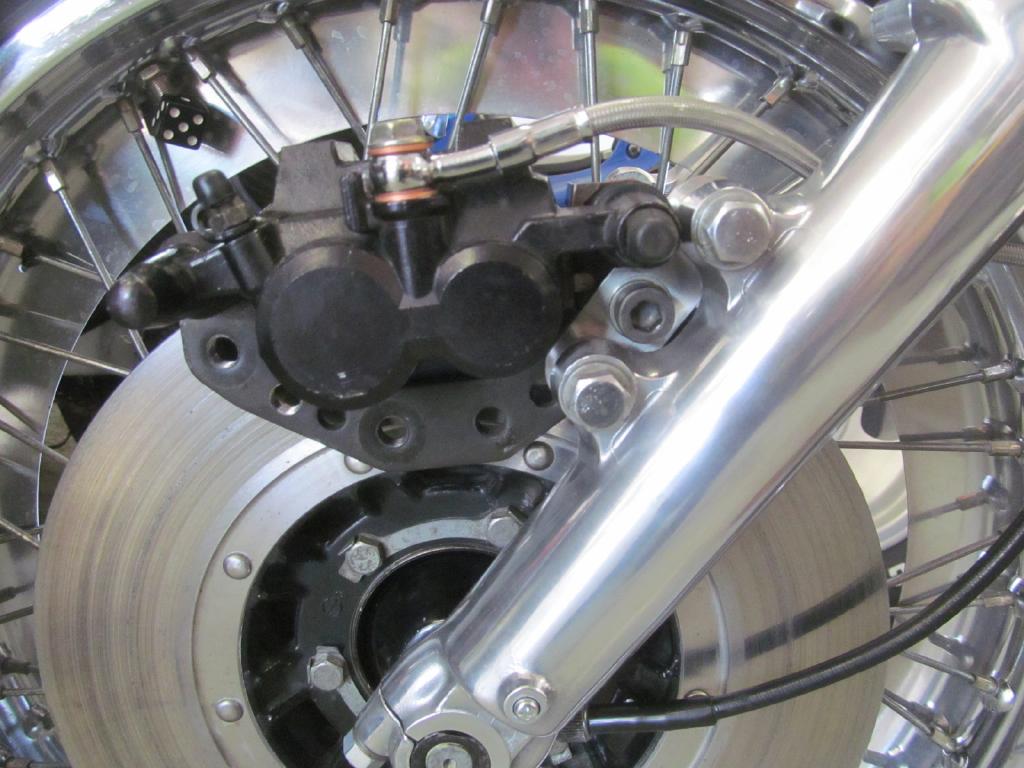
teazer said:I suspect that the brackets are to fit those calipers to H1 or H2 or Z1 forks.
Yep.
crazypj
Split personality, I fake being smart
Few years ago I was asked to make brakets to fit EX500 calipers to RD350YPVS, not sure why he wanted to do it but there was a name on CAD file he sent. I don't understand 'new' cad, just the old one (cardboard aided design) I still have pdf of the brackets somewhere though so the brackets are probably named fro a different fork fitting as couple of people already pointed out. The actual caliper design is used by Honda and Suzuki, only differene I could find was the mounting bolt spacing, Kawasaki is the narrowest and Honda the widest (I think there was over 30mm difference) Haven't measured them for several years though but have a couple of Honda ones in boxes (I've forgotten half the stuff I have stashed, until I can't find it :") )
)
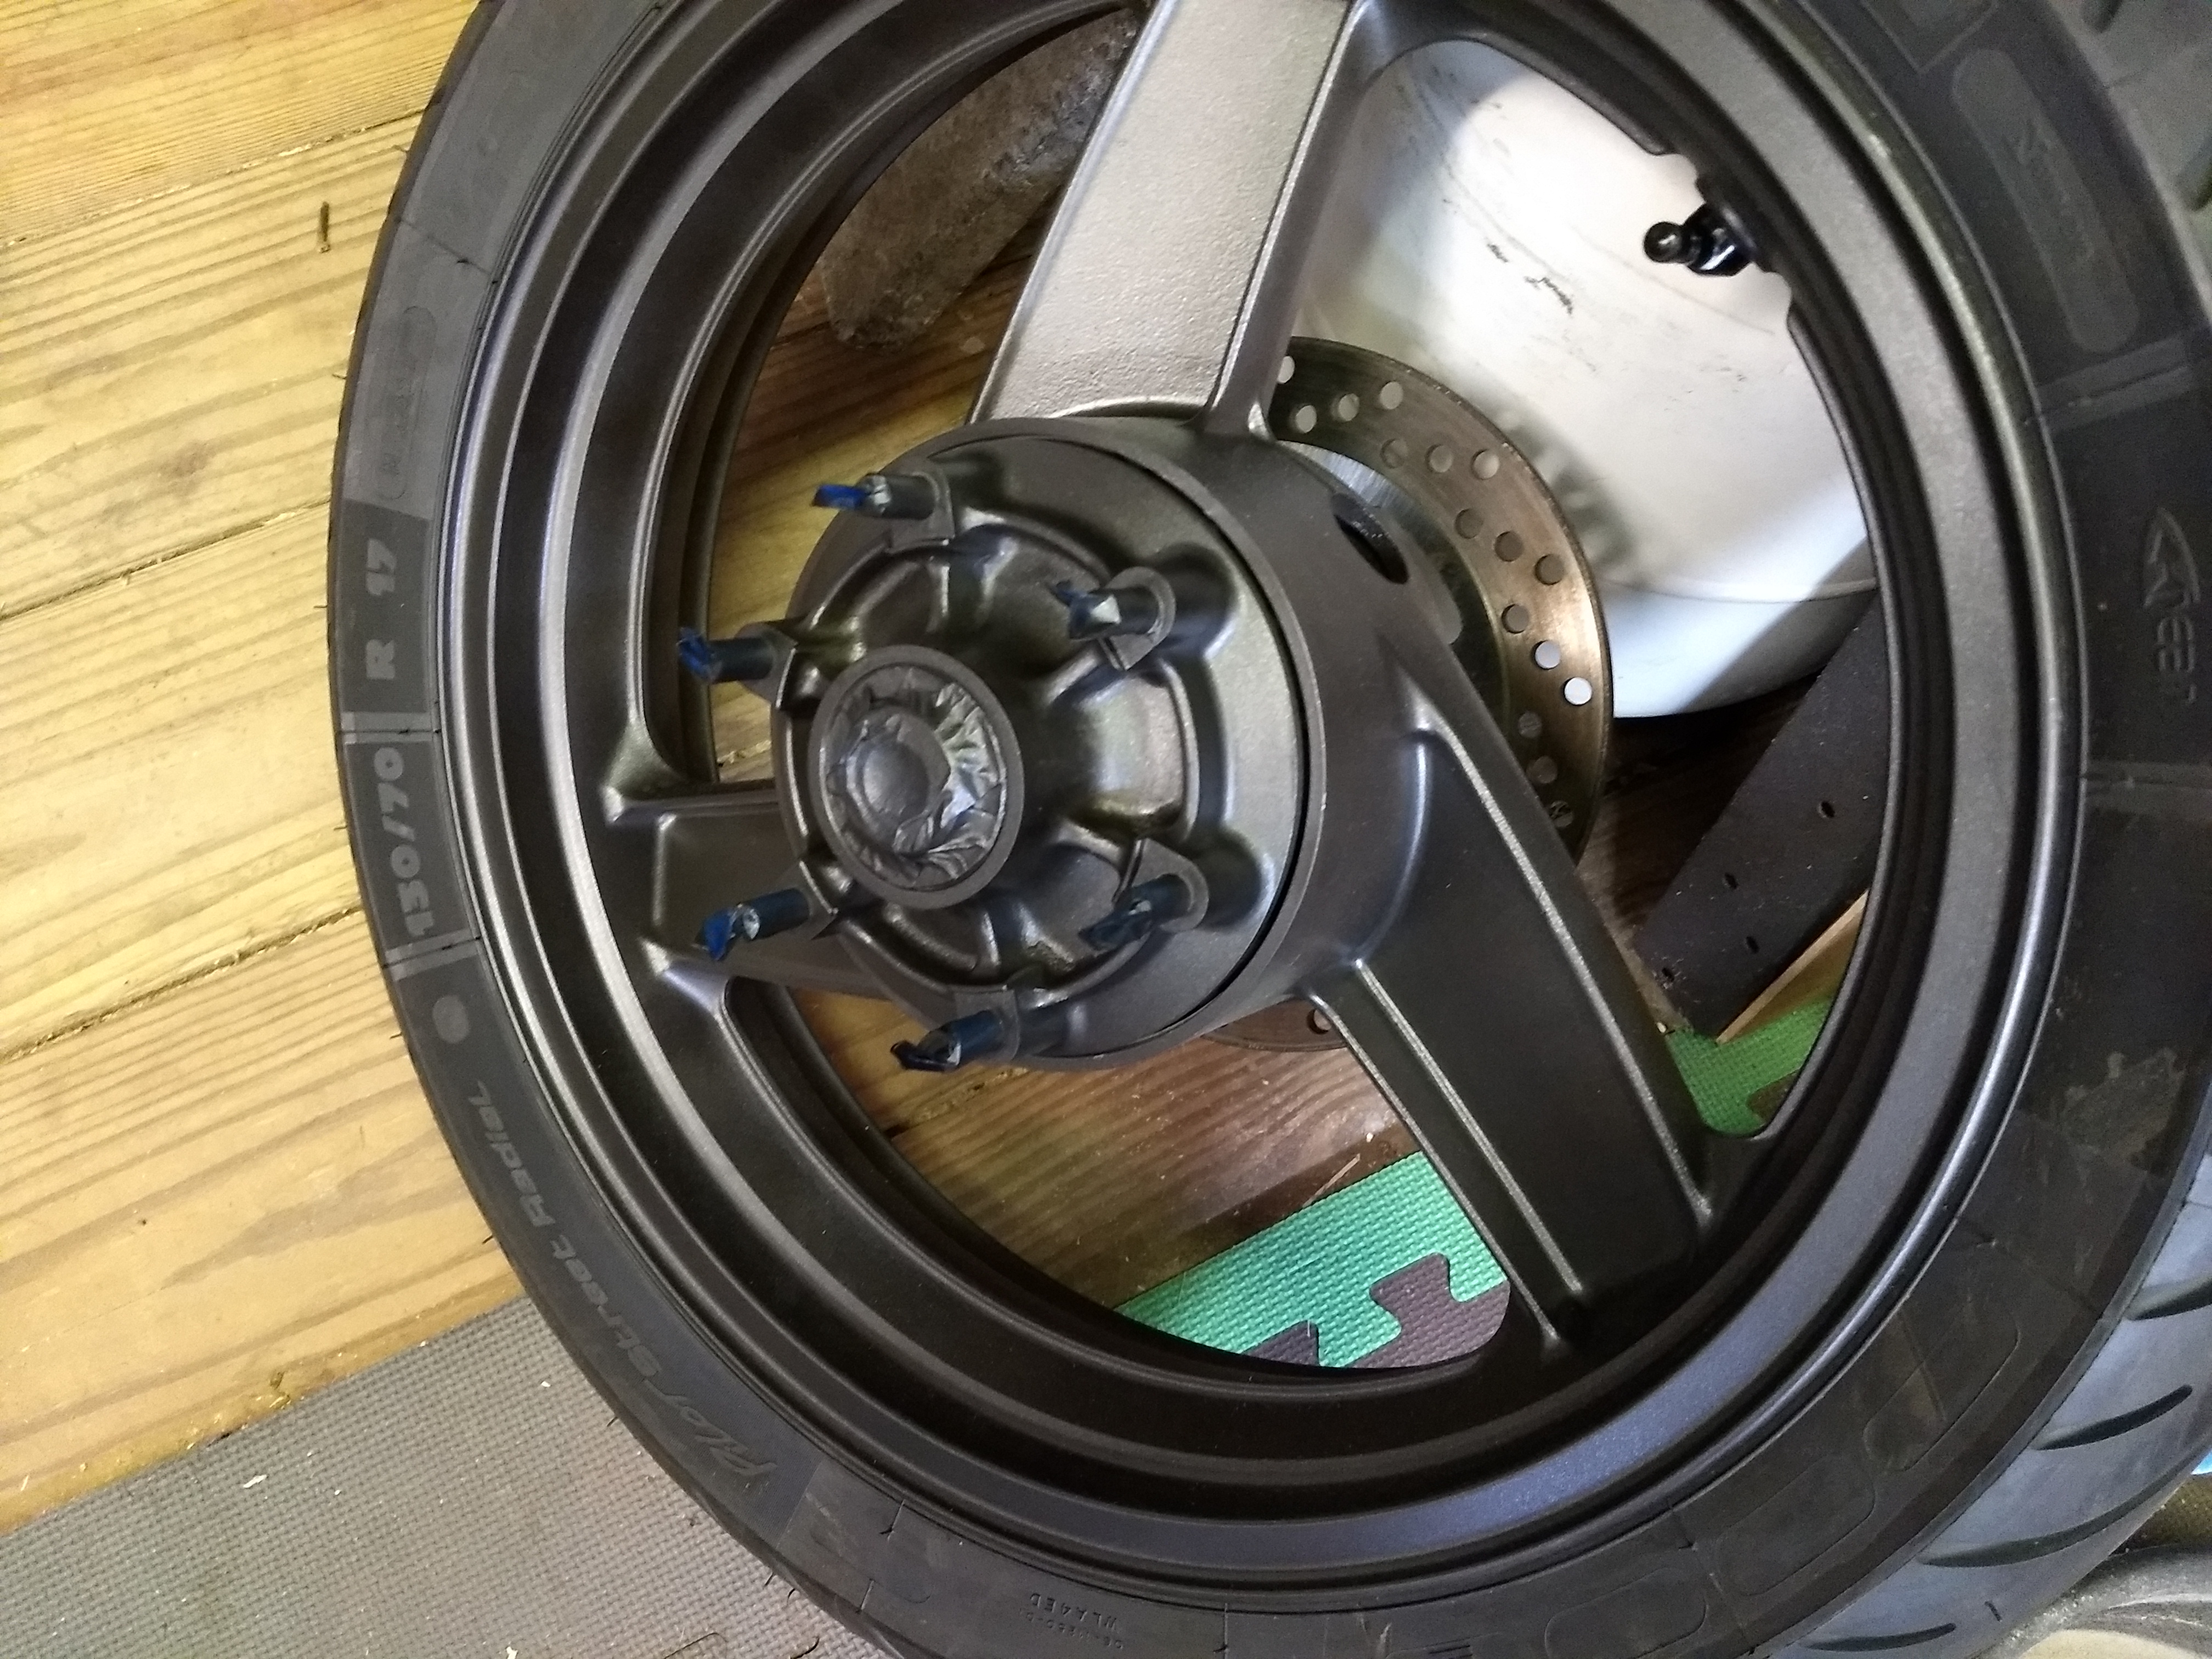
)The other day I was going through the parts and realized that when I painted the wheels I forgot to do the sprocket carrier. Done now.
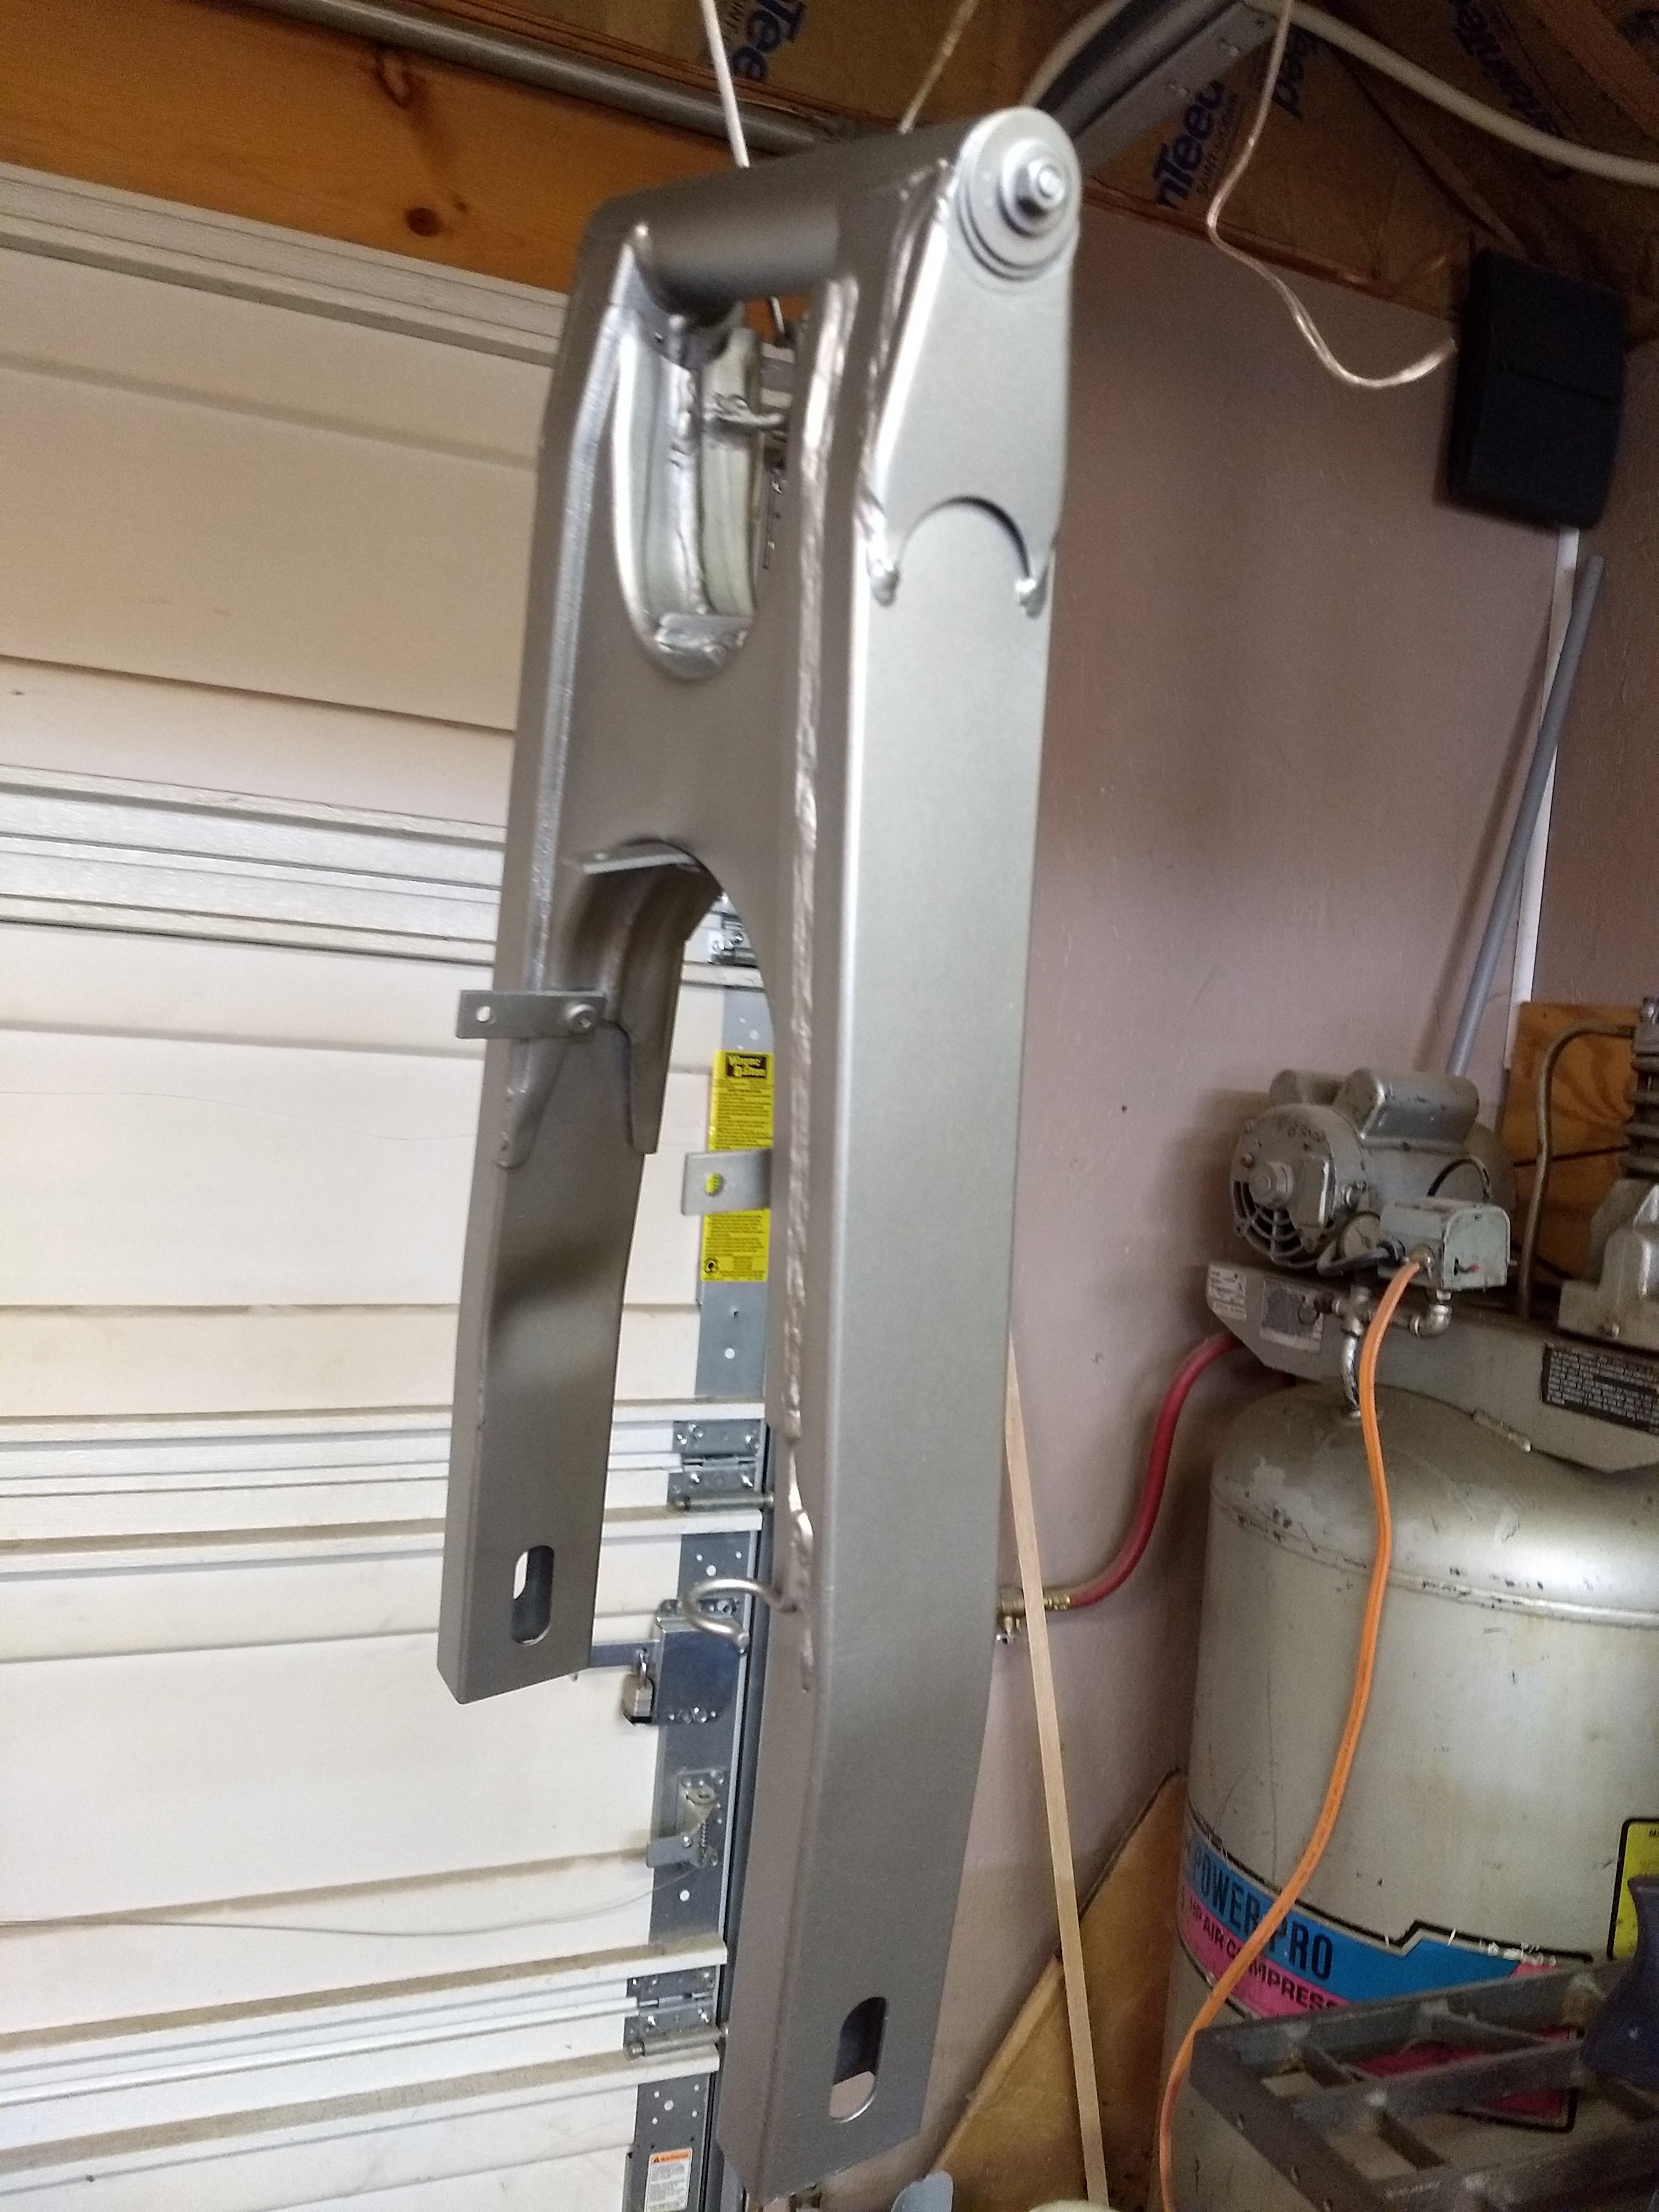
When I was reading back through this thread I noticed that several times I had said "going to paint the swing arm today", "plan to get the swing arm painted", and similar statements. Finally did it! (Might add another coat or two, but there it is, Yay!
And for giggles, a shot of the thing w/ the hugger fender stuck on.
I threw the rear wheel onto the swing arm just to see how it looks. It'll have to come off again to put on the new rear sprocket but getting a look at things seemed worth the trouble.
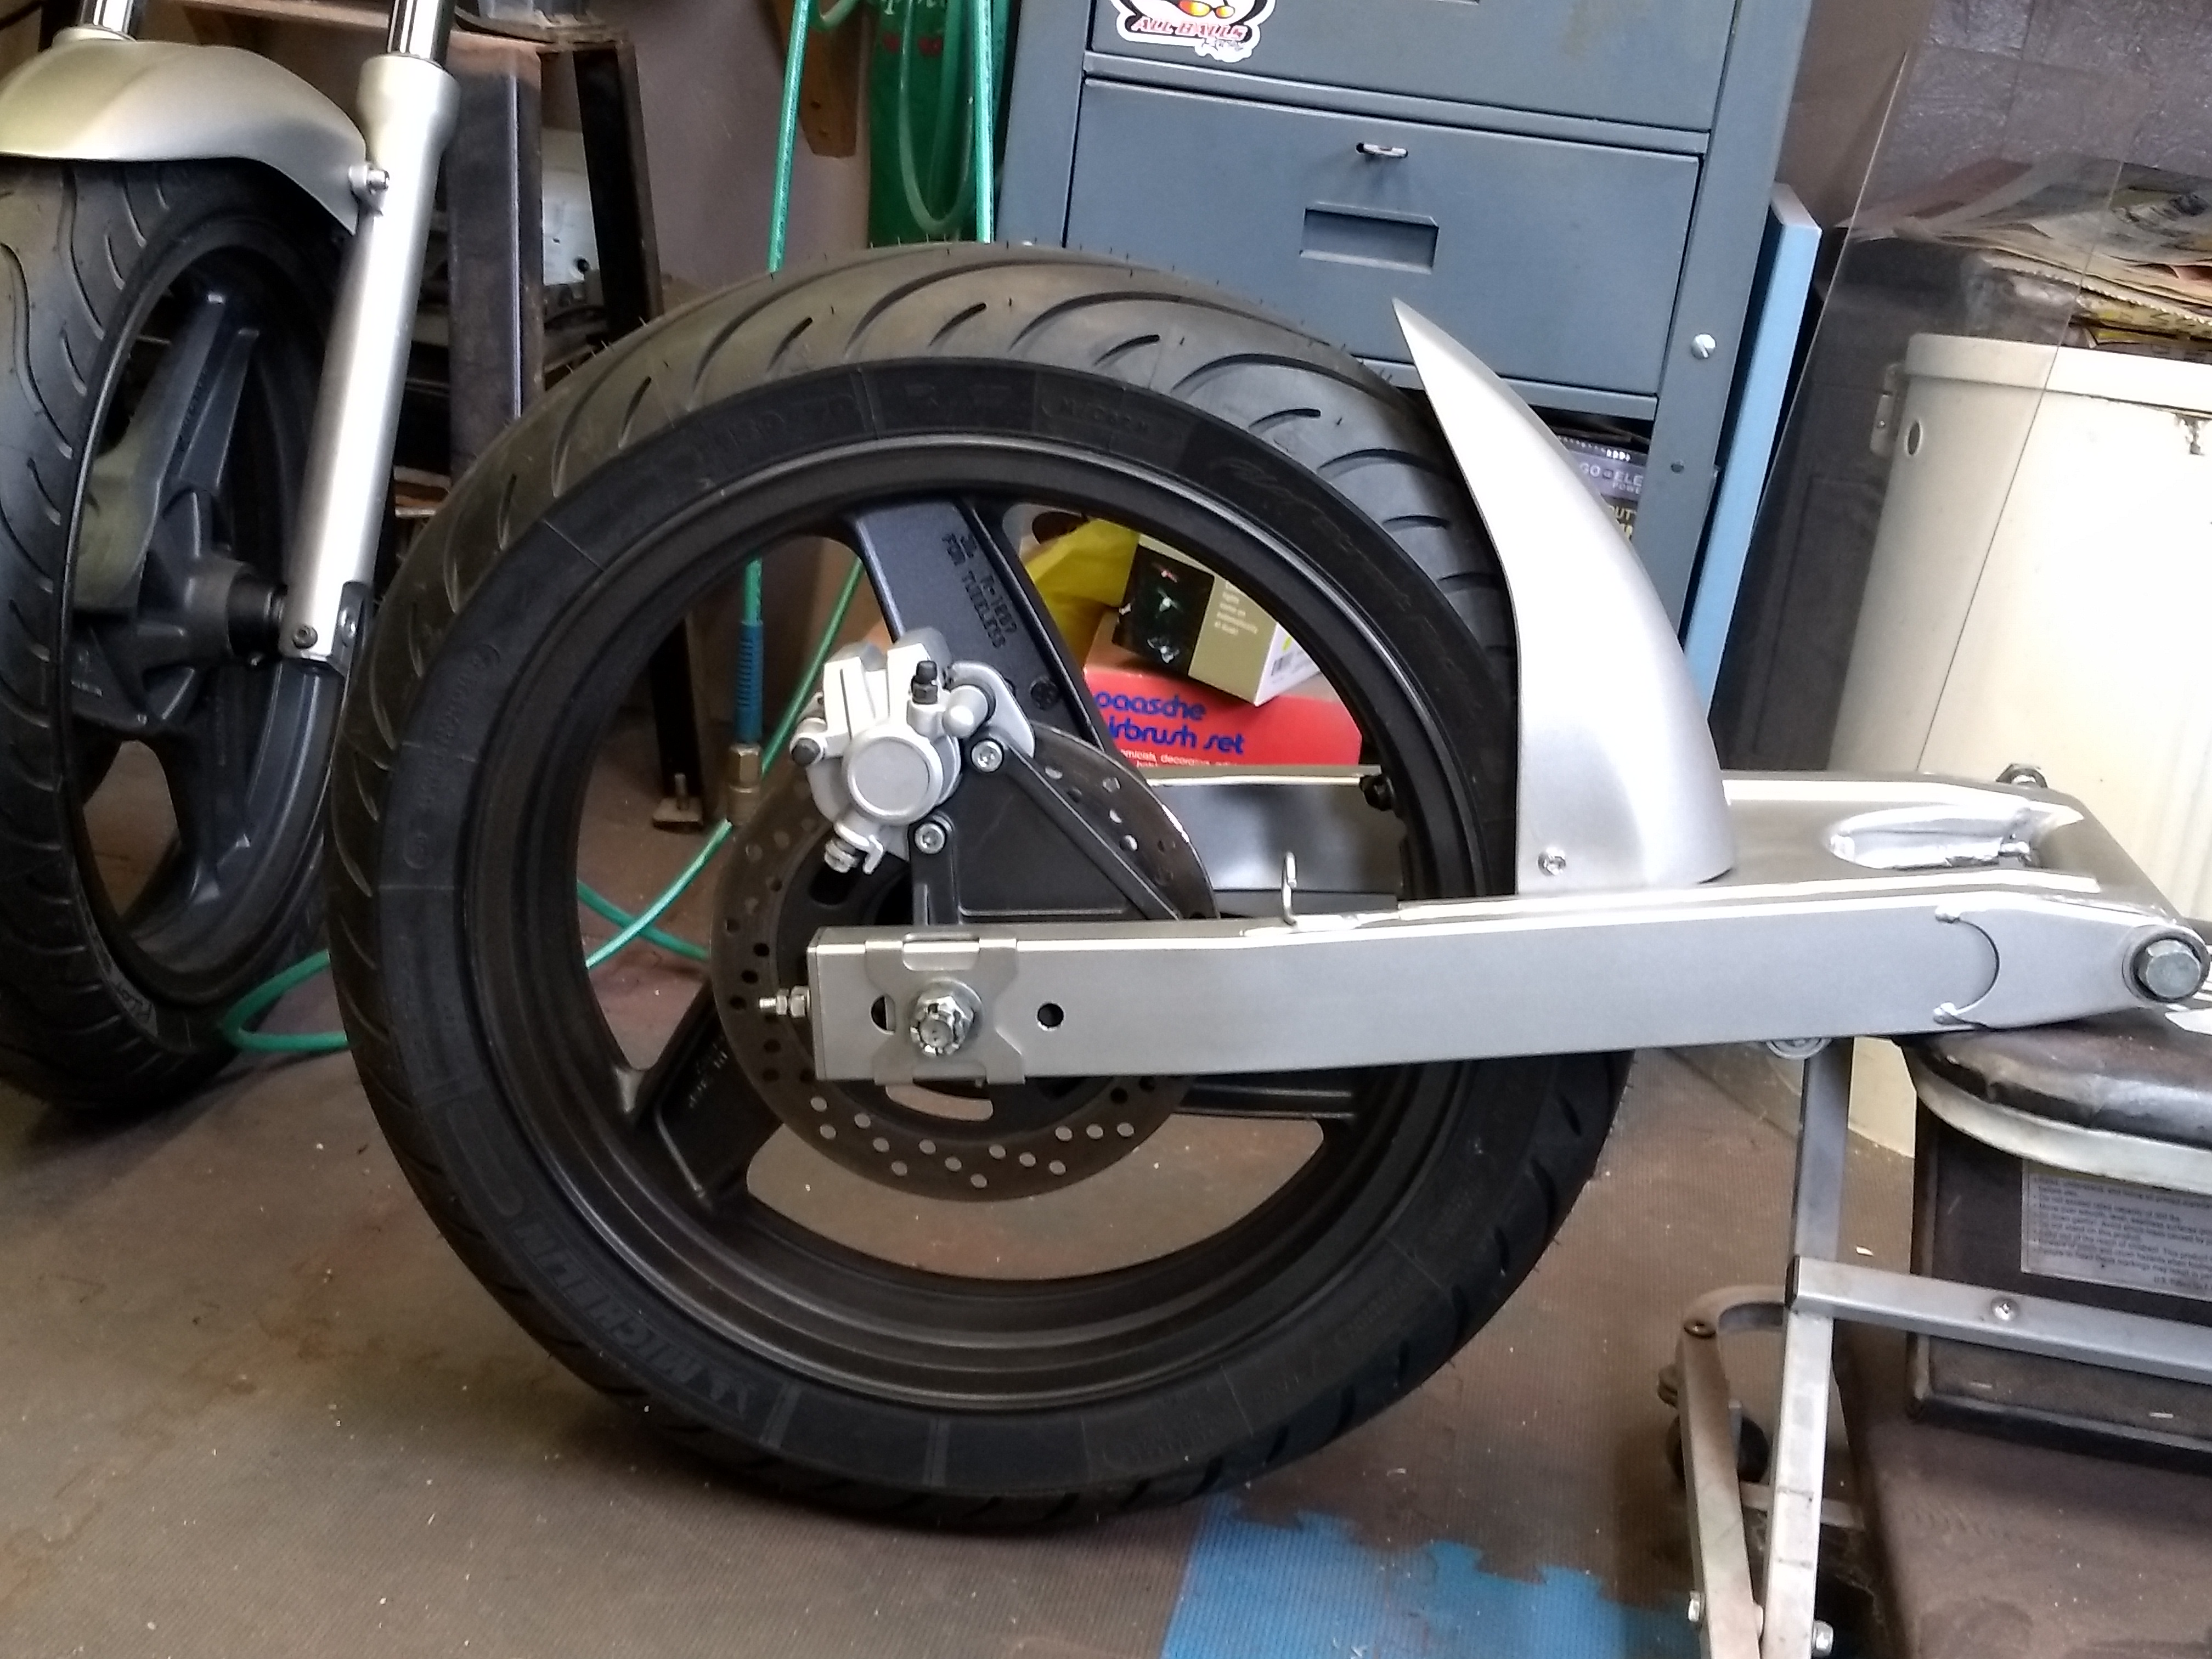
I had some silver caliper paint on hand from a brake job on the Tundra and since the predominant color on the thing is going to be Stainless Steel color epoxy paint I thought using that would be a good decision. I used Black Pearl engine paint on the engine side covers, wheels, brake discs, and the bracket for the real caliper. Now I'm not liking the silver calipers on the black bracket w/ the black wheels in the background. I'd appreciate opinions on the brake parts. Would it be better to have the bracket and caliper the silver color to match the swing arm and frame or might it look better to repaint them the black color to match the bracket and wheels and have them just sort of blend into the background of the wheel? Thoughts? Opinions? Silence?
The hole in front of the axle is for a pit stand button (since there's no longer a center stand).
I agree, I like the silver caliper and black bracket. Gives some detail to the whole assembly but the bracket blends in nicely with the wheel.
Re: Re: Shake the Box CL360/378
Thank you for the input. I'm surprised, two comments liking it the way it is. Sometimes when you're so close to something it's hard to be objective. I'm attempting to put lots of thought into the placement and colors of the various components because it's going to be heavily monochromatic anyway and I'd like it look planned and "natural" when it's done rather than just have splashes of color here and there almost at random. AND it wouldn't break my heart to not have to repaint the calipers.
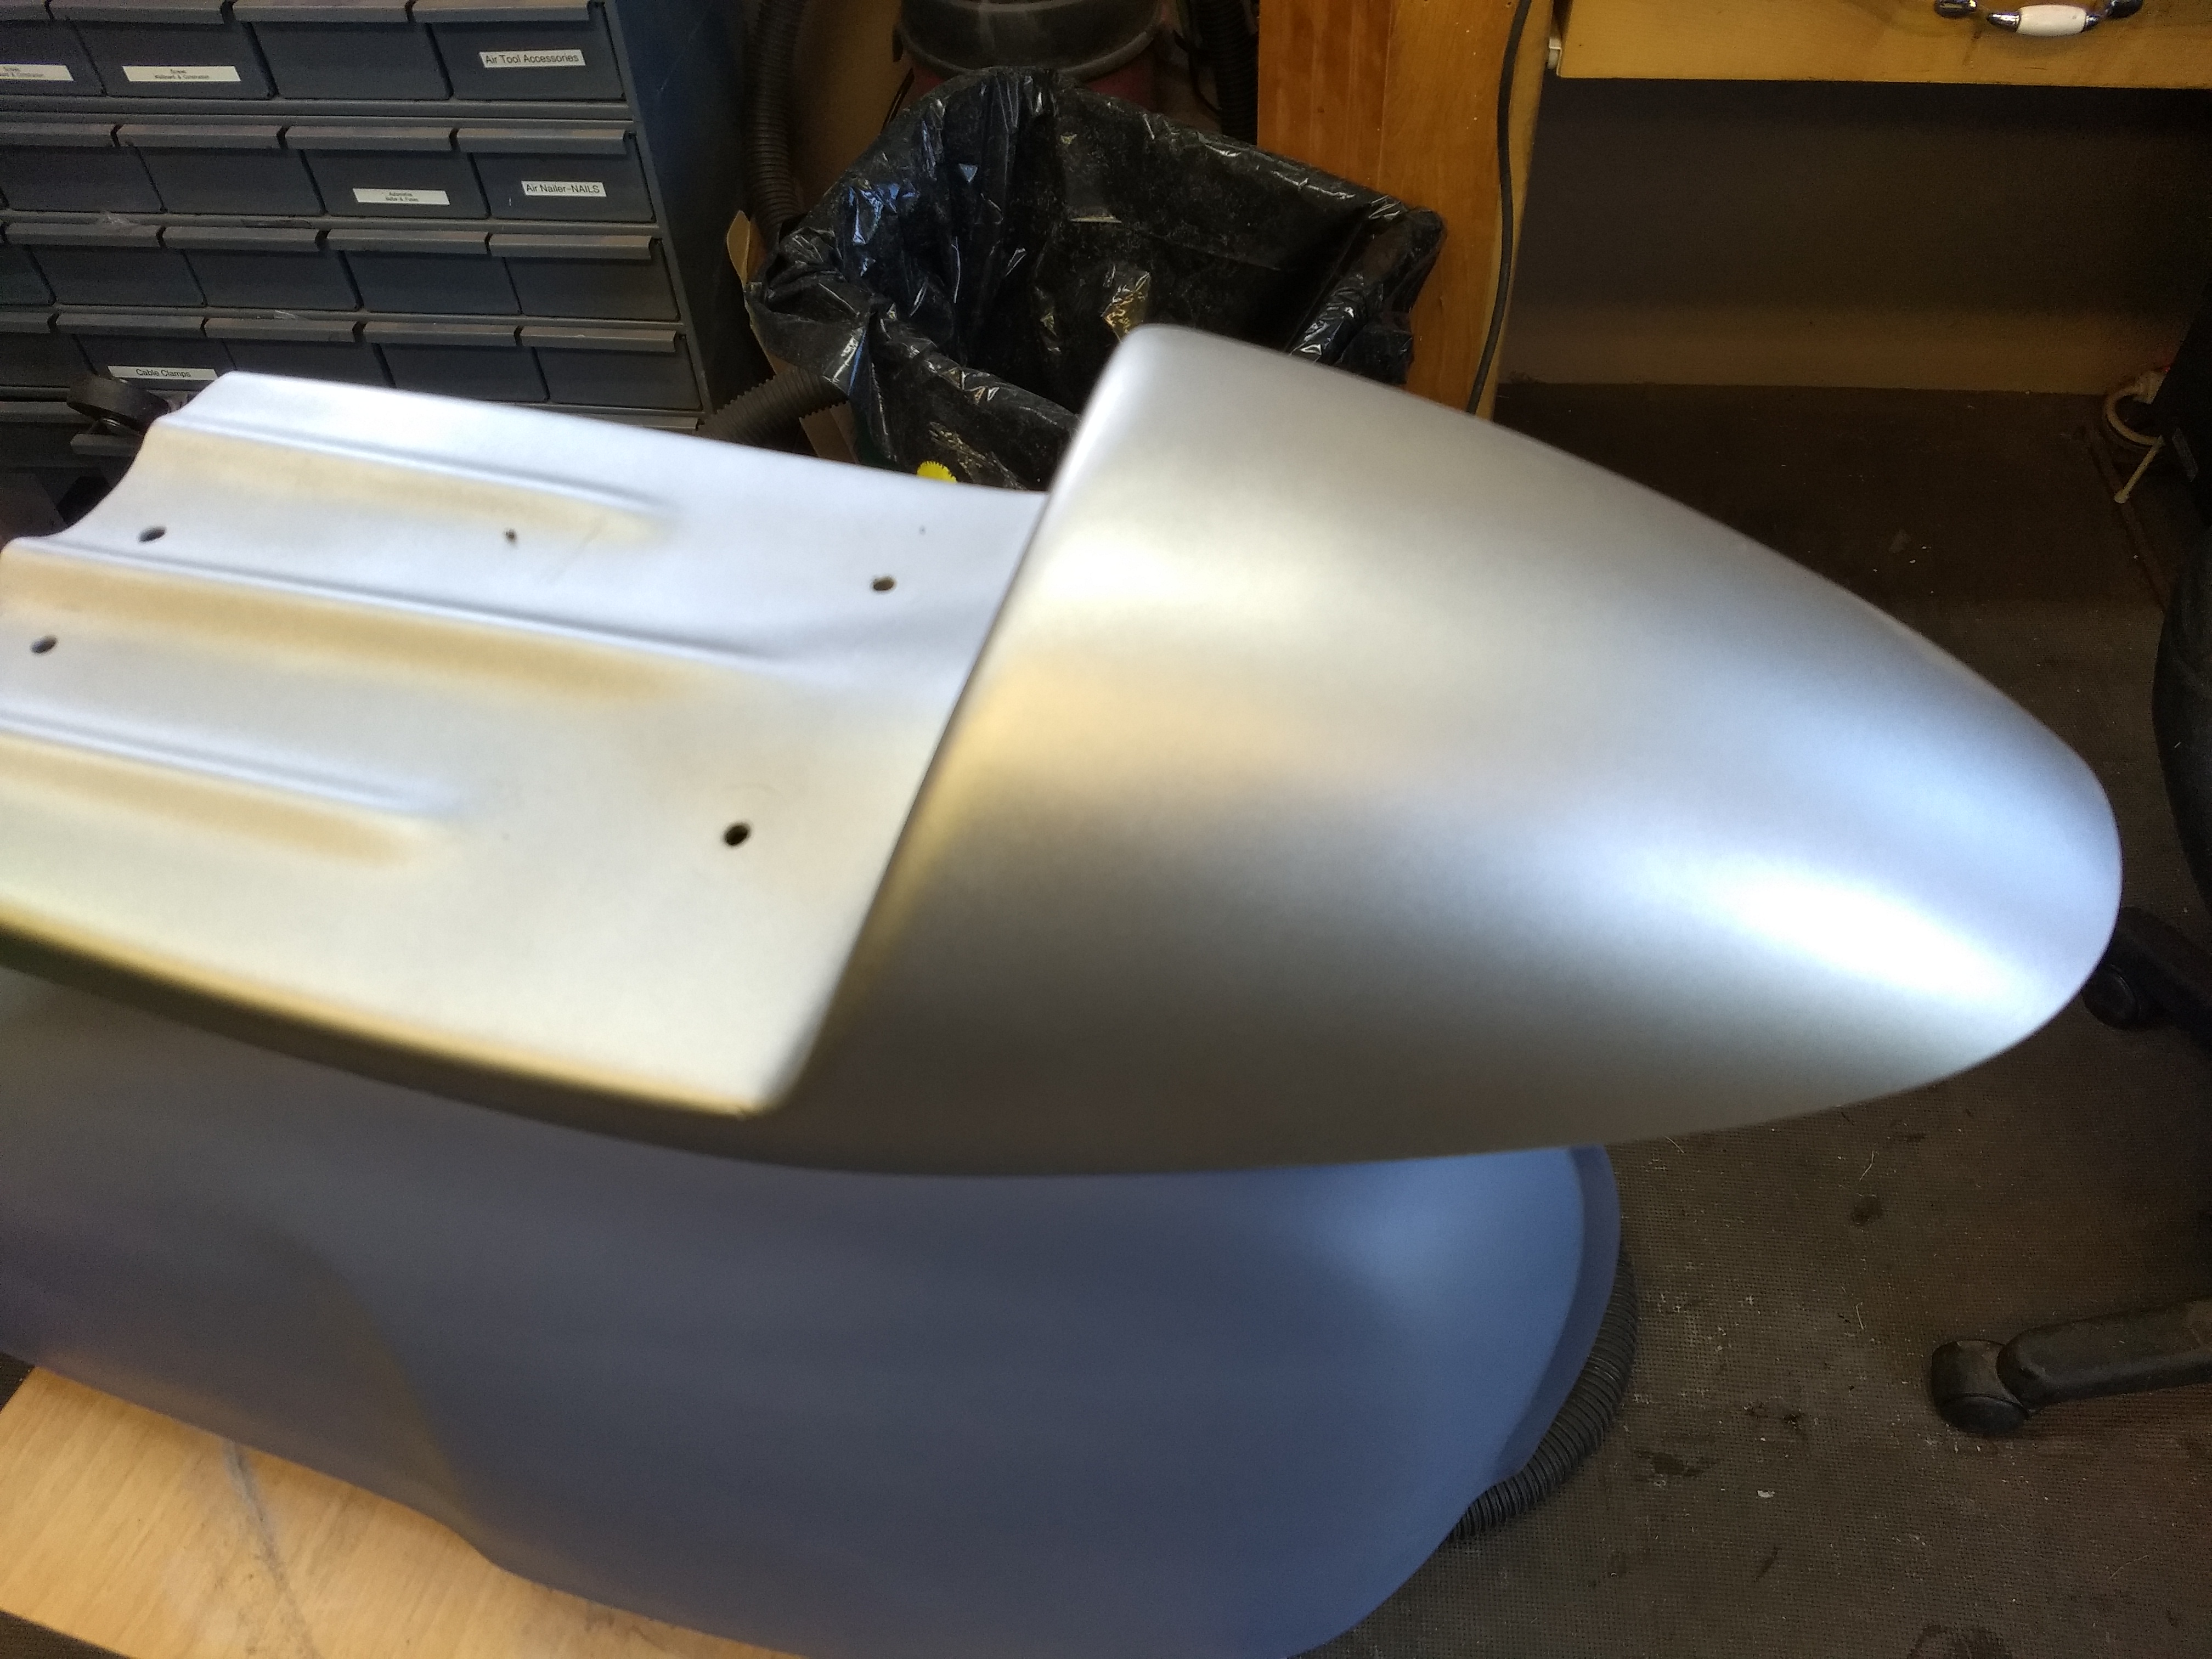
On another part of the beastie, I got the seat base sanded and put another coat of primer on so it'll be soon ready to get into final sand and then put color on it.

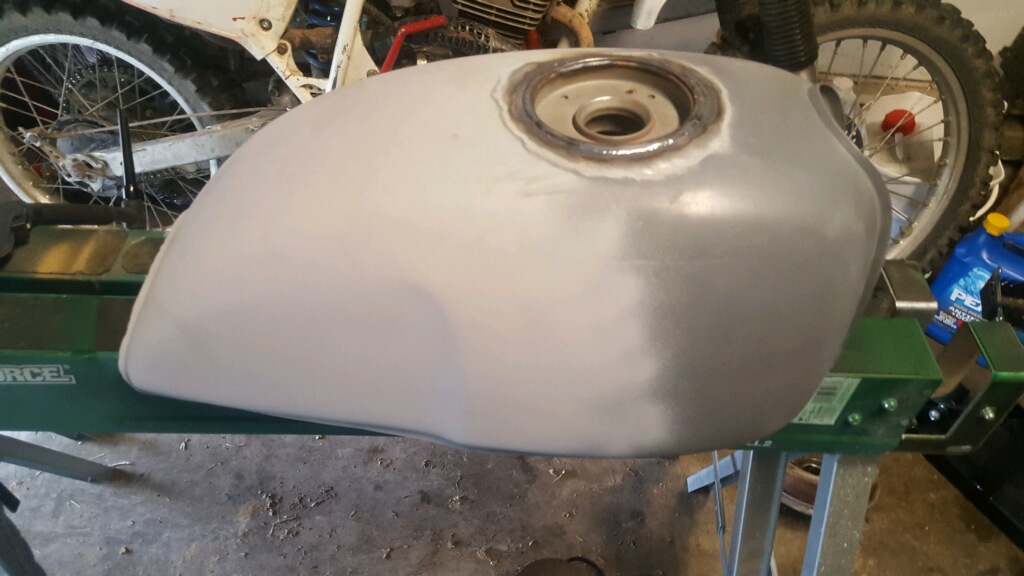
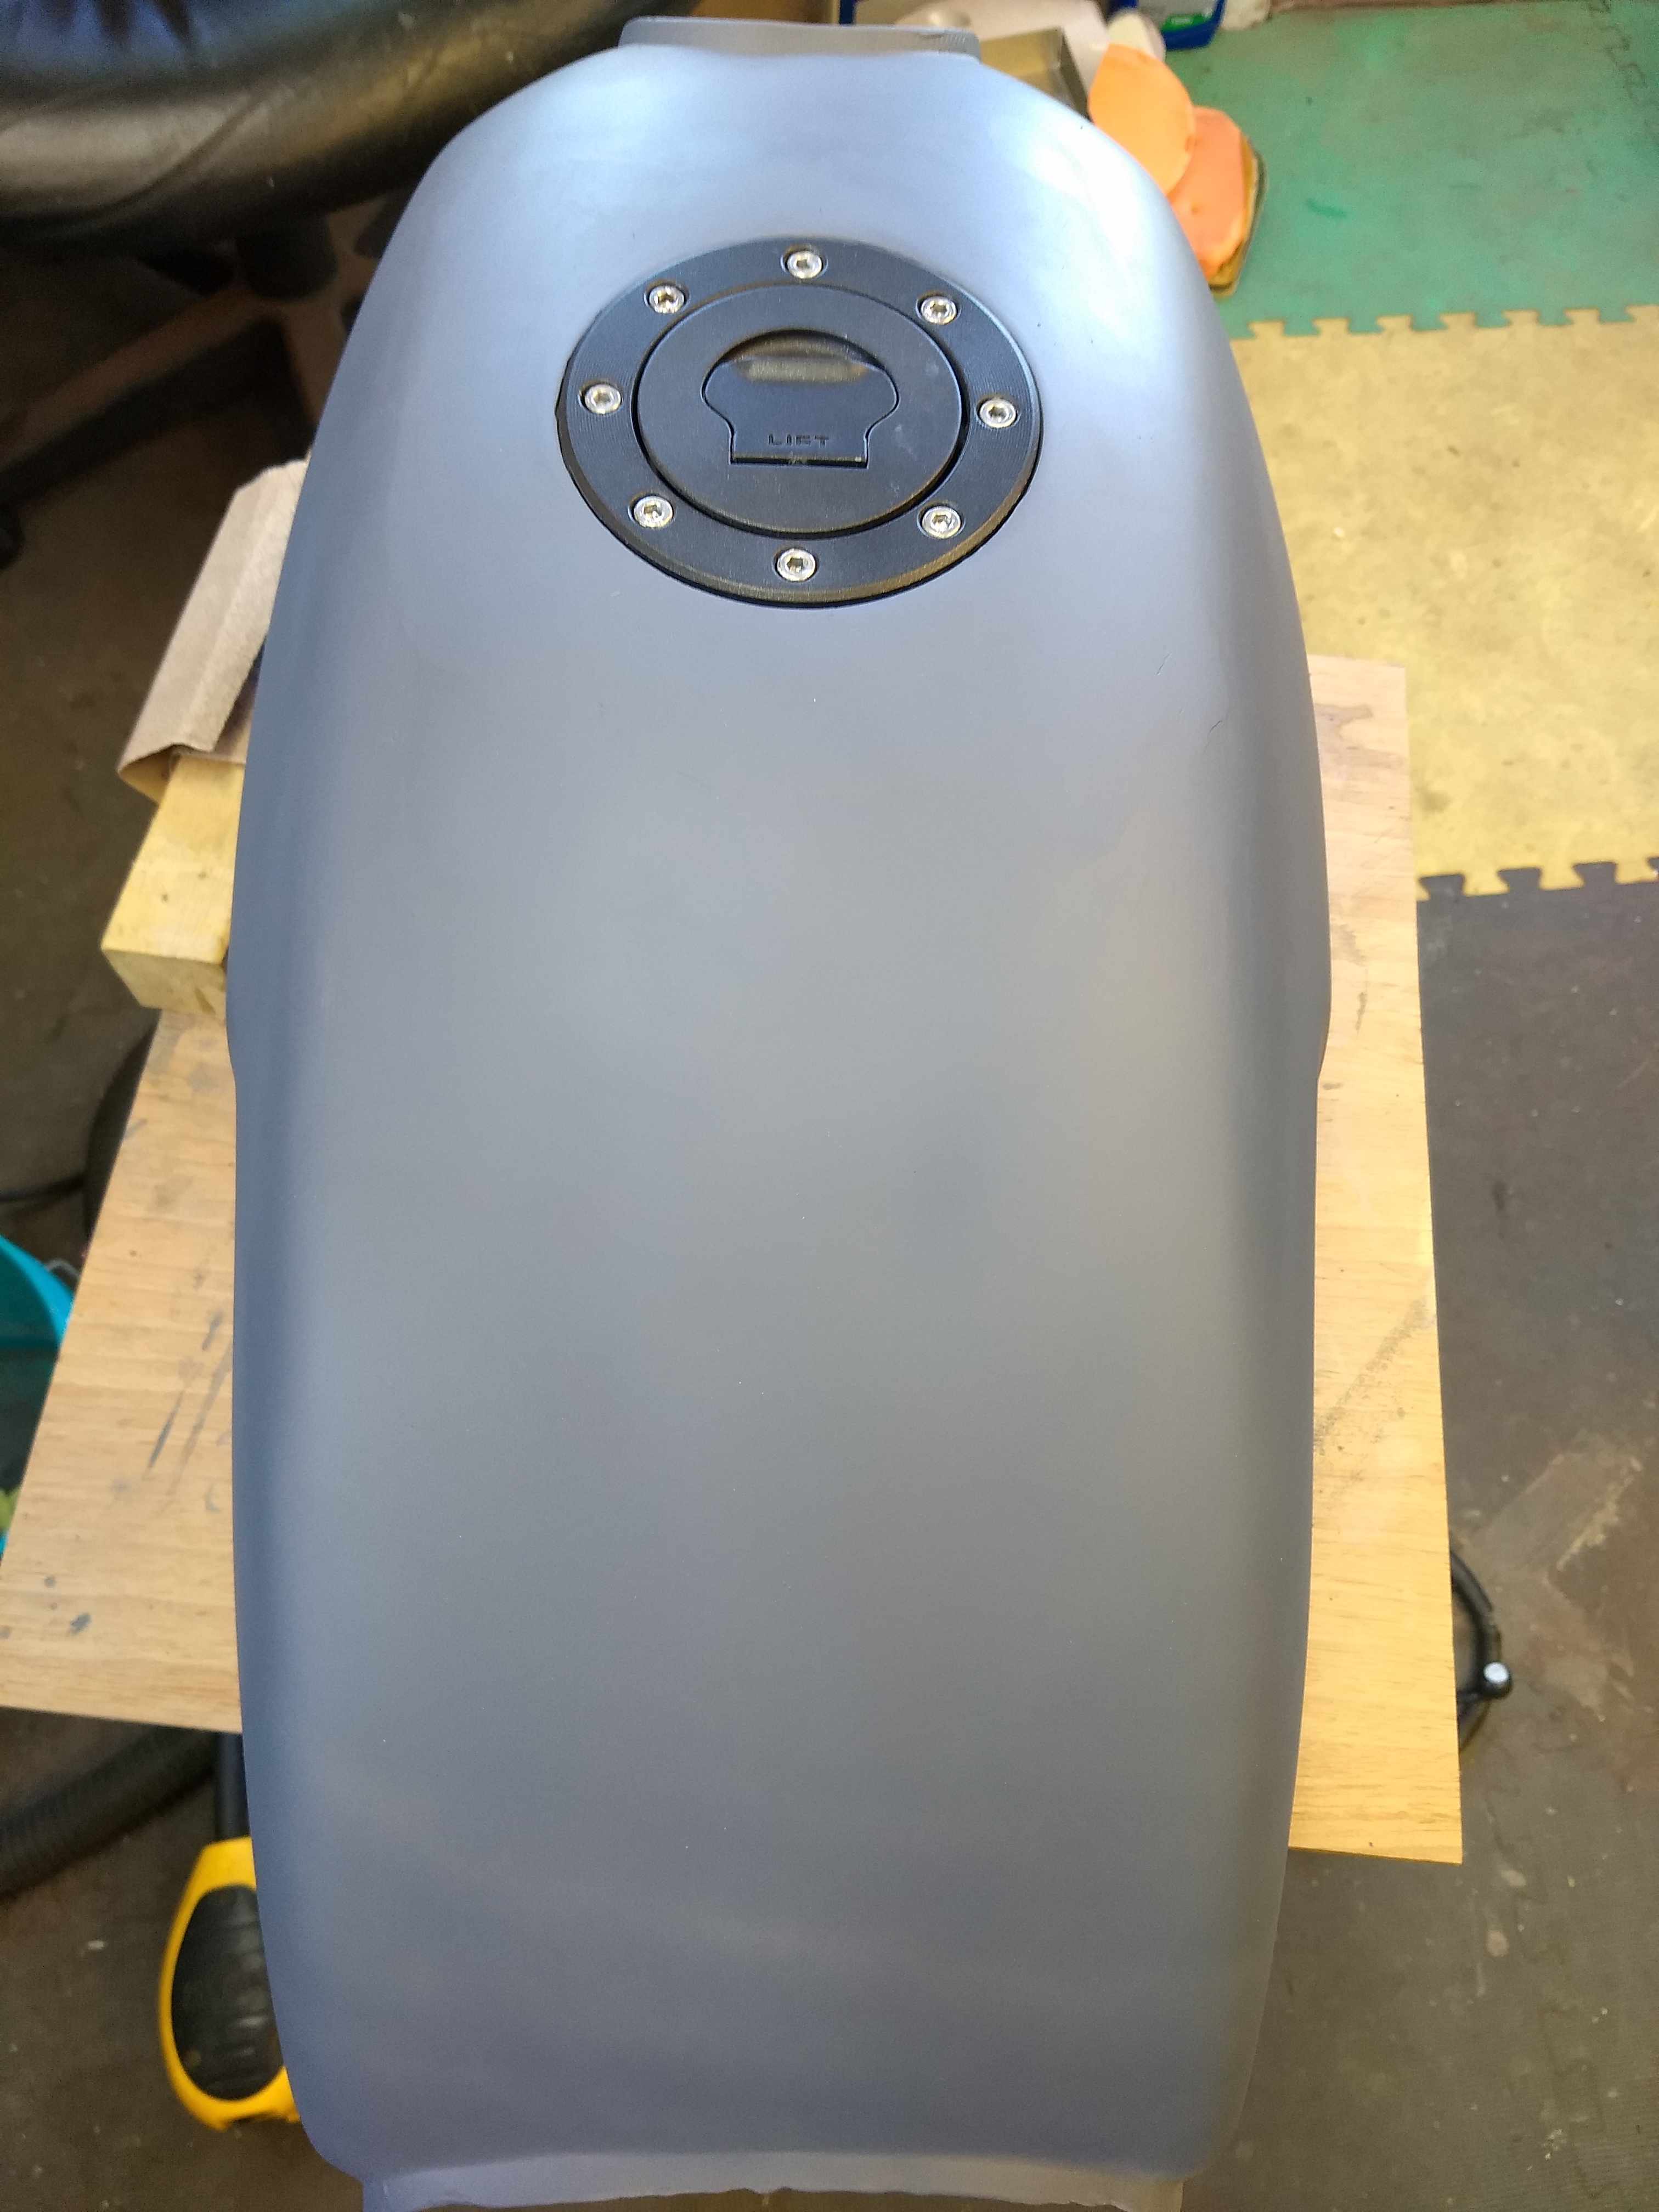
And speaking of sanding, I just got word from Levi that he's been welding on my tank, so I'll soon be sanding and filling and filling and sanding on it to get it ready for paint.
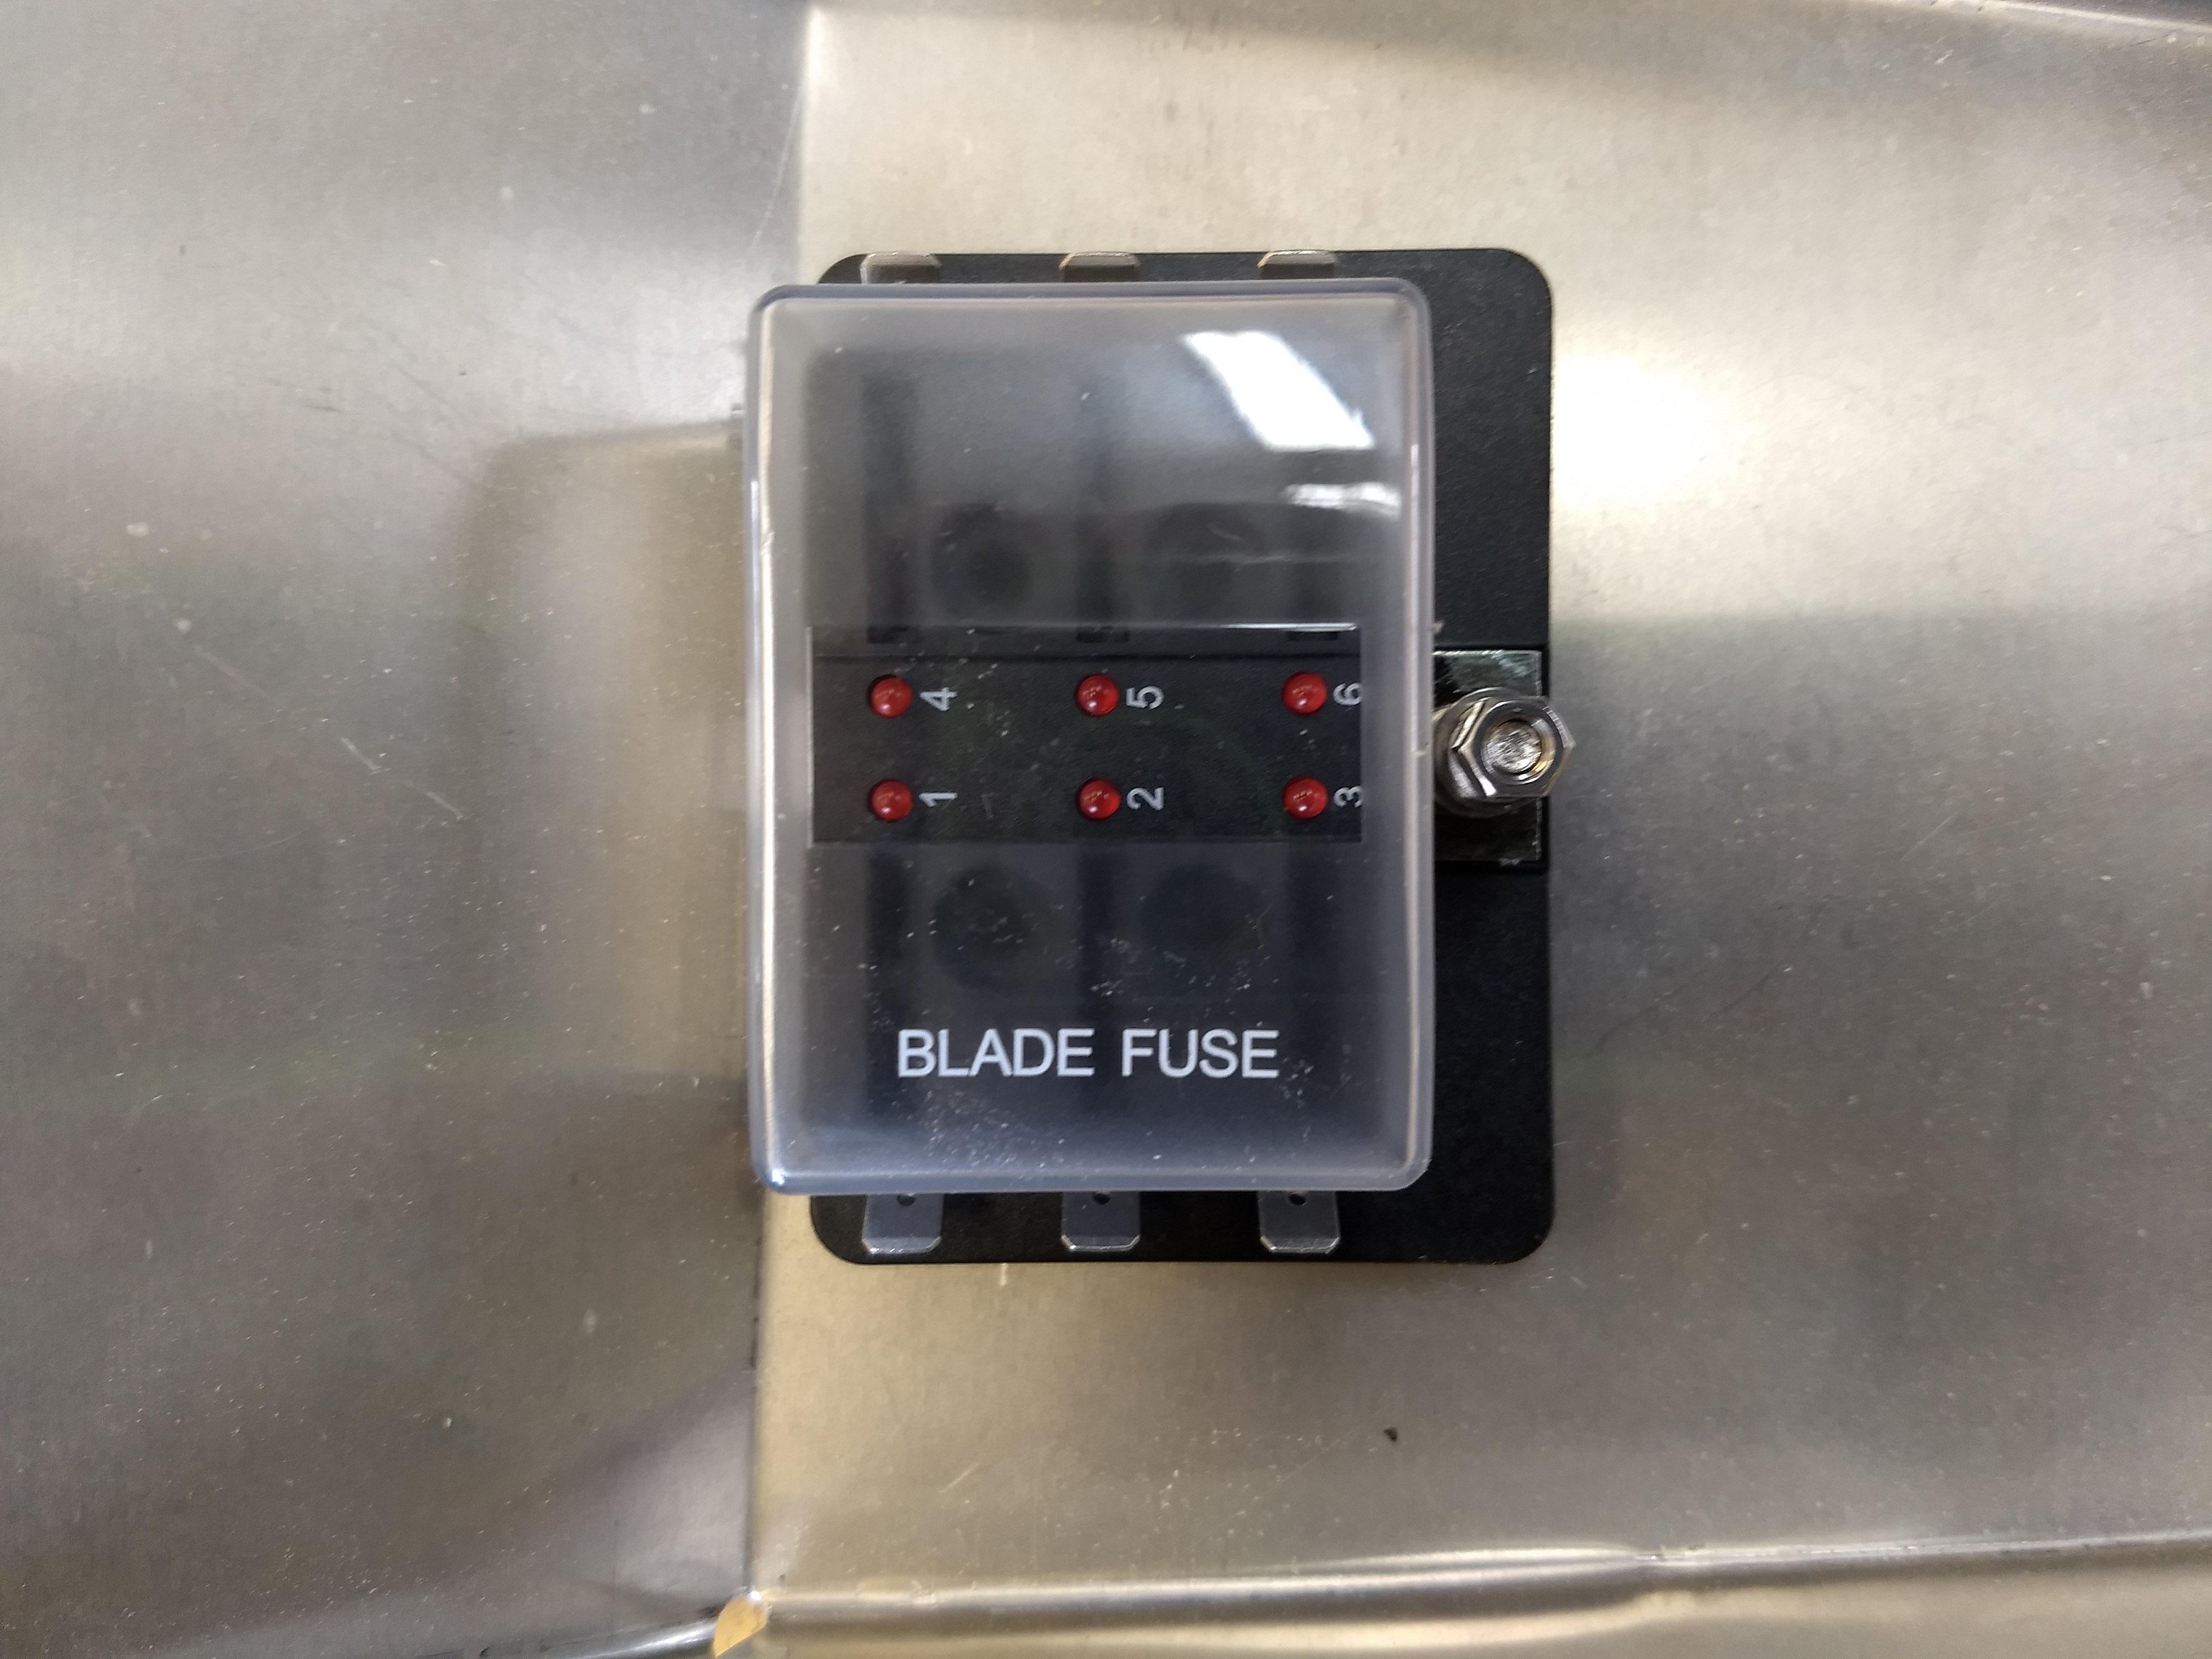
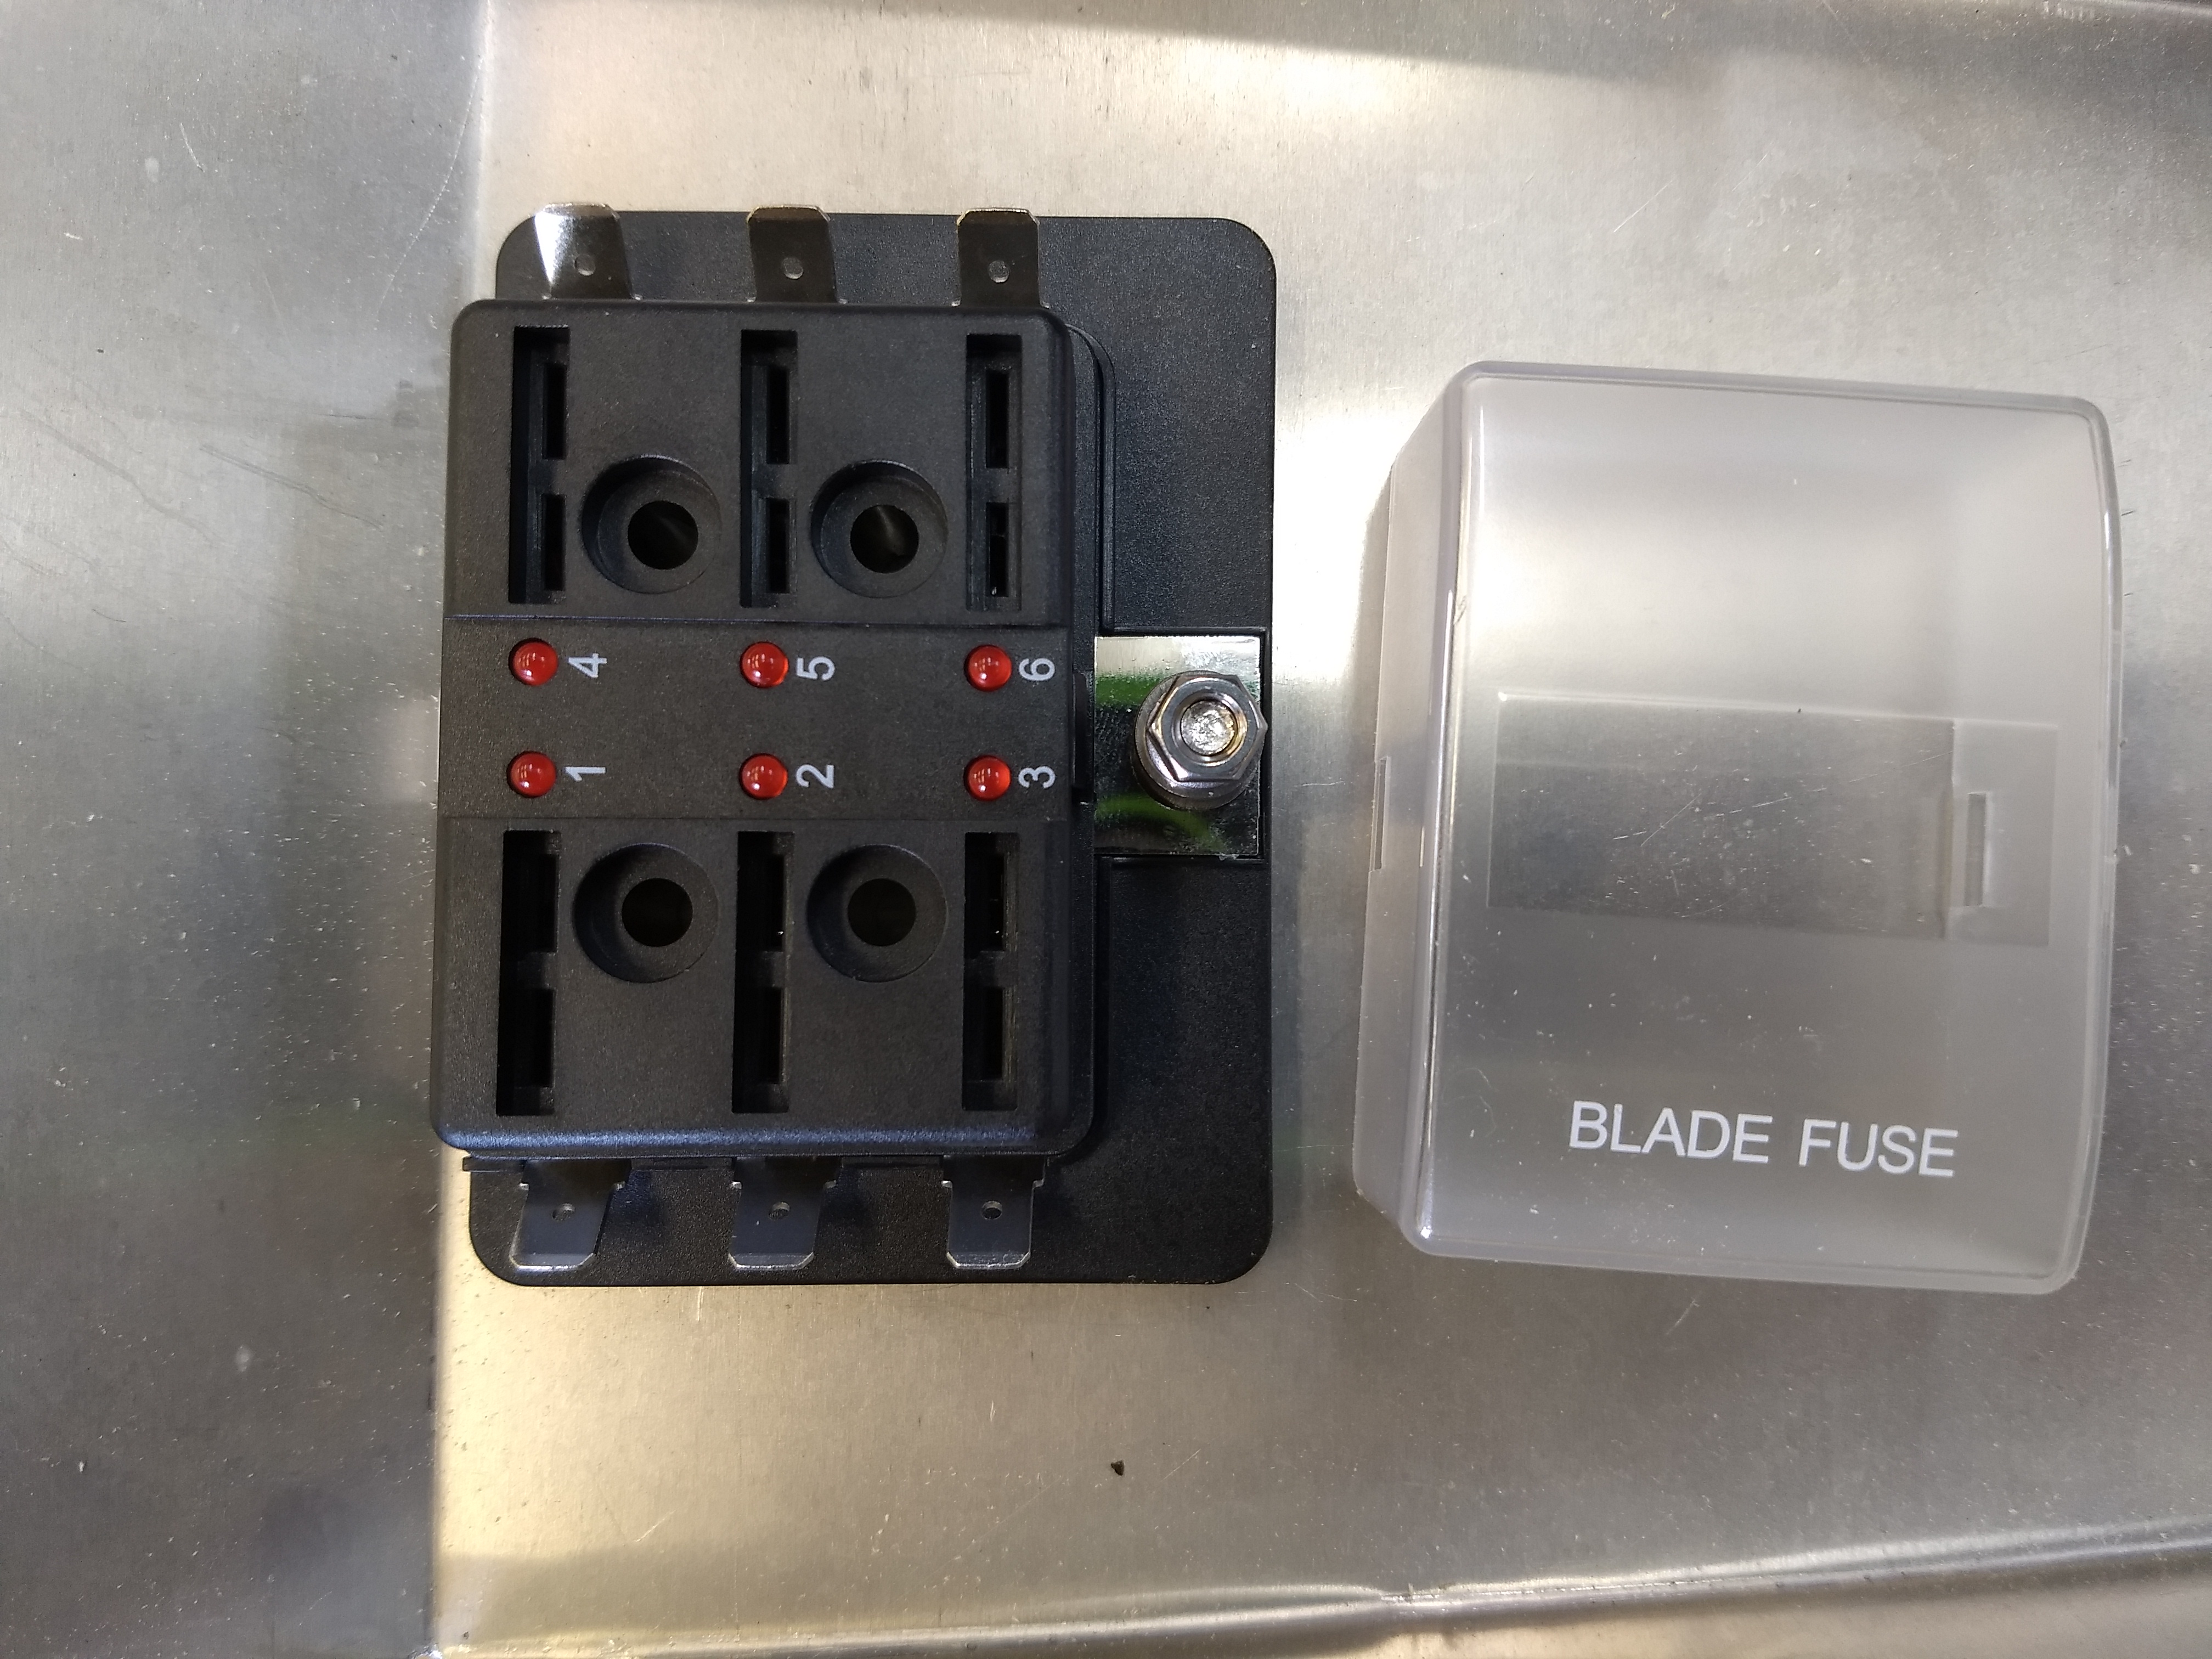
Also got in the fuse box for the wiring. Found this one, I think that six circuits should be enough, especially since it'll be kick start only.
The fun continues.
Jimbonaut said:I dig coloured calipers - just powdered mine bronze. Think it would look a bit much if the bracket was silver too - the way you have it set up looks great.
advCo said:I agree, I like the silver caliper and black bracket. Gives some detail to the whole assembly but the bracket blends in nicely with the wheel.
Thank you for the input. I'm surprised, two comments liking it the way it is. Sometimes when you're so close to something it's hard to be objective. I'm attempting to put lots of thought into the placement and colors of the various components because it's going to be heavily monochromatic anyway and I'd like it look planned and "natural" when it's done rather than just have splashes of color here and there almost at random. AND it wouldn't break my heart to not have to repaint the calipers.
On another part of the beastie, I got the seat base sanded and put another coat of primer on so it'll be soon ready to get into final sand and then put color on it.
And speaking of sanding, I just got word from Levi that he's been welding on my tank, so I'll soon be sanding and filling and filling and sanding on it to get it ready for paint.
Also got in the fuse box for the wiring. Found this one, I think that six circuits should be enough, especially since it'll be kick start only.
The fun continues.
Hurco550 said:Looking swell my friend! Now if the lazy neighbor will get off his rump and finish your frame, you'll really be able to get it going on this thing
Lazy neighbor?? Holy crap, he's got so much on his plate and handling it all pretty well, I think he's anything BUT lazy! Thanx for the compliment. I'm pretty happy w/ how it's going.
Work slows down some when you have to apply filler or primer and then wait for things to become sandable and repeat and repeat, etc. I suppose good body working is a skill acquired through practice or maybe there's a gene for it. If that's the case it's a gene I didn't get.
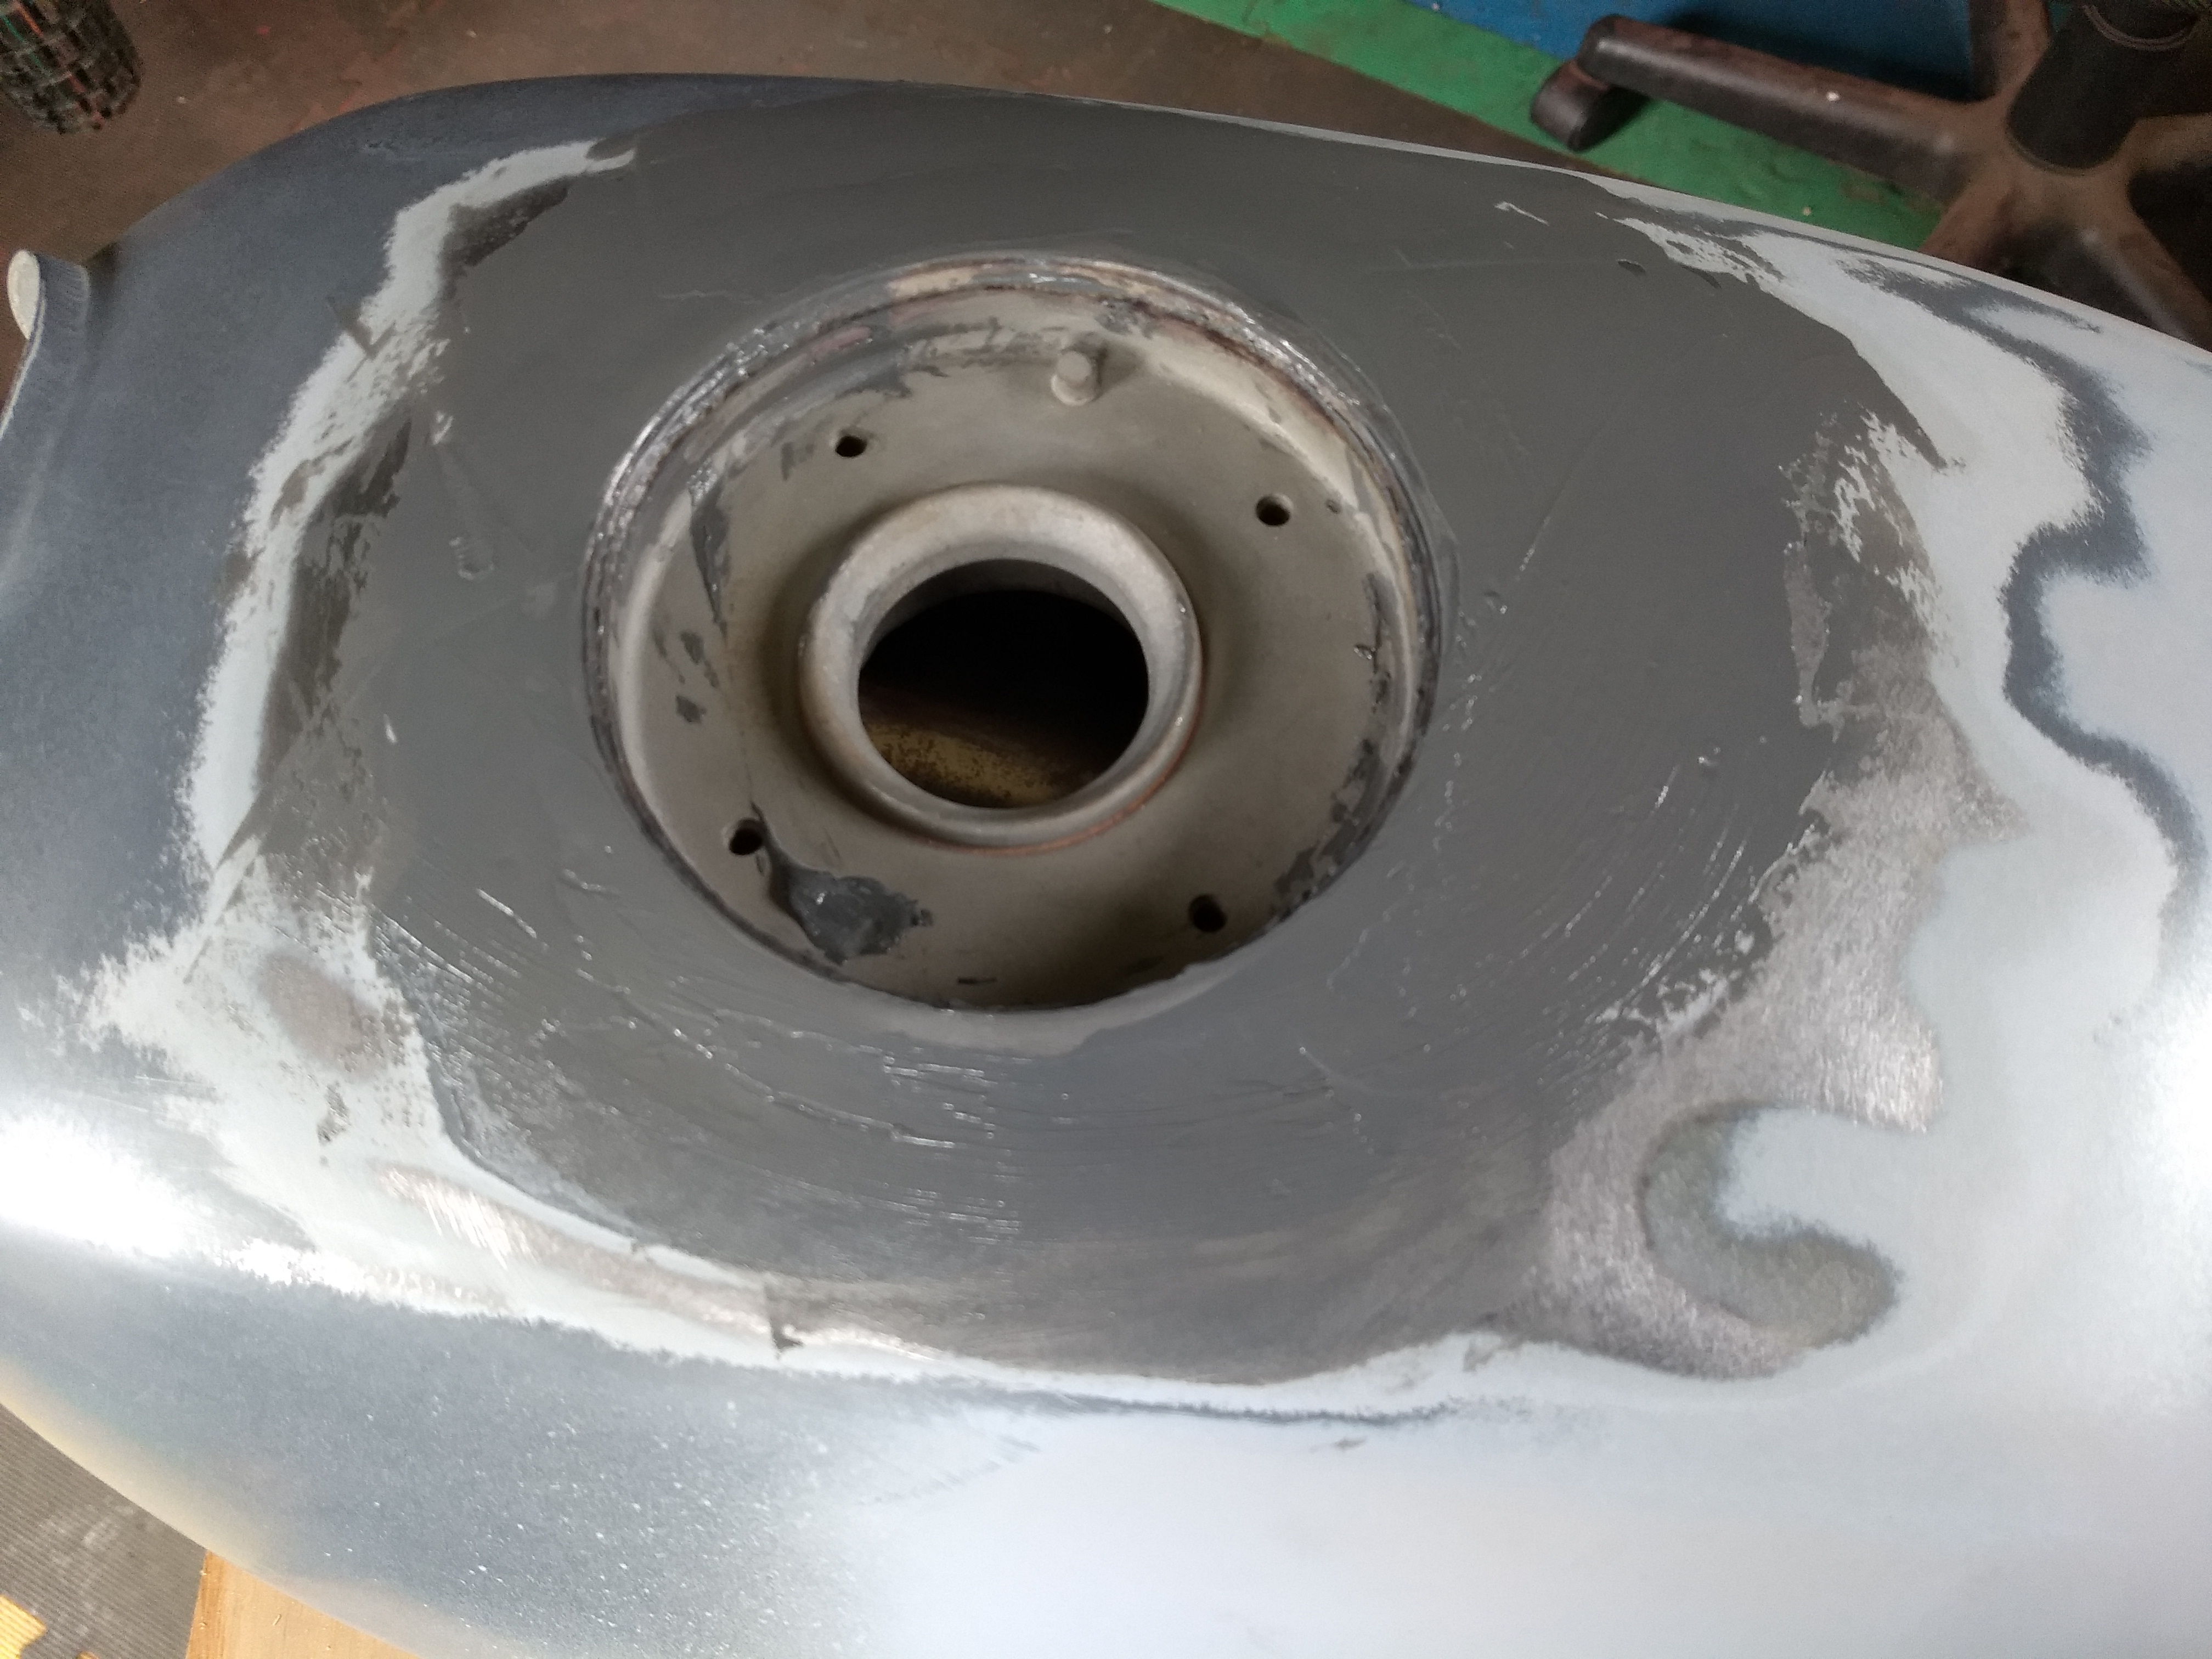
The filler neck fixture was welded in by Hurco550. Rather than attempting to make an edge-to-edge joint I cut the opening so there was an overlap, knowing that it all would have to be filled and smoothed out. JB Weld seemed to be the best filler to use; solid, strong, permanent, and little shrinkage. It works well but I wish it could be thinned just slightly to make it easier to spread more smoothly.
After a pretty fair amount of time it's looking better and it's going to finish out fine. It'll probably take me hours to get it right but a good body guy probably could have it ready to paint in a half hour. Oh well, I'm retired so it doesn't matter anyway.
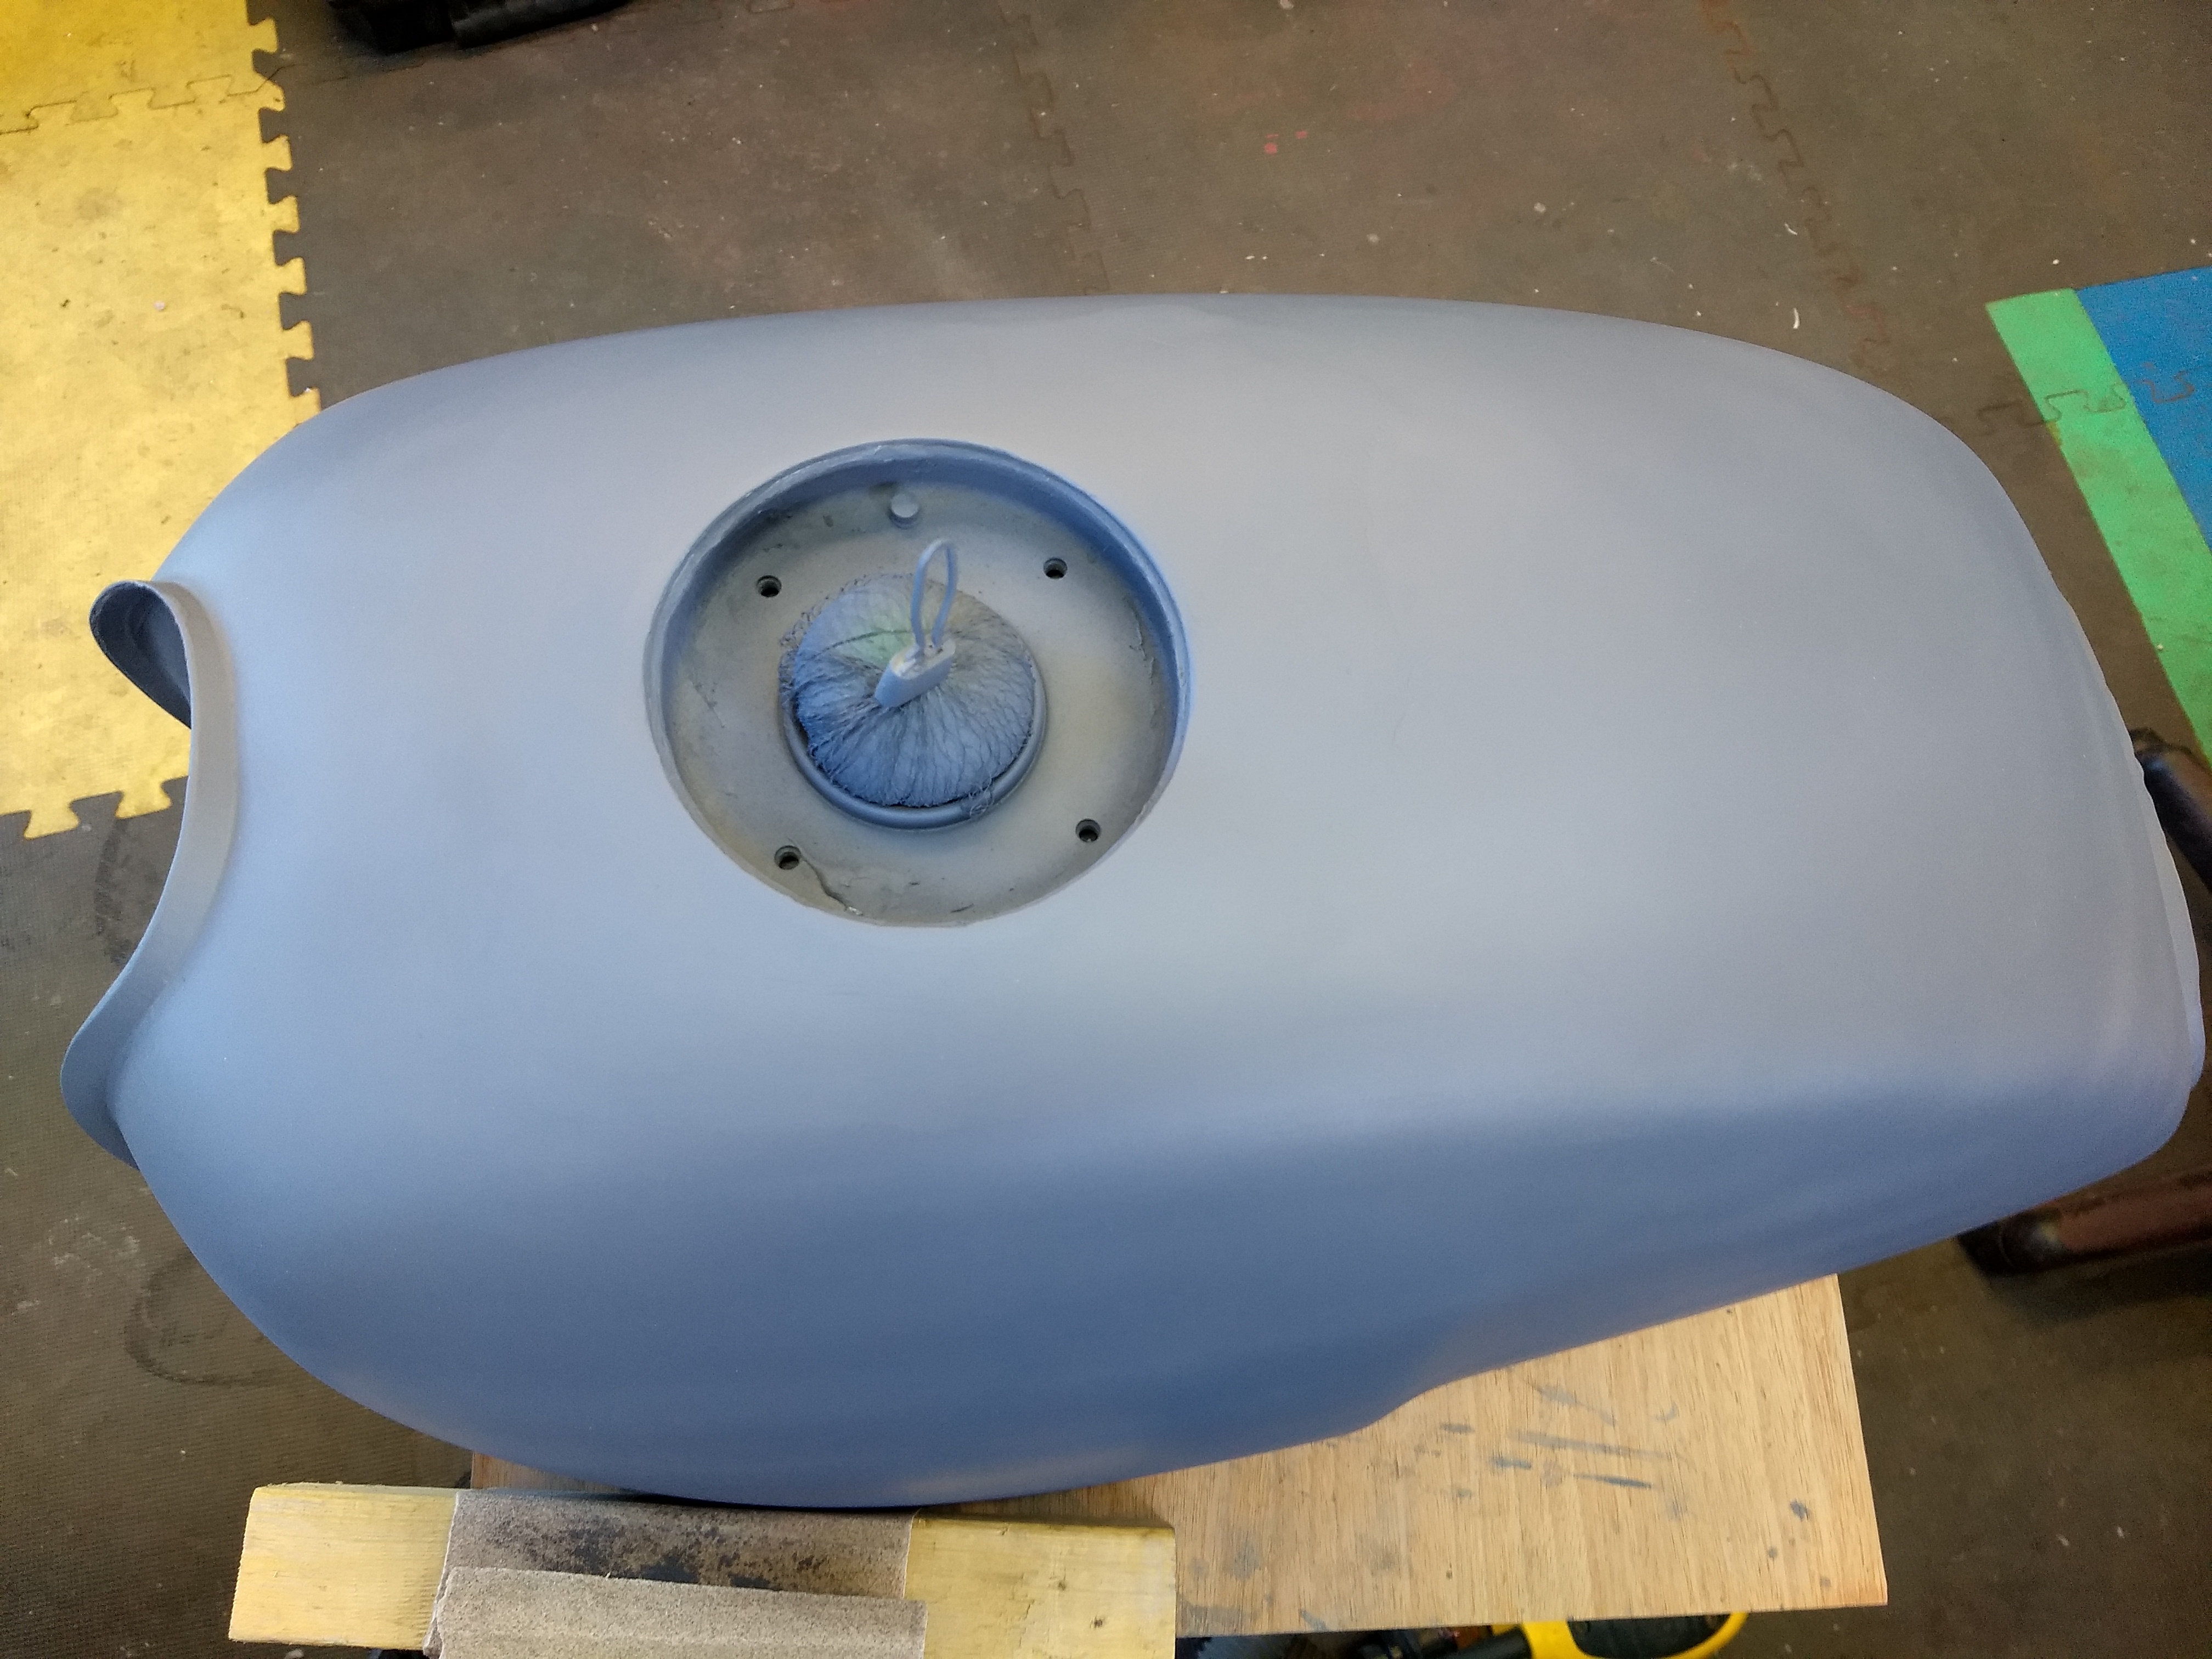
I couldn't resist putting in the filler to check it out. Not bad in my opinion. Levi wasn't sure I should have cut a big hole into that 500T tank. I think it's going to work.
I've gotten a couple of coats of paint on the seat base.
The filler neck fixture was welded in by Hurco550. Rather than attempting to make an edge-to-edge joint I cut the opening so there was an overlap, knowing that it all would have to be filled and smoothed out. JB Weld seemed to be the best filler to use; solid, strong, permanent, and little shrinkage. It works well but I wish it could be thinned just slightly to make it easier to spread more smoothly.
After a pretty fair amount of time it's looking better and it's going to finish out fine. It'll probably take me hours to get it right but a good body guy probably could have it ready to paint in a half hour. Oh well, I'm retired so it doesn't matter anyway.
I couldn't resist putting in the filler to check it out. Not bad in my opinion. Levi wasn't sure I should have cut a big hole into that 500T tank. I think it's going to work.
I've gotten a couple of coats of paint on the seat base.
crazypj said:'next time' (
"Next time" yeah right!
Have been using a DeWalt random orbital sander to do the rough stuff, hogging it down. That does really well and I even had the presence of mind to stick the hose from the shop vac onto the dust outlet so it hasn't been too awful dusty. This final stuff is just scratching away w/ the black wet n dry paper. It'll get there.
You can thin JB Weld. Use acetone or lacquer thinner.ridesolo said:[size=12pt]JB Weld seemed to be the best filler to use; solid, strong, permanent, and little shrinkage. It works well but I wish it could be thinned just slightly to make it easier to spread more smoothly.
irk miller said:You can thin JB Weld. Use acetone or lacquer thinner.
EXCELLENT! You da man! I assume that it's just a few drops into an average little batch.
One teaspoon per 2 ounces of mixed product, according to the JB Weld site. I would just do it per taste.
irk miller said:One teaspoon per 2 ounces of mixed product, according to the JB Weld site. I would just do it per taste.
Ok, I usually taste it after I add the salt and pepper anyway.
trek97 said:Try thinning w Tobasco sometime...Its the best ever.
Serve it up hot w Vodka and Grapefruit juice over ice.
AND it really sticks to your ribs, right?


