suzuki gt250 cafe build

adriansgt250

Active Member
Hi everyone,

Been lurking on here for the last month or so and love the site.

I was always more of a car person but decided a few months ago I needed a project to work on. About a month ago I stumbled across a hunk of junk gt250 on ebay for $215. Ever since I bought it I've become addicted and spend every spare minute rebuilding it and researching more and more about cafe racers.

I've been documenting the build on a 350z forum but I'm going to try copy the text below and see if the pictures will embed for me.

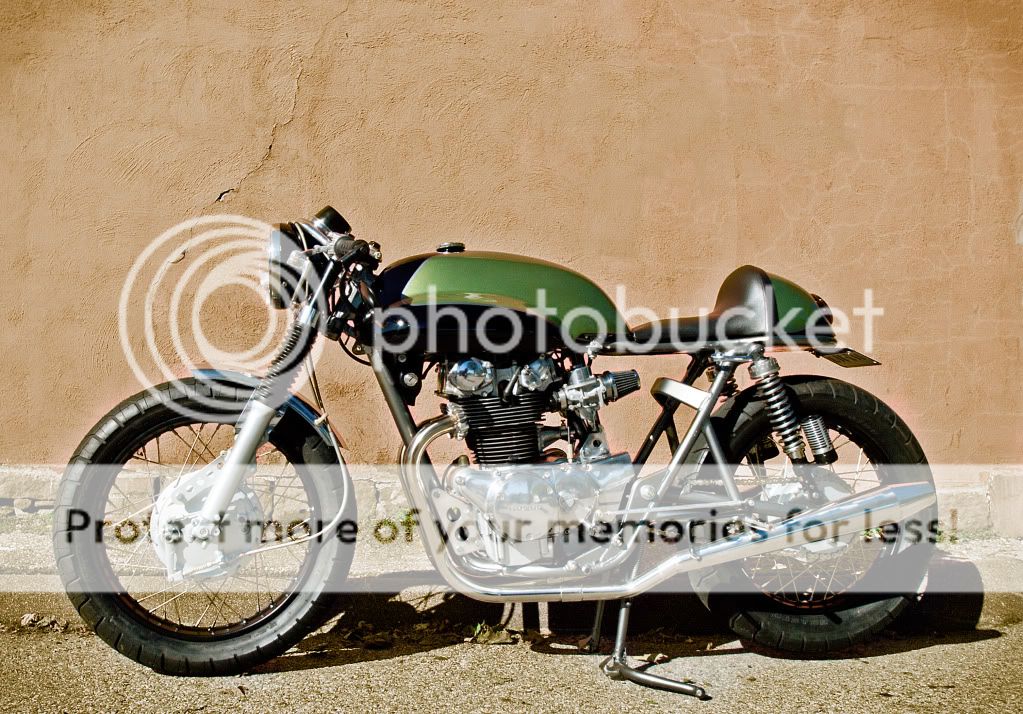
This is the starting point, the rest of the text I will copy word from word

6504611573_f670449f1e_z.jpg


6504611667_cc93c31b73_z.jpg
 
(this message is from about 4-5 weeks ago)

Well after a 6 hour drive with a raging hangover the bike is now in my possesion :D

It is definitely going to be a loooooooong job as it's in a million pieces


plenty of room to make a start
6361943661_d6878ea0c9_z.jpg


The frame has been sprayed a horrible green for some reason
6361947305_18591e2f6e_z.jpg


Wheels removed in preparation to take it back to a bare frame.
6361862863_5115cf45c4_z.jpg


And it begins, bare frame ready to start the project from the ground up
6361900699_54822c7112_z.jpg


Seat has definitely seen better days, time to pull it apart and start again
6361875275_92c34d8128_z.jpg


6361930813_b1081604c1_z.jpg


to be continued
 
Had a crack at the seat today, attacked it with a wire brush but the rust is pretty stubborn. I'll pick up an angle grinder from my folks today and have another try later.

6365943043_86d3aed44a_z.jpg


Started re-spraying some of the smaller pieces back to black

6365956243_7c1958ca84_z.jpg
 
Bought some rust remover today, a wire brush drill bit, some sand paper and set to work.

First up sprayed some of the more rusted parts with the rust remover
6375711085_38e3dda1c0_z.jpg


The seat is almost ready for primer and a respray.

Next up time to get stuck into the frame. Sanded out every lump and bump and got it as tidy as possible ready for primer.
6375736691_e9ef423862_z.jpg


had a quick go at the tank with the steel brush but it was getting late so I'll have another crack at it later this week.
6375704999_41af065b0f_z.jpg
 
Frame and a few other parts primed and first coat of black have gone on now.

6380069063_6848274b17_z.jpg


6380077995_53a2b5a0df_z.jpg


Couple more coats then I can start making it look like a bike again :D

Have a feeling I am going to get a new tank, the current one is dented to hell and in pretty bad shape
 
Had a crack at the front wheel too with the rust remover and some steel wool. Came up alright and the tyre is new so it's ready to go.

Not too fussed about the rear just yet as I need a new tyre so I'll wait till I pick that up. Have one on order.

6381622337_f1d45dbf72_z.jpg
 
I was going to try rebuild it using totally OEM parts and make it original but after trying to source parts I've decided that is going to be a ridiculously costly idea for what was supposed to be a fairly budget rebuild. Having said that I have only spent about $300 so far and I've got around 2k set aside to play with so now my plans are.......

I intend to rebuild the original seat just in case the little lady ever wants to come for a spin but I'm also looking into a seat like this one. that I can take on or off if I just want to go for a spin.

http://www.ebay.com.au/itm/AUBURN-CAFE-RACER-SEAT-/380385812789?pt=Motorcycles_Parts_Accessories&hash=item5890c2e135

next up a set of clubman handle bars
1309346726-IMG_0794.JPG-original.jpg


Looking for a new fuel tank similar to this style with the cut in knee area
$(KGrHqQOKiQE3e-P!VIQBOCSZt0G!Q~~_35.JPG


I'd love the finished product to look something like this with a different colour scheme and shorter mufflers.
Shot_oldskool-10.jpg
 
Fixed up the tail light yesterday. Decided to ditch the original (right of the picture) and bought a smaller single round lamp with number plate illuminator.

had to drill new holes but it looks a lot better
6403747597_1913a65c37_z.jpg


Decided to have another crack at the fuel tank. Took off some more paint and removed the suzuki badges.

6403749371_00666da400_z.jpg


Need a new wire brush drill bit, I've totally destroyed this one in a couple of days haha

6403750807_43959b6eff_z.jpg
 
Bit more progress over the weekend. Just waiting on parts now so I can start putting it all back together pretty much.

Spent most of yesterday cleaning engine parts ready to put it back together

6416727129_64aa940892_z.jpg


Clutch assembly looking brand new again :) first time I've ever touched one let alone assembled one before. Happy with the end result

6416724833_5422a63453_z.jpg


Starting to lay out everything in a rough order so I could tidy up the garage a little and not lose parts.

6416728701_736c222e45_z.jpg


Gave the garage a good clean and unleashed my inner 12 year old with the high pressure hose :)

6416733647_41d81593f6_z.jpg
 
This brings the updates to about a week ago when I decided to buy another more complete GT250 off ebay to try speed the process up a bit.

I was missing a lot of important parts that were going to be hard to find so I splased out and now have two semi complete bikes
 
Well I've been a busy little beaver in the last week or so. Here's where she's up to now

6458832423_771ee11059_z.jpg


Juuuust Kidding.

Raided the bank account a bit more this week and bought another GT250, albeit one a little more completed with all the bits I didn't have. The next job is to combine the two into one perfect bike and pile of parts to sell off :icon38:

Here's the new lady

6458824617_af46e7f310_z.jpg


Sorry the pics are bit cr@ppy, my phone is being wierd.


The two ladies getting acquainted

6458827851_3c78842704_z.jpg


New seat arrived today

6458835441_8502742d28_z.jpg


So did the handlebars

6458839307_5973816957_z.jpg


Unfortunately I'm interstate for work till the end of the week so I won't get to tinker till the weekend.

This should definitely speed up the build process quite a lot though
 
Update Time.....

Was interstate all week on business but managed to get some time to myself friday afternoon and over the weekend.

Starting to transfer a lot of new parts as well as the best bits of both over. Put the clubman handles on, new headlight brackets and a few other bits. Put the nicer driller rotors on and properly installed the fork gators.

6491230377_604b76c021_z.jpg


Pulled apart a lot more of the 2nd bike trying to get the engine out. In the process I think I slipped and punched the engine, frame and assorted other hard objects about a million times haha, you can't see it too well in the photo but I have a chunk out of every finger. The C bomb was dropped a lot this weekend.

6491262167_d3d537da2d_z.jpg


Bought an angle grinder to tackle the seat pan. I want to bolt the original seat pan to the fibreglass cafe seat but it's a little too wide, need to shave a bit off.

Having never used an angle grinder I was a little hesitant until I was standing there showering sparks like a boss :thumbup:. Unfortunately the cutting disc ran out before I could get it cut just right but it was a bit of fun either way.

6491230843_64e7c8a8b9_z.jpg


Anyways here's where she stands now. Took this to give myself a better idea what it will look like completed.

6491229907_5a7c20895b_z.jpg


One of my clients gave me a massive pile of tan italian leather which was a bonus. should be perfect for trimming the seats. Gotta love a freebie.

I plan on doing the frame, fenders, handles and oil tank/airfilter cover in gloss black with the tank and seat in flat black with a gloss black racing stripe down the middle and tan seat but open to suggestions.
 
Finally done pulling apart everything now. managed to get the engine out and up onto the bench by myself without too much drama. It was kinda heavy but not too bad. I'll definitely need a hand putting it back in though.

6502198157_5e3668421d_z.jpg


Now I have a spare frame that should actually clean up ok. It's pretty dirty but underneath it all it's actually pretty solid. Do I dare build 2? haha.

*Not the poor Z sitting outside that has lost it's home for the last 3 weeks or so. Something not quite right about dumping an expensive vehicle outside to house a cheap ass bike haha

6502198685_8a06618261_z.jpg


Seat pan has also been cut to size and fits the fibreglass seat like a glove. Did a test fit and the flow lines are all spot on. Sprayed it with primer last night and will spray it black tonight. I'll need to put a rubber protector around the rim though as it's pretty sharp now.

6502196993_b377acf453_z.jpg


Next step will be to try get the engine running on the bench so I can try troubleshoot any issues while it's easy to work on. After that I've got A LOT of rewiring to do
 
So that brings things pretty much up to date now. Should hopefully have the engine cleaned up and installed in the frame in the next few days.
 
Streetfighter89 said:
Nice choice! I have one myself.

Always nice to see other GTs.

Ha I have your build thread bookmarked, drew a lot of inspiration from the way you built yours.

Can I ask what brand your gauges are? finding originals that don't cost an arm and a leg has been a challenge
 
Great to see another X6 powered cycle being built! I am also building a GT250 for the road Caff style and have drawn lots of inspiration from this site as well. Joeshuit gave me some details on chambers but have had limited success getting the power band where I would like it but thats part of the fun I guess. I also have T20's and a T250 for the track which are apart again in an effort to make them look a little more presentable :)
 
My gauges are from a company named "Koso", wellknown over here in europe.

They are both electrical, the speedo is showing the speed digital and the tachometer is showing the revs analouge. They are a little pricey but kickass small, each costs around 100$ new, I got both togehter for around 50 used.

You can find them on ebay or directly at the Koso-homepage: http://kosoeurope.com/shop/index.php?language=en&XTCsid=a339665f24ccd8cf4cf22460bb28a3fc
 
Very cool start, I've really been searching for a GT550 or 500.. I have a few T250s and a T20 also. Any plans for the pipes?? Aftermarket expansion chambers? I'm working on a jig for T250 expansion chambers I've built.
 
Streetfighter89 said:
My gauges are from a company named "Koso", wellknown over here in europe.

They are both electrical, the speedo is showing the speed digital and the tachometer is showing the revs analouge. They are a little pricey but kickass small, each costs around 100$ new, I got both togehter for around 50 used.

You can find them on ebay or directly at the Koso-homepage: http://kosoeurope.com/shop/index.php?language=en&XTCsid=a339665f24ccd8cf4cf22460bb28a3fc

Thanks for that, I'll check them out
 
Back
Top Bottom