Follow along with the video below to see how to install our site as a web app on your home screen.
Note: This feature currently requires accessing the site using the built-in Safari browser.
We noticed you are blocking ads. DO THE TON only works with community supporters. Most are active members of the site with small businesses. Please consider disabling your ad blocking tool and checking out the businesses that help keep our site up and free.
Haven't posted a build thread here in a while. This will be abbreviated post. The bike is already up and running all summer long. I prefer to spend my time building and riding, so I never got around to doing a step by step build here. I originally posted a thread on the suzuki two stroke forum. Special thanks to teazer who helped me out some on that forum.
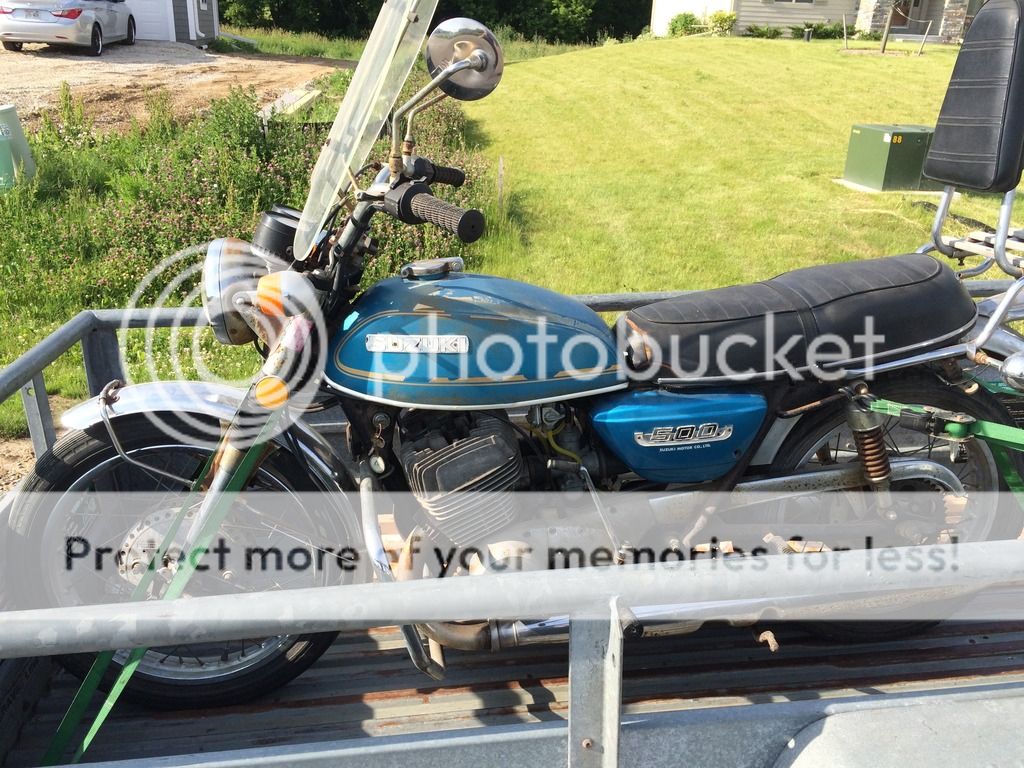
Picked it up last summer for $600. It was pretty rough and very rusty. Was sitting outside for about 20 years down in Alabama. Its a 1975 Suzuki T500. I was lucky to get it. I saw the CL post about 5 minutes after the guy posted it. By the time I got there 20 minutes later, he was getting calls from all over the state. I had a short video that he took showing it running, but it was really rough. Front brakes all seized up- could barely roll it up onto trailer.
I got the bike home and spent about 10 minutes on it before it was running. Its pretty amazing how resilient these old bikes are. I then proceeded to completely tear it apart. My intent was to rebuild absolutely everything on the bike.
just for the hell of it, I threw on a GSXR front end that I had laying around in garage to see what it would look like.
I really had no intention of using it. The rear sprocket offset and narrow swingarm would have made it pretty difficult to fit a suitably larger rear wheel back there. I had though of maybe using an RD swinger and rear mag wheel but I still would have needed to deal with sprocket offset. Plus, I wanted to keep this more of a classic appearing cafe racer.
I wanted this bike to look fairly classic and retain alot of the period correct parts and styling- so..... I got out my credit card and ordered up some parts.
Paul Miller Vintage supplied some of the new parts that I ordered up right away.
Brand new, NOS rear shocks..
Brand new front and rear wheels and hubs made from NOS parts. These cost a fortune but were still cheaper than getting them made from Buchanon.
Also spent a day in the sandblasting booth getting all the rust and crud off everything.
I never took any pics of the insides of the motor, but...
Crank and jugs were sent to Bill Bune in Minnesota. The cranks were rebuilt with all new seals and bearings and balanced. The cylinders were bored one over and new Wiseco pistons and rings were installed. I then put it all back together with the polished side covers.
Then came time to pick a tank. I had three tanks laying around including the stock t500, a cb200 and an XS750. Ultimately ended up with the XS750. That seems to be my go-to tank these days. I have built several other bikes using this same tank. I like the proportions, the build-in knee dents and the large size (over three gallons I think).
found a guy online who makes oil tanks. I sent him specifications on sizing, outlets, etc and about four days later I had an oil tank in my hands. Only cost about $100. Welded up some tabs to mount it on the frame.
Meanwhile, at the start of the project I ordered up a set of chambers from Higgspeed in the UK. I had also looked at Jemco's in the USA. Jemco pipes are mild steel and you have to have them chromed, nickel plated or jet-hot coated. Yet another option are Titan chambers but those require you to use your stock (or NOS) header pipes. I didn't want the appearance of two piece chambers and my stock headers were trashed anyway. Higgspeed are actually polished stainless. For around the same price, I went with the higgy chambers. I would much rather have no coating and felt the stainless was a better option. I was quoted about 7-8 weeks turnover. I ended up getting them over three months later. Despite the painful wait, they were worth it. These chambers are beautiful. They bolt right up to the stock location.
then came time for the seat. I absolutely required a metal seat pan. I don't like fiberglass. I looked all over the place for the proper seat. I was about ready to have one custom made.... until I stumbled on bedlam werks. They make several different sized seat pans and they are solid aluminum. They are sold at DCC, which is where I ordered mine. You can also purchase upholstery from them as well. They are lightweight, sturdy, yet super thick. I have had problems with steel seat pans cracking because they were too thin. There is no way this seat is going to crack. It is super thick.
here it is mocked up with XS750 tank. you can also see the upholstery that I ordered. Instead of the typical left to right tuck and roll pattern, I had them do a custom front to back tuck and roll with silver thread and black leather.
this was going to be a minimalist build from the start. no horn, no battery, rear turn signals only. I never intended on using any gauges and wanted the bare minimum appearance. Used a POSH switch setup for the left side to control blinkers. The right side uses a K&S switch that has kill button and headlight switch. Headlight is a bates style chrome from DCC.
body parts ready for paint. I was pretty lucky to find this fairly pristine XS750 tank. No dents and no interior rust at all. It did have a few pinholes on the bottom near the petcock. I took it to the local welder for repair. I also had him weld on two 3/8NPT bungs for pingel style petcocks. After all that was done, I coated interior of tank with Caswell as an extra safeguard. I have been using that stuff for years and it works perfectly. Never had any failures. Ducati USA recommends it on all their bikes with plastic tanks.
meanwhile, a few months prior I had also ordered my rearsets from Titan in the UK.
They took an eternity to build, but in the end, the rearsets turned out great. As far as I could tell, these are only one of two custom made rearsets availble for this bike. The other company is in the USA but they aren't polished and don't look nearly as nice in my opinion. The kickstarter (which is on the left side of bike) had some clearance issues with the left rearsets. A local machine shop heated the kickstarter and put a small bend in it. This helped but it still contacts every few kicks. I plan on having them bend it some more.
in the rear, I hacked off about 8 inches of the frame so the seat would clear. I picked up a pair of X-arc duo turn signals for the rear. These cost a small fortune, but they are really tiny and have built-in running lights, stop lights, and turn signals. They have both red and yellow LED lights built-in. Great little product. You can hardly see them until they are lit up.
next came the paint. I tried a new painter from Waukesha. He's done lots of high profile custom work. Name is Jason Lecavallere (pretty sure I spelled that wrong). He also goes by Artistimo.
This site uses cookies to help personalise content, tailor your experience and to keep you logged in if you register.
By continuing to use this site, you are consenting to our use of cookies.