
We noticed you are blocking ads. DO THE TON only works with community supporters. Most are active members of the site with small businesses. Please consider disabling your ad blocking tool and checking out the businesses that help keep our site up and free.
You are using an out of date browser. It may not display this or other websites correctly.
You should upgrade or use an alternative browser.
You should upgrade or use an alternative browser.
Take 2: CB750K2 Steampunk(ish) Bobber Thing
- Thread starter Noddy78
- Start date
john83 said:Super clean! Did that little indicator panel start life as something else?
Nope. Well, that's not entirely true, the wood started out as a blackwood tree and I imagine the Copper and Zinc started life in the ground... but I digress...no, it's made from scratch.
Red23 said:Your profile says you're in Hobart, is that correct?
Hey mate, thanks. Yep, I'm in Hobart (Hobart, Tassie that is). If you see me putting about come and say hi!
MotorbikeBruno
Over 1,000 Posts
 found my next build theme cheers
MotorbikeBruno said:Noddy, I think he might have been asking what it was derived from.
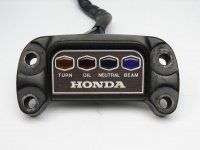
Ah, gotcha. Yep, it was just the stock dash board. It's hard to see in that photo, but the original panel had a faux wood-grain effect printed on the aluminium.. so I clearly had to make it out of real wood!
And thanks heaps for the kind words guys, but I'm certainly no guru! Just bumbling along learning as I go...

JustinLonghorn
No Purple Hearts, No Blue Ribbons
I can dig it.
jag767 said:If you don't mind me asking what is the process you use?
I don't mind at all mate, but I'm not sure I understand your question? My process for what exactly?
jag767
Over 1,000 Posts
Noddy78 said:On which component? The brass?
If the light you just posted is brass then yes. It really gives a beautiful look and am quite curious what's involved.
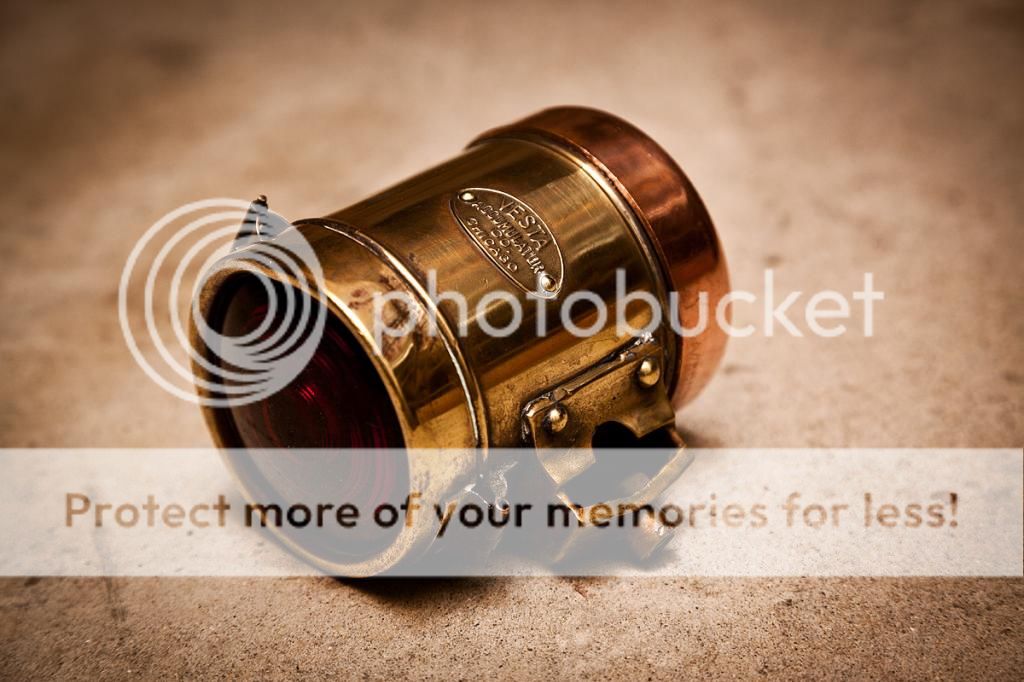
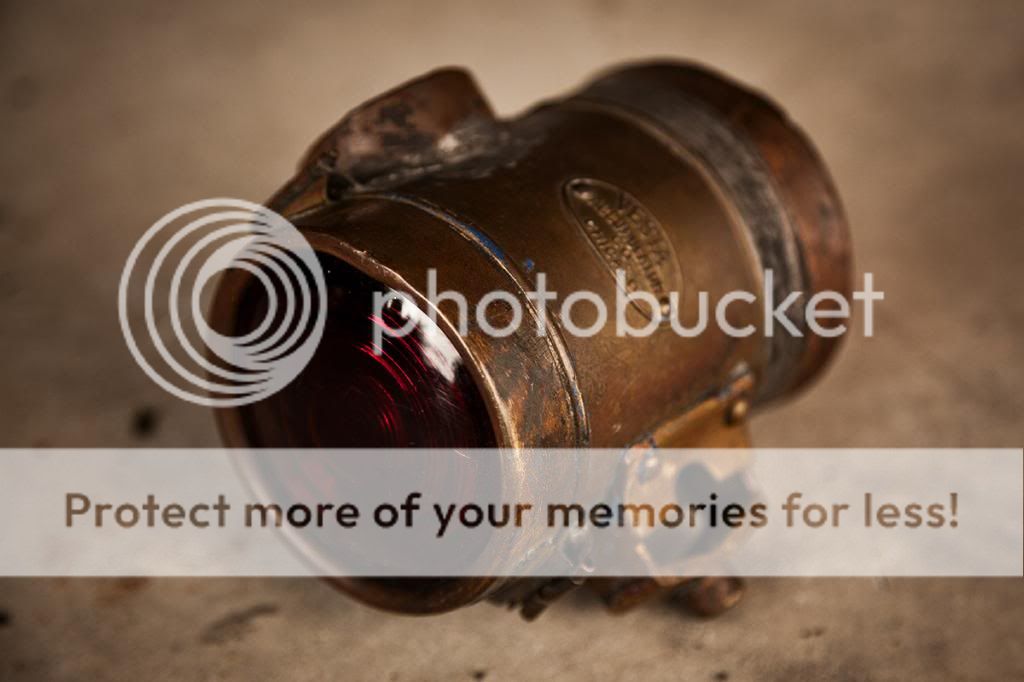
Sorry mate, I'm not entirely sure what you mean... but I'll give it a go. That light started life as a carbide lamp. I found it for $20 on eBay and it looked like this:
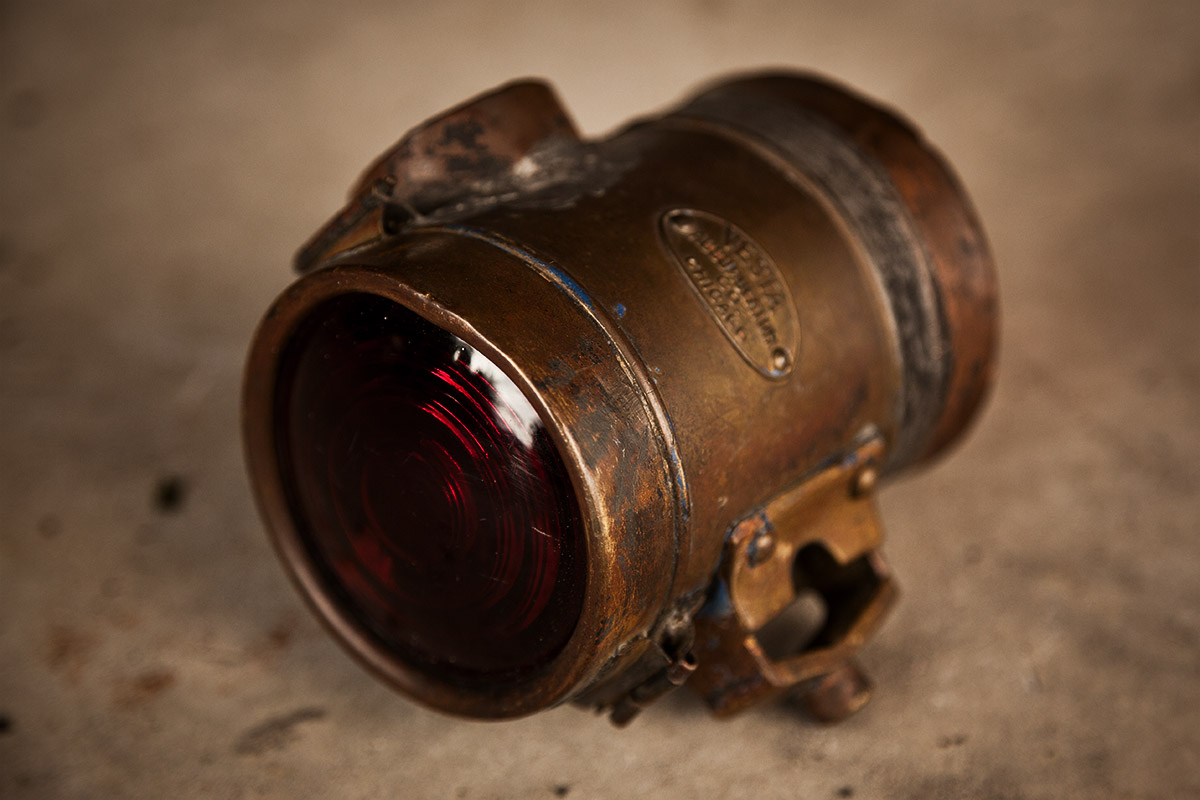
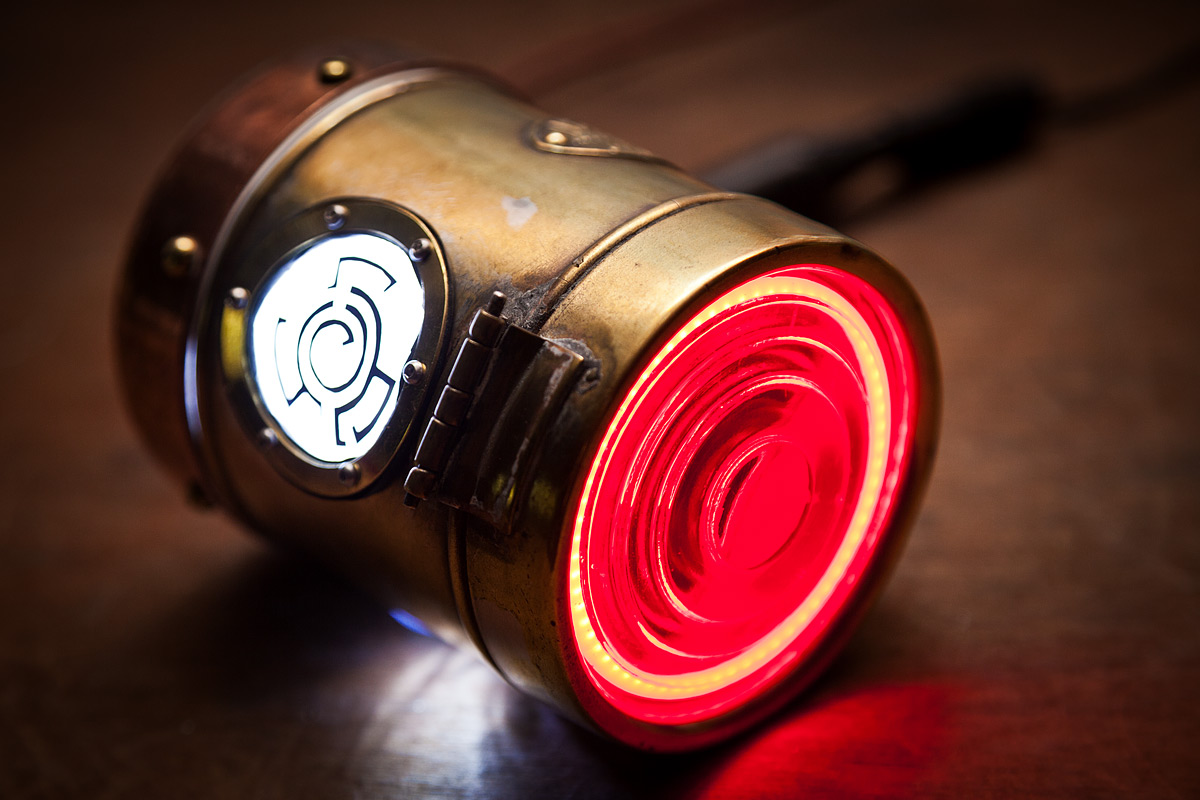
The previous owner had added an extra lens on the back and side and converted it to a incandescent light (all very poorly I might add). So I had to unsolder all the extra bits he put it on to get it back to somewhat original condition (then a good dose of Autosol to get it all shiny again). I found a copper plumbing end-cap to blank off the back of the light and secured it with brass slotted domed screws and self-clinching nuts (I'll be mounting the final brake light bulbs etc on the copper end cap so I want to be able to take it on and off). Just to add to the plumbing theme I used a bit of plumbers tap to make a decent seal (though given it isn't finished it's not fully sealed - and you can see a little bit of light leaking out from the edges in the earlier shot).
The lit-up logo is there to cover the hole where the previous owner soldered his own lens in. I cut the brass ring out of sheet brass with a jewellers coping saw and used some rubber stripping to make a seal (probably the ahrdest part of the whole thing and I'm still not happy with it - freakin' rubber is a PIA to cut/shape.. anyone got any clever tricks for doing this?). The logo is hand cut (scalpel) out of black signage vinyl and attached to a semi-opaque tracing-type paper with a sheet of clear acrylic over the top siliconed together and then siliconed to the inside. 6 x 2mm SS domed allen head screws and nuts to secure it all in place.
The lighting so far is 2 x 60mm LED rings, one attached to the copper end cap, and one against the front lens for 'running' lights. As mentioned before, I haven't sorted the actual brake light set up yet, but it'll be mounted on the copper end cap as well (inside the 60mm LED ring).
That's pretty much it. Is that what you meant?
And then I just re-read your question and now I'm actually assuming you meant how do I finish the brass itself? I just Autosol Metal polish. Then let it age and patina as it naturally does over time. That's what I like about brass and copper, it changes and ages and ends up getting really nice character to it. Sometimes if the piece is a little more banged up I'll use Wet and Dry sand paper reducing is grits until it's ready to be polished. But I generally like to leave some of the bangs and dings as that gives it some nice character too.
jag767
Over 1,000 Posts
Noddy78 said:And then I just re-read your question and now I'm actually assuming you meant how do I finish the brass itself? I just Autosol Metal polish. Then let it age and patina as it naturally does over time. That's what I like about brass and copper, it changes and ages and ends up getting really nice character to it. Sometimes if the piece is a little more banged up I'll use Wet and Dry sand paper reducing is grits until it's ready to be polished. But I generally like to leave some of the bangs and dings as that gives it some nice character too.
Yep that's exactly what I was asking thanks.
edelweiss
Coast to Coast
Re: Take 2: CB750K2 Steampunk Bobber Thing
Hi,
What brand is that "Sahara Black" Powder? Would love to pick some up.
Thanks!
John
Noddy78 said:Well, I did say it was going to take a while... but slow progress is still progress....
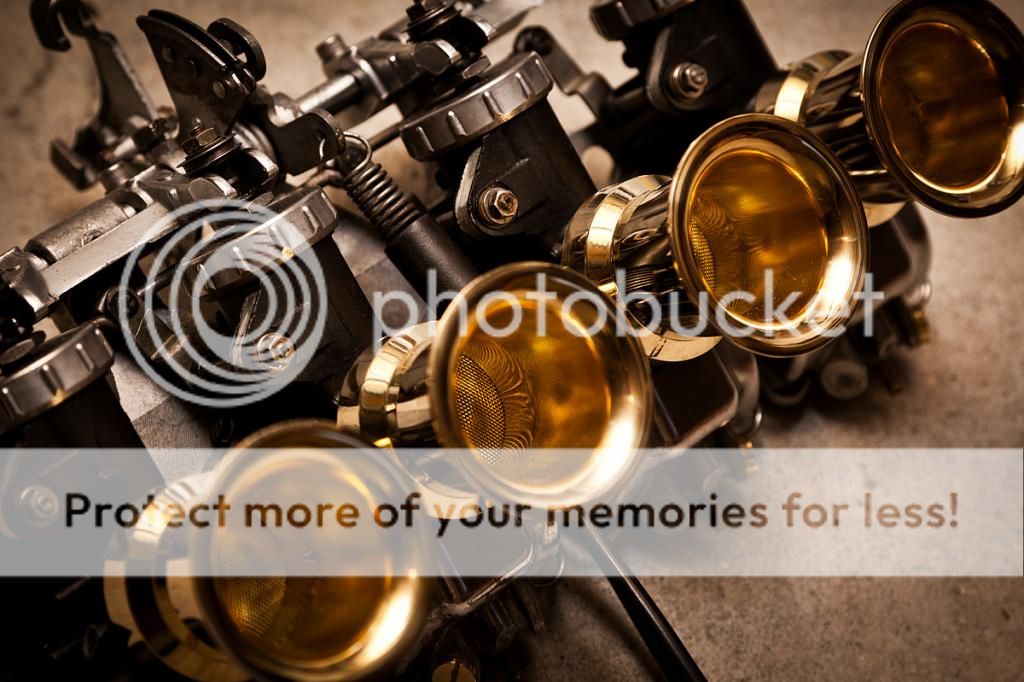
Rebuilt the carbs, painted, polished and velocity-stacked:
Un-fucked what will be the tail-light and found some replacement pieces to make it (mostly) whole again (just the beginning of finding plumbing bits to recycle... Terry will love it):
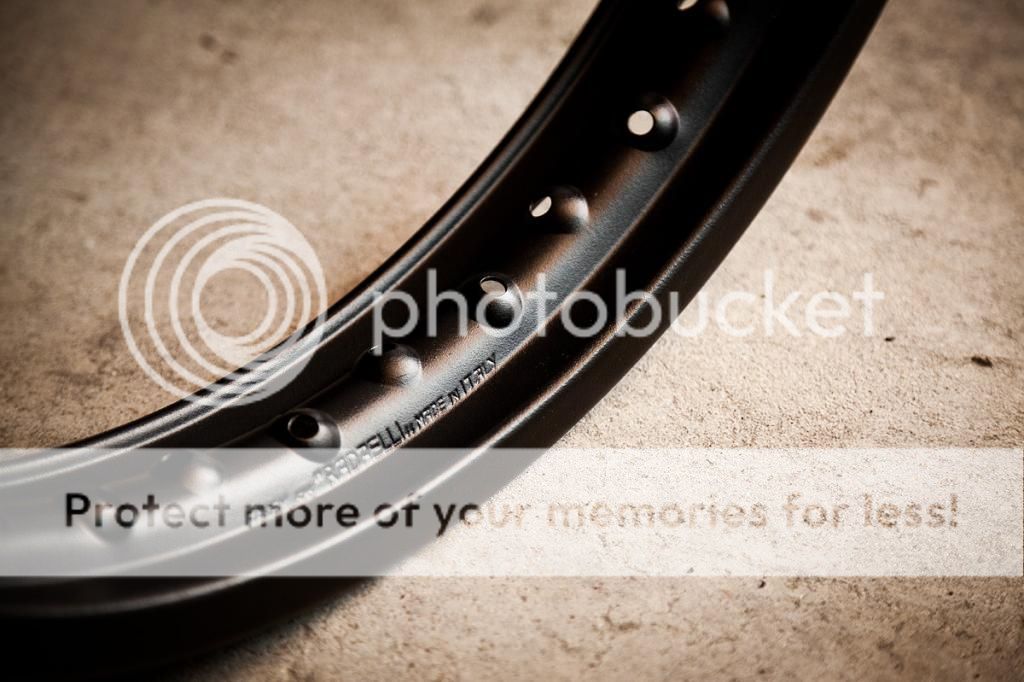
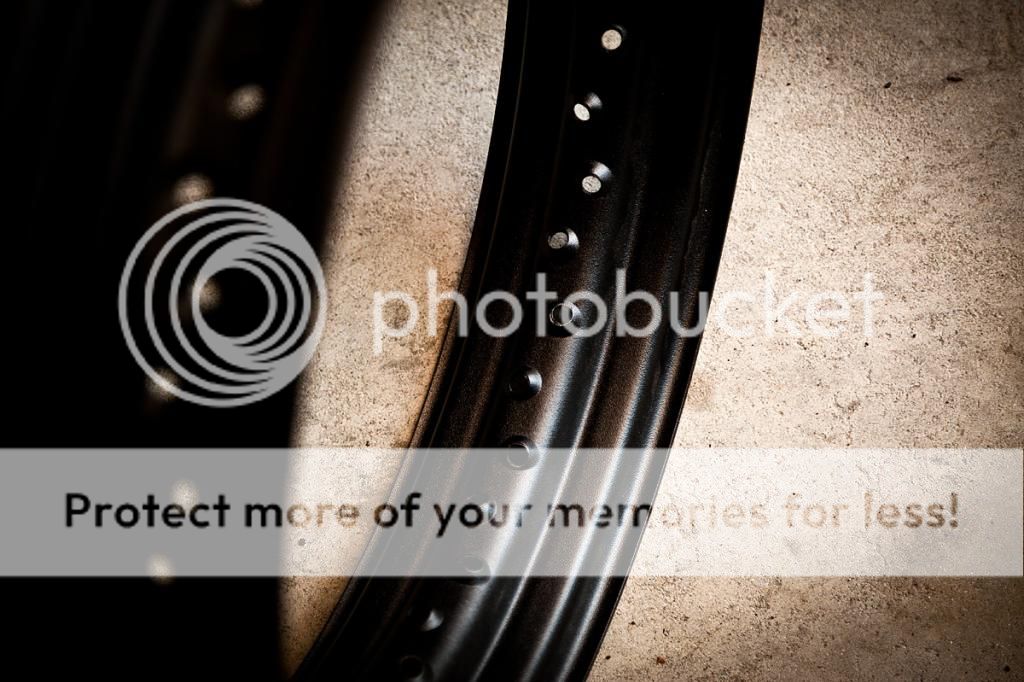
Rims and hubs back from the powder-coaters, done in "Sahara Black", looks like iron, I love it:
And messed around with the rusting spokes idea. Colour-wise worked really well, unfortunately the sealer just makes them too shiny and is not particularly hard-wearing, so with that and the fact that the Radaelli wheel requires shorter spokes than the original means the test-spokes are pretty-much useless. But, worth a try. So I've since got some SS custom spokes made up and just thinking of other options for dulling them off suitably. Someone suggested Copper-plating them, and I think that's probably the next path do investigate, but I can't imagine an electroplater being too chuffed about plating 80 spokes...

Aaanyway, still no garage, but plodding along with what I can...
Hi,
What brand is that "Sahara Black" Powder? Would love to pick some up.
Thanks!
John
edelweiss
Coast to Coast
Noddy78 said:Sorry mate, I'm not entirely sure what you mean... but I'll give it a go. That light started life as a carbide lamp. I found it for $20 on eBay and it looked like this:
The previous owner had added an extra lens on the back and side and converted it to a incandescent light (all very poorly I might add). So I had to unsolder all the extra bits he put it on to get it back to somewhat original condition (then a good dose of Autosol to get it all shiny again). I found a copper plumbing end-cap to blank off the back of the light and secured it with brass slotted domed screws and self-clinching nuts (I'll be mounting the final brake light bulbs etc on the copper end cap so I want to be able to take it on and off). Just to add to the plumbing theme I used a bit of plumbers tap to make a decent seal (though given it isn't finished it's not fully sealed - and you can see a little bit of light leaking out from the edges in the earlier shot).
The lit-up logo is there to cover the hole where the previous owner soldered his own lens in. I cut the brass ring out of sheet brass with a jewellers coping saw and used some rubber stripping to make a seal (probably the ahrdest part of the whole thing and I'm still not happy with it - freakin' rubber is a PIA to cut/shape.. anyone got any clever tricks for doing this?). The logo is hand cut (scalpel) out of black signage vinyl and attached to a semi-opaque tracing-type paper with a sheet of clear acrylic over the top siliconed together and then siliconed to the inside. 6 x 2mm SS domed allen head screws and nuts to secure it all in place.
The lighting so far is 2 x 60mm LED rings, one attached to the copper end cap, and one against the front lens for 'running' lights. As mentioned before, I haven't sorted the actual brake light set up yet, but it'll be mounted on the copper end cap as well (inside the 60mm LED ring).
That's pretty much it. Is that what you meant?
Hi Noddy,
Did you fit that with a lens or did it originally have a lens there? I was looking on ebay and saw some coal miner's lamps.
Thanks!
John


