The CL350 named Conrod - Beater Build

Wow, got my 30 days warning.

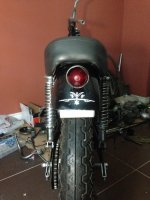
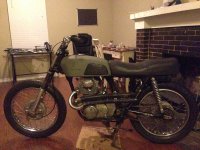
So I have enough cashed stashed to run through this and finally get on the road. All told, the build will be about $1,500 total. The bike itself was practically free, since the money I made from parts was more than what I paid for the whole thing!

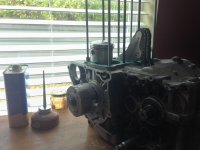
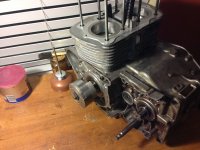
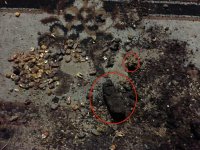
Talk about a barn find, I shook the frame out one good last time, and yet AGAIN more corn cobs tumbled out! You rat bastards!!!
 

Attachments

  • caaaaawn!.JPG
    caaaaawn!.JPG
    127.1 KB · Views: 932
Ground all of the tabs off of the frame and swingarm then added rust. I don't want bare metal showing, since something that has been sitting exposed would of course rust.

There were some (amateur) welds on the passenger peg area that I'm assuming was going to be rearsets. I cut these off but left plenty of sloppy welds only half-ground. I want there to be evidence of having a past-life, so the welds and the chain-gaurd mounts will remain pronounced. Even more-so thanks to the contrasting rust.

The rust is applied like paint. I keep a jar of rust for touching up as more metal is exposed. Keep in mind that all moving parts will be clear of any dust and sealed and greased properly, ;D

It looks like these mounts were ground years ago. Excellent effect!
 

Attachments

  • photo 2-1.jpg
    photo 2-1.jpg
    154.5 KB · Views: 270
  • photo 5-1.jpg
    photo 5-1.jpg
    133.6 KB · Views: 262
Here's the diagram for now. I have other things I want to add and simplify at a later date, but I'm welcome to second opinions and critiquing if there is an issue here. What about the joined white and yellow wires coming from the stator?
 

Attachments

  • Conrod Diagram.jpg
    Conrod Diagram.jpg
    569.2 KB · Views: 285
This was before cutting the fender to be flush with the bottom of the seat. I'm against useless fenders or lack of fender at all, so even while this looks quite bobbed, it will sufficiently protect the seat and rider.

The black is a false fender. Just a "cap" at the end that can allow the seat to be opened. There is a second fender under the seat and going down to the swingarm, so the tire is well enclosed. It makes the rear look complete but naked at the same time ;D

As for the pin-striping, I'll be doing something reminiscent of the 50's or 60's but much more generic. As manufacturers have used decals in the past, I'm modeling after that practice. The design is based on work my grandfather did, but is much more generalized so that it looks like it could be something that may have been applied by the manufacturer in those days.
 

Attachments

  • photo 1-1.JPG
    photo 1-1.JPG
    171.3 KB · Views: 723
New KA slipper tensioner and tsubaki chain installed with new pistons/rings.

Here's a shot of my motor being introspective, per se.
 

Attachments

  • photo 2.JPG
    photo 2.JPG
    112 KB · Views: 264
Didn't get as much time as I wanted. Busy weekend with all the sportsbikes that showed up for me to work on.

Put the jugs on. Almost there :p
 

Attachments

  • photo 3.JPG
    photo 3.JPG
    140 KB · Views: 264
Well, got pretty far last night. Top end buttoned up, doing some final fit and adjustment.
 

Attachments

  • photo 1.JPG
    photo 1.JPG
    138.1 KB · Views: 264
Well, here's this. But there's a LOT more to be done, so this is a very vague mockup. Tank is a purchase from member JakeZ70 and one of the pipes is from a HondaTwins member, Timberwolffxdl.

Both excellent finds!
 

Attachments

  • conrod tank 2.jpg
    conrod tank 2.jpg
    546.9 KB · Views: 275
Back
Top Bottom