
We noticed you are blocking ads. DO THE TON only works with community supporters. Most are active members of the site with small businesses. Please consider disabling your ad blocking tool and checking out the businesses that help keep our site up and free.
You are using an out of date browser. It may not display this or other websites correctly.
You should upgrade or use an alternative browser.
You should upgrade or use an alternative browser.
Time to Contribute! RD350 Cafe Build
- Thread starter andrewlk
- Start date
andrewlk
Been Around the Block
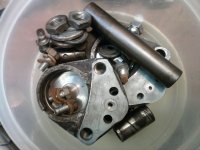
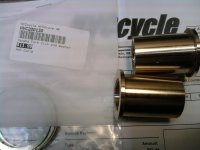
Here are some pics to update: Bunch of parts pre/post Metal Rescue. The stuff works well, but I have some pieces that are just too much for it. If pieces are pitted it doesn't take all the rust off. The worst pieces don't look the greatest, but I haven't come across anything that isn't salvageable from a function standpoint. The caliper pistons were a little pitted on the top edge, but not enough that should cause them to leak.
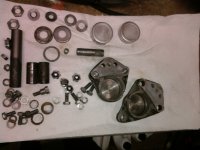
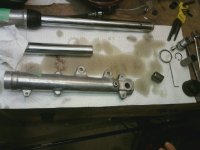
Also got swingarm bushings and fork rebuild pieces in the mail today...though they don't look like what I imagined when I thought of 'fork seals' which is what I thought I ordered. Hopefully that's all I'll need and when the new springs/emulators arrive I have everything to rebuild the forks. Let me know if (based on the pics) I'm mistaken. Each pic set is before first, then after.
Also got swingarm bushings and fork rebuild pieces in the mail today...though they don't look like what I imagined when I thought of 'fork seals' which is what I thought I ordered. Hopefully that's all I'll need and when the new springs/emulators arrive I have everything to rebuild the forks. Let me know if (based on the pics) I'm mistaken. Each pic set is before first, then after.
Attachments
shamus
LDMMC
andrewlk said:Does the little baggy with the fork pieces look like everything I'd need to replace fork seals? I've never taken forks apart before so I'm not sure.
No fork seals in the picture you posted.
andrewlk
Been Around the Block
Re: Time to Contribute! RD350 Cafe Build 'Marla'
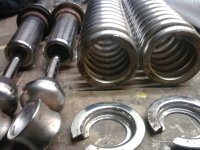
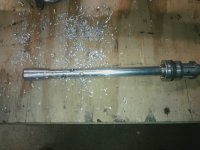
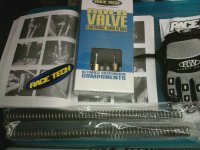
Got the racetech stuff so started rebuilding the forks and making the mods necessary to accomodate cartridge emulators. Anyone know the best way to remove the roll pins at the top of the fork dampers?
Got the racetech stuff so started rebuilding the forks and making the mods necessary to accomodate cartridge emulators. Anyone know the best way to remove the roll pins at the top of the fork dampers?
Attachments
andrewlk
Been Around the Block
andrewlk
Been Around the Block
Here are the new parts. Instructions could be clearer...going to have to call Racetech to figure out some of the details, most of it is pretty straight forward when combined with a shop manual.
Installing the emulators calls for drilling out the compression damping holes, which is straight forward. But they also call for cutting out the roll pin or some section off the top of the damper rod and that's what I'm not sure about.
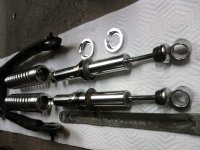
My fork seals actually look really good, and they weren't leaking before taking them apart so I think I'm going to leave them. I have new ones on the way and can always replace them later. The forks aren't as complicated as I imagined they'd be.
Installing the emulators calls for drilling out the compression damping holes, which is straight forward. But they also call for cutting out the roll pin or some section off the top of the damper rod and that's what I'm not sure about.
My fork seals actually look really good, and they weren't leaking before taking them apart so I think I'm going to leave them. I have new ones on the way and can always replace them later. The forks aren't as complicated as I imagined they'd be.
Attachments
If you remove that roll pin, what do you use to hold the emulator on top of the damper rod and where does the seal go? Did R-T supply adapters that take a piston ring (seal) or solid adapters? Are they stepped to fit on that small diameter shaft or simple parallel tubes?
Depending on what they supplied the answer as to what you do next may vary. Typically the emulator sits on top of a 12mm (or so) tall piece of aluminum tube (AKA adapter) and if the damper rod has no seal, that adapter typically has a groove to take a plastic piston ring.
That adapter has to sit on top of the damper rod, so size matters here.
andrewlk
Been Around the Block
The center of the damper rod is open (like a tube), and the roll pin passes through cross ways. The Racetech instructions suggest removing the roll pin so that it does not restrict oil flow through the damper rod. It then recommends using locktight to hold the top of the damper rod in place.
The emulators came with the adapters that have piston rings and which sit on top of the damper rod.
There certainly seems to be a decent amount of space around the roll pin, but compared to the compression holes I drilled out, this will almost certainly be a choke point.
It is entirely possible that I'm interpreting the instructions wrong, either way, I plan to give racetech a call today.
andrewlk
Been Around the Block
Got the first of two fork legs rebuilt this evening. After having everything apart and rereading the directions a few times it made more sense. I removed the roll pin and cut it down into 2 smaller pins. Put locktight on the threads of the top of the damper rod and screwed the top back on, then put the two pin pieces into place which now leaves the center of the rod wide open. Adapter w/ piston ring sits on top of that, then emulator and spring.
New seals too - geez those are a bitch to remove. Used a claw hammer and a rubber mallet to beat them out. Added some grease before the new ones so hopefully won't be so bad next time. Only thing left is to cut preload spacer and add oil...then repeat for the other leg.
I left the emulator with the 3 turns of preload (how it came) and sliver spring, springs are Racetech .75kg straight rate springs and I'll probably space for 20mm of preload. Any recommendations?
andrewlk
Been Around the Block
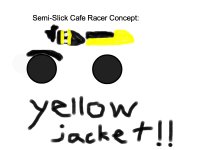
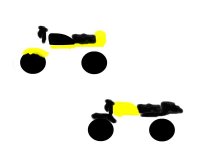
Tried making some cardboard seats to mock up. Still not exactly sure what I want to do. Here are 4 samples. I tried to emulate the tank lines by shining a light on the tank and tracing the profile, then made some cardboard seats for ideas. Turns out the scale was a little off...only seat 4, which was just for fun, actually looked okay. All the rest looked ridiculous when taped up.
I will work to modify them and get them closer to something I'm not ashamed of.
Seats 1 and 3 are solo seats, seat 2 is an attempt at a 2 person seat with removable cover for the passenger seat. Seat 4 is similar to the Twinline fastback #4 seat, which would be about $175 for raw metal with no upholstery. Open to suggestions.
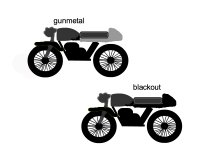
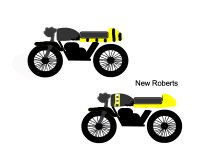
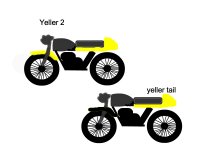
Latest color thoughts are blacked out with stainless/chrome accents and raw steel tank and seat/tail with clear powder-coat and possibly some Yamaha tank decals clear-coated on.
I will work to modify them and get them closer to something I'm not ashamed of.
Seats 1 and 3 are solo seats, seat 2 is an attempt at a 2 person seat with removable cover for the passenger seat. Seat 4 is similar to the Twinline fastback #4 seat, which would be about $175 for raw metal with no upholstery. Open to suggestions.
Latest color thoughts are blacked out with stainless/chrome accents and raw steel tank and seat/tail with clear powder-coat and possibly some Yamaha tank decals clear-coated on.
Attachments

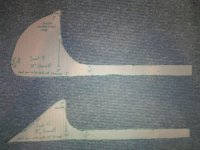
Not sure what your fab skill level is but that #4 seat is about a 100x easier to make than the first three. In my opinion some variation of #4 would look the best. Make a model seat/tail out of cardboard (3 dimensional) or foam first then buy half a sheet of 18gauge sheet take paper templates from your model and give it a go.


