vintage race CB350 - last 10% is the hardest

Re: vintage race CB350 - attending to details

They are the same tire front and rear. Both tires mounted in the proper direction according to the arrows imprinted on the sidewalls. I did not mount the rear tire backwards.
 
vintage race CB350 - attending to details

My motor was on the workbench. But to install the PVL I've got to remove the side cover, which means I've got to drain the oil, which is easier said than done when the motor is resting on some 2x4s. So I've decided to put the bike back together and install the motor in the frame to facilitate the PVL installation.

So far I've got the swingarm and rear shocks bolted to the frame. The rearset footpegs limit the amount of rear suspension droop travel as the large footpeg fixing bolt is rather long. I won't know until I install the motor and chain but I may need to address this. Also, the Works shocks have spacer bushings in the lower mounts. One shock has equal thickness spacers and the other has two different width spacers to offset the shock to one side. Trying to figure out which one is left side and which is right side. They're interchangeable right now but that's because I haven't torqued the swingarm pivot down yet. I think I'll do that and fit the rear wheel and tighten the axle and everything will come into final alignment.
 
vintage race CB350 - attending to details

Latest CB350 status update.

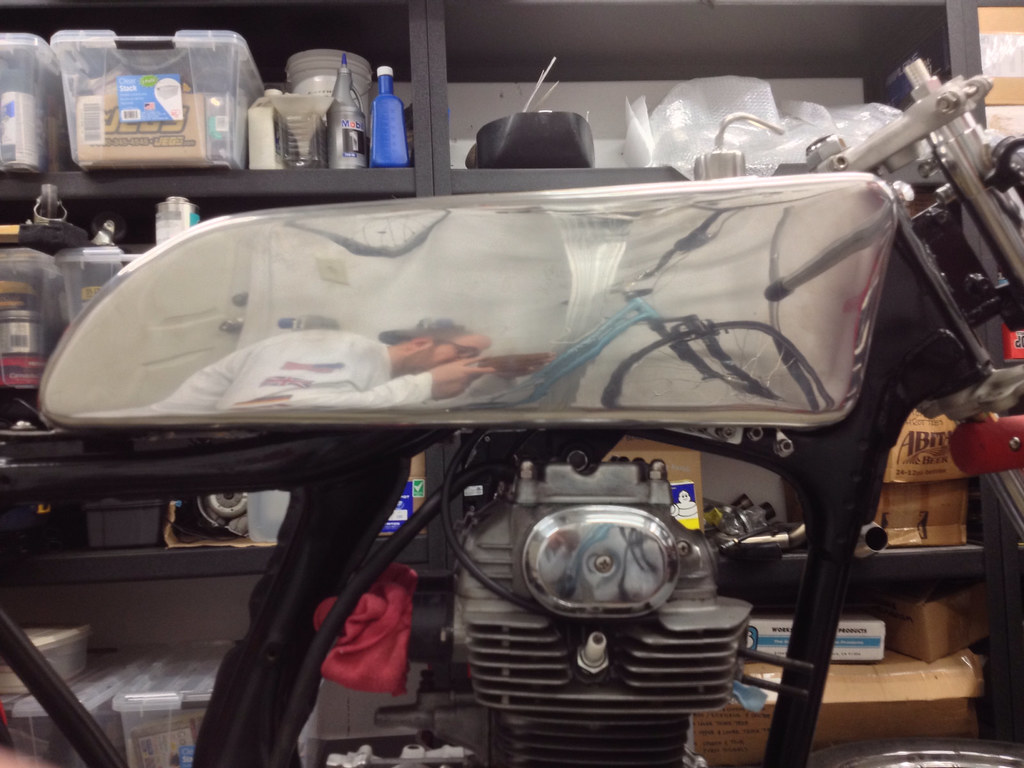
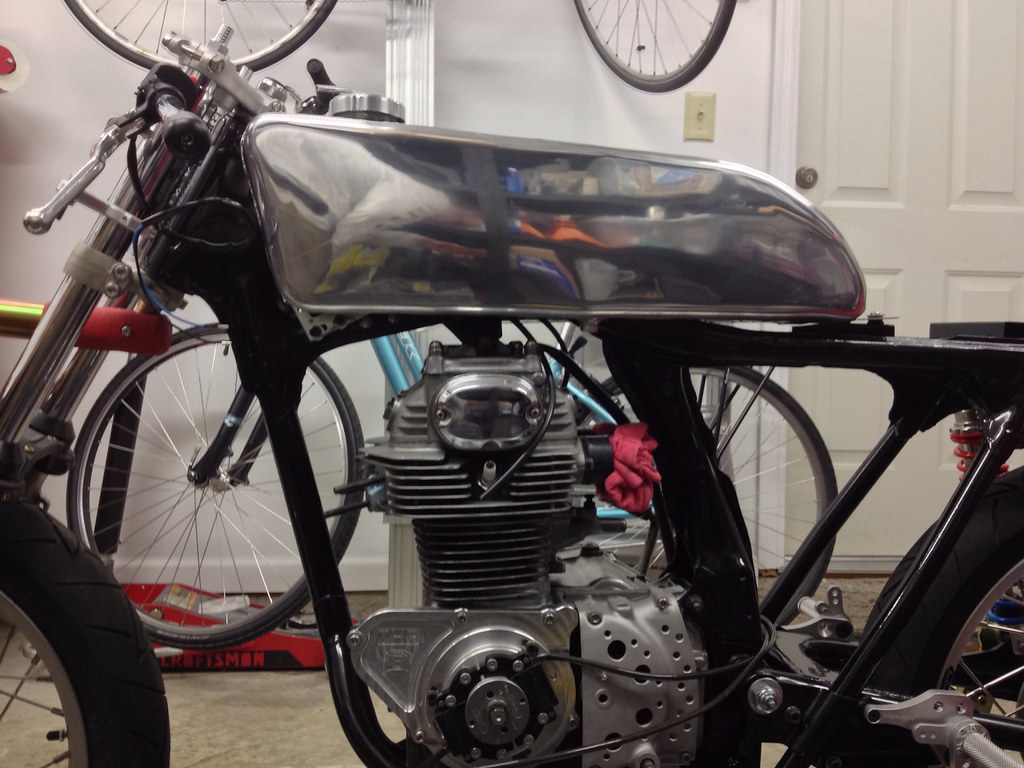
It's starting to look like a motorcycle once again.

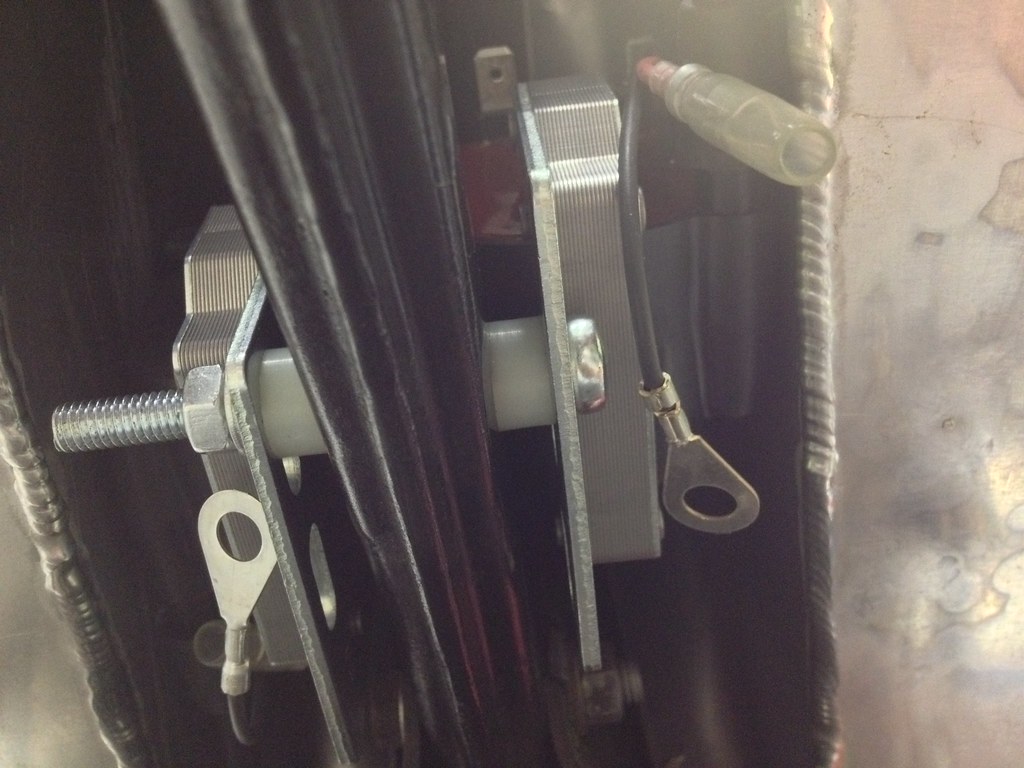
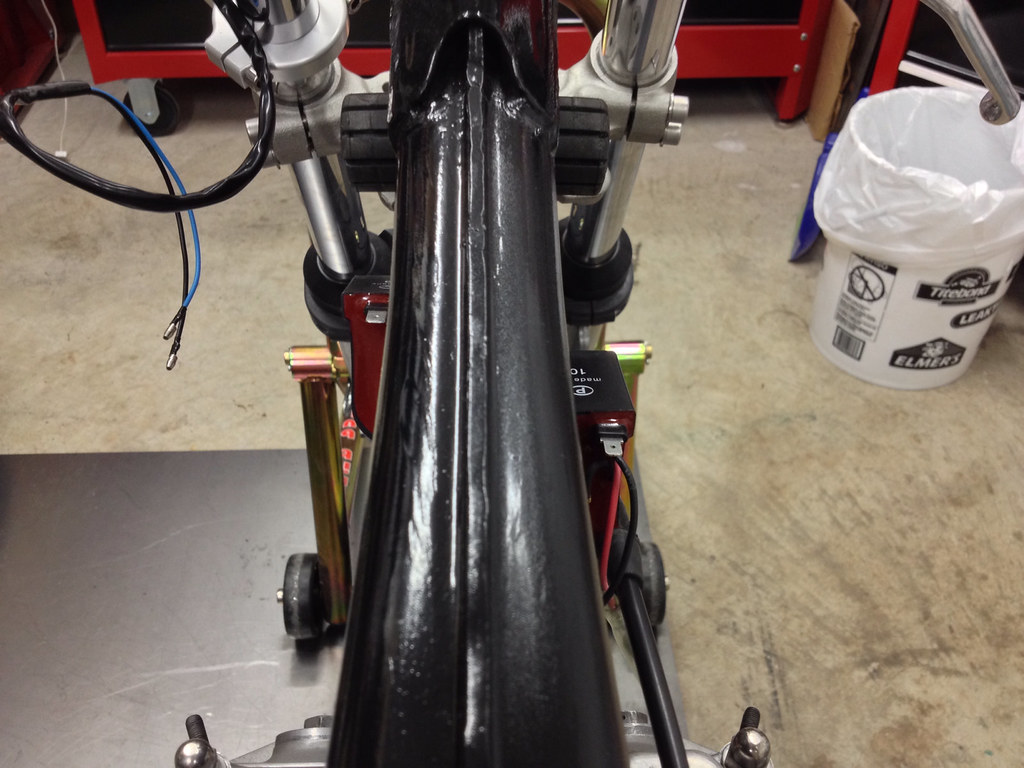
Metric Floating Nut Plates

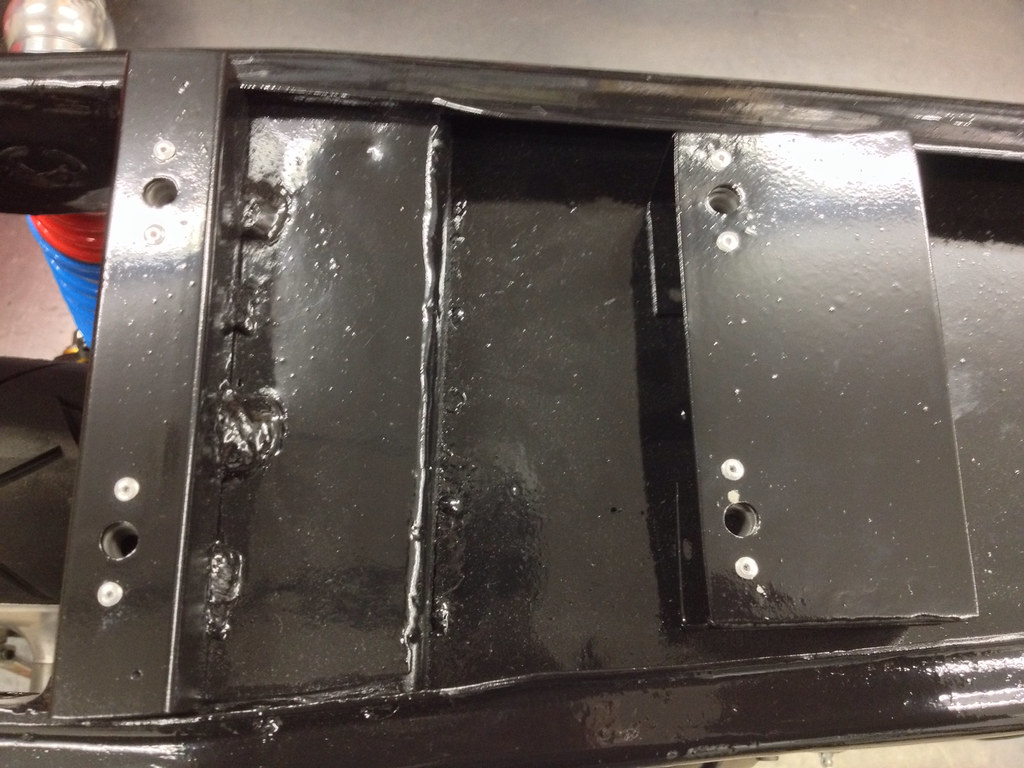
These lightweight, low-profile plates are an excellent way to install a captive nut behind a panel. They allow a bit of misalignment so there's very little struggle when installing bolts. Not as trick as quarter turn quick release fasteners but much simpler and cheaper to implement. These are used to affix my fuel tank and seat to the frame. Never again will I be searching the ground for a missing nut!
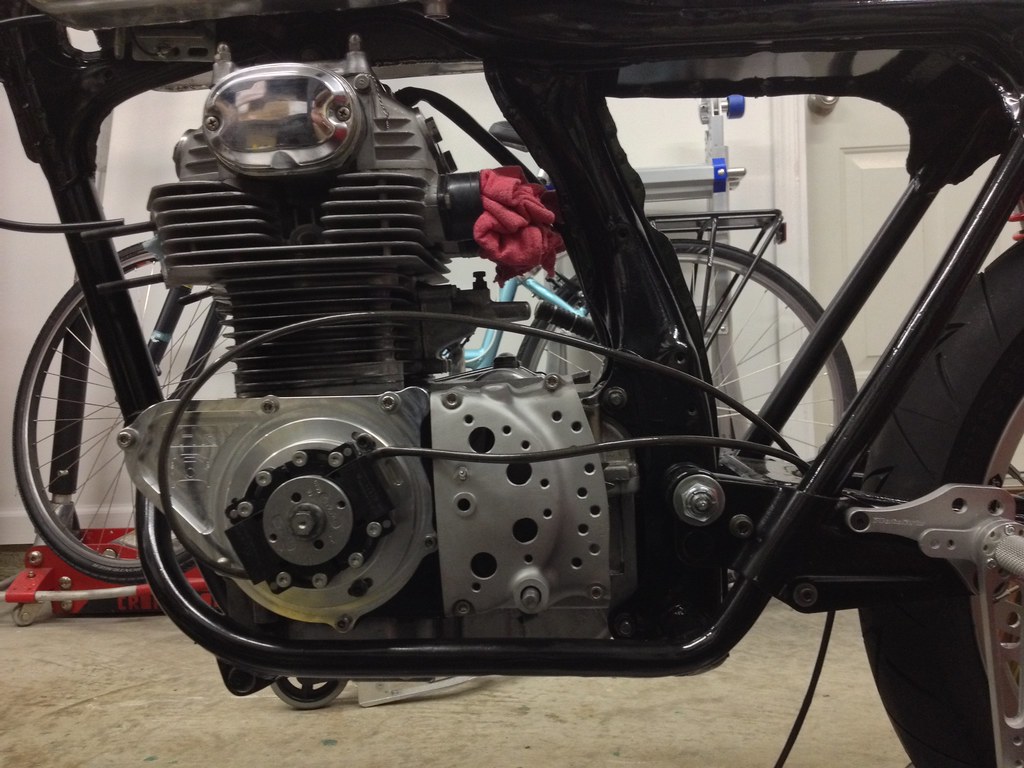
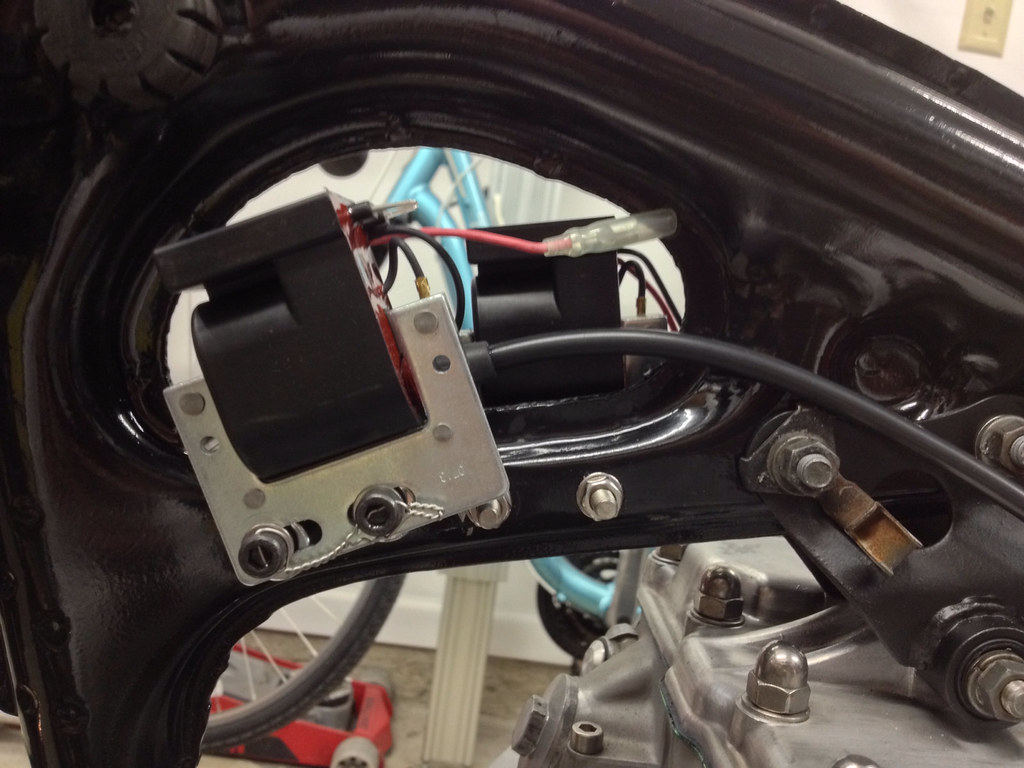
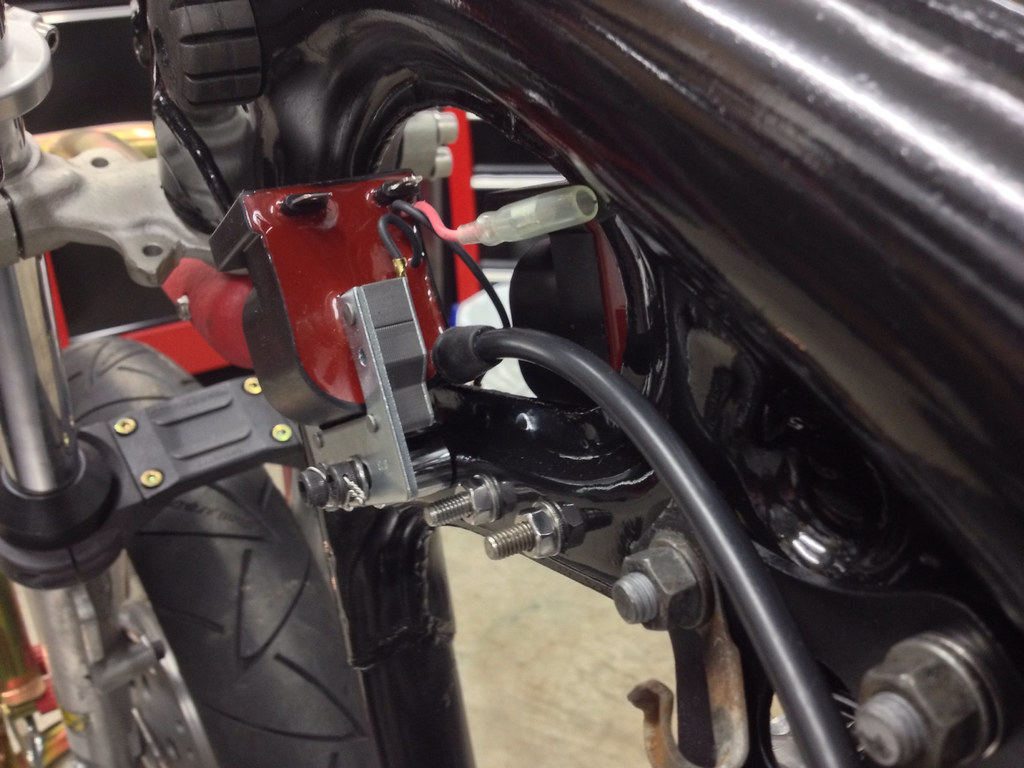
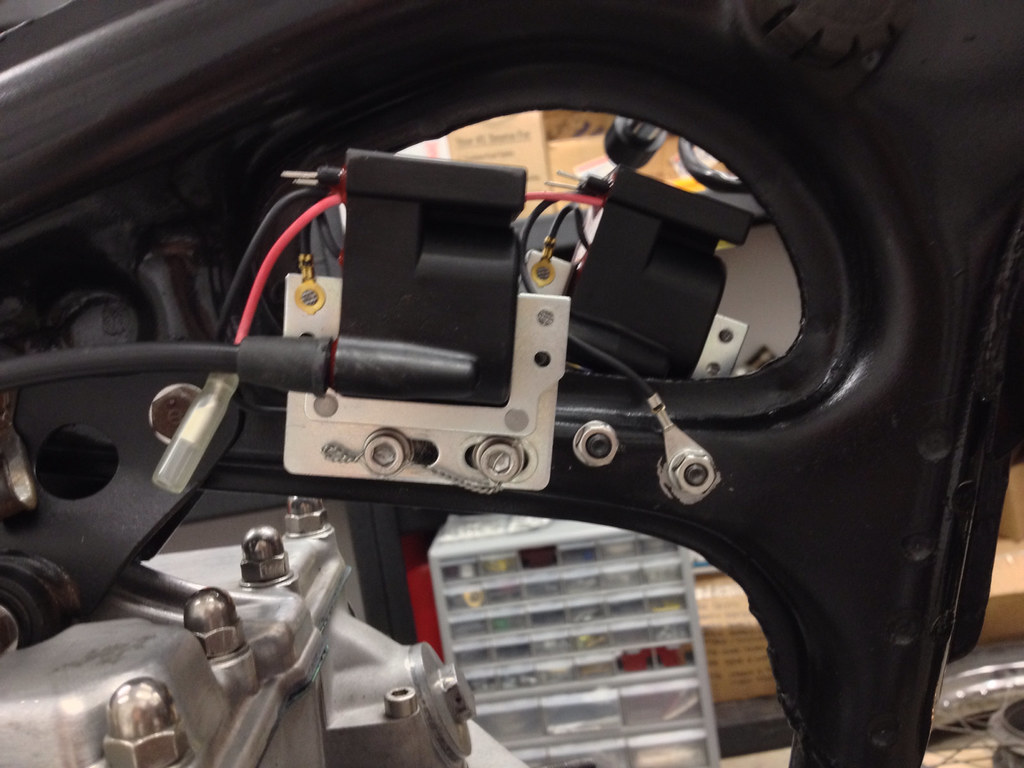
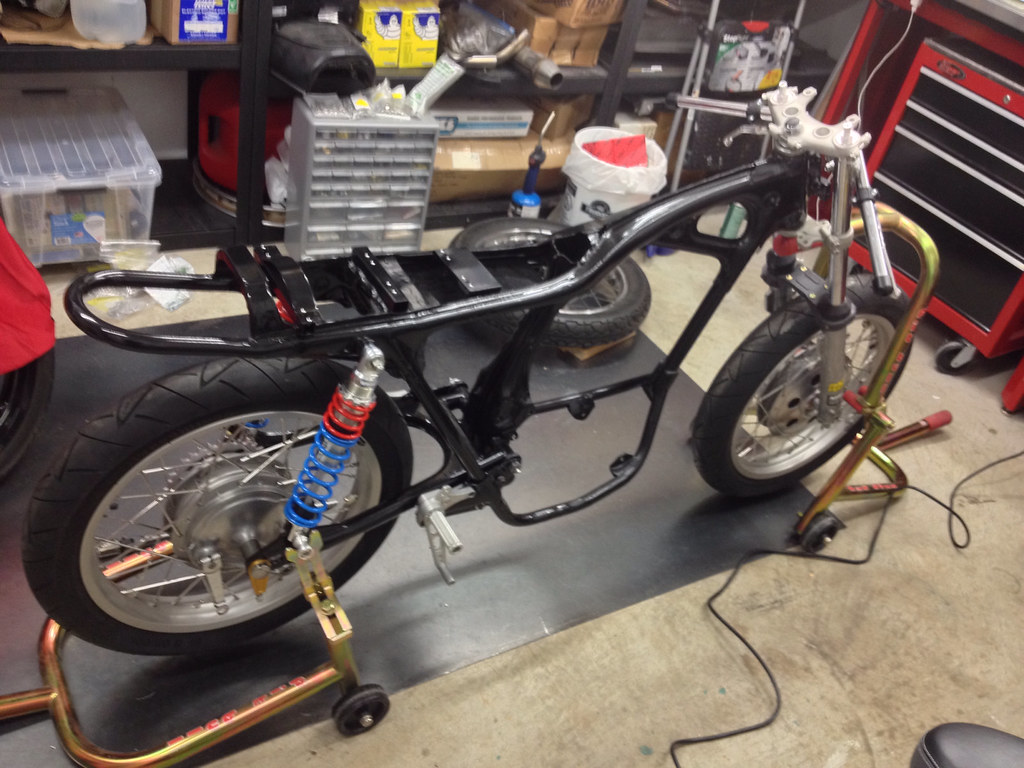
Right side detail

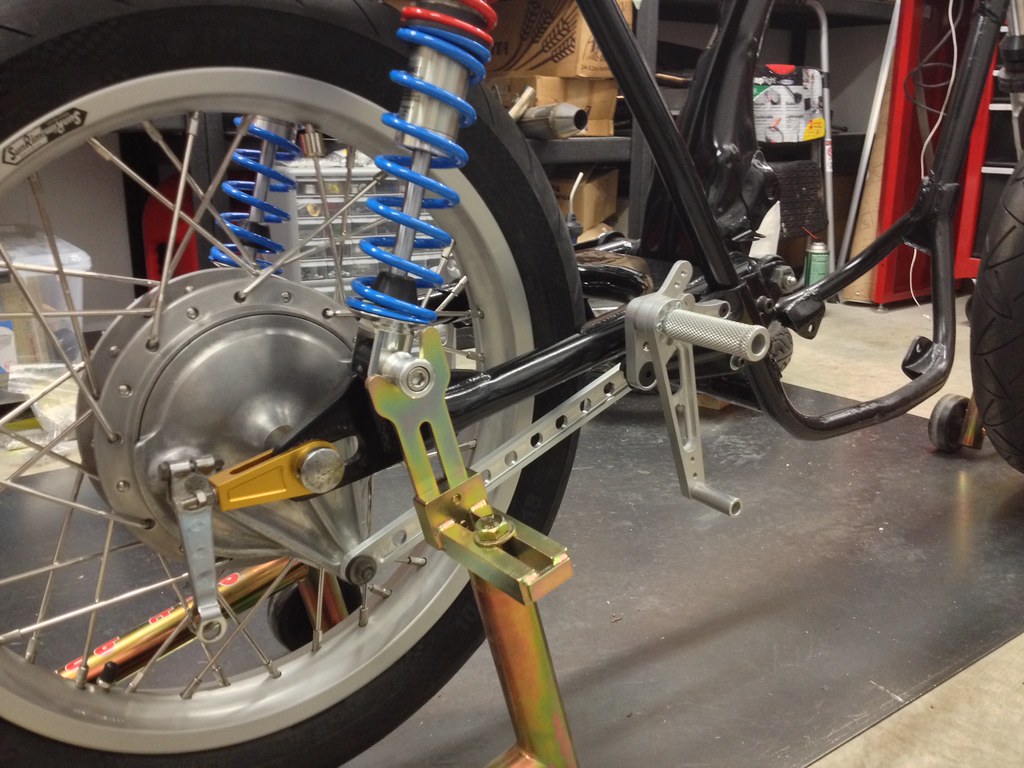
Rear shock mounts double as spool lifts. TTR400 axle adjusters converted from ridiculous unobtanium M7 bolts to standard M6 bolts using TimeSert kit. Joker Machine rear drum brake stay rod. Amazing I was able to find the specialty shoulder bolts for mounting that in a zip lock bag of rusty junk that was all tossed together in haste the last time I moved work shops.

Rear Sprocket Detail

520 aluminum rear sprocket installed. I ditched the rear sprocket mounting stud lock tabs and used plain washers instead. Stainless steel M10x1.25 nuts were corner drilled and safety wired so they don't come off. Reusable safety pin in rear axle will get safety wired to that little hole above it. I solved my rear sprocket / shock mount clearance problem when I realized I can just slide the axle back a little. Sometimes the answer is staring you right in the face.

Motobits Rearsets

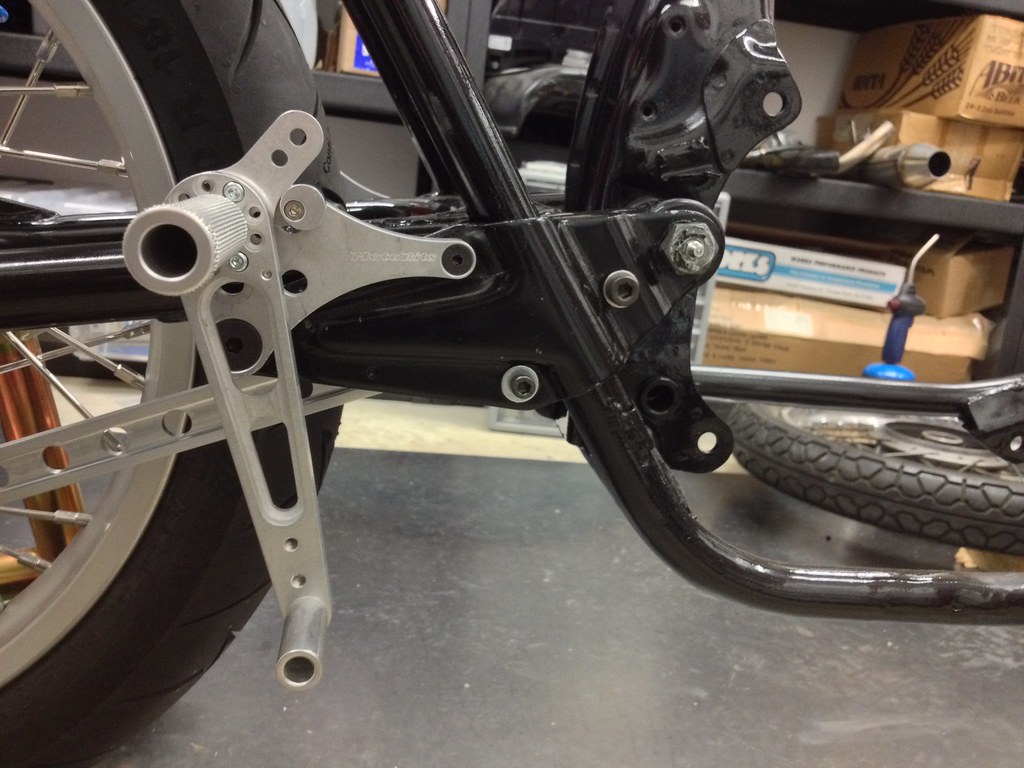
I replaced the footpeg bolts on both sides with shorter ones. The right side has plenty of clearance between footpeg bolt and swingarm. The left side not so much. My Motofiaccone exhaust originally mounted to the rear engine mount but this precludes me from installing the necessary belly pan. So I think I will move the rear exhaust mount to the bottom of the two M6 footpeg mounting plate bolts. Hopefully I can find a steel sleeve rubber isolator bushing for that.

Left side Motobits rearset foot controls

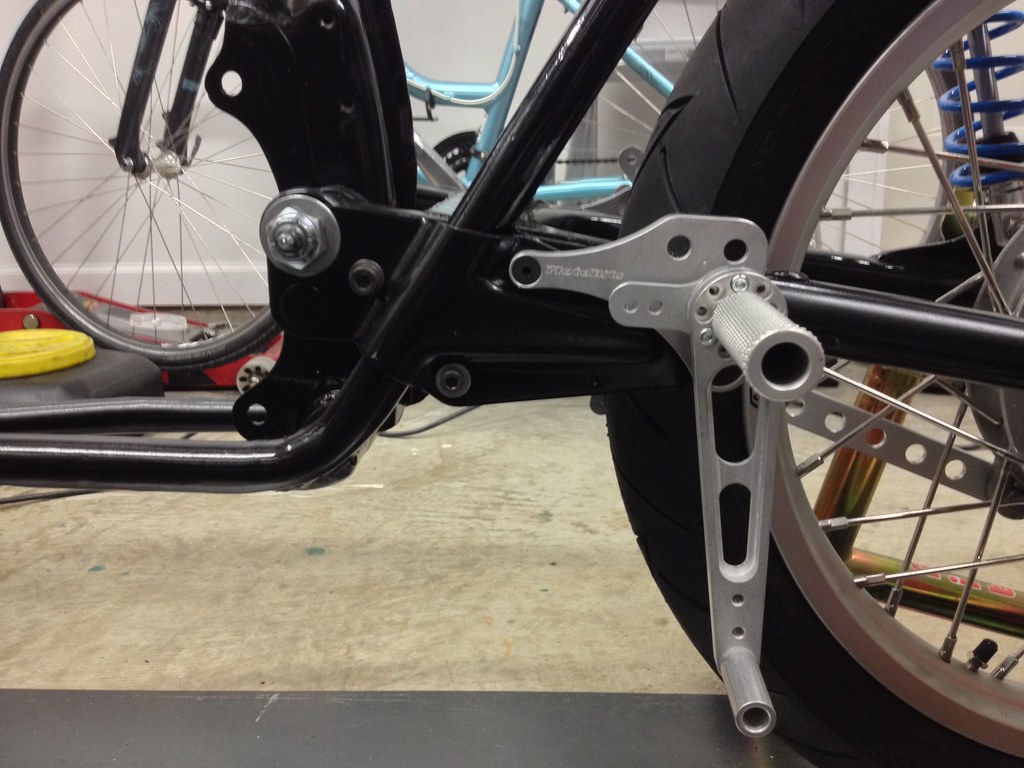
I installed a much shorter footpeg mounting bolt but there's barely any room between that and the swingarm. I wonder it the problem will go away once the motor is installed and I set rear suspension sag properly.

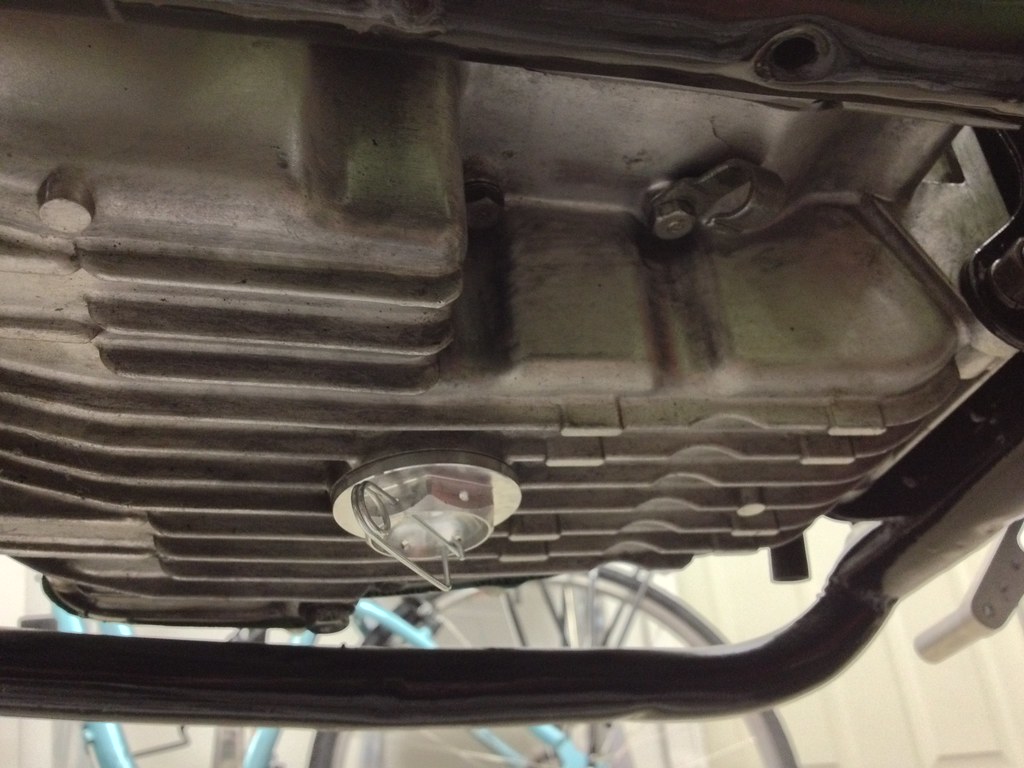
Safety wire and blue loctite the cam sprocket bolts


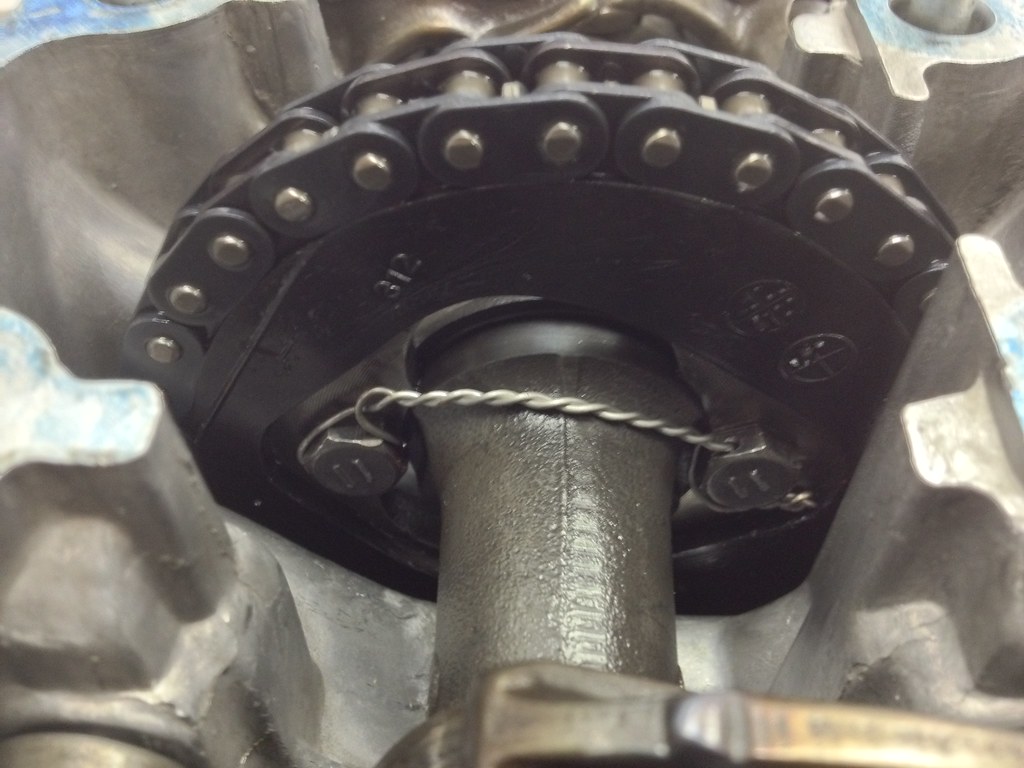
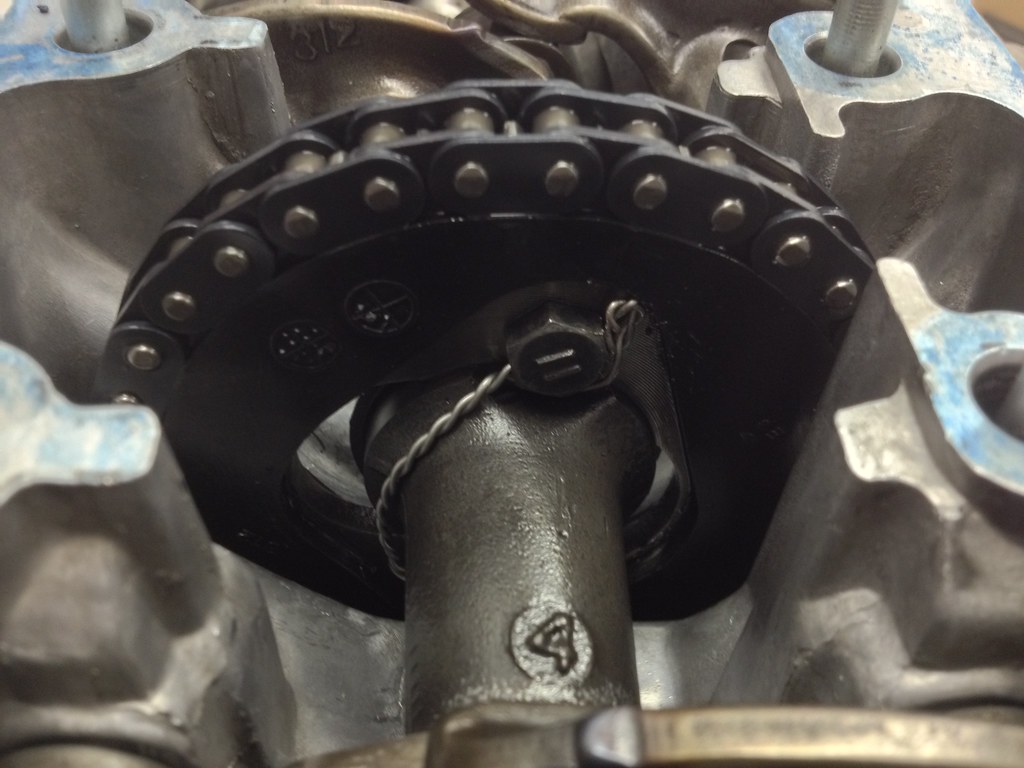
Tip I learned from midge. The originals bolts did just fine for 40 years but I doubt the bike was ridden the way I plan to ride it on the race track. Hopefully this helps avoid any future calamity.
 
Re: vintage race CB350 - attending to details

Excellent build, and it's also nice to see a fellow pipe smoker on here!
 
Re: vintage race CB350 - attending to details

Really nice build. Will you be at Barber Vintage Festival in October.
 
vintage race CB350 - attending to details

Thanks for the kind feedback. I don't think I'll make it to Barber this year but that's my eventual goal.

Today I did a timing chain tension and valve adjustment as I wanted to be sure everything was right before I pulled the stock ignition system. Using feeler gauges gets you close but it's hard to hold the eccentric still with a screwdriver as you tighten things up. So I always anticipate how much the eccentric adjuster moves when tightening the nut so I'm on target when it's good and tight. Then I recheck with a feeler gauge again and if that's good then I rotate the motor 720* and check the clearance again just to be certain. Cleaned and painted the top motor mount brackets. And my new Scitsu blue dot B1 12k tachometer arrived from England. Excited to get the motor back in and the PVL fitted so I can install it.

 
Re: vintage race CB350 - fitting PVL ignition


Got the motor mounted in the frame. Started fitting PVL ignition.

Removed stock side cover, stator, rotor and starting sprocket.

Removed MG Innovative starter block off plug because it stuck out too far for the PVL mounting plate to sit flush against the motor. Fitted THR alloy starter motor block off plug. The block off plug has a tail on it from the casting process that aids installation. I tapped on it with a rubber mallet until the two fingers bottomed out against the inside of the case. However, this tail piece extends out past the gasket surface and prevents the alloy PVL mounting plate from sitting flat against the motor. So I took my hammer and gave the tail piece a sharp whack to break it off to gain the necessary clearance.

Fitted the PVL mounting plate to the motor. All but one of the case bolts fit with the new PVL plate but one is way too long so will have to be shortened or replaced with a shorter one. The stator plate bolts were tight when I installed the PVL mounting plate but they the plate must have flexed while tightening it down, causing the stator plate bolts to loosen up. I placed a small washer underneath the stator plate bolts to make sure they don't bottom out. I may also add a split lock washer just to be sure the timing doesn't inadvertently change on me.

Fitted the PVL rotor to the crankshaft. Tightened the bolt until the motor started spinning then gave it a few quick pulses with the impact gun.


Test fitting the PVL coils. They fit up underneath the gas tank... barely. My tank has a very narrow tunnel. The only way I can get the PVL coils to fit up there is to mount them further back than stock where my tank widens a little bit, which means drilling a new mounting hole in the frame. I'll put a piece of foam between the coils and between the tank and coils to deal with any vibration issues.


Cappellini Moto oil drain plug. I had to drain the motor oil to fit the PVL ignition so took the opportunity to replace the stock oil drain plug with this alloy drain plug with magnet to catch metal particles inside the motor. The safety pin will get safety wired to a cooling fin or something else nearby.
 
Re: vintage race CB350 - fitting PVL ignition

Looking awesome.

BTW, Scitsu are active again with support and battery swaps etc. Did you get the external battery, or the 12v option? On a TZ we have to go with the internal battery and that requires sending the head back to the UK for service. With a PVL you probably went with an external battery - yes?
 
vintage race CB350 - fitting PVL ignition

Yeah, I heard on the k21 forums that Scitsu.com has new ownership and that the new guy is much better at providing support. But after all the years of hearing about people's troubles with the internal battery I decided to go with the external 9V. It's very compact and should be very reliable. The 9V batter comes wrapped in a cool Velcro case that's easy to mount anywhere. I'll probably zip tie the battery to my fairing probe.
 
Re: vintage race CB350 - fitting PVL ignition

After trying many different possible mounting configurations for my PVL ignition coils I finally settled on this one. My gas tank has a very narrow tunnel. So in order for the tank to fit over the ignition coils I had to offset mount the coils with the left ignition coil mounted further ahead than the right ignition coil. This allowed me to move both coils closer to the center line of the bike than if I had mounted them side by side. They're mostly hidden from view now. I massaged the tank recess a little bit with a hammer but I'm still going to line the tank recess with some thin adhesive backed foam so the ignition coils don't rub against the tank itself. Yes, I realize I need to redo the safety wire - I'm a noob and have to look at the instructional diagram while doing it or else I do it wrong. And I'll probably fit nylock nuts as it's just too difficult to corner drill M6 nuts. Each ignition coil is grounded to the frame via one of the coil mounting bolts. I might add an additional ground wire from the motor to the frame just to be certain.

As for the kill switch, it has a blue wire and a black wire. Each ignition coil has a red wire for connecting to the kill switch. Can I just connect the two red wires in parallel to my kill switch blue wire?


vintage race CB350 - fitting PVL ignition

Also decided to fit NGK non-resistor spark plug caps instead of the ones supplied with the PVL. The LZFH cap works with the NGK B8ES plugs with the loose terminal that can be removed. The cap snaps directly onto the threaded terminal stud. Unfortunately, no one stocked the locally so had to order some online.

http://www.ngk.com/product.aspx?zpid=20083
 
Re: vintage race CB350 - fitting PVL ignition

Sorry if this is a dumb question but did you make sure to expose some frame metal to ensure a good ground? Yes, I would say the kill switch wire input on coil would work if connected in parallel to the kill switch (which is just a switch to ground).
 
vintage race CB350 - fitting PVL ignition

Thanks for the input. Yes, I sanded away the paint (about the size of a nickel) so the ground terminal is touching bare metal.

I've read that I might need to connect a diode to each kill wire?
 
Re: vintage race CB350 - fitting PVL ignition

What does the manufacture recommend? Can you check the red wire to see if voltage is present when the coils are powered? If so, a pair of diodes (common cathode) will keep them isolated. It's basically good practice but thinking as a hardware designer, it should have built in protection. I (as the mfgr) wouldn't expect the consumer to wire in diodes in the harness. Two coils is a common installation. It seems that should be covered in the instructions. I should have thought about it more before I shot off an answer. If it was my bike, I wouldn't bother with the diodes. The two kill wires connected together will not affect normal operation and when grounded, it should kill the ignition as designed.

Also, resistive spark plug caps should be used since you are using an electronic tach. Reading the PVL docs, it recommends 5k ohm caps.
 
Re: vintage race CB350 - fitting PVL ignition

I believe that PVL is like a Motoplat and needs a double kill switch or diodes or two kill switches.
 
Re: vintage race CB350 - fitting PVL ignition

Sounds like the information is not confirmed. In this case, I would make sure so as to avoid damage and voiding warranty. After researching this PVL a little more, it is a complex electronic ignition. Sorry, I thought it was a simple analog ignition at first. If you can't get a straight answer from PVL, just wire a pair of 1N4005 axial diodes (RadioShack) in common cathode configuration (banded end soldered together to the switch and non-banded ends to the two red kill SW wires). Not too difficult and better to be safe.
 
vintage race CB350 - fitting PVL ignition

I'm running the analog PVL for twin cylinder motors. The instructions I have say don't use resistor caps as doing so can hurt spark energy. Apparently, magnetos are notorious for weak spark at low rpm such as during kick start. The instructions also recommend using iridium plugs if possible. But the only NGK iridiums I can find have a built in resistor. I could use B8EG but I don't see the value at this point. I'll stick with plain old B8ES for now. The tach should be fine without the resistor caps. Loads of classic bikes use Scitsu. Suppression wires and resistor caps are more important when you've got a CPU to worry about such as electronic fuel injection.

The instructions I have say to use a DPST kill switch. But I've already got a kill switch with handlebar mount that is conveniently labeled ON/OFF and complies with all sanctioning body rules. So I prefer to figure out how to make that work.
 
Re: vintage race CB350 - fitting PVL ignition

DPST reference confirms the need to use diodes. Spark energy is very low at cranking speed and fine wire plugs are an advantage. Try B9EGV if they are available. We run 8s on unleaded gas to burn off soot and 10s with leaded race gas.
 
Re: vintage race CB350 - fitting PVL ignition

DPST is dual pole, single throw meaning two switches operated by one button. In the off position, the two kill wires will be isolated/open and in the on position they are shorted together (the other two poles are wired together then grounded). Since you have a SPST switch, you need the diodes.

Good info on the plugs! Good work!
 
Back
Top Bottom