
We noticed you are blocking ads. DO THE TON only works with community supporters. Most are active members of the site with small businesses. Please consider disabling your ad blocking tool and checking out the businesses that help keep our site up and free.
You are using an out of date browser. It may not display this or other websites correctly.
You should upgrade or use an alternative browser.
You should upgrade or use an alternative browser.
XS360 Bratstyle Replica- Codenamed: Sheeple II
- Thread starter DeanJ
- Start date
JustinLonghorn
No Purple Hearts, No Blue Ribbons
Damn good work with the seat, sir.

DeanJ
Been Around the Block
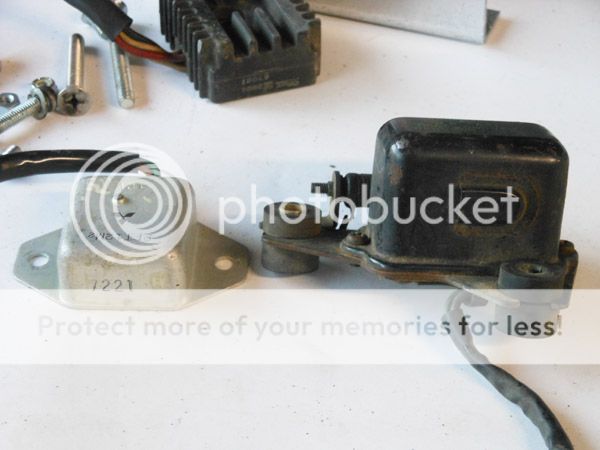
I wanted to mount the regulator and rectifier on a custom bracket that is flush with the top of the frame rails under the seat. This way they are virtually invisible from the side view and I will have the proper open triangle sheeple look. So I picked up a solid state regulator ( pictured on left ) that is much much thinner and smaller than the stock mechanical relay regulator ( on right )
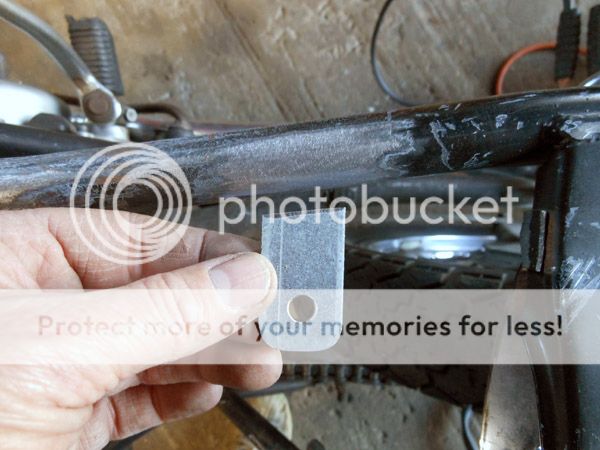
I made up the "T" bracket from some scrap and also some seat mounting tabs

everything welded in place

Pic below shows exactly how the reg and rec mount.
I now have the exact mounting marked for the seat pan, so now I can go ahead and install hardware through the pan and permanatly secure the foam and cover in place. The trim rails, I made up will screw to the underside of the seat after I decide on final finish and color


I made up the "T" bracket from some scrap and also some seat mounting tabs


everything welded in place

Pic below shows exactly how the reg and rec mount.
I now have the exact mounting marked for the seat pan, so now I can go ahead and install hardware through the pan and permanatly secure the foam and cover in place. The trim rails, I made up will screw to the underside of the seat after I decide on final finish and color

I'm in
Is the wood and the padding covered? That second pic of the seat profile confuses me.
DeanJ
Been Around the Block
yes, in this pic , the pan and foam are covered....deviant said:Is the wood and the padding covered? That second pic of the seat profile confuses me.

As I noted prior, that is a loose fit. I need to save up for a few mounting screws to run through the wood from the top now that I have locations marked and the tabs welded to the frame. Then I can stretch and glue the cover to the pan

DeanJ
Been Around the Block
Found a tail light that mirrors the profile of the headlamp

I will fit it on top of the fender "here"

I can't think of anything else so that completes the fab and mock-up process
It's extremely cold out there , so it may be awhile before I finish up with the cosmetics

I will fit it on top of the fender "here"

I can't think of anything else so that completes the fab and mock-up process
It's extremely cold out there , so it may be awhile before I finish up with the cosmetics
DeanJ
Been Around the Block
jvandyke said:Where'd you get the tail light?
fleabay is littered with them for around $15 shipped. example: http://www.ebay.com/itm/161508897842
Just make sure it is dual filament if you are using it for brake/tail as there are a bunch of single element turn signal/marker lights that look identical.
PLAZACYCLEJOSH
Honda make Josh, happy Josh
Parts Unlimited is a good source for them as well, I just got 4 of them (they come in amber also) for the turn signals on one of my projects.
DeanJ
Been Around the Block
The weather improved and the salt has washed off the roads... so of course I have been out terrorizing the local peasants on my bikes for the past few weeks. But it's time to finish up the XS360 Bratstyle Replica !
I poked at the layers of primer and paint that were under the Yellow (that fell off in sheets last fall) . There was primer over a red re-spray that I scraped off revealing some bondomagic'ed dings and small dents. #awesomecharacter


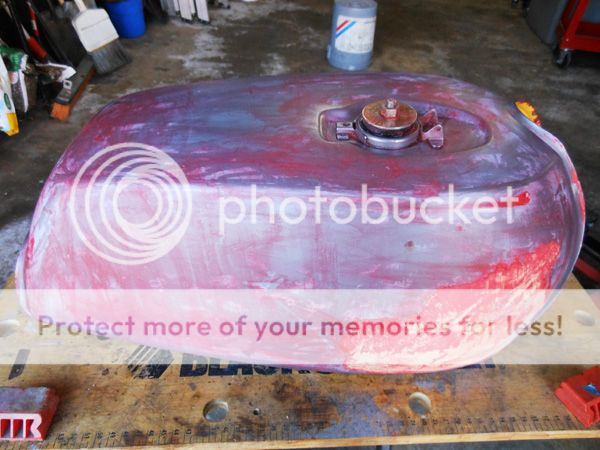
As this is a Sheeple build, it's going to be just raw steel hit with some sandpaper to look somewhat like cheesy brushed stainless. So.. no wasted time or brains on design, prep or painting. I'll just hit it with some clear

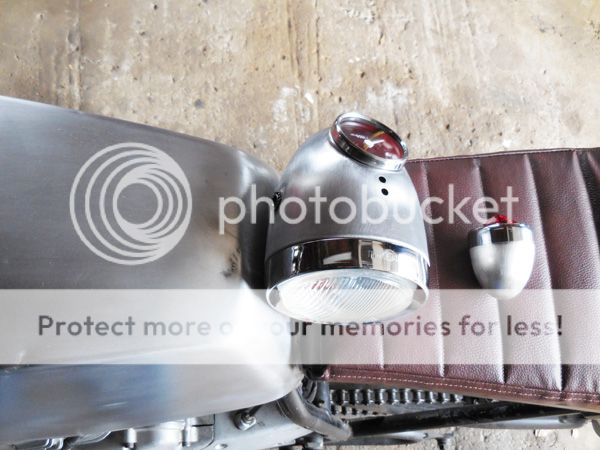
Decided to give the matching treatment to the headlight bucket and that cheap tail light
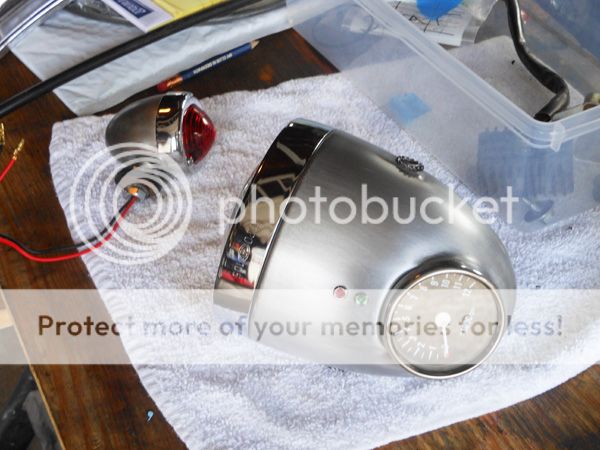
Looks douchetastic and I saved millions !
I poked at the layers of primer and paint that were under the Yellow (that fell off in sheets last fall) . There was primer over a red re-spray that I scraped off revealing some bondomagic'ed dings and small dents. #awesomecharacter


As this is a Sheeple build, it's going to be just raw steel hit with some sandpaper to look somewhat like cheesy brushed stainless. So.. no wasted time or brains on design, prep or painting. I'll just hit it with some clear

Decided to give the matching treatment to the headlight bucket and that cheap tail light

Looks douchetastic and I saved millions !

DeanJ
Been Around the Block
With the wheels off to pop on new tubes and tires, I found the rear drum shoes to be nearly new and the front to be " good 'nuff " . I gave the bearings / seals some good grease.
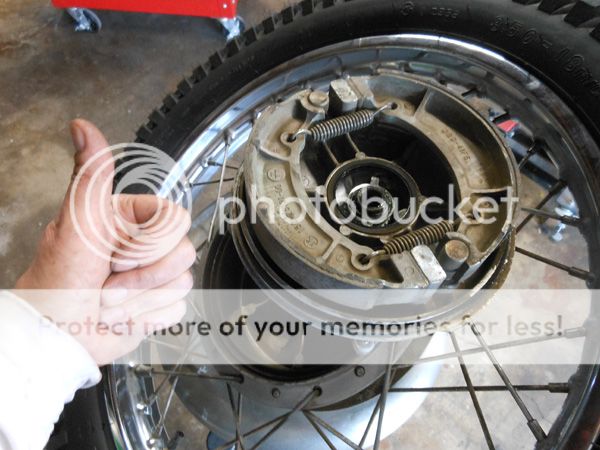
The headstock bearing were dry, but 37 of 38 of the rusty little buggers were there !
I had a baggie of good bearings left from when I upgraded another bike to tapered rollers. I was saving them for wrist-rocket ammo... but they were needed today.

I slipped on some gaitors for that sheeple look since the front end was apart ...and also changed the fork oil.
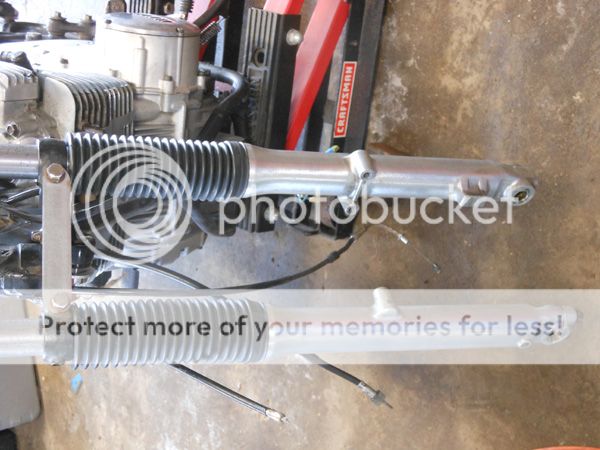
Awesome, my bobbed and modified fender clears the knobby rubber !

DeanJ
Been Around the Block
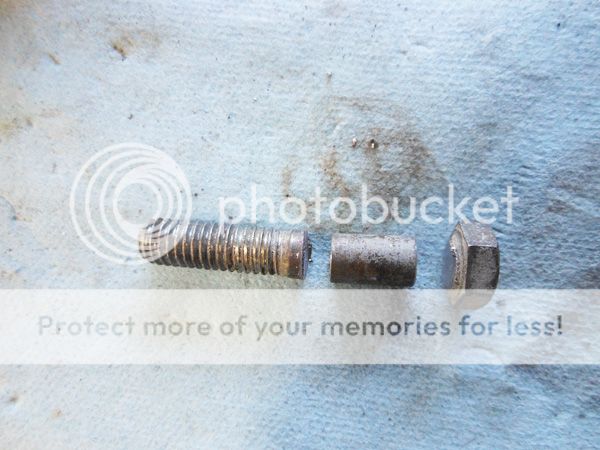
The front brake cable was 90mm too long, so I cut it down and made a new cable end from this bolt to solder on

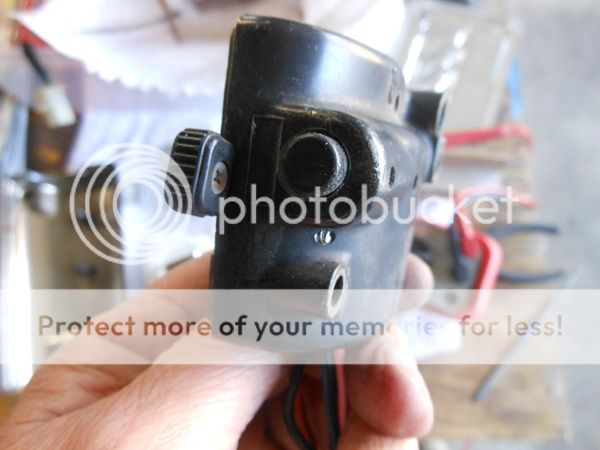
I'm using only right switchgear/ throttle housing. The kill switch was in crumbs and since this is a kick only bike without a stock starter button on that side, I'm moving the horn button from the left housing over to the right side where the starter button would have been on other models. The lights on/off will also stay.

Lower part of right housing with the horn button added:
decal indents and kill switch on the top were filled using some miracle putty

painted and new throttle cable installed.. I had to make a housing stay... so I put an old city vehicle tag to better use than hanging on a nail.


I'm using only right switchgear/ throttle housing. The kill switch was in crumbs and since this is a kick only bike without a stock starter button on that side, I'm moving the horn button from the left housing over to the right side where the starter button would have been on other models. The lights on/off will also stay.

Lower part of right housing with the horn button added:

decal indents and kill switch on the top were filled using some miracle putty

painted and new throttle cable installed.. I had to make a housing stay... so I put an old city vehicle tag to better use than hanging on a nail.


