Follow along with the video below to see how to install our site as a web app on your home screen.
Note: This feature currently requires accessing the site using the built-in Safari browser.
We noticed you are blocking ads. DO THE TON only works with community supporters. Most are active members of the site with small businesses. Please consider disabling your ad blocking tool and checking out the businesses that help keep our site up and free.
yep well...after a long and frustrating wait, a guy in scotland named Kojaycat has sent a wiring diagram to me via an aeroplane. Now I can see just how bad I've fucked everything up while drunkenly snipping away instead of waiting...looks like a lot of work ahead of me but with my other bike at the shop till tomorrow getting a roadworthy so I may as well get to it in the mean time. I worked out my bike is aa z750 p3 by counting the wires on the indicator control unit and consulting via ebay with kojaycat- he sent me out a wiring diagram which is computer generated and clear as chrystal on A3 laminate...legend.
I need to start rewiring but am having a think about where to start from
1- from the ignition
2-from the start run/on off switch
3- from the fuse box
whatdya you guys reckon- everything is gonna need re connecting as I go- its not as simple as just reconnecting because there are splices everywhere and missing bits
Im gonna do the lights later..all i want is spark.
My priority is to get her to turn over so I can divert my attention to more fun things like
rebuilding the brakes
relining and spraying the tank
newdiscs
anyway..im gonna go get to it.. later.
R
TOP TIPS FOR NEWBIES
Don't fuck with it till you know what you are doing and have the correct manual
buy electrical bits methodically
invest in a multimeter
dont drink and wrench
buy storage before you take it apart
Well, I think it wasn't a mistake...it just means you'll learn the "hard way" on how to do it. So if another project comes in you aren't too worried about it, and know roughly what to do next time! keep at it!
hmm ..got power everywhere. new starter solenoid etc
The line into the run/stop switch unit is reading battery voltage on the way in and then there's a voltage drop on the way out
12.6-11.6 but when you hit the starter it jumps back up to full voltage
a)this means that the starter switch is shorting somewhere
b)this means that the starter button is doing what its meant to and I have an issue with coils or IC
Keep a battery charger hooked up to the battery. Makes sure it maintains the 12V even if there is a draw. See if that changes anything. And if not, then you know there may be something with the switch etc.
Rich, those switches sometimes get some oxidation on the contacts from sitting around and never being used. Using the switch helps to make it work better, so it's not that surprising to see a voltage drop across an old switch that then shows improvement.
I like to pack some dielectric grease in the handlebar switches to keep water out and prevent oxidation.
I eliminated the clutch interlock on my GS450, mostly because it made for two fewer wires to have to squeeze into the handlebars. It's a tight fit to internally wire 7/8" handlebars, and I wanted to keep the holes I drilled in the bars as small as possible.
awesome ...dp9 and alpha
I have three wires from the interlock..going to diode and eventually IC.
If I cross them will that do the trick? At the IC?
I don't have the interlock connector so I have to work from the other end
also
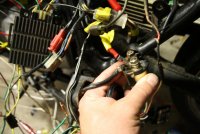
my starter solenoid has positive- negative which are reading as they should
and two wires which go to the coils and starter switch
however there is a third wire marked that i dont have on my starter solenoid
I could give you more help with a better/bigger image of the wiring diagram. I can't read it in that picture. Flatten it out, take a better photo at high resolution, and email the image to me.
alphadog@alphadogchoppers.com
Just stripped the tank..its got Bondo (bog, holefilla) holes in it, so there goes the idea of keeping it steel.Im gonna paint it the original blue with bare metal side stripes.
Electrical is driving me crazy and is slooooww so I;m gonna finish sanding the tank and rattlecan it- and start work on the brakes
anyone got any tips about brakes before I start.
Meanwhile Im gonna keep reconnecting wires...strip check measure solder arrrghhh
Just read the topic. +1 for you for just doing it! Everyone here started somewhere, it's not like they wrenched their way out their mom's tummy's
Just keep working on it. There's a point in every build it comes together at once. You'll be so freaking proud when that happens and you'll think "well, let's save another bike!"
I'd say it depends on what you are doing with the brakes. Usually I take off the pads, hook the caliper back up to the fork so you can easily bleed air out if needed, put fluid in reservoir and pump the brakes until the pistons come out of them. at that point you put new fluid in the top and have been pushing all the old gunk into the calipers. Then when the pistons are almost out, I pull the brake back off and hold it over an oil-drain pan. Pump until they come out and gush fluid everywhere...(I didn't say I do this a very clean way by any means :) Then I pull out the piston seal MAKING SURE YOU KNOW WHICH WAY IS UP. Because most of them have a profile that has to be in the correct way. Clean out the gunk. Put a the seal back in (if you aren't using NEW seals) and put a bunch of clean brake fluid on the piston and seal, push back in (making sure the bleeder is OPEN so air can escape as you push the piston back in). And proceed to re-bleed the brakes. Like I said, not perfect, but thats how I do it...heh.
Bruno, I would take difference on a couple points.
For one, even when the budget is tight, I would never remove and reuse a caliper seal. The only thing that makes the brakes release is the resilience of the seal. I always use new. These are the brakes. You don't fuck around with half-assed work on brakes!
Second, don't use brake fluid as an assembly lubricant. Brake fluid is hygroscopic, and traces of it outside of the seal can draw moisture and cause corrosion. I use a special silicone grease made for caliper assembly.
http://www.google.com/products/catalog?q=brake+caliper+grease&oe=utf-8&rls=org.mozilla:en-USfficial&client=firefox-a&um=1&ie=UTF-8&tbm=shop&cid=2987855264664531275&sa=X&ei=_HvnTve4D6rw0gG5vPCXCg&ved=0CGQQ8wIwAQ
Rich,
Petroleum grease must NEVER be used on a caliper piston, as brake fluid is not compatible with petroleum. The Permatex silicone grease for calipers is available in a little packet with plenty for your purposes for $3.
This site uses cookies to help personalise content, tailor your experience and to keep you logged in if you register.
By continuing to use this site, you are consenting to our use of cookies.


 )
)

